An old phone can be a dedicated document scanner if its camera focuses, it stays powered, and it can reach your file folder.
Set it up in one place, choose one scanning workflow, and check each saved file before putting the paper away.
You do not need to turn the phone into your everyday device again.
Give the phone one job and one home
Choose a stable spot with a flat surface, enough light, and an outlet nearby.
A desk or filing area keeps the phone close to the papers you scan.
Keep the charging cable out of the camera’s path and leave room to place a full sheet without balancing it on the edge of a table.
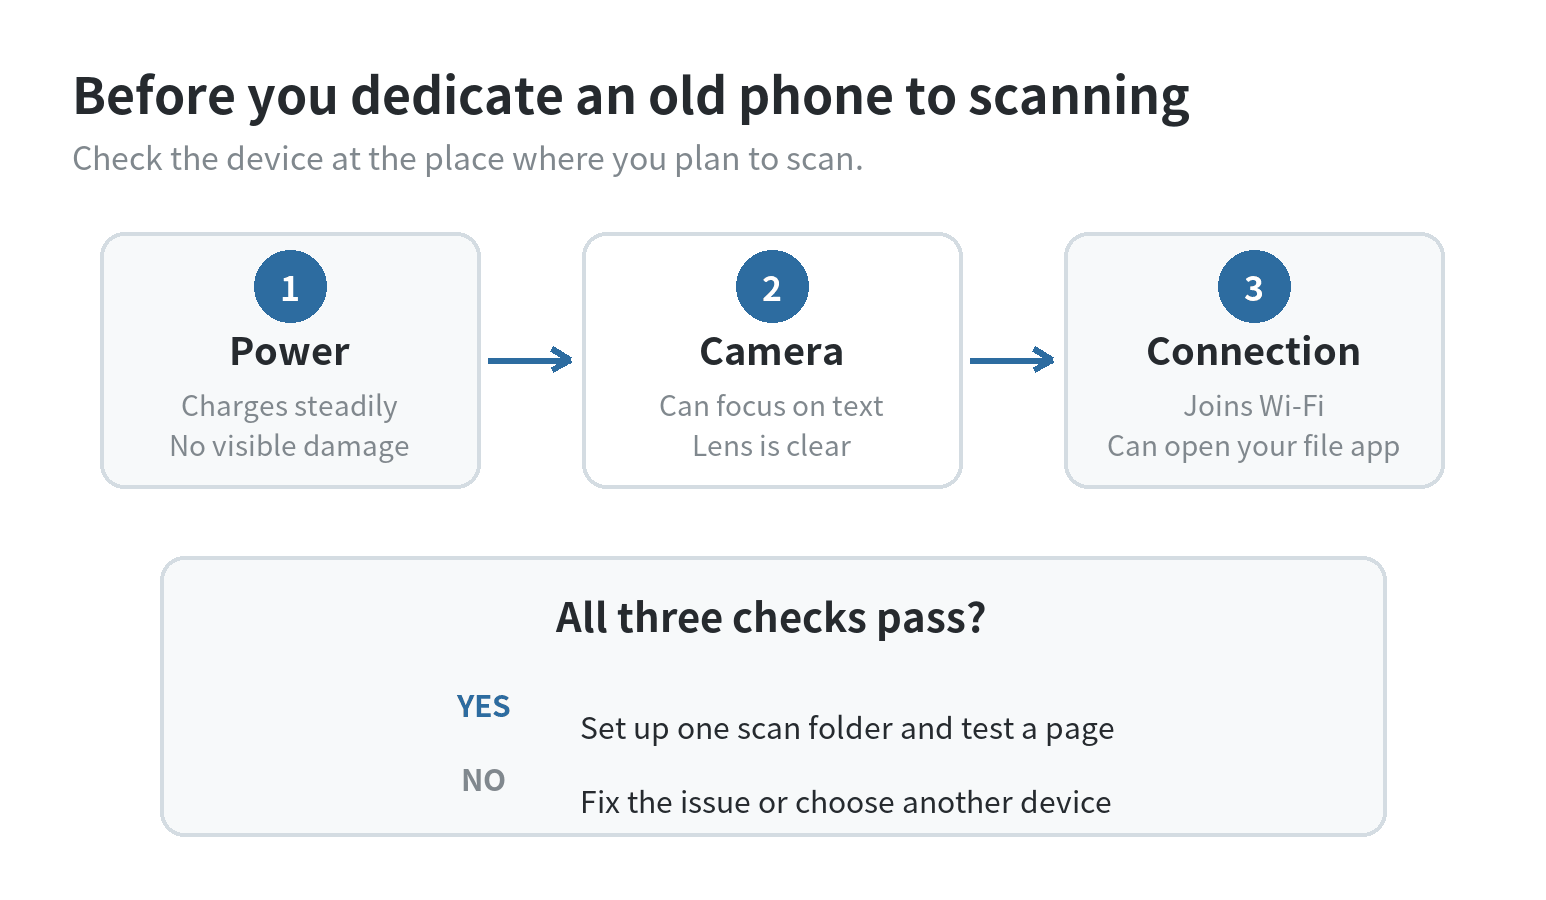
Check the screen, camera lens, charging port, and battery behavior before leaving the device plugged in as part of a routine.
If the phone restarts, loses charge while connected, or cannot focus on a printed page, it is not a dependable station for paperwork.
A phone that works for occasional snapshots may still be awkward for small receipts or densely printed forms.
Keep its role narrow: capture a receipt, letter, or form, save the file, and return the phone to its spot.
You can use a stand to hold the phone above a page, but a stand is optional; a steady hand and a clear, flat work surface are enough to start.
If the phone is going to stay at home without a cellular plan, connect it to Wi-Fi for tasks that need internet access.
Android Help says Wi-Fi can provide internet services and updates without mobile data (checked October 2026).
A mobile connection and Wi-Fi are separate ways to reach online services; scanning itself begins with the camera and the document app.
Make the camera and file destination predictable
Pick a single destination before the first scan.
For example, create a folder named “Scans” in the storage service or Files location you already use.
On Android, Google Drive’s mobile app can scan to a chosen Drive folder and save as PDF or JPG, according to Google Drive Help (checked October 2026).
The same help page says the resulting PDFs are searchable; check a saved document yourself before relying on text search for a particular form.
On iPhone, Apple’s Notes guide places a scan inside a note and lets you add more pages before finishing.
Keep the scan in a note with a name you can recognize, or use Apple’s Files scanning route when you want to choose a file location directly.
Menu names can differ across operating-system versions, so follow the options shown on your device.
Set a simple file naming pattern while the first document is open.
Use a consistent filename with a date, sender, and document type, such as “Date — Utility — receipt.”
You can leave out the date and use a label such as “Car repair — invoice.”
Choose names that distinguish one file from another when you search later.
Use a folder structure that matches how you retrieve records.
One folder for incoming scans may be enough at first; add subfolders only when the contents become difficult to browse.
Avoid making separate folders for every one-off paper before you know which groupings you actually use.
Use a capture routine that catches mistakes early
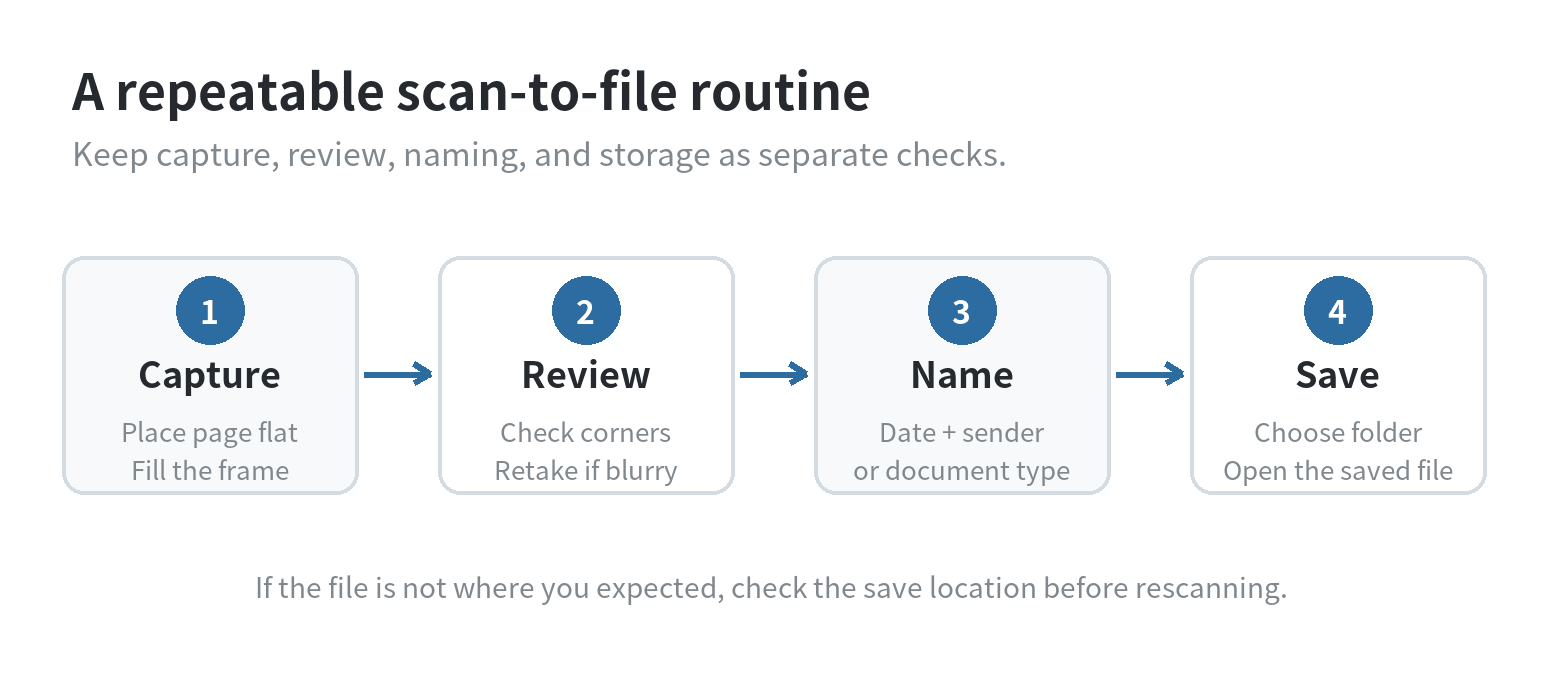
Place the paper on a plain surface with enough contrast for its edges to show.
Move the phone until the page fills most of the camera view without cutting off text, signatures, or receipt totals.
Hold the camera parallel to the page rather than aiming from an angle; that makes the page easier to frame evenly.
Google Drive Help describes the Android scan flow: open the app and use its camera scan function.
Adjust the crop or filter, add pages if needed, name the file, choose PDF or JPG, select a folder, and save (checked October 2026).
Apple’s iPhone guide describes scanning in Notes by placing the page in view and capturing it automatically or manually.
Adjust the corners if needed, then finish the scan (checked October 2026).
Do not treat the shutter as the last step.
Open the saved result and inspect the edges, small print, and any marks near the margins.
If a page is blurry or clipped, recapture it while the paper is still on the desk.
For a multi-page document, scroll through the whole file and confirm that pages remain in the intended order.
For receipts, position the long edge so all printed lines fit in the frame.
For a letter or form, look for faint text, check boxes, and signatures near the borders.
If a page has a colored background or low contrast, test the available filters and choose the version that preserves the information you need to read.
Choose PDF or image based on what you will do next
A PDF is a straightforward choice for letters, forms, and documents with more than one page.
Google Drive’s scan workflow offers PDF and JPG output.
A JPG is a single image file; it may fit a one-off picture of a paper, but it does not create the same multi-page document flow.
When a form needs to be emailed or stored with related paperwork, give it a recognizable name and save it beside similar records.
When you only need a quick reference image, keep the image with the relevant project or note.
Choose a file type that matches the receiving office’s instructions.
Acceptance can depend on the form or recipient.
A scan app can offer cropping, color filters, and page additions, but an old phone’s camera and software determine how well those tools behave.
Google lists crop and rotation, filters, cleanup, page addition, and PDF or JPG saving in Drive’s Android scan instructions.
If a feature is missing on your device, use the options it actually shows rather than following steps written for a different version.
Keep access and maintenance simple
A dedicated phone is still a device that can display personal paperwork.
Use a screen lock if other people can reach it, and avoid leaving a sensitive scan open on the screen.
Before sharing a file, check the sharing controls and the destination address.
Google Drive’s Android help explains that files can be shared with other people, so check that a document is private unless you intend to share it.
Review the scan folder as part of putting papers away.
Delete duplicate attempts, keep the readable version, and move files into an existing category when that makes them easier to find.
If storage is limited, remove unrelated downloads or transfer records to the location you already maintain.
Avoid making extra copies without a reason.
Keep the camera lens clean and the charging area reachable.
If the phone gets warm, the battery swells, or the case separates from the body, stop using it and follow the device maker’s service guidance.
A phone that cannot stay powered or maintain a clear camera view should not be the only copy route for paperwork you need to retain.
For a similar single-purpose setup, see our guide to using an old phone as a digital photo frame.
For Wi-Fi-only use, our old-phone Wi-Fi home-phone guide explains internet access and cellular service.
FAQ
Can an old phone scan paperwork with no cellular plan?
Yes, when the camera and scanning app work on the device; Wi-Fi handles the internet connection for services that need it.
Android Help says Wi-Fi can provide internet services without mobile data, while the camera capture itself happens in the scanning app.
Should I scan a receipt as a PDF or a JPG?
Use a PDF when you want a document file or need to combine pages; use a JPG when one image is enough.
Google Drive’s Android scanner offers both formats, while the receiving office’s instructions should decide what you send.
How do I keep multi-page scans in the right order?
Scan pages in sequence, then review the finished file from beginning to end before filing the paper.
Both Google Drive and Apple Notes describe adding pages to a scan before saving or finishing it.
What if the scanning option is missing on an older phone?
Check whether the app supports the phone’s operating system.
Then use a scanning option available on that device.
Do not assume that menu labels or features match a newer phone; Google and Apple document separate scanning paths for their own apps.
Last updated: October 2026.
Last updated: 2026-10