A wood stove is a realistic fit only when its clearances, chimney route, and heat output work together in your house. Start with the installation manual for the exact model, then compare its required space and venting with your room and roof before you settle on a heating capacity.
If the appliance will sit inside an existing fireplace, use our fireplace-insert planning guide for that separate installation type. Pellet appliances use different fuel and venting requirements; see our pellet-stove guide for that category.
A square-foot rating is a screening clue, not a promise that one appliance will heat every home of that size. The EPA Certified Wood Heater Database helps confirm a model’s certification and test details; the manual and local building or fire official answer the installation questions.
Measure the room before comparing stove ratings
Write down the floor area you want to heat, ceiling height, and which rooms connect to it. A stove in an open living area will distribute heat differently from one separated from bedrooms by closed doors. Note large windows, uninsulated walls, and whether the space is open to a second floor. Those details help you judge whether a published heating-area range is relevant to your layout.
Use the manufacturer’s recommended heating area as an initial filter, then look at its tested heat-output range and fuel type. The EPA hangtag guidance says the listed “heating area” comes from the owner’s manual and describes cordwood testing as a better measure of performance in homes than crib wood testing. That makes a listed area a useful comparison point, not a substitute for assessing insulation, climate, and room layout.
For scale, one stove manual lists an approximate heating capacity of 750 to 1,400 square feet and tested cordwood output from 12,129 to 59,527 BTU per hour. Those figures belong to that particular appliance and test range; they are not a standard for other stoves. Check whether the room you plan to heat sits inside the product’s stated range and whether the manufacturer describes the rating as maximum, approximate, or tested output.
Map every clearance as a separate measurement
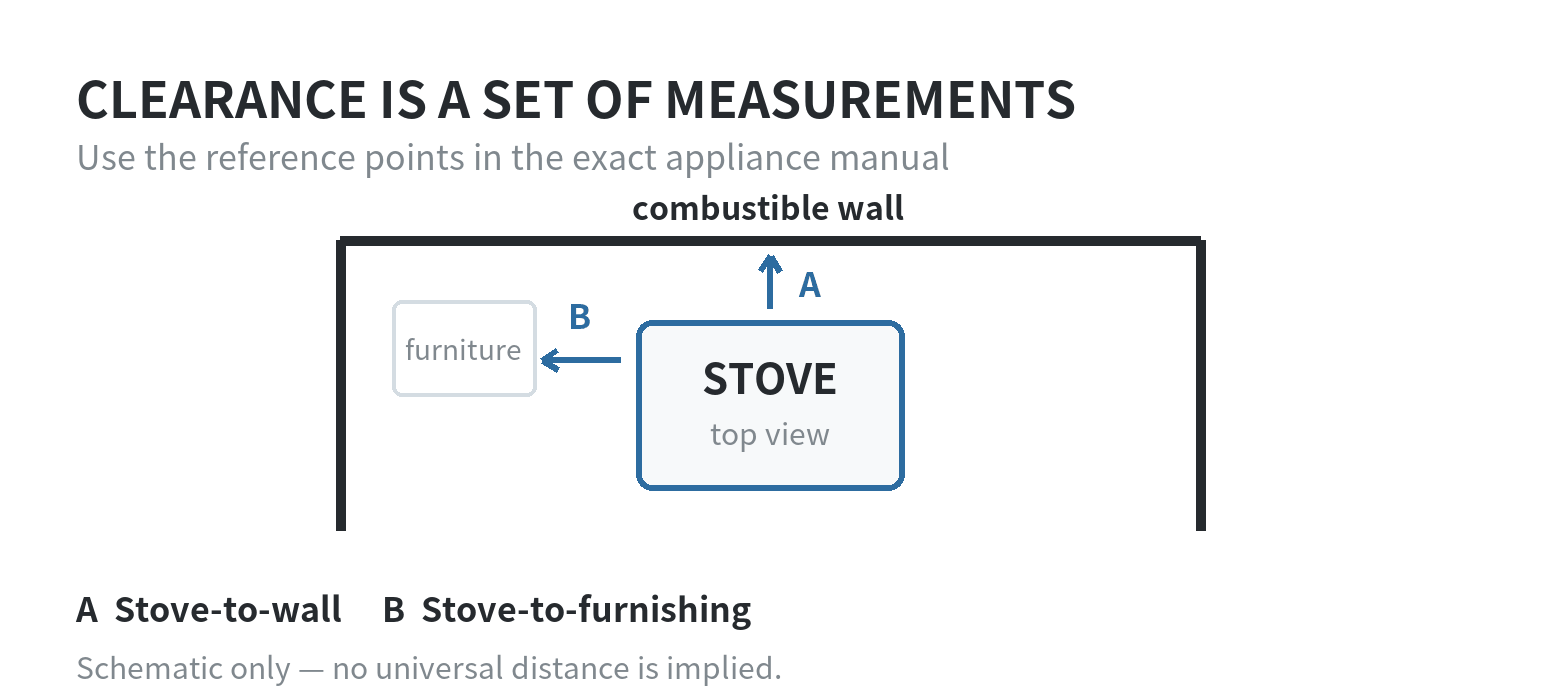
Clearance means the required distance between a heated component and combustible material. Do not treat the stove body, connector pipe, and insulated chimney as one object: each can have a different clearance rule. Include wall framing behind a finished surface, trim, shelves, furniture, curtains, and the ceiling in your room sketch.
As one specific example, the DuraTech chimney instructions call for 18 inches between single-wall stovepipe and combustibles, while that chimney product requires 2 inches of space to combustibles. The same instructions say an appliance listing can specify a different clearance and direct users to the appliance maker for appliance spacing. A different stove, pipe, or chimney may have different listed requirements, so copy dimensions from the manuals that match the actual components.
Draw the stove footprint, door swing, connector route, and nearby surfaces on graph paper. Mark the measurement start point from the manual; one stove manual, for example, says to measure side and rear clearances from the nearest edge of the stovetop. Then compare those measurements with your available room. If a required distance does not fit, do not assume a decorative brick or cement-board finish reduces it. Any clearance-reduction method must be allowed by the appliance instructions and accepted by the local authority.
Floor protection is a separate check. Confirm the manual’s hearth dimensions, ember protection, and floor-protection requirements for the intended installation. A wall clearance diagram does not tell you how far a hearth must extend in front of the loading door. Record the values in a small plan rather than relying on memory while comparing equipment.
Trace the chimney from the stove to open air
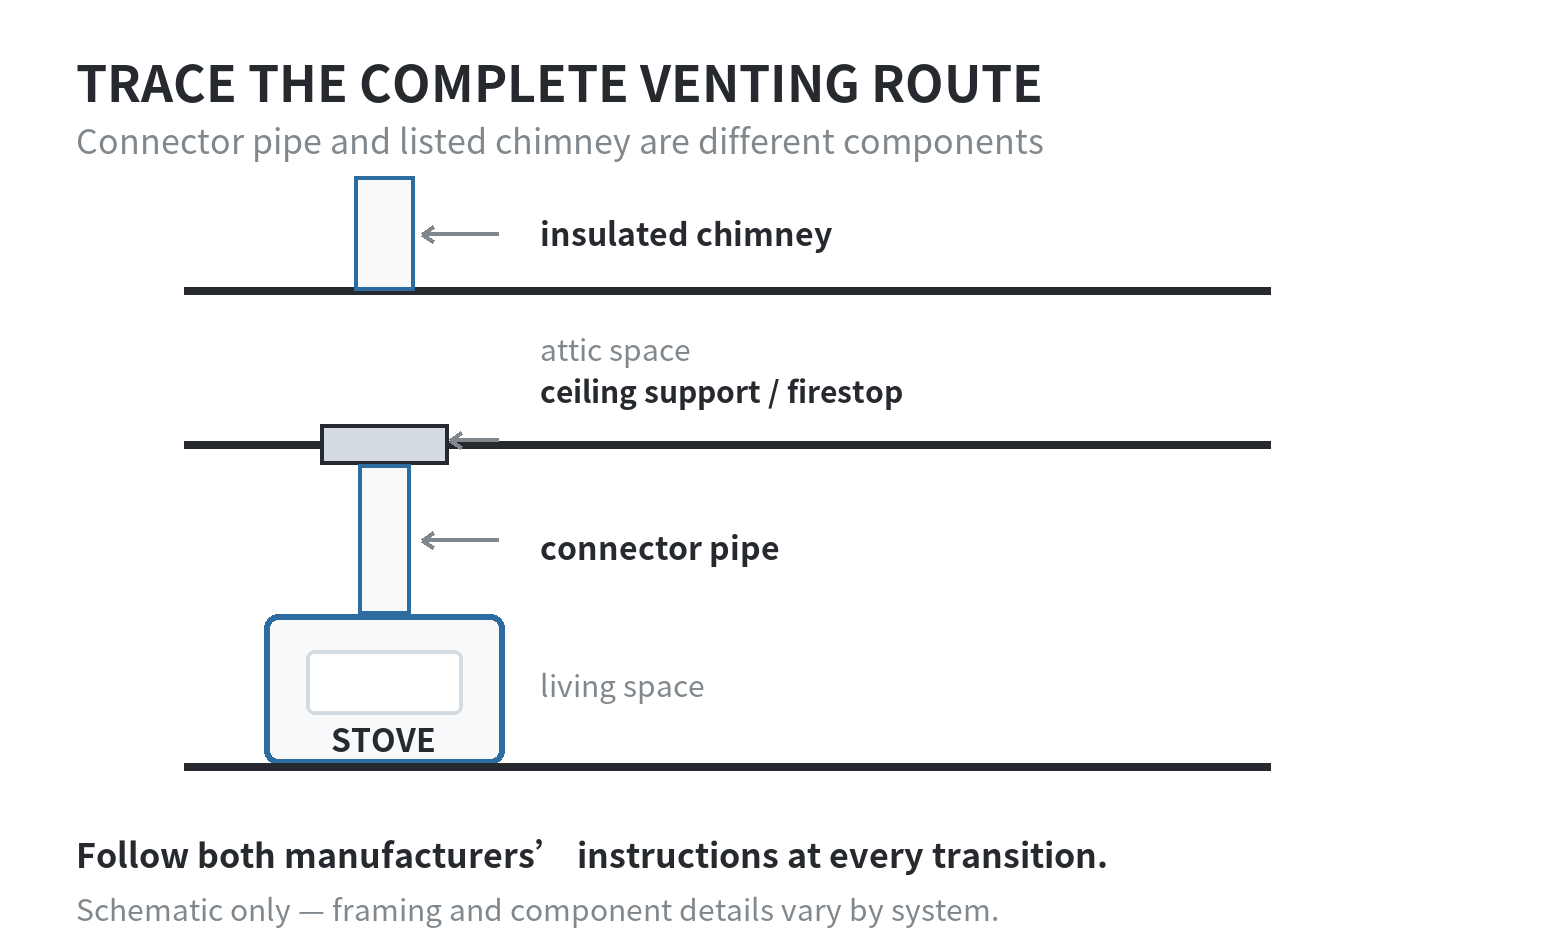
A chimney is a matched venting system, not simply a length of stovepipe. The connector pipe links the stove to a listed chimney or a compatible, inspected masonry chimney. The chimney carries flue gases through a ceiling or wall and out above the roof. At each ceiling, attic, wall, and roof penetration, the system needs its specified support, firestop, insulation shield, flashing, and clearance details.
The DuraTech installation instructions say to follow the appliance manual for chimney diameter and never choose a chimney with an inside diameter smaller than the appliance outlet. They also describe a listed chimney system and require its own compatible components. These are product-specific instructions, but they show why a stove outlet size alone does not identify every part needed for a complete route.
Sketch a straight route from the stove collar to the roof or wall exit. Count offsets and note the total height, attic access, roof framing, and whether the chimney passes an occupied room. For a through-wall route, include the wall thimble and exterior support; for a ceiling route, include the support box and attic insulation shield called for by the system manual. A route that crosses a beam or requires several turns needs a qualified installer to assess whether the appliance and chimney manuals allow that layout.
Clearances at a penetration matter because framing, insulation, wiring, and finished walls can be hidden from view. The DuraTech instructions tell users not to fill its required air space with insulation and to contact the local building or fire official about permits, restrictions, and inspections. NFPA describes Standard 211 as covering solid-fuel appliance installation and chimney construction. Ask the local official which adopted code and permit process applies to your address before cutting an opening.
Read the EPA label for what it actually measures
EPA certification is an emissions check, not a room-size recommendation or an installation approval. EPA’s current database can be searched by manufacturer or model and includes heater type, efficiency, emissions, carbon-monoxide values, fuel type, and whether a unit meets the 2020 Step 2 limits. Match the name on the stove label and manual to the database entry; a similar product name is not enough to verify the exact model.
For wood and pellet stoves, EPA lists a 2.0 grams-per-hour particulate limit for the 2020 crib-wood test and a 2.5 grams-per-hour cordwood alternative. The federal rule at 40 CFR 60.532 sets the applicable standards, and the EPA guidance explains the two test paths. Compare the test fuel shown for the model rather than treating the figures as directly interchangeable.
A passing emissions result does not show whether the stove fits your room, whether your chimney is compatible, or whether a local permit is required. Keep those checks separate: EPA’s database reports model compliance and test information; heating range and installation documents answer different questions.
Use this shortlist when reviewing a model
- Space: Write the stove’s side, rear, corner, front, ceiling, connector, and floor-protection requirements next to your measurements.
- Venting: Record the outlet diameter, approved chimney type, permitted route, component clearances, and any support or shielding parts shown in the manuals.
- Heat: Compare the target rooms with the stated heating-area range and tested output. Check the assumptions and fuel behind the rating.
- Verification: Match the model label to the EPA database and ask the local building or fire office about permits and inspection steps.
If any required dimension or connection remains unclear, pause the layout and have a qualified hearth installer review the exact stove and chimney manuals. The practical decision is whether the complete approved route and the appliance’s stated heat range fit your house—not whether the stove body alone fits in a corner.
FAQ
Can a wood stove vent into an existing fireplace chimney?
It can only be considered when the stove instructions allow that connection and the existing chimney is evaluated for the appliance. The appliance and liner manuals specify compatibility, sizing, and installation details; a visual check from the room does not establish the condition of the full flue.
How can I check certification if a model listing leaves out the full model number?
Ask for the identifier printed on the stove label or in its manual, then search that manufacturer and model in the EPA database. EPA says the appliance label also indicates certification; a product-family name alone may not identify the model line.
Can a stove’s BTU range tell me how many hours one load will burn?
No. The BTU range reports heat output per hour; the manufacturer’s manual lists burn time separately and explains that EPA output testing uses one load at each burn rate. Compare those labels as different measurements, not as a direct conversion.
How often should a wood-stove chimney be inspected?
CSIA says chimneys, fireplaces, and vents should be inspected at least once a year, with cleaning, maintenance, or repairs completed if needed. Its homeowner guidance attributes that interval to NFPA 211.
Last updated: October 2026.
Last updated: 2026-10