Ever wondered why some TikTok videos pop while others look soft or grainy even on the same phone? The answer often lies in the right phone settings that boost clarity, color, and motion. This guide shows you exactly which tweaks matter for great video quality, whether you’re on an iPhone or an Android device.
Think of this as a practical checklist you can apply today. You’ll learn which camera options to enable, how to optimize lighting, and how to keep files sharp without draining performance. By pairing these phone tweaks with smart TikTok in-app adjustments, you can unlock a noticeable difference in every clip.
We’ll cover core settings that impact every frame: resolution, frame rate, and stabilization, plus how to manage exposure and white balance. You don’t need fancy gear to get pro results; you need the right moves on your device. This guide keeps things simple, with steps that work for most modern smartphones.
On iPhone and Android, the path to better video quality starts with the basics and builds to fine tuning. You’ll see concrete examples of default settings to adjust and when to leave them alone. If you shoot in dim light or fast motion, you’ll find tips tailored to those scenarios.
This introduction gives you a clear route to sharper, more vibrant TikTok videos. Once you’ve set up your phone, you’ll focus on how you shoot and where you post for the best impact. Let’s step through the settings that make your smartphone camera sing on TikTok.
Understanding how phone settings affect TikTok video quality
Smartphone settings shape every frame you publish. Small choices in resolution, frame rate, lighting, and audio can lift your video from average to standout. This section explains what to tweak on your device so TikTok clips look crisp, feel smooth, and stay true to your intent, whether you’re filming in bright sun or a dim room.
Video resolution and frame rate choices that work on TikTok
Choose a resolution and frame rate that balance sharpness with smooth motion. On TikTok, the most reliable combination is a 1080p resolution (1920×1080) with frame rates in the 24 to 60 fps range, depending on your device and bandwidth. Here’s what to aim for and why:
- Resolution: 1080p (1080×1920) — This gives a clean, detailed image that fills the vertical frame TikTok uses. If your phone tops out at 4K, you can still export at 1080p for compatibility and faster processing. TikTok accepts lower options, but 1080p provides the best balance of clarity and file size. For reference, many creators use 1080p as the standard baseline for TikTok videos.
Source guidance: 1080p is the recommended default for TikTok video size and keeps your details sharp on most screens. TikTok Video Size Guide - Frame rate: 24, 30, or 60 fps —
- 24 fps provides a cinematic feel with smaller file sizes, good for talking heads and slower actions.
- 30 fps is the standard for smooth, natural motion and widely supported by the platform.
- 60 fps shines in fast motion or action shots, offering extra fluidity but larger files and higher bandwidth demands.
If you’re on limited bandwidth, start with 30 fps; it’s a safe default that TikTok handles well and still looks sharp after compression. For more on frame rate expectations, see guides that discuss 30 to 60 fps recommendations. TikTok Video Resolution: The 2025 Guide
- TikTok compression reality — TikTok re-encodes uploads to optimize streaming. That means tiny differences in how you shoot can vanish after processing. To minimize quality loss, shoot with stable exposure and avoid extreme lighting shifts within a clip. If you have to shoot with limited bandwidth, consider recording at a lower bitrate but keep resolution high, then let TikTok handle the final compression.
Practical tip: use the phone’s native camera app to capture at 1080p, then review the footage before uploading to ensure it’s sharp enough even after compression. - Practical steps you can take today
- Set your camera to 1080p and 30 fps as the default.
- If your scene has fast motion, switch to 60 fps for that clip, then revert to 30 fps for static segments.
- Use the highest practical bitrate in your camera settings, if available, but don’t overdo it if you’re unsure how bandwidth will affect upload times.
- Shoot in good lighting to minimize noise, which TikTok’s compression would otherwise amplify.
- When to adjust up or down
- If uploads stall or stall with buffering, lower the frame rate to 30 fps and reduce color grading intensity to keep file size manageable.
- If you’re delivering a high-action clip and have stable bandwidth, 60 fps can elevate perceived smoothness.
To plan your workflow, pair these settings with in-app TikTok adjustments. For example, enabling HD upload or selecting a higher quality interaction in the app can help preserve details you captured on the phone. For more on official size expectations, see the TikTok sizing guide linked above.
Lighting, stabilization, and audio quality as phone settings
Video quality hinges on more than resolution. Lighting, stabilization, and microphone input determine how clean and professional your final clip feels. Here’s how to optimize these factors on both iPhone and Android.
- Lighting — Good light is the fastest path to clear footage. Natural light from a window works well, but avoid direct glare. If you’re indoors, use a soft, even source positioned in front of you. A simple ring light or compact LED panel can dramatically reduce noise and boost color accuracy.
- Tip: sit so the light falls at a slight angle from your direction rather than from the side or behind you.
- Quick check: run a quick test clip in the same room with the lights on, then review for harsh shadows or blown-out highlights.
- Stabilization — Shaky video destroys the sense of quality. Use either built-in stabilization or a handheld stabilizer to keep frames steady.
- On iPhone: enable any available stabilization option in the camera app or use a gimbal for ultra-smooth motion.
- On Android: look for optical image stabilization (OIS) or electronic stabilization (EIS) in the camera settings and keep a steady hand or use a small tripod.
- Practical approach: if you don’t have a stabilizer, hold the phone with two hands, keep elbows tucked, and use slow, controlled movements.
- Audio quality and mic input — Clear audio can make or break a clip. Lip-sync accuracy matters, and noisy backgrounds kill clarity. Use an external microphone when possible. If you must rely on the built-in mic, choose a quiet spot and speak evenly toward the device.
- iPhone users can connect wired mics via the headphone jack or lightning adapter, or use high-quality wireless mics.
- Android users can pair USB-C mics or 3.5 mm mics if available, or rely on the phone’s internal mic with proper proximity to your mouth.
- How to adjust these on iPhone and Android
- iPhone:
- Open the Camera app > Video mode. Tap the exposure icon to lock focus and exposure for the scene.
- Enable HDR video if available to preserve detail in bright and dark areas.
- If you use an external mic, connect it before opening the app and test a short clip to ensure audio is captured correctly.
- Android:
- Open Camera app > Settings > Video resolution and frame rate; set to 1080p at 30 or 60 fps.
- Look for stabilization options like “Techno stabilization” or “OIS/EIS” and switch on.
- For mics, connect the external mic and run a quick test to confirm the device recognizes the input.
- iPhone:
- Practical steps you can follow
- Light your scene with soft, even illumination.
- Use a stable hold or a small tripod, especially for longer takes.
- Test audio with the mic you plan to use; if possible, record a sample clip with the external mic and compare it to the built-in mic.
- Review a short clip at normal playback to confirm the balance of lighting, stabilization, and audio before filming longer content.
- A quick checklist for rapid setup
- 1080p resolution, 30 fps as default
- Enable stabilization (OIS/EIS or app stabilization)
- Light from the front, not behind you
- External mic if possible, or ensure quiet surroundings
- Lock exposure for stable brightness across scenes
When possible, test your setup with a short practice clip before committing to full production. This helps catch issues with lighting, movement, or audio early, so you can adjust on the fly. For further reading on recommended sizes and frame rates, check the linked guides above.
Links to reference:
- TikTok video size and dimensions guide: https://riverside.com/blog/tiktok-video-size
- TikTok video resolution and frame rate guidance: https://www.maius.com/post/tiktok-video-resolution-the-2023-guide
- Additional frame rate discussion: https://www.shortsgenerator.ai/blog/what-frame-rate-does-tiktok-use/
Top phone settings to boost TikTok video quality
In this section, you’ll learn practical phone-level tweaks that lift every TikTok clip. These settings work across most modern iPhone and Android devices, and they’re easy to apply right away. Think of it as a quick-win guide: make smart adjustments once, then let your videos look sharper, more color accurate, and steadier from clip to clip. A few minutes here can translate to noticeably better results without extra gear.
Camera app settings for iPhone that improve TikTok videos
iPhone users have a strong built-in toolkit that can dramatically improve video quality when you upload to TikTok. Start with the basics and layer in refinements as you test.
- Enable 60fps if available and appropriate for the scene. For actions with fast movement or punchy transitions, 60fps delivers smoother motion. If you’re shooting slower scenes or conserving bandwidth, 30fps remains perfectly serviceable. On some models, Auto FPS can adapt frame rate automatically; use it cautiously, or switch off if you notice unwanted changes mid-shot.
- Record at 1080p for the best balance of sharpness and file size. Many creators set 1080p as the default for TikTok uploads, then reserve 60fps for action moments. If your device supports 4K, recording in 4K can be tempting, but you’ll likely end up with bigger files that TikTok compresses anyway.
- Use HDR or Smart HDR when available to preserve dynamic range. HDR helps keep detail in bright skies and dark shadows, which is especially helpful for outdoors or scenes with mixed lighting.
- Lock exposure and focus to prevent flickering brightness while you move through a shot. Tap to focus, then hold on the exposure slider until you see “Lock” or a lock icon. This keeps brightness stable as lighting changes gradually.
- Turn on grid lines to compose shots more consistently. The rule of thirds is easier to apply when you can see the grid as you frame each clip.
- Keep the lens clean. A smudged lens softens detail and dulls contrast, especially in brighter lighting. A quick wipe with a microfiber cloth before filming makes a real difference.
- ProRes is heavy and usually not needed for TikTok uploads. If you’re filming with ProRes for other projects, remember TikTok will re-encode, and the extra data might not translate into visible gains on the platform.
- Practical setup tip: set a default 1080p/30fps profile, then capture one or two clips at 60fps to compare. Review both at full resolution before deciding which setting to keep for your usual workflow. For how Apple frames these options, see Apple’s guide on video recording settings.
Useful resource: Apple’s official guidance on changing video recording settings helps verify how to lock exposure and adjust FPS on iPhone. Change video recording settings on iPhone
Camera app settings for Android that boost TikTok videos
Android devices vary by maker, but the core ideas stay the same. Use the camera app that gives you the most reliable, clean encoding without adding noise. If you prefer a manual or semi-manual approach, a well-maintained third party app can be a solid choice, as long as it preserves quality.
- Enable 60fps where your device supports it and the scene benefits from it. Fast action or sports-like clips often look best at 60fps, while standard talking-head segments can stay at 30fps without sacrificing quality.
- Record at 1080p as the baseline. Some devices push 4K, but 1080p provides plenty of detail with manageable file sizes after TikTok compression.
- Activate stabilization features. Optical or electronic stabilization reduces shake and helps maintain a professional look, especially when you’re filming handheld or on the move.
- Use white balance presets to keep color consistency. If you’re shooting in mixed lighting, a preset like Daylight, Cloudy, or Incandescent helps keep skin tones natural.
- Manual focus when available. Locking focus ensures your subject remains sharp as you reframe or adjust distance.
- Avoid third-party apps that add heavy noise or degrade encoding. A clean, stable app with solid compression will help your footage look better in the final upload.
- Consistent encoding matters. If you can choose a stable, well-optimized encoding profile, stick with it to minimize quality loss during TikTok processing.
- Practical steps: test with a short indoor clip and a short outdoor clip to compare how the device handles color, noise, and motion. If you shoot with an external microphone, test the audio path in the same pass.
Real-world reference: there are several Android camera guides that cover the same themes—1080p target, stabilization on, and careful white balance. When you want to verify specifics for your device, check the camera app’s own help section or OEM support pages.
- For iPhone oriented readers, you can also review iPhone camera settings for video and how to lock exposure for a stable result. A helpful overview exists at Switcher Studio’s guide to the best iPhone camera settings for video. The Best iPhone Camera Settings for Video
Color profiles, exposure, and autofocus tips
Across platforms, color and exposure choices play a big role in how your TikTok videos read on different screens. Here are practical steps you can apply now to keep your visuals consistent and strong.
- Choose a color profile that yields natural skin tones and accurate color. If your device offers sRGB or BT.709 equivalents, start there. Some phones provide HDR color profiles; use them when you’re filming scenes with high dynamic range, but be aware of how this may affect brightness in post.
- Keep exposure consistent from shot to shot. Sudden brightness jumps cause viewers to look away. Lock exposure as you start each scene, then reframe slowly if you need to move.
- Use focus lock to prevent constant AF hunting. On iPhone, tap to focus and then use the exposure lock as described earlier. On Android, many devices let you drag a focus box to lock focus or use a dedicated AF lock in camera settings.
- Practical steps for iPhone users:
- In Video mode, tap the exposure icon and hold to lock exposure and focus. This locks brightness for the scene and prevents minor shifts in lighting from ruining your frame.
- If your iPhone supports HDR video, turn it on for scenes with bright light and shadows. Review a quick clip to ensure highlights aren’t blown out.
- Practical steps for Android users:
- If your camera app offers manual focus, enable it and set a focal distance that works for most of your shot. Reframing can be done but try to keep the subject distance stable.
- For white balance, start with a preset that matches lighting conditions (Daylight for bright sun, Cloudy for shade). If possible, lock white balance to maintain color consistency.
- Quick practical tip: run a brief test clip under your intended lighting. Compare color fidelity, skin tones, and contrast to ensure your color profile gives you the most natural look on the platform’s encoding.
Cross-platform pointers you can apply today include using a consistent color profile, keeping exposure steady across clips, and applying a focus lock when possible. These steps reduce surprises after TikTok re-encodes your footage and help your content stay visually cohesive across devices.
A reliable source on color and exposure basics can guide you through practical adjustments. If you want a deeper dive into iPhone color handling, the Apple guide and Switcher Studio article mentioned above offer detailed steps and visuals to help you master exposure and focus settings.
- Example workflow: Set 1080p, 30fps, lock exposure, enable HDR if supported, use grid lines, and test a short clip in the same lighting before committing to a longer shoot. If the color looks off, adjust white balance and retry. This approach minimizes post-production time and keeps your upload process clean.
- Quick reference: for more on iPhone camera settings and how exposure changes affect brightness, this Apple support article is a solid baseline. Change video recording settings on iPhone
In all cases, the goal is to deliver stable, color-accurate footage that holds up when TikTok compresses the final file. The steps above help you reach that target with minimal fuss.
Links to reference:
- TikTok video size and dimensions guide: https://riverside.com/blog/tiktok-video-size
- TikTok video resolution and frame rate guidance: https://www.maius.com/post/tiktok-video-resolution-the-2023-guide
- Additional frame rate discussion: https://www.shortsgenerator.ai/blog/what-frame-rate-does-tiktok-use/
Additional notes:
- Remember to keep the language accessible and actionable. Readers should be able to implement these settings without extra tools.
- Consider adding a brief “before and after” example in a future update to illustrate the impact of these adjustments.
- If you want to personalize further, you can tailor tips to popular devices among your audience, such as iPhone models or top Android flagships.
In-app TikTok settings and best upload practices
Optimizing TikTok uploads goes beyond basic camera quality. The right in-app options, combined with mindful export practices, can preserve sharpness, color, and motion after TikTok’s processing. This section lays out practical in-app settings and concrete file handling steps that help you reach peak video quality without extra gear. Implement these tweaks, and you’ll notice crisper details, better color accuracy, and smoother motion across devices.
High quality upload options and file formats
TikTok’s high quality upload setting is a simple toggle that can make a meaningful difference. Turn it on before you publish, and pair it with using widely supported file formats to minimize double compression. The recommended approach is to export or upload in MP4 format with H.264 video and AAC audio. This combination keeps file sizes reasonable while preserving detail after TikTok re-encodes the clip.
When preparing your video, aim for 1080p resolution and a clean bitrate. Higher resolutions can be beneficial, but TikTok compresses content aggressively, so 1080p usually delivers the best balance between quality and performance. If you shoot at 4K, export down to 1080p before uploading to avoid unnecessarily large files that will be compressed anyway. In-app HD upload improves the odds that your original detail is retained through TikTok’s processing.
Practical takeaway:
- Enable High Quality Uploads in TikTok settings.
- Use MP4 with H.264 video and AAC audio.
- Export at 1080p for best consistency; if you record at higher resolutions, downscale before posting.
Helpful references for in-app quality options:
- How to enable high quality uploads on TikTok: https://www.tiktok.com/discover/how-to-turn-on-high-quality-uploads-tiktok?lang=en
- Disclosure on high quality uploads and data usage: the official TikTok help resources linked in the references
For readers who want a quick how-to, a typical path is profile > Settings > Data Usage > Enable High-Quality Uploads, then upload in 1080p. This approach reduces the risk of extra compression erasing fine detail.
Record from camera roll vs in-app recording
Choosing where to capture video influences how much you can preserve in post. Recording in the camera app often yields more control over bitrate, color profiles, and stabilization, while in-app recording offers a streamlined workflow with immediate posting. Here are the trade-offs to help you decide, plus steps to preserve quality regardless of your choice.
- Record from camera roll (external camera app)
- Pros: Higher control over camera settings, better texture and color accuracy, more consistent exposure and focus across shots.
- Cons: Requires an extra step to transfer and crop for TikTok, more potential for misalignment when editing.
- How to preserve quality: shoot in a high-quality profile (1080p, 30 or 60 fps), avoid aggressive in-camera edits, and export using a stable, widely supported format like MP4. Before uploading, trim within the camera roll app to keep the final clip tight and avoid additional compression during in-app edits.
- Record in-app
- Pros: Quick workflow, ensures aspect ratio is correct for the platform, streamlined export options.
- Cons: In-app capture can apply different processing that may introduce more compression, depending on the device.
- How to preserve quality: enable the in-app HD upload setting, and if available, choose the highest supported frame rate (up to 60 fps for scenes with motion). Keep lighting stable during the shot to minimize post-processing adjustments.
Steps to preserve quality when uploading from the camera roll:
- Ensure the clip is 1080p and 30 fps as a baseline.
- If the scene has movement, consider 60 fps for that segment, then switch back to 30 fps.
- Trim directly in the camera roll to avoid re-encoding within TikTok.
- Export with minimal color grading and no heavy filters that add extra compression.
If you want a smoother in-app workflow, test both methods with a short clip and compare the output. For reference, you can review official guidance on high quality uploads and frame rate considerations in the linked resources.
Compression awareness and best practices
Compression is TikTok’s final step before your clip reaches viewers. It can soften detail, alter colors, and smooth motion. Understanding how compression works helps you tailor your shoot and post so the end result stays faithful to your intent.
- Minimize heavy edits that distort color: drastic color grading or multiple LUTs can amplify compression artifacts. Make color choices early and keep edits light if you plan to post quickly.
- Keep file size reasonable: extremely large files get compressed more aggressively. If you’re unsure, export at 1080p with a moderate bitrate rather than pushing beyond 60 Mbps to avoid unnecessary re-encoding overhead.
- Maintain the correct aspect ratio: TikTok natively uses vertical 9:16. Always shoot and export in 9:16 to prevent pillarboxing or letterboxing that can introduce scaling issues during processing.
- Use steady lighting and minimal motion blur: clean, well-lit footage holds up better once the platform compresses it.
Practical tips you can apply today:
- Shoot with natural, soft light and avoid harsh backlighting that creates noisy shadows.
- Stabilize footage to reduce the amount of motion the encoder has to manage. A small tripod or a handheld stabilizer helps a lot.
- If you must edit, do it in a way that preserves color integrity. Export intermediate versions using the same color space as your original footage (preferably sRGB or BT.709).
Quick workflow example to minimize compression impact:
- Capture at 1080p, 30 fps, in MP4 with H.264.
- Apply only minor color corrections, keep LUT usage minimal.
- Export at 1080p with a reasonable bitrate, upload in HD if the option is available.
In all cases, test a short clip in your typical shooting environment to validate how lighting, motion, and color behave after TikTok processing. For broader guidance on frame rate and resolution, see the linked references in this section. And when you’re ready to refine further, you can explore device-specific tips that align with your model and shooting style.
External resources to support these practices:
- TikTok video size and dimensions guide: https://riverside.com/blog/tiktok-video-size
- TikTok video resolution and frame rate guidance: https://www.maius.com/post/tiktok-video-resolution-the-2023-guide
- Additional frame rate discussion: https://www.shortsgenerator.ai/blog/what-frame-rate-does-tiktok-use/
Practical setup tips and quick fixes
Small, smart adjustments can elevate TikTok video quality without new gear. This section lays out practical setup tips you can implement today, plus quick fixes for common hiccups. Use these moves to keep your clips clean, consistent, and ready to share.
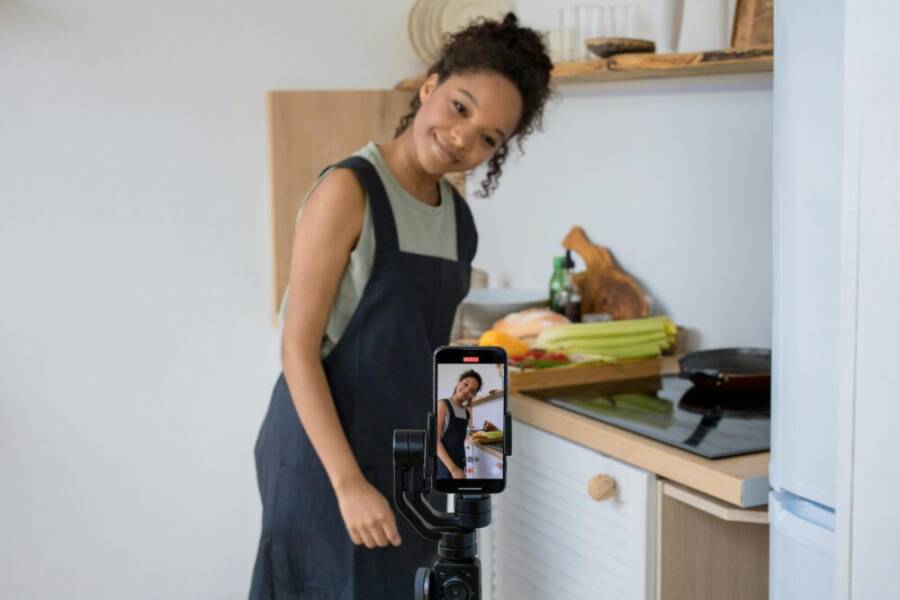
 Photo by Ron Lach
Begin with a simple lighting and backdrop that makes your subject pop. A clean background reduces distractions and helps viewers focus on what you say or show. A 2 to 3 point lighting setup works well for most indoor spaces. Place a key light at about 45 degrees in front and slightly above you, a secondary light on the opposite side for fill, and a soft background light to separate you from the wall. If you don’t have dedicated lights, a bright window (diffused with a sheer curtain) can substitute as a key light. Keep the backdrop uncluttered and use a solid color or a subtle texture to avoid reflecting colors onto your skin.
- Quick setup tips you can copy today:
- Use a neutral backdrop or a single colored canvas to reduce color cast.
- Position the camera at eye level for the most natural perspective.
- Keep distance consistent across takes to minimize variation in framing.
- Use a small reflector or white foam board to bounce light onto darker areas.
Stabilization is non negotiable for a polished look. If you don’t have a tripod, prop the phone on a stable surface or stack books to raise the camera to eye level. For on the go filming, a lightweight tripod or a compact phone mount can dramatically reduce shake. When you’re moving, keep your elbows close to your body and use smooth, deliberate motions.
- Quick tip for tight spaces: use a mini tripod or a gorillapod with flexible legs to clamp onto shelves or desk edges. This gives you a steadier setup without cluttering the frame.
- If you must shoot handheld, shoot with both hands and keep movements slow. Short, controlled panning is easier to stabilize in post than rapid shudders.
Audio quality deserves its own focus. Clear sound makes your message credible and keeps viewers engaged. If you can, use an external microphone. Even a small lavalier or a compact USB microphone bigger than the phone mic makes a big difference. If external gear isn’t an option, approach the mic properly and minimize room reverb by soft furnishings or a small rug.
- Quick fixes for audio on the fly:
- Record in a quiet room with doors closed and fans off.
- Get close to the mic but avoid popping on hard consonants.
- If you hear echo, add a soft surface behind you or move to a smaller space.
Finalize your setup with a quick test. Record a 5 to 10 second clip in your intended lighting, then review the footage for exposure, color, stability, and audio. Small tweaks before filming longer content save time later.
- In-app tips you can apply now: enable High Quality Uploads if your TikTok version supports it and keep your clip in 1080p. A well-armed phone can do a lot without extra gear.
For deeper guidance on lighting and backdrops, these references offer useful perspectives:
- Background Lighting for Videos: https://www.tiktok.com/discover/background-lighting-for-videos
- How to Set Up Lighting for Video at Home: https://www.tiktok.com/discover/how-to-set-up-lighting-for-video-at-home
- Lighting setups and equipment guide: https://www.colborlight.com/blogs/articles/tiktok-lighting-what-to-use-and-how-to-set-it-up
When you’re ready to level up, consider a few affordable additions. A small LED panel, a flexible phone mount, and a compact gimbal can unlock new possibilities without breaking the bank. If you want a quick, widely applicable setup, aim for the 2 point lighting with a clean backdrop and a stable camera height.
- Practical takeaway: a clean background, front lighting, and steady framing beat complicated setups every time. Even with limited gear, you can produce clips that feel professional and trustworthy.
- Quick reference: for quick frame rate and resolution notes, see the linked resources above.
If you’re curious about how other creators configure their setups, explore the article on in-app upload options and camera handling to ensure your workflow remains smooth from shoot to publish.
Conclusion
Smartphone tweaks can lift TikTok video quality more than you might expect. By locking exposure, choosing a crisp 1080p baseline, and using stabilization plus clean lighting, you’ll notice sharper detail and truer color across devices. Test a few combinations—1080p at 30 fps, then compare with 60 fps on moments with action—to find what feels best for your style. If you found a setup that works well, share your tips in the comments and help others optimize their shots.