Thousands of People Were Struggling With Money Until They Discovered This One Ancient Secret Hidden in Sound
>>> Unlock It Now <<<

Have you ever pressed the power button only to see nothing at all light up on your phone? If your device won’t turn on, you’re not alone, and there are practical steps you can take right away. This guide covers both iPhone and Android, so you can follow a logical sequence without the worry of losing data.
First, you’ll want to check the basics like the battery and charger. A completely drained battery or a faulty charger can make a phone seem dead even when it’s fine. Safe, simple fixes usually involve charging with a known good cable and outlet, then trying a force restart to wake the device.
If the phone still won’t power up after those steps, inspect for physical or water damage and consider the possibility of a software glitch. In many cases, data backup before deeper troubleshooting saves your important files. If issues persist, professional help becomes the best option to address underlying hardware problems.
Start with simple power checks and safety first
When a phone won’t turn on, the quickest path to clarity is to verify power basics and safety. This sets a stable foundation before any deeper troubleshooting. You’ll check charging reliability, try a safe restart, and assess whether a screen issue might be misinterpreted as a power problem. Following these steps can often restore usability without risking data or hardware.
He Was Drowning in Bills and Burnout Until a Simple Daily Ritual Rewired His Brain for Wealth in Less Than a Week
>>> Start Your Shift Today <<<

 Photo by Kelvin Valerio
Confirm the phone is charging with a reliable charger
A dead battery is the most common reason a phone stays dark. To confirm charging is actually happening, look for a charging indicator on the screen when you plug in the device. If the screen stays completely off, you can still hear a soft click or feel a vibration when you connect power, which can indicate the device is receiving power.
- Try a known good charger and a fresh cable. A worn cable or a faulty brick is a frequent culprit.
- Use a different wall outlet. Some outlets have low power or are controlled by wall switches.
- Wait 15–30 minutes before checking for life. A deeply discharged battery can take a moment to show signs.
- Remove bulky cases or accessories that might cover the charging port. Dust, lint, or a blocked port can prevent a proper charge.
If the phone still shows no sign of life, try charging in a different scenario. For iPhone users, use an Apple-certified cable and a wall adapter. For Android, a standard USB-C or micro USB charger works, but avoid unknown adapters that might deliver inconsistent power. For more on what to try when your phone won’t turn on, see practical guidance from reputable sources such as PCMag and Asurion.
- Don’t rely on a single charger test. Repeating with a different charger and cable reduces the chance of a false negative.
- If you see a charging icon or LED after swapping components, the device is likely drawing power and may respond to a reset soon.
External reading: Don’t panic: What to Do If Your Phone Won’t Turn On. If you own an iPhone, Apple’s official support guidance also covers charging indicators and safe charging steps. For Pixel and other Android phones, official support pages outline charging indicators and power-on behavior.
- Useful links:
- Don’t panic: What to Do If Your Phone Won’t Turn On
- If your iPhone won’t turn on or the screen is black
- How to fix a phone that won’t turn on
Attempt a basic power reset or force restart
A simple reset is a safe, non destructive first move. It can wake devices that are unresponsive without risking data.
- For most devices: press and hold the power button for 10–30 seconds. Release when you see the logo or the device vibrates.
- Android specifics: some models respond to Power + Volume Down as a force restart. If that combo doesn’t work, try Power + Volume Up or consult the model’s manual.
- iPhone specifics: use the standard forced restart sequence for your model. For example, iPhone models with Face ID require quickly pressing the Volume Up button, then the Volume Down button, then holding the Side button until the Apple logo appears.
- Treat this as a safe, initial step. It avoids more invasive measures while potentially restoring normal operation.
If the device powers on during the reset, you can assess further steps like updating software or checking for app conflicts. If it remains off, proceed to check for deeper issues.
External reading: Pixel not turning on and iPhone restart guidance from official support. Additional user experiences discuss how a forced restart can resolve a non responsive state.
Check for signs of life that point to a screen issue
Sometimes the device is alive but the screen stays dark. The difference matters because it guides where to focus repairs.
- Observe for subtle indicators: vibrations, faint sounds, or a click from the device when you press power or volume keys.
- If there are signs of life but no display, the problem is likely the screen or its connectors rather than the power system.
- In this case, you may need to explore screen-specific fixes, such as checking for a loose display cable or seeking a professional screen replacement.
If you’re unsure, compare with another display if you have access to a compatible spare or an authorized service provider. This approach helps isolate whether the issue is the display itself or a deeper power/board problem.
External reading: For official guidance on force restarts and power-on behavior, see Google Pixel support and Apple support articles. If the device still won’t show anything after a reset, reputable tech outlets offer structured checklists to follow.
Notes on safety and care:
- Always handle the device with dry hands.
- If the phone has been exposed to water or you suspect water damage, avoid turning it on repeatedly. Water exposure can create dangerous shorts or corrosion.
- Do not attempt to open the device if you’re not comfortable with electronics. A professional repair may be the safest path.
By starting with these basics, you can quickly determine whether the problem is a drained battery, a simple reset, or a potential screen issue. If the device remains unresponsive after these steps, you’ll be equipped to decide between professional help or deeper troubleshooting.
External reading for more context on screen issues and safe power practices:
- Google Pixel support on turning the phone on and off
- Apple Support on iPhone power and screen behavior
Note: If you’re seeking model-specific steps, check the official support pages for your device brand. They provide the exact button sequences and troubleshooting paths for your exact model.
Troubleshoot software and system problems that block boot
When a phone won’t boot, the issue is often software related rather than hardware. You can usually rule out simple causes first, then move to recovery options if needed. This section focuses on practical steps to identify and fix software or system problems that prevent the device from starting up, for both iPhone and Android. Follow the sequence to avoid data loss and to pinpoint whether a stuck boot is due to an app, a recent update, or a deeper system fault.
Use Safe Mode to rule out app problems (Android)
Safe Mode disables all third party apps and runs only the core system services. If your Android device boots in Safe Mode, the culprit is almost certainly a recently installed or updated app. Here’s how to use Safe Mode and what to do next:
- How Safe Mode helps: In Safe Mode, non essential apps are hidden. This lets the system operate with only essential services, so you can test boot behavior without third party interference.
- Entering Safe Mode: The method varies by model, but a common approach is to hold the power button, then tap and hold Power off or Restart until the Safe Mode option appears. Some devices require a specific button combo, like Power + Volume Down.
- What to do if Safe Mode works: Uninstall recently installed or updated apps one by one. After each removal, restart normally to test boot. If the device starts up without issue, you’ve found the likely problematic app.
- What to do if Safe Mode doesn’t help: If Safe Mode still results in a black screen or no boot, the problem may be deeper. Check for system updates or consider a recovery path. For Android, you can consult model specific guides from your manufacturer.
Extra tips:
- If your phone has a stuck volume button, it can force Safe Mode inadvertently. Ensure the hardware buttons aren’t pressed during boot.
- Keep a short list of recently added apps so you can quickly revert changes if needed.
For further details on Safe Mode steps tailored to your model, see official Android support resources. If you want model specific guidance, local manufacturer pages often provide step-by-step instructions.
Helpful reference:
- Find problem apps by rebooting to safe mode on Android
Try recovery or restore options without losing data when possible
Recovery options let you refresh the software without wiping data in many cases. This can fix corrupted system files and restore boot capability while preserving your information.
- iPhone: Connect to a computer and use Finder (macOS Catalina and later) or iTunes (Windows or older macOS) to restore. If a full restore is necessary, you may be prompted to set up as new or restore from a backup. This process can fix boot loops caused by software issues.
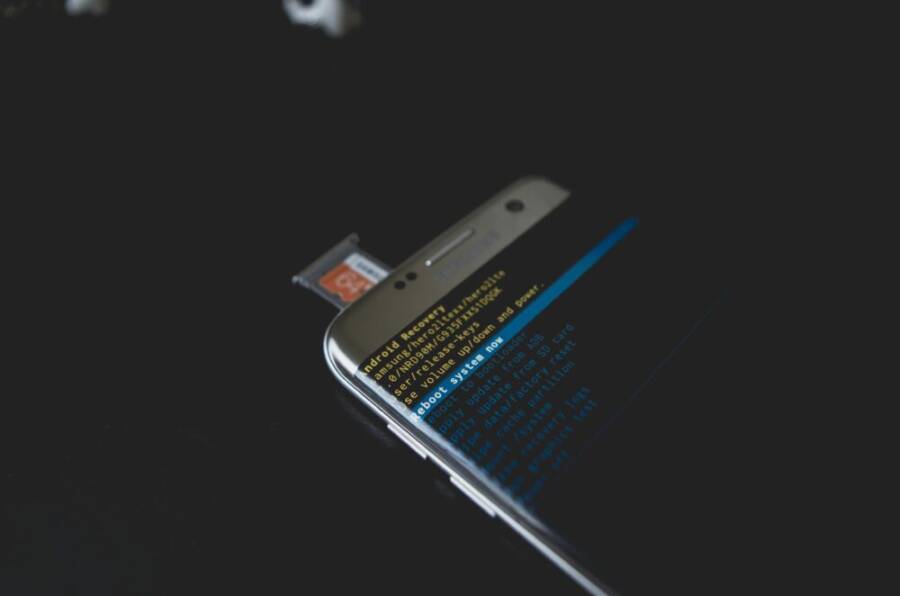
- Android: Enter Recovery Mode to access tools like “Apply update from ADB,” “Wipe cache partition,” or “Repair” options depending on the vendor. A full factory reset is a last resort because it erases data; if you have backups, this is safer.
- When to try recovery first: If the device can access recovery options but not the main OS, you can often reinstall the system image or apply a fresh update without losing personal data. If there’s no option to preserve data, back up what you can before proceeding.
Practical steps:
- iPhone: If possible, connect to Finder or iTunes and choose Restore. If backing up is recent, you can restore from iCloud or computer backups during setup.
- Android: In Recovery Mode, choose the option that updates or reinstalls the system while keeping apps and data if the device supports it. If not, prepare for a factory reset as a last resort.
External guidance:
- Apple support on updating or restoring an iPhone
- Android recovery mode guides from reputable sources
Notes:
- Always back up when you have access to the device. Backups save photos, messages, and app data and reduce the risk of data loss during deeper fixes.
- If you’re unsure about a step, pause and seek model-specific instructions. Manufacturer support pages tailor steps to your exact device.
Update software and plan for a factory reset only if needed
Keeping software up to date is one of the best ways to prevent boot problems. Updates patch bugs, improve stability, and fix security flaws that can cause boot issues.
- Regular updates matter: Manufacturers release patches that address known boot problems. Set devices to install updates automatically when possible.
- When a reset is the last option: A factory reset should be a final step after other options fail. It wipes all data, so back up first. If you perform a reset, be ready to restore from a backup during setup.
- Backup first: Use cloud backups, computer backups, or local storage for photos, contacts, and app data. This protects your information if a reset becomes necessary.
Important reminders:
- Before a reset, verify you have access to essential accounts and credentials to re-enroll devices after the reset.
- After updating or resetting, test boot behavior and reintroduce apps gradually to identify any potential causes.
External sources you can consult for up-to-date guidance on updating and resetting:
- Apple support on updating or restoring iPhone
- Android device software update guides from manufacturers
Practical takeaway:
- Prioritize software updates to fix boot issues. Reserve factory resets for when other options fail and you have a verified backup ready.
Images and references:
- If you want to see a quick reference on the update and restore flow for iPhone and Android, check the official support pages linked in the sections above.
External reading to broaden your understanding:
- Apple support on updating or restoring
- Android recovery and update guides from official sources
Note: If your device remains unresponsive after trying these methods, you may be facing a deeper hardware issue. In that case, organizing a professional check remains our safest path.
Links:
- If you want to dive deeper into Android Safe Mode specifics, this resource explains how to reboot and diagnose app conflicts
- For iPhone users, the official guide on updating or restoring helps map the process to Finder or iTunes
Remember, backing up before any major step is always wise. It protects your data while you work through boot issues. If you’d like, I can tailor these steps to a specific model you own.
Investigate battery and hardware health
If your phone won’t turn on, a systematic check of battery and hardware health can save you time and money. This section walks you through practical steps to assess whether the power system or the device’s internal hardware is to blame. You’ll learn how to read battery signals, spot swelling, and decide when a repair or replacement makes more sense than a DIY save. A careful assessment now can prevent data loss and avoid risky fixes.
Evaluate battery health and look for swelling
A failing or swollen battery is a common cause of a phone that won’t start. Look for clear signs that the battery is struggling or damaged. If the device shows a faint buzz or a subtle hiss when plugged in, or if the back of the phone appears puffed or the screen sits at an odd angle, stop charging and seek professional help immediately. A swollen battery can leak harmful chemicals or swell enough to press against internal components.
He Was Drowning in Bills and Burnout Until a Simple Daily Ritual Rewired His Brain for Wealth in Less Than a Week
>>> Start Your Shift Today <<<
- Signs to watch for: bulging or curvature in the body, screen separation from the chassis, signs of heat during charging, a screen that stays dark even with a charger connected.
- Battery age matters: most lithium-ion cells begin to lose capacity after about two to three years of regular use. If the phone has aged batteries, replacement is often the most practical path.
- Safety note: never charge a visibly swollen device. Contain it and seek a repair service that can safely handle battery replacement.
If you want to dive deeper into what swollen batteries look like and how professionals repair them, see expert guidance from iFixit and trusted repair resources. For a broader overview of what to expect when a battery swells, this guide offers practical context.
Helpful reads:
- 6 Signs It’s Time to Replace Your iPhone Battery
- iPhone Battery Swelling? 2025 Best Fixes
Inspect for physical or liquid damage
Physical damage or liquid exposure can derail power and boot behavior in hours. Start by inspecting the exterior for cracks, bent frames, or a loose back panel. Look at the charging port for debris or corrosion, and check the seal around the SIM tray and screen. Liquid damage often shows up as corrosion on connectors or moisture indicators inside the SIM tray area, even if the phone powers on later.
- Cracks or bent frames signal possible internal damage that may affect the motherboard or connectors.
- Water indicators: many phones have moisture sensors in the SIM tray or near the charging port. If these indicators change color, water ingress likely occurred.
- Corrosion signs: white or greenish residue on connectors is a red flag that moisture has reached critical parts.
Keep in mind that liquid damage often voids warranties and may require specialized service. If you suspect water exposure, stop using the device, dry it carefully, and consult a trained technician. Don’t attempt to open the device yourself if you’re not experienced with electronics.
For model-specific guidance, turn to official support pages from the device maker and reputable repair guides. They provide safety steps and service options tailored to iPhone and Android devices.
External resources:
- How to spot water indicators and corrosion on phones
- Official guidance on water damage and smartphone repair
Know when to replace parts or the whole device
Some failures require replacing a part, while others justify replacing the entire device. Understanding when to swap the battery, motherboard, or the whole phone helps you avoid wasted money and effort.
- Battery replacement scenarios: a battery that shows rapid discharge, poor calibration, or swelling is a prime candidate for replacement. If the device no longer holds a charge despite proper charging and a full reset, a new battery is often the simplest fix.
- Motherboard or deeper hardware issues: signs include persistent boot loops after software fixes, frequent random reboots, or components that fail to respond even after reseating and cleaning.
- Cost considerations: a new battery is typically less expensive than motherboard service. If you’re approaching the cost of a new device or the repair would require extensive disassembly, replacement may be the wiser option.
- When replacement is sensible: if data recovery is unlikely or if the device is several years old with multiple failing components, replacing the device might provide better long-term value.
Practical approach:
- Get a clear quote from a reputable repair shop that itemizes battery replacement versus motherboard repair.
- Compare that to the current value of the device and the cost of a new or refurbished model.
- If data preservation is critical, prioritize repair only if data can be safely backed up during the process.
For additional context on when to replace a battery or a phone, consider checking sources that discuss battery health, swelling indicators, and repair pricing. These resources can help you make a grounded, cost-aware decision.
External references:
- 6 Signs It’s Time to Replace Your iPhone Battery
- How to Check and Maintain Your Android Battery Health
Putting it all together, a logical health check helps you decide the right next step. If the device powers up after a battery swap or a motherboard test, you can resume normal use with fewer surprises. If you still face power problems after evaluating the battery and hardware health, professional diagnostics become the most reliable route. For readers who want model-specific steps, the official support pages for iPhone and Android models offer precise guidance and troubleshooting paths tailored to your device.
When to seek professional help and how to prepare
If your phone won’t turn on after trying the basic steps, it’s time to consider professional diagnostics. This section explains when to seek help, what to expect at a repair shop, and how to prepare so you don’t lose data or pay for unnecessary work. A thoughtful approach can save time and money while protecting your files.
What a technician will check
At a repair shop, technicians start with broad checks to identify the likely cause. They won’t deep dive into every component unless needed, but they’ll cover the essentials to map out next steps.
- Battery and charging system: tests that the device actually receives power and holds a charge.
- Charging port and cables: looks for debris, corrosion, or loose connections that block charging.
- Display and connectors: checks if the screen is the actual problem or if power reaches the display.
- Main board or logic board: a broad assessment to see if there are hardware failures impacting startup.
This approach helps you understand whether the issue is a simple fix, such as replacing a charger, or something more involved like a logic board repair. For clear expectations, you can reference reputable guides from sources like PCMag and official manufacturer support pages.
External reading if you want a quick preview of typical technician checks:
- https://www.pcmag.com/how-to/what-to-do-if-a-phone-wont-turn-on
- https://support.apple.com/en-us/HT204667
What to bring to a repair shop
Being prepared speeds up service and helps you get an accurate quote. Bring enough information to verify ownership and the device history, while minimizing data exposure if you’re worried about privacy.
- Model and serial number: easy to locate in settings or on the device shell.
- IMEI/MEID: useful for warranty claims and insurance.
- Proof of purchase: helps confirm eligibility for warranty or service plans.
- Recent backup: if possible, have a backup ready or know where your data lives.
- Uncluttered device and SIM: remove the SIM card if advised and bring along any accessories you used for charging.
If you’re concerned about personal data, ask about data-preserving options before agreeing to a full reset. For model-specific submission tips, see official support pages and trusted repair guides.
External links for guidance on what to bring:
- https://www.911phonerepairokc.com/things-to-do-before-sending-phone-for-repair/
- https://www.quora.com/What-do-you-do-before-taking-your-phone-to-a-repair-shop
Warranty options and repair vs replacement
Weighing repair versus replacement comes down to warranty coverage, the device’s age, and the repair price. A clear comparison helps you avoid overpaying or chasing an endless cycle of fixes.
- How warranties work: determine if the issue is covered and what proof is required. Many repairs are covered only for manufacturing defects, not accidental damage.
- Typical out-of-warranty costs: battery replacements and screen repairs are common, but prices vary by model and shop.
- Decision factors: if the device is several years old and repair costs approach or exceed the value of a new or refurbished unit, replacement can be wiser.
To decide, get an itemized quote from a reputable shop and compare it to the current value of a similar device. If data recovery is a priority, prioritize repairs that preserve data and confirm that backups exist before proceeding.
External resources you can consult:
- https://eu.community.samsung.com/t5/other-galaxy-s-series/proof-of-purchase-imei/td-p/3607344
- https://www.pcmag.com/how-to/what-to-do-if-a-phone-wont-turn-on
Takeaway: use professional help for complex hardware issues or when you’re unsure about safety. A qualified technician can estimate a fair path to either repair or replacement, often with a transparent quote and a plan for data protection.
If you’d like, I can tailor recommendations to your device model and local repair options. For model-specific warranty guidance, check the official manufacturer support pages and trusted retailers.
External links for warranty and repair decision guidance:
- https://www.quora.com/What-do-you-do-before-taking-your-phone-to-a-repair-shop
- https://www.pcmag.com/how-to/what-to-do-if-a-phone-wont-turn-on
Endnote: when in doubt, prioritize data safety. A professional service can often secure backups and recover information before performing invasive repairs, reducing the risk of data loss during the process.
Prevention tips to keep your smartphone turning on reliably
Keeping your smartphone ready to wake up at a moment’s notice is about smarter habits as much as fine-tuned hardware care. This section covers practical prevention tips that reduce boot failures and extend overall reliability. From software hygiene to everyday handling, these steps help your device boot cleanly each time.
 Photo by Tima Miroshnichenko
Keep software updated and watch app installs
Regular software updates are not just about new features. They fix bugs that can crash boot sequences and improve overall stability. Keeping your operating system current reduces the chances of startup problems caused by outdated code. Also, limit installs to trusted sources. A shady or poorly coded app can trigger conflicts that stop your device from starting properly.
- Enable automatic updates when possible so critical fixes install without delay.
- Review new apps before install. Prefer official stores and check reviews for reliability.
- After updates, monitor boot behavior for a few days to ensure no new issues appear.
- If you must install an app from outside the official store, scan it with a trusted antivirus and read permissions carefully.
Helpful links for further guidance on updates and app safety:
- Why keeping software up to date is important for devices and applications
- Keeping devices and software up to date – NCSC.GOV.UK
- Why Android updates matter: features, security, and more
Use quality chargers and avoid heat
Using original or certified chargers helps deliver steady power and protects the battery. Poor quality or mismatched chargers can cause voltage irregularities that disrupt booting or shorten battery life. Heat is another enemy; excessive warmth accelerates battery wear and can trigger protective shutdowns that prevent startup. Keeping a cooler charging environment supports longer battery health and more reliable power on.
- Use the charger that came with the phone or a certified replacement.
- Avoid charging on soft surfaces that trap heat, and keep vents clear.
- If you notice the charger or cable getting unusually hot, stop and replace with a cooler, certified option.
- Don’t leave the device charging in direct sunlight or in a car on a hot day.
Helpful links on choosing safe chargers and avoiding overheating:
- Charger gets hot? Here’s why and how to stop it now
- How to choose a fast charger without overheating your device
- Power surge incidents when plugging in phones and how to avoid them
Protect against water and drops
Physical protection matters for reliability. Drops can loosen connectors or crack the display, both of which can create startup trouble even if the device seems fine when powered off. Water exposure is especially damaging to internal components and battery health. A sturdy case, careful handling, and prompt cleanup after exposure dramatically reduce the risk of boot related issues.
Thousands of People Were Struggling With Money Until They Discovered This One Ancient Secret Hidden in Sound
>>> Unlock It Now <<<
- Choose a case with solid drop protection and a sealed charging port if you work in damp environments.
- Always dry your hands before handling the device and avoid powering it on if water has entered the ports.
- Regularly clear lint from the charging port and SIM tray area to prevent charging faults.
- Store the phone away from pockets with coins or keys that could press against buttons during movement.
Practical option tips:
- Consider cases that provide both impact resistance and water splash protection.
- If a phone has seen water exposure, seek professional evaluation before attempting many reboots.
External resources that discuss protection and repair considerations:
- Best drop protection cases for smartphones
- Water damage guidance and smartphone repair
By adopting these preventive habits, you reduce the likelihood of boot problems caused by preventable wear and accidental damage. If you’re ever unsure about a protective step, a quick consult with the device maker’s guidelines can confirm the best approach for your exact model.
Conclusion
Most startup problems with a phone not turning on have a quick, user friendly fix. Start with basic power checks, a safe force restart, and smart use of a known good charger before moving to software recovery or professional help. A simple data backup before deeper steps saves you from potential loss and makes any fix less stressful.
If you still face issues, don’t hesitate to seek professional diagnostics. A technician can confirm hardware limits and protect your data, often offering a clear path to repair or replacement. How will you apply these steps to your current smartphone and reduce downtime this week?
She Pressed Play on a Strange Audio Track and Within Days Her Financial Reality Started Shifting in Ways She Could Not Explain
>>> See How It Works <<<
