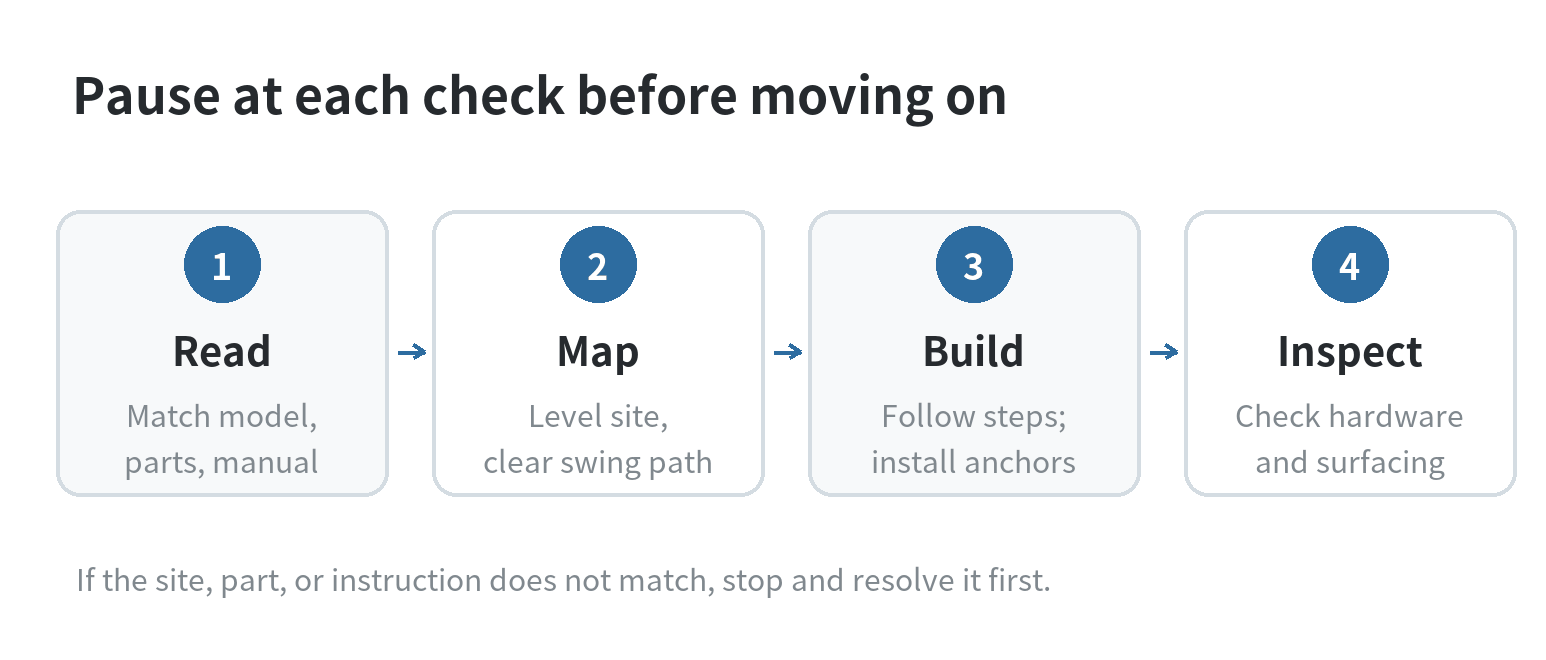
Before assembling a swing set, confirm that the whole moving area fits your yard, the ground is level, and the manual matches every part in the box. The frame is only one piece of the setup: swing clearance, protective surfacing, and buried anchors all affect where and how the structure can be installed.
Measure the moving area before choosing a spot
Start with the manufacturer’s footprint, then mark the full use area on the ground with string or chalk. A tape measure around the legs alone will miss the room a swing needs as it travels. Check the route from the house, fence, driveway, trees, overhead wires, roots, rocks, and any other play equipment.
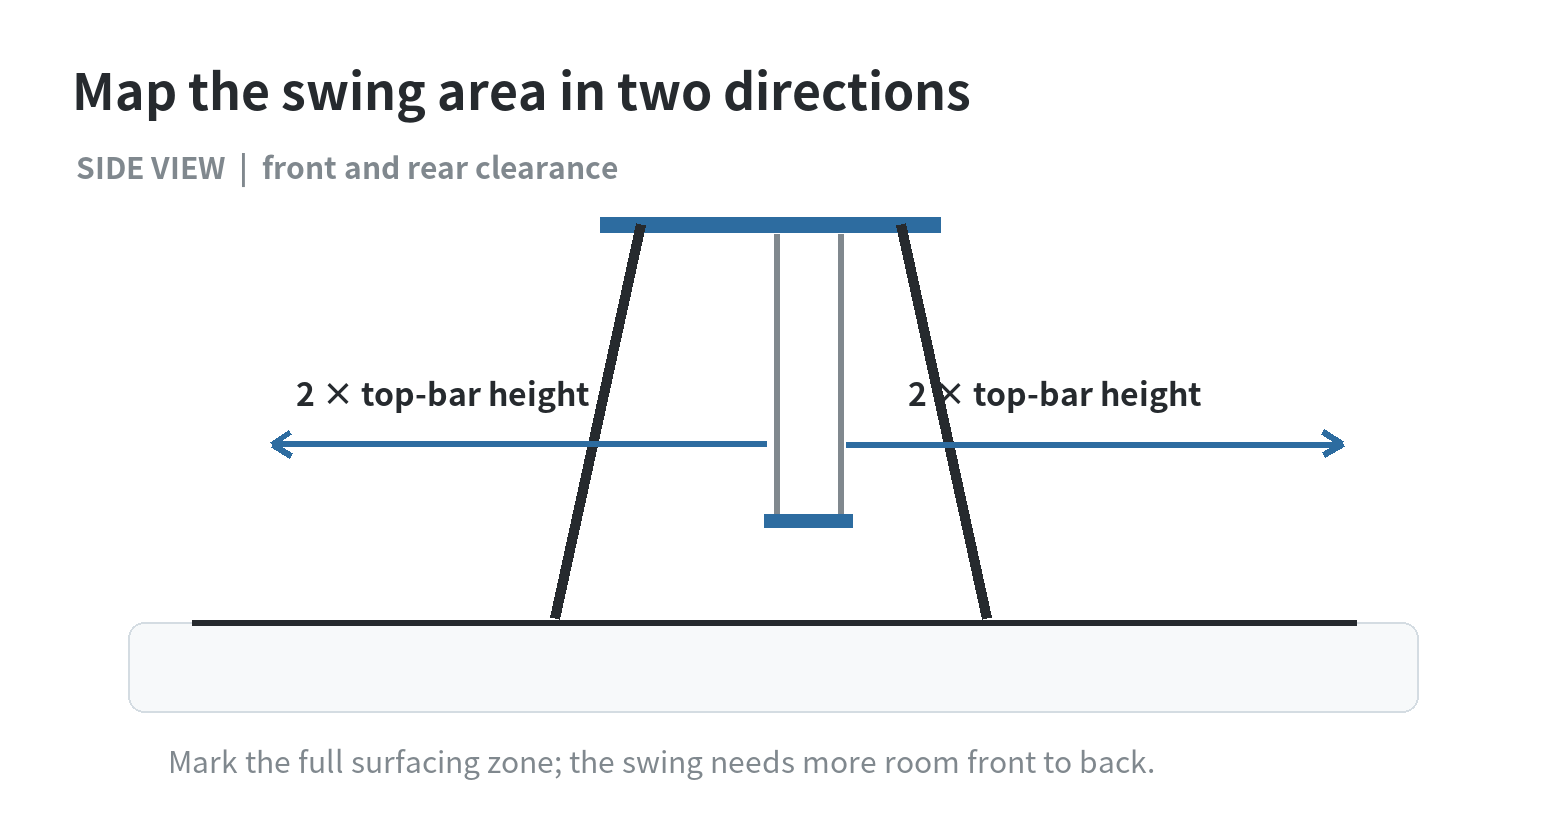
The CPSC’s Outdoor Home Playground Safety Handbook recommends a level location, at least 6 feet between play equipment and obstacles, and more room in front of and behind swings. For a back-and-forth swing, it calls for surfacing to extend forward and behind the seat by twice the height of the top bar. If the bar is 7 feet above the planned surface, that guideline means a 14-foot extension on both sides, measured from the swing area. The manual for your exact unit may set additional distances.
Include the slide exit and climbing routes in the sketch. The CPSC home playground handbook advises arranging multi-activity equipment so a slide does not end in front of a swing. If the required area runs into a fence, tree, walkway, or another structure, choose a different spot before digging or building.
Check the yard and surface under the frame
Walk the marked footprint after rain as well as when the ground is dry. The CPSC handbook says a level location can reduce tipping risk and loose-fill surfacing washing away in heavy rain. If a slope needs grading or water pools in the area, resolve that before assembly; do not try to correct an uneven base by tightening one side of the frame harder.
CPSC’s home playground handbook says grass and bare dirt are not protective surfacing. It recommends maintaining loose-fill materials such as wood chips, engineered wood fiber, or shredded rubber at a minimum depth of 9 inches for equipment up to 8 feet high; sand or pea gravel at that depth is listed for equipment up to 5 feet high. It also describes 6 inches for equipment under 4 feet high. These are handbook recommendations, and the correct surface depends on fall height and material. For unitary mats or poured surfaces, check the tested fall-height rating and installation depth rather than relying on the product name alone.
Plan how to keep loose material within the outlined zone without creating a hard border where a child could land. Account for drainage and inspect the depth after use, weather, and raking. Avoid installing a set over concrete, asphalt, or another hard surface; the CPSC says those surfaces do not provide the impact protection intended for a home play area.
For a detailed spatial analogy, the site’s outdoor structure layout guide also explains why posts, access paths, and surrounding obstructions belong on one plan before installation.
Sort the parts and instructions before building
Open the manual before separating hardware. Confirm the model name or number on the instructions against the package label, and keep the parts list beside the pieces as you identify them. Sort bolts, washers, brackets, swing hangers, and caps into labeled containers. Compare the count and shape with the illustrated inventory; a similar-looking fastener may have a different length or shoulder.
Make a tool list from the manual instead of assuming that a household wrench set covers every step. Check whether the instructions specify a drill bit, socket size, ladder, second adult, concrete, or a separate anchoring kit. Lay long beams on a clear surface and identify their orientation before raising the frame. If a part is missing, damaged, or does not match the illustration, pause and contact the manufacturer for the correct replacement or instruction sheet.
The site’s manual-finding walkthrough covers how to locate and keep a product’s instruction document. Save the manual and the model information after assembly; they are useful when checking hardware or identifying replacement parts later.
Assemble in the sequence the maker specifies
Build on a clear, level work area and follow the numbered sequence in the manual. Keep connections loose only where the instructions require alignment, then tighten them at the stated stage and to any stated torque. Do not substitute a generic bolt, make a new hole, or alter a beam to make pieces fit. Those changes can affect how loads travel through the frame.
Get help to lift or hold large sections when the manual calls for it. Keep children and pets outside the work area while long members are being raised, parts are being drilled, or hardware is exposed. Before moving to the next step, check that each brace, beam, and connector faces the direction shown in the diagram. A frame that looks square from one side can still be twisted when viewed from the end.
When the assembly reaches the anchoring step, use the specified anchors and method for the actual ground conditions. The CPSC home checklist says anchors should be buried or covered with adequate surfacing so they do not become tripping hazards, and the structure should not tip. Do not skip anchors because the set feels heavy or because the yard is sheltered. If the required anchor method cannot be used at the chosen site, stop and ask the manufacturer what installation surface is supported.
Inspect the finished set and keep a maintenance record
Before use, walk around the structure and compare it with the manual’s final illustrations. Look for missing caps, loose connections, protruding bolt ends, open S-hooks, sharp edges, pinched ropes, and anchors or footings exposed above the surfacing. Confirm that the surfacing covers the planned zone and that the swing path remains clear.
The CPSC home handbook calls for periodic checks of nuts, bolts, caps, swing seats, ropes, chains, and cables, with worn or broken parts replaced. Write down the date of each inspection and note any part that needs attention. Check loose-fill depth and redistribute material that has moved away from the landing area. If a connector has loosened repeatedly, a member is cracked, or the set shifts at its anchors, keep children off it and contact the manufacturer for repair guidance.
ASTM’s F1148-24 listing identifies the consumer safety specification for home playground equipment and sections covering equipment layout, installation, structural integrity, and maintenance. The CPSC’s home playground equipment page describes its handbook as guidance and says staff supports voluntary standards work on home playground equipment. Reading a standard reference is useful context, but the product’s own instructions still determine the assembly steps and compatible parts.
FAQ
Can I treat an ASTM F1148 reference as proof that my setup is approved?
No. ASTM identifies F1148-24 as a consumer safety specification for home playground equipment, but seeing the standard’s name by itself does not verify that a particular unit or installation has been evaluated. Check what the manufacturer says about the exact model and its documentation.
What should I keep after the swing set is assembled?
Keep the instruction sheet, model label information, parts list, and any manufacturer replies together. The CPSC handbook recommends saving the manufacturer’s instructions so replacement parts can be identified, and its maintenance guidance calls for checking hardware and swing components periodically.
Can two play structures share the same surfaced area?
Do not assume their use areas can overlap. The CPSC home handbook asks for space around play equipment and warns against arranging a slide exit in front of a swing. Draw both footprints and their movement paths, then compare that layout with each manufacturer’s instructions before fixing either position.
Last updated: 2026-10