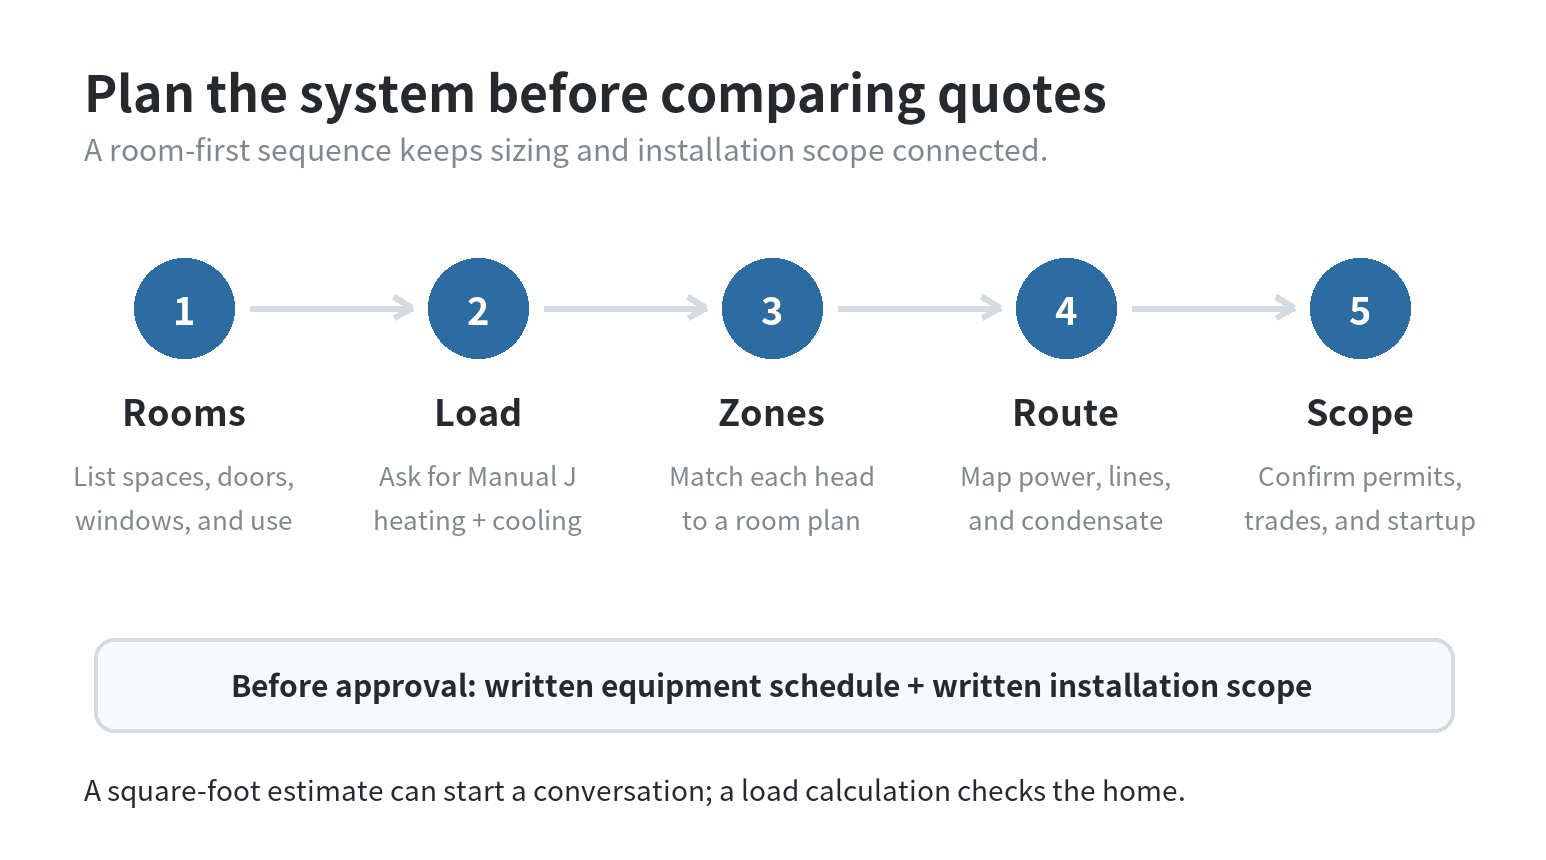
A ductless mini split is easiest to plan when you treat it as a room-by-room HVAC project, not a box matched to a square-foot chart. Start by identifying which rooms need heating or cooling, ask for a documented load calculation, and get the electrical, refrigerant, drainage, and permit work spelled out before comparing equipment or installation quotes.
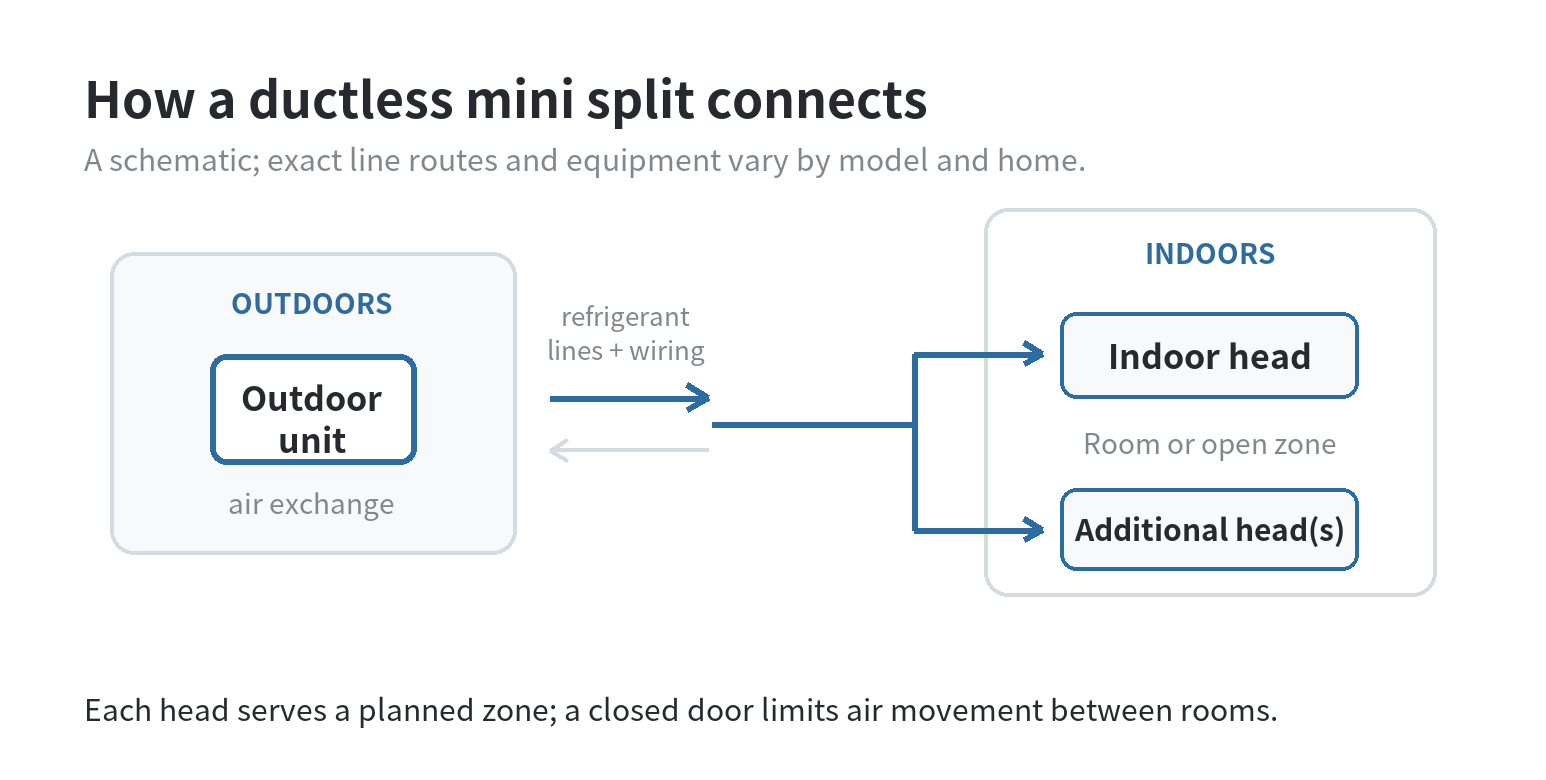
The system has an outdoor unit connected by refrigerant lines and wiring to one or more indoor air handlers, as ENERGY STAR’s system overview describes. That layout avoids new ducts, but it also means each head has a defined zone and the location of both units affects airflow, drainage, service access, and the route through the wall.
Start with the rooms the system must serve
Write down the rooms that are uncomfortable or lack ductwork, then mark which doors stay open or closed. A single wall head does not distribute air evenly through every adjoining room. ENERGY STAR notes that air can be difficult to move through an open doorway and cannot move through a closed one; it also advises considering how warm air rises and cool air sinks when evaluating a head location. Read ENERGY STAR’s ductless installation tips.
This matters in a finished attic, addition, enclosed sunroom, or room above a garage. A head in the main living area may not serve a closed bedroom at the far end of a hallway. If the goal is to condition several separated rooms, ask the installer to map each room to a head instead of assuming one unit will cover the floor.
Make a simple room list before a consultation: room use, approximate dimensions, ceiling height, window direction and size, insulation concerns, and whether the door stays open. This is preparation for the load calculation, not a substitute for it. If attic insulation or air leakage may be affecting a room, see this attic insulation and ventilation overview while listing the conditions to discuss.
Ask how the capacity was calculated
Use the room measurements to start the conversation, but do not select capacity from floor area alone. ENERGY STAR says a system that is too large or too small can struggle to meet the space’s comfort needs and recommends that the contractor verify size with Manual J, a calculation of the home’s heating and cooling requirements. The Air Conditioning Contractors of America describes Manual J as its residential load-calculation standard, which accounts for building and local design conditions. ENERGY STAR sizing guidance and ACCA’s Manual J overview explain the method.
Ask the contractor to show the rooms and assumptions included in the calculation. Window area and exposure, insulation, air leakage, and local outdoor design temperatures can change the result. A rough online calculator may help you prepare questions, but it cannot inspect those conditions or determine whether a selected model’s heating capacity fits your climate.
For example, a shaded den with few windows and an enclosed sunroom with broad glazing may have similar floor areas but different heating and cooling loads. Ask what information changed the recommended capacity, whether the calculation covers heating as well as cooling, and how the selected equipment performs at the outdoor temperatures in your area.
In a cold-winter location, ask specifically about heating output at low outdoor temperatures and whether the existing heating system remains part of the plan. ENERGY STAR advises homeowners in climates that regularly fall below freezing to choose a unit suited to the home with a contractor. The Department of Energy describes cold-climate heat pumps as designed for heating performance at low outdoor temperatures. The equipment’s published heating data and your local design conditions matter more than a general claim that a model is “cold climate” capable. See ENERGY STAR’s cold-climate guidance and the Department of Energy’s cold-climate program page.
Choose zones around doors and daily use
A single-zone system uses one indoor head with an outdoor unit; a multi-zone arrangement connects multiple heads to an outdoor unit. Carrier’s system overview describes single-zone equipment for one area and multi-zone systems for separate areas. The right layout depends on the rooms in the load calculation and the equipment’s approved combinations, not simply the number of rooms in the home.
| Layout | Useful planning question | What to confirm |
|---|---|---|
| One indoor head | Is there one open area to condition? | Airflow path, obstructions, and rooms separated by doors |
| Several indoor heads | Do separate rooms need independent control? | Room-by-room loads, compatible head combinations, and outdoor-unit capacity |
A multi-zone system can place a head in each priority room, but the outdoor unit must support the proposed combination. Ask how the system behaves when one room calls for heating or cooling and whether each head can be controlled independently, as Carrier describes for multi-zone setups. Request the equipment schedule by model and room, then compare it with the rooms shown on the load calculation.
Check unit locations before approving a quote
The indoor head needs an unobstructed air path and a route for refrigerant lines, wiring, and condensate drainage. The outdoor unit needs open airflow, a stable mounting location, and room for a technician to service it. ENERGY STAR recommends avoiding tight outdoor placements and considering access, nearby doors and windows, roof runoff, and winter defrost water. Its placement checklist is a useful way to review a proposed site.
Walk the proposed line route with the installer. Confirm where the wall penetration will be, how the lines will be covered outside, where condensate will drain, and whether the route crosses a closet, attic, crawlspace, or finished wall. Ask who restores any wall finish and whether the quote includes the mounting pad or bracket, electrical disconnect, circuit work, permit, condensate provisions, and startup checks.
For an outdoor unit near a bedroom window, patio, or neighbor’s property line, ask the installer to review sound and service access before the location is fixed. If the outdoor location could affect a walkway or collect defrost water, ask where water will discharge and how the route will avoid creating a slick spot. These are layout decisions to settle on the site plan, not after the equipment is mounted.
Separate homeowner preparation from licensed work
Plan for a wall opening, refrigerant tubing, condensate drainage, electrical wiring, outdoor mounting, and system commissioning. Carrier’s installation overview lists line and wiring connections, drainage, electrical checks, and startup as installation steps. EPA’s Section 608 Q&A says certification is required when installation work could violate the refrigerant circuit, including cutting refrigerant lines or connecting or disconnecting hoses or pre-charged lines. Read EPA’s Section 608 installation guidance and ask the local building department about permit requirements.
You can make the visit more efficient by clearing the planned indoor and outdoor work areas, identifying hidden pipes or wiring from available plans, and deciding where visible line covers are acceptable. Leave refrigerant connections, evacuation or charging, electrical work, and any task that local code reserves for a licensed trade to qualified personnel.
Ask what the startup visit includes: a leak and connection check, condensate-drain check, operating-mode test, and a walkthrough of controller and filter access. The HVAC service overview explains the difference between equipment planning and installation support.
Compare the scope, not just the equipment line
Ask for a written quote that names the indoor and outdoor equipment, the rooms served, the electrical work, line routing, drainage, mounting, permit responsibility, startup, and warranty coverage. Ask what would trigger an added charge, such as a longer line route, panel work, concealed obstruction, or finish repair. Quotes with just a model and a total do not show whether competing installers priced the same scope.
Before scheduling, confirm who obtains permits, who will be on site for each trade, how the installer will protect floors and walls, and what documentation you receive at handoff. Keep the load calculation, equipment schedule, permit record, and warranty documents together. That gives you a clear reference if you later need service or want to add another zone.
Last updated: October 2026.
FAQ
Does every mini split provide both heating and air conditioning?
No. Some mini split systems are cooling-only, so verify that the equipment schedule identifies a heat pump if you need heating as well as cooling. Both the installation guide and Carrier’s system overview distinguish cooling-only mini split AC systems from heat pumps.
Can an outdoor mini split unit sit on a roof or wall?
It can be mounted on the ground, roof, or an exterior wall with suitable mounting hardware, according to the installation guide and Carrier’s placement guidance. Ask the installer to confirm that the proposed location supports airflow, drainage, secure mounting, and future service access.
Can I install a pre-charged mini split without a technician?
Do not assume “pre-charged” removes certification requirements. EPA says connecting or disconnecting pre-charged lines can require Section 608 technician certification when the work could compromise the refrigerant circuit; Carrier’s installation guidance also advises checking with the local building department because permit requirements vary by location.
What should I keep after the installation?
Keep the load calculation, equipment schedule, permits, commissioning or startup notes, warranty documents, and the manufacturer’s maintenance instructions. Those records identify what was installed and provide a reference for later service.
Can I add another indoor head to the system later?
Do not assume an outdoor unit can accept another head later. Some multi-zone systems can be expanded, but supported head counts and combinations depend on the system. Ask the installer to check the manufacturer’s instructions for the exact outdoor unit before planning a future room addition; Carrier describes expansion as system-dependent.
Last updated: 2026-10