
Staining and sealing a deck starts with identifying the finish you want and preparing the wood for it. Deck stain can add color while leaving some or all of the grain visible; a clear sealer adds little or no color. Some products combine stain and sealer, so read the label for the surface, preparation, application, and drying instructions before opening the can.
The retailer’s deck-preparation and staining guides, checked October 4, 2026, recommend inspecting, cleaning, rinsing, and fully drying the boards before coating them. Product makers add their own label directions, which control the amount to apply and when the deck can be used again.
Choose how much wood grain should show
Opacity describes how much of the wood’s original grain and color remains visible through a coating. The retailer’s exterior-stain guide and Olympic’s stain-opacity guide use these categories; naming and available options can differ by product line.
| Finish | What you see | When it fits |
|---|---|---|
| Clear or transparent | Most of the natural grain and color | You want the wood’s existing appearance to stay prominent. |
| Toner | A slight color shift, with grain still visible | You want a subtle tint rather than a major color change. |
| Semi-transparent | Color becomes more noticeable while grain remains visible | You want a colored finish that still reads as wood. |
| Semi-solid | More color coverage; some grain is obscured | You want the texture visible with less emphasis on grain. |
| Solid | An opaque, paint-like color layer | You want the surface color to dominate the wood pattern. |
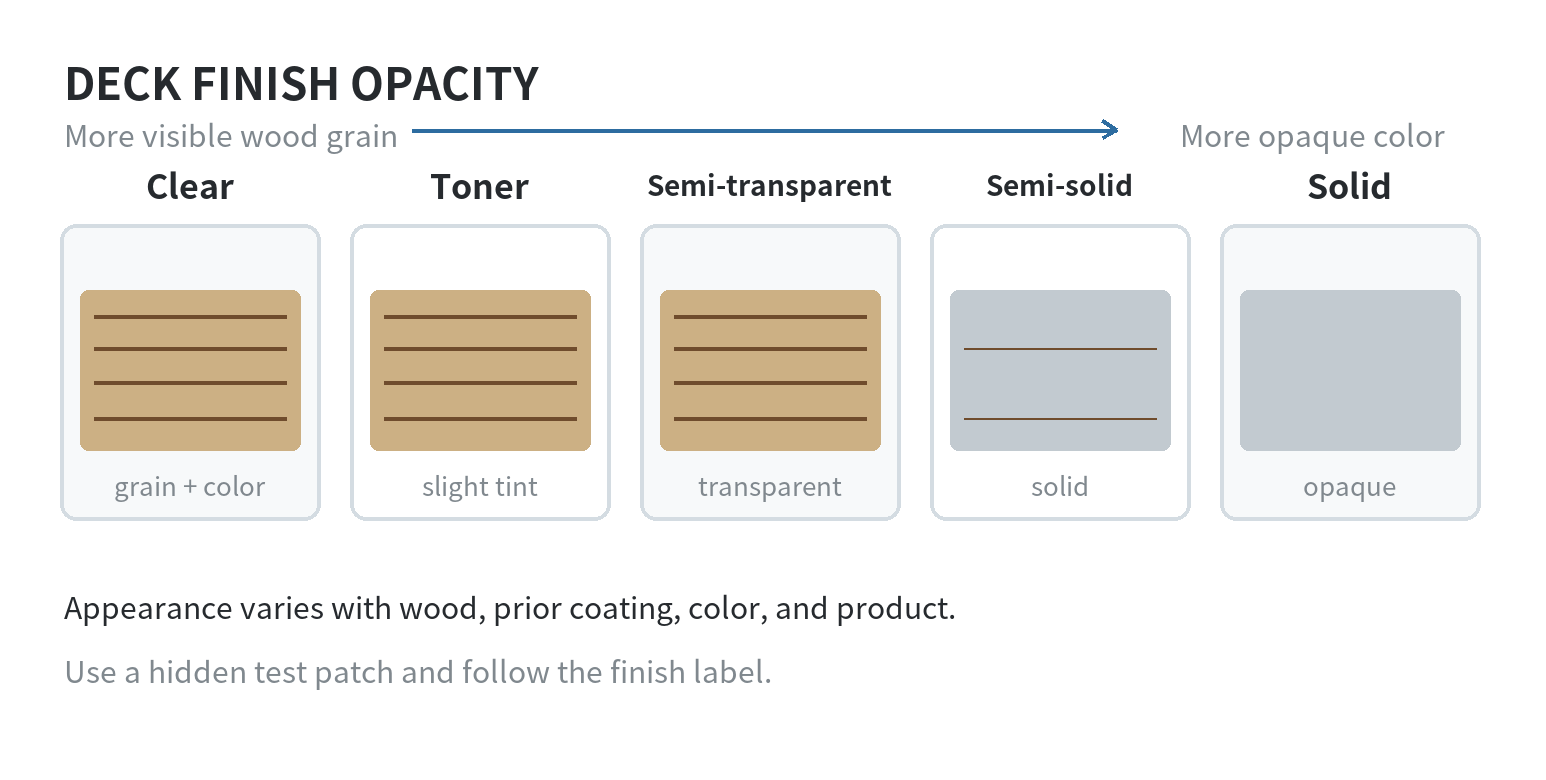
Think of opacity as a spectrum rather than five perfectly separate formulas. A clear sealer and a solid stain sit at opposite ends; intermediate products trade visible grain for stronger color coverage. The accompanying scale shows that relationship at a glance. It is a visual guide, not a promise that every product will look identical on every board.
Before choosing a shade, consider the existing finish. A new transparent coating will not make a previously dark, opaque surface look like bare wood. If you want a major color or opacity change, the old coating may need removal or sanding. Read the product label and test a small, inconspicuous area first; the wood and existing finish affect the result.
Check the deck before buying supplies
Move furniture and planters, sweep away leaves, then inspect each board, stair, railing, and the framing visible around the deck. Look for soft or rotted areas, warped boards, splinters, protruding fasteners, and loose connections. Repair structural damage before applying a finish. A coating is not a repair for a board that needs replacement.
Existing coatings can change the preparation plan. The retailer’s guide describes a small water-drop check for surface absorption and a stripper test for clues about an unknown stain. Treat these as preliminary checks, not a substitute for the label’s compatibility directions. If the old product is unknown, remove loose coating and follow the new product maker’s preparation instructions before covering the whole deck.
Make a short project list based on the deck you actually have: cleaner suitable for the wood and old coating, a stiff non-metal brush, a hose, protective coverings for nearby surfaces, and the application tools named on the stain label. A pressure washer is optional in the retailer’s guide; high pressure can damage softer wood, so a hose and brush are reasonable alternatives when they fit the job.
Clean and let the boards dry fully
Protect nearby plants and surfaces, then apply deck cleaner as its label directs. Work in manageable sections so cleaner does not dry on the boards. Scrub where dirt or loose residue remains, then rinse the full surface thoroughly. Cleaner left behind can interfere with the finish, so do not stop when the deck merely looks wet and clean.
Drying is a schedule decision, not a visual guess. The retailer’s preparation guide says rinsed decks may need 24 to 48 hours to dry, depending on humidity and temperature; its staining guide gives a similar one-to-two-day window. Those are planning ranges, not a substitute for the stain label. Cool, humid, or shaded conditions can extend drying, and the product instructions may specify a moisture limit or another test.
Once dry, sweep away dust and debris. Sanding is for specific surface problems or as required for the coating system, not an automatic step for every deck. If sanding is needed, use the product maker’s preparation directions and protect your eyes and lungs from dust. New pressure-treated lumber has separate drying requirements; check the lumber and stain instructions before scheduling a first coat.
Apply stain in a controlled sequence
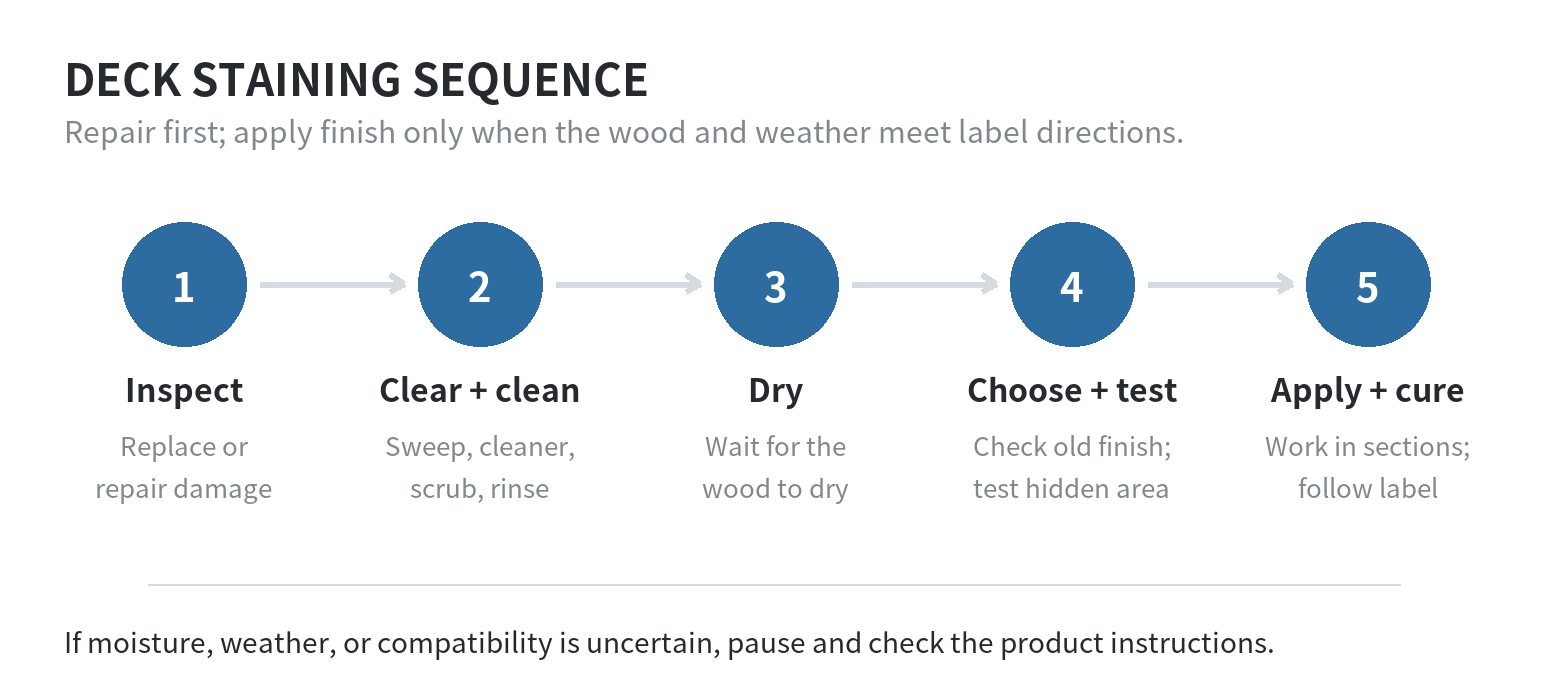
Check the forecast and label for the permitted temperature, sunlight, and rain conditions. The retailer’s September 2026 prep guide recommends dry weather and avoiding direct sun because fast drying can leave lap marks. The exact limits depend on the product, so use its current label rather than treating a general project guide as a universal specification.
Stir the stain as directed and test the color in a hidden spot. Start with railings and other raised parts, then coat the deck boards while keeping a wet edge. Work along a few boards at a time so you can join each fresh section to the next before it dries. A brush helps reach corners and gaps; a roller or pad can cover broad boards. Choose an applicator the label permits.
Use the coverage and coat count on the container. Olympic’s deck guide, checked October 4, 2026, recommends back-brushing to keep the coat even. Follow the selected product’s own method for back-brushing or removing excess. Keep a clear route to the stairs or door so you do not have to cross wet boards to leave the deck.
On a long run of boards, plan where each pass will end before you start. Olympic’s deck-staining instructions, checked October 4, 2026, advise coating a few boards at a time and maintaining a wet edge to limit lap marks. Work from one natural stopping point to another, such as a board end or stair landing, instead of pausing in the middle of a board. Keep the next section within reach so fresh stain can meet the previous pass while it is still workable.
Railings create a separate drip problem: stain can fall onto boards you have not coated yet. Cover the boards below, coat railings and posts first, and remove drips while they are still wet if the label permits. Then move to the walking surface and finish toward your exit. That sequence reduces the chance that you will need to step over wet finish or leave a dried edge behind.
Some products are stain-and-sealer combinations; others are separate coatings. Do not assume a second clear sealer is needed after stain. Check whether the selected finish is designed as a combination product and whether its maker permits a topcoat. This distinction affects both the sequence and the amount of work.
Plan for cure time and cleanup
Dry-to-touch, ready-for-rain, and ready-for-foot-traffic are different milestones. The retailer’s staining guide mentions at least 24 hours before rain exposure for some deck finishes, while its application guide says to follow the manufacturer’s stated dry time before walking on the surface or replacing furniture. Use the can’s directions for your exact product and conditions.
Keep pets and people off the deck until the label allows use. Do not return rugs, planters, or furniture early; they can trap moisture or mark a coating that has not cured. Keep leftover material sealed and dispose of it according to the product label and local waste rules. The U.S. National Park Service notes that rags soaked with some oils can self-heat and ignite; checked October 4, 2026. Follow the finish label’s rag-handling instructions.
For related wood-finishing context, see the guide to choosing interior versus exterior wood stain. If the project is a fence rather than a deck, the fence-staining article covers that separate surface.
Last updated: October 2026.
FAQ
Can I stain a deck that was previously sealed?
Yes, if the existing coating is compatible and the wood is prepared as the new product label requires. A water-drop test can indicate whether water is soaking in or beading, but it does not identify every coating or prove compatibility.
Do I need a pressure washer before staining a deck?
No. A hose and deck brush are options for removing cleaner and residue; a pressure washer is optional. The retailer’s prep guide warns that high pressure can gouge softer wood, so use a low setting and keep the nozzle moving if you use one.
Can I apply a clear sealer over colored deck stain?
Only when the stain maker allows that coating combination. Some products already combine color and sealing functions, and an incompatible extra coat can create an application problem. Check the technical data and label for the specific products before layering them.
How do I know when I can put furniture back?
Use the label’s stated recoat, cure, or return-to-service time for the weather conditions during application. Touch-dry does not necessarily mean ready for rugs or heavy furniture.
Last updated: 2026-10