If you are choosing an air compressor for home tools, start with the tools’ air requirements and the space where the compressor will sit.
Pancake, hot-dog, and twin-stack describe tank layouts; none tells you by itself how much air the pump can deliver.
Use the shape to judge storage and handling, then compare the compressor’s CFM and PSI ratings with each tool’s manual.
What the three names describe
The labels refer to the arrangement of the air tank, not a shared performance standard.
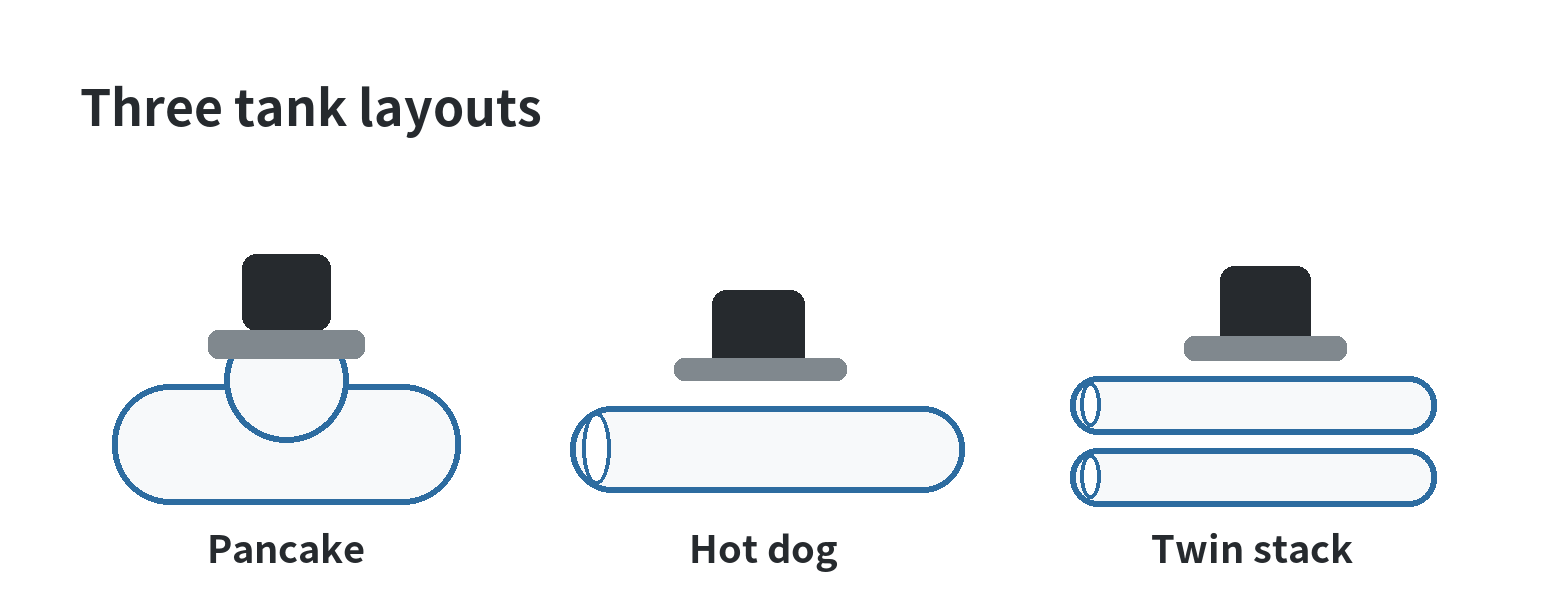
A pancake compressor has a short, broad tank beneath the pump.
A hot-dog model uses a single horizontal cylinder.
A twin-stack model places two horizontal tanks one above the other.
Those shapes affect footprint, carrying points, and where the drain sits.
Manufacturers classify real products this way: Metabo HPT lists “Hot Dog” as the tank type for one compact model and “Twin Stack” for a separate compressor.
The names are useful for picturing the machine, but they do not set a universal tank capacity, weight, or output.
Compare the layouts in the space you have
| Layout | What the tank arrangement looks like | What to check at home |
|---|---|---|
| Pancake | One low, broad, rounded tank | Top and side clearance, handle access, and whether its width fits your storage spot |
| Hot dog | One horizontal cylinder | Full length, the direction it rests, and access to the drain valve |
| Twin stack | Two horizontal cylinders arranged vertically | Total height, carrying balance, and room around the lower tank and drain |
Do not choose by the silhouette alone.
Two compressors with similar-looking tanks can differ in tank volume, pump output, power requirements, noise, and weight.
Read the specification plate and manual for the exact unit, then measure the spot where it will operate and be stored.
Think through the route from storage to the work area, too.
A compressor that fits beneath a bench may still be awkward to lift over a threshold or carry with a hose attached.
In a shared garage, mark a place that leaves the drain reachable and keeps the unit’s cooling openings clear.
For broader layout ideas, see our notes on planning a garage workshop.
Match air delivery before tank shape
CFM describes air volume delivered per minute; PSI describes pressure.
A tool can require both a minimum pressure and a flow rate.
A compressor’s maximum PSI does not answer whether it can keep a tool supplied while that tool is running.
Compare the tool’s stated CFM requirement at its listed PSI with the compressor’s delivered CFM at the same pressure.
On a specification sheet, do not read maximum pressure as an air-flow figure.
A manufacturer can list maximum pressure separately from CFM at a stated pressure.
If the tool calls for a CFM figure at a pressure the compressor table does not show, ask the manufacturer which rating to compare.
The manuals make this distinction practical.
DEWALT’s compressor manual says to check an accessory’s air requirement.
It warns that a compressor may be too small when the accessory needs more CFM or pressure than the unit supplies.
The same manual lists air delivery at a specified pressure, rather than treating a maximum-pressure figure as the whole story.
Pressure at the tool also depends on the path from the compressor.
Ingersoll Rand’s dynamic-pressure guidance says to check hose size and the air available at the tool while it is running.
A small or restricted hose can reduce airflow at the tool even when the compressor gauge looks adequate while nothing is running.
For example, imagine your finish nailer lists a modest air demand while a spray tool lists a higher continuous demand.
Write down each tool’s CFM and PSI requirements, then compare them against the compressor’s output at the relevant pressure.
If a tool manual gives a range or a duty condition, use that wording rather than assuming the tool runs continuously or intermittently.
Use tank capacity to understand the work rhythm
The tank stores compressed air; the pump replenishes it as air is used.
A larger tank can provide a larger reserve before pressure falls, but it does not raise the pump’s rated CFM.
If the tool consumes air faster than the compressor can replenish it, the pump has to catch up and the tool may not maintain its required pressure.
This is why a tank-size label cannot replace the output rating.
For short bursts, such as fastening a few trim pieces, stored air may cover pauses between uses.
For a tool that draws air for longer stretches, pump delivery and the maker’s stated duty guidance deserve more attention.
These are different use patterns, not promises tied to a particular tank shape.
Check the compressor manual for its operating limits and the tool manual for its air demand.
If compressor pressure falls during use or it cannot keep pace, stop and reassess the match. Do not compensate by turning the regulator beyond the tool’s rating.
Check power, handling, and routine care
Before settling on a layout, confirm the compressor’s voltage and circuit requirement against the outlet you plan to use.
The product manual is the authority for that unit.
Also note the listed weight and dimensions: a compact tank arrangement does not guarantee that the whole machine is easy for you to move.
Air compressors collect moisture in the tank as they run.
The owner’s manual explains where the drain is and how to release pressure and empty the tank safely; follow the exact steps for your model.
Keep the compressor on a stable surface with ventilation openings unobstructed, and allow hot components to cool before maintenance.
Plan for the hose, fittings, and the tool’s connection as well.
A mismatch at the connector can stop a setup even when CFM and PSI look suitable on paper.
Check the tool and compressor manuals for compatible couplers, hose size guidance, and any regulator instructions.
Our workshop safety and cleanup checklist covers the surrounding work area.
Decide whether tools run one at a time
Make a short list of the tools that will share the compressor.
If you use them one after another, compare each tool’s requirement with the compressor output and follow the manuals’ limits.
If two tools may run together, consider their combined air use at the same time rather than judging each tool in isolation.
A simple garage example is a nailer used between cuts and a blow gun used to clear a work surface.
If those jobs happen separately, the compressor only needs to support the active tool at that moment.
If another person is using a second air tool at the same time, the demand changes.
The compressor’s rated delivery and the tools’ requirements still decide whether it can keep up.
Do not add every connected tool’s demand automatically.
Add together only tools that will actually operate at once, and use each maker’s stated pressure and flow figures.
When a tool manual does not say whether its air figure assumes continuous or intermittent use, contact the manufacturer instead of guessing from the tool’s size.
For a mix of tasks, identify the one with the greatest air demand and the one requiring the highest pressure.
They may be different tools.
Check that the compressor can meet both requirements at the same time, then confirm that the hose and fittings do not contradict the tool’s instructions.
When the same tool must keep running for a long stretch, read the compressor maker’s operating guidance as well as the tool rating.
Tank reserve may cover a brief burst, but it cannot replace pump output over a sustained task.
This distinction helps explain why two compressors with similar tank capacity can behave differently once a tool draws air continuously.
A quick decision sequence
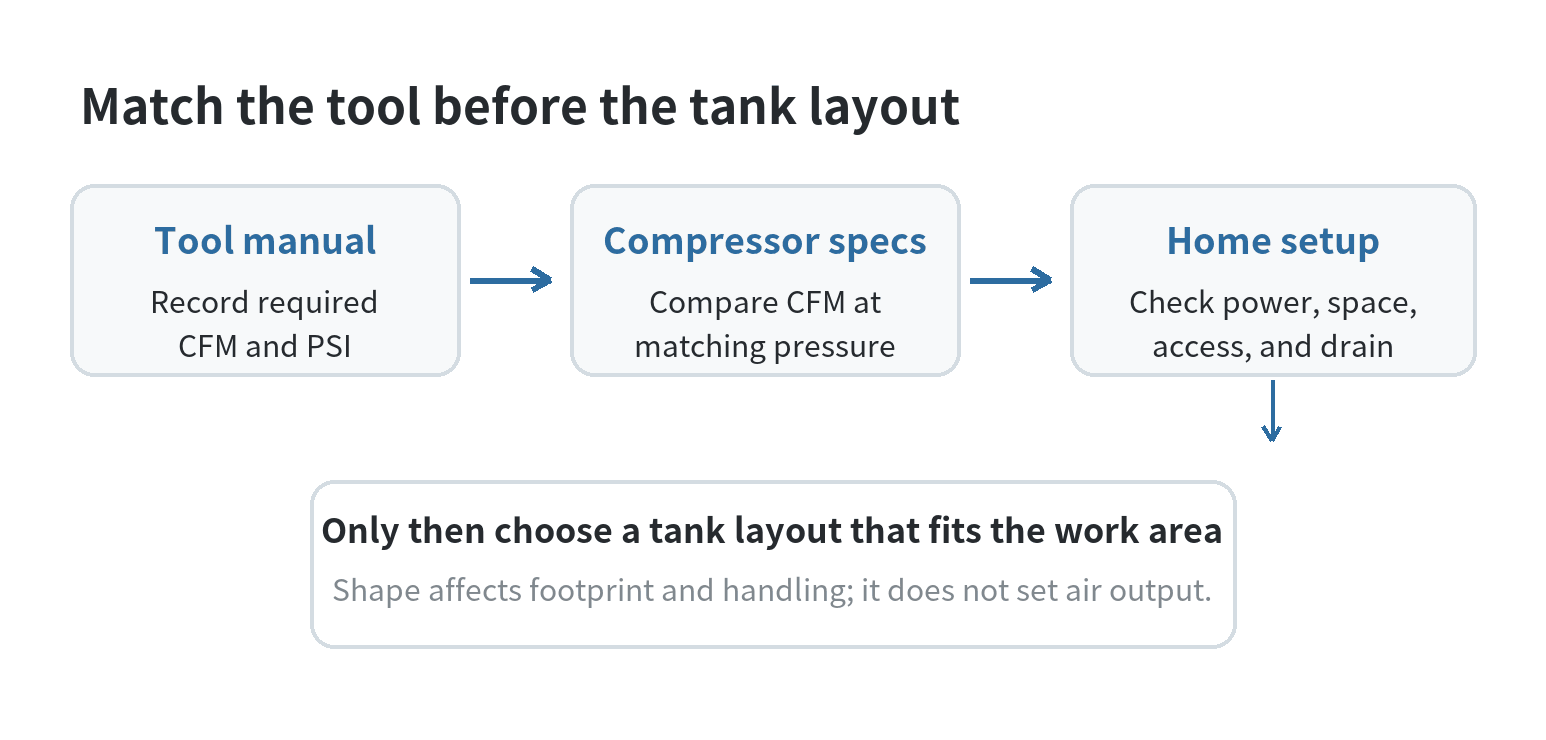
- List the air tools you expect to use and copy each tool’s CFM and PSI requirement from its manual.
- Compare those figures with compressor air delivery at the matching pressure; do not use maximum tank pressure as a substitute for CFM.
- Check tank capacity, voltage, circuit needs, weight, dimensions, noise information, and the manufacturer’s operating guidance.
- Choose the pancake, hot-dog, or twin-stack layout that fits your storage space and lets you reach the controls, ventilation openings, and drain.
If no listed compressor meets a tool’s stated air requirement, the tank shape will not solve that mismatch.
Ask the manufacturer for clarification about an unclear rating, or choose a different tool-and-compressor combination that the specifications support.
FAQ
Does a pancake compressor always have more air than a hot-dog model?
No.
The name describes tank layout, not a guaranteed capacity or output.
Compare the exact model’s tank volume and CFM at the pressure your tool requires.
Can I use a compressor with a higher PSI rating than my tool?
Possibly, if the compressor’s regulator can be set within the tool’s limit and its CFM is adequate.
Follow both manuals and do not exceed the tool’s pressure rating.
What should I check if a compressor fits under my workbench?
Confirm that the controls, drain, and ventilation openings remain accessible, and that the unit can sit on a stable surface.
Check the manual’s clearance instructions for the specific model.