
Deck building basics come down to four decisions: confirm the site and local approval path, draw the load-carrying layout, choose compatible treated or naturally durable materials, and build the frame before the walking surface. A simple single-level deck is still a structural project. The ledger, beam, posts, footings, joists, fasteners, and guard system must work together; a shopping list alone is not a design.
Start with the site and the permit path
Measure the proposed footprint, the distance from the house, the finished height, stair location, and how water will leave the area. Mark doors, windows, vents, hose bibs, utility lines, and any slope that could move soil around a footing. Photograph the wall where a ledger might attach. This prevents a plan that looks tidy on paper but blocks a door or lands over a drain.
Before ordering materials, ask the local building department which code edition, permit, footing detail, setback, and guard requirements apply. The International Residential Code exterior-deck section and the American Wood Council DCA 6 guide are useful references for a single-level residential wood deck. Neither document replaces local approval or an engineered design when the project falls outside its scope.
Draw the load path before the material list
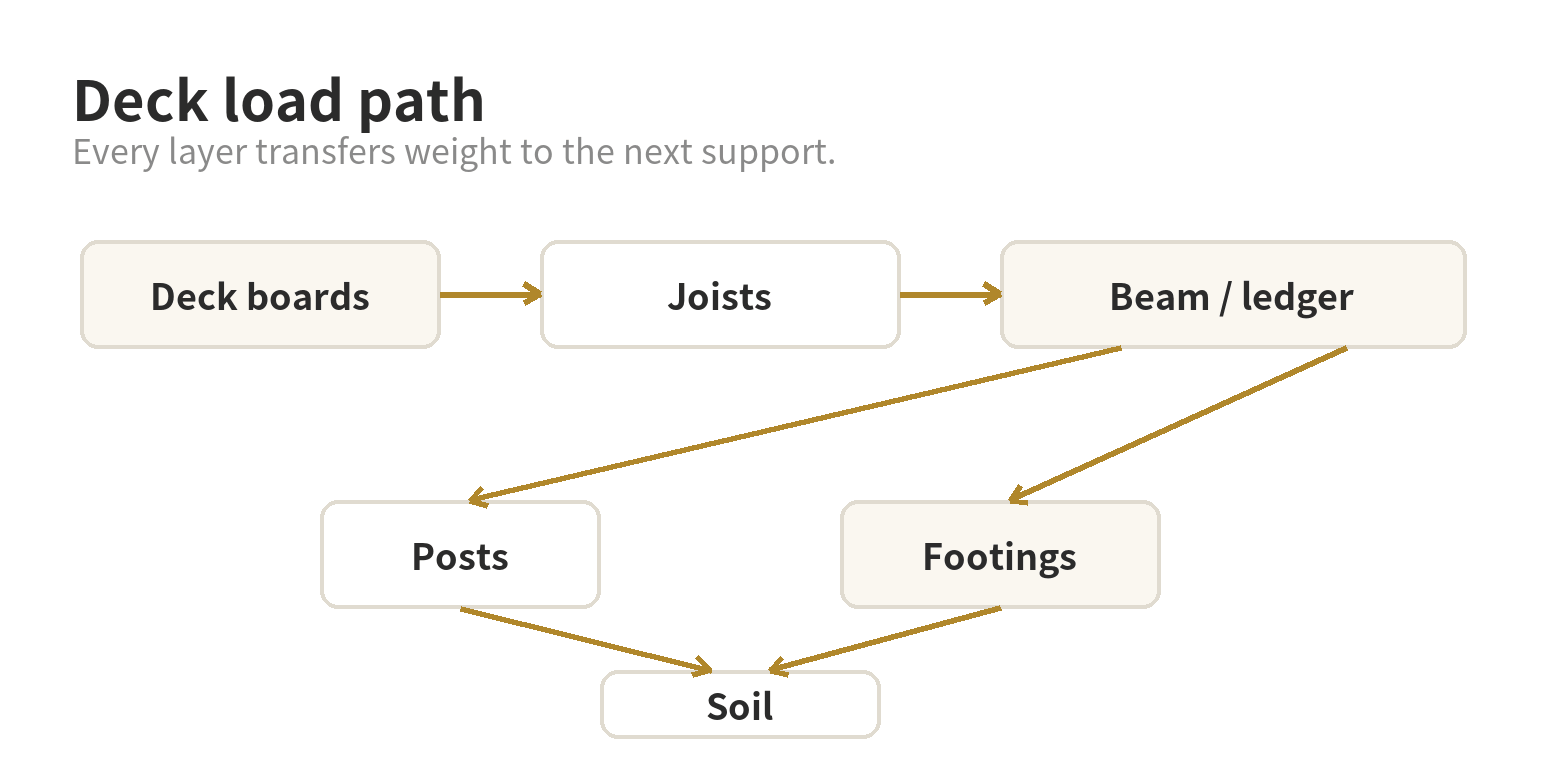
Think of the deck from the surface down. Deck boards transfer weight to joists; joists transfer it to a beam or ledger; the beam transfers it to posts; posts transfer it to footings and soil. The house connection must be detailed separately. A ledger is not simply a board screwed into siding, and a beam is not interchangeable with a rim board.
The DCA 6 guide shows the parts that must align: ledger or hangers, joists, rim joists, blocking where required, beam, posts, and footings. Its span tables are conditional, not universal. Wood species, grade, member size, spacing, wet-service assumptions, loads, and overhang all affect the permitted span. Use the table that matches the actual material and framing plan, then have the building department accept the detail.
Choose materials by role, not by appearance
Make a takeoff in groups: framing lumber, deck boards, posts and beams, concrete or approved footing components, connectors, structural fasteners, flashing, stairs, and guard parts. Keep the structural list separate from finish items such as trim and stain. That makes it easier to spot a missing connector or an incompatible fastener before the project starts.
For exterior framing, use material rated for the exposure and follow the treatment label. Fasteners and connectors need corrosion resistance appropriate to the lumber treatment and site conditions. The connector manufacturer’s listed fastener type matters; a generic screw is not automatically a substitute for a listed structural connection. Use compatible flashing where the deck meets the house, and do not trap water behind the ledger.
For the walking surface, compare boards by actual width, thickness, spacing guidance, edge treatment, maintenance instructions, and how the boards meet stairs or guard posts. Composite and wood decking can require different joist spacing and fastening details. Treat the manufacturer’s installation instructions as part of the material specification, not as optional packaging.
Sourcing your deck materials at Home Depot
Home Depot carries the lumber, decking, and building materials a deck project draws on, but the store aisle is the last step, not the first. Bring the approved drawing and the grouped takeoff from the previous section, and check each item against it: the treatment label and exposure rating on framing lumber, the listed fastener type for each structural connector, and the decking maker’s instructions for joist spacing and fastening. If a product on the shelf differs from what the plan specifies, confirm the substitution with the building department before it goes into the frame.
A few Home Depot services can make the logistics easier:
- Delivery. Home Depot offers home or jobsite delivery and says most in-store and in-stock items are eligible. Long framing lumber and bundles of deck boards are awkward to haul, so confirm which items on your list qualify.
- Tool rental. The Home Depot Tool Rental Center rents augers, including a two-person model for large holes or tough, compacted soil, which can help with footing holes. Footing size and depth still come from the approved plan.
- How-to videos. Home Depot’s How to Build a Deck video gives an overview of a ground-level deck, and a separate video describes a raised deck as an advanced-level DIY project.
Use these resources to organize the work, not to replace the permit review or the prescriptive guide your design follows.
Build in an order that exposes mistakes early
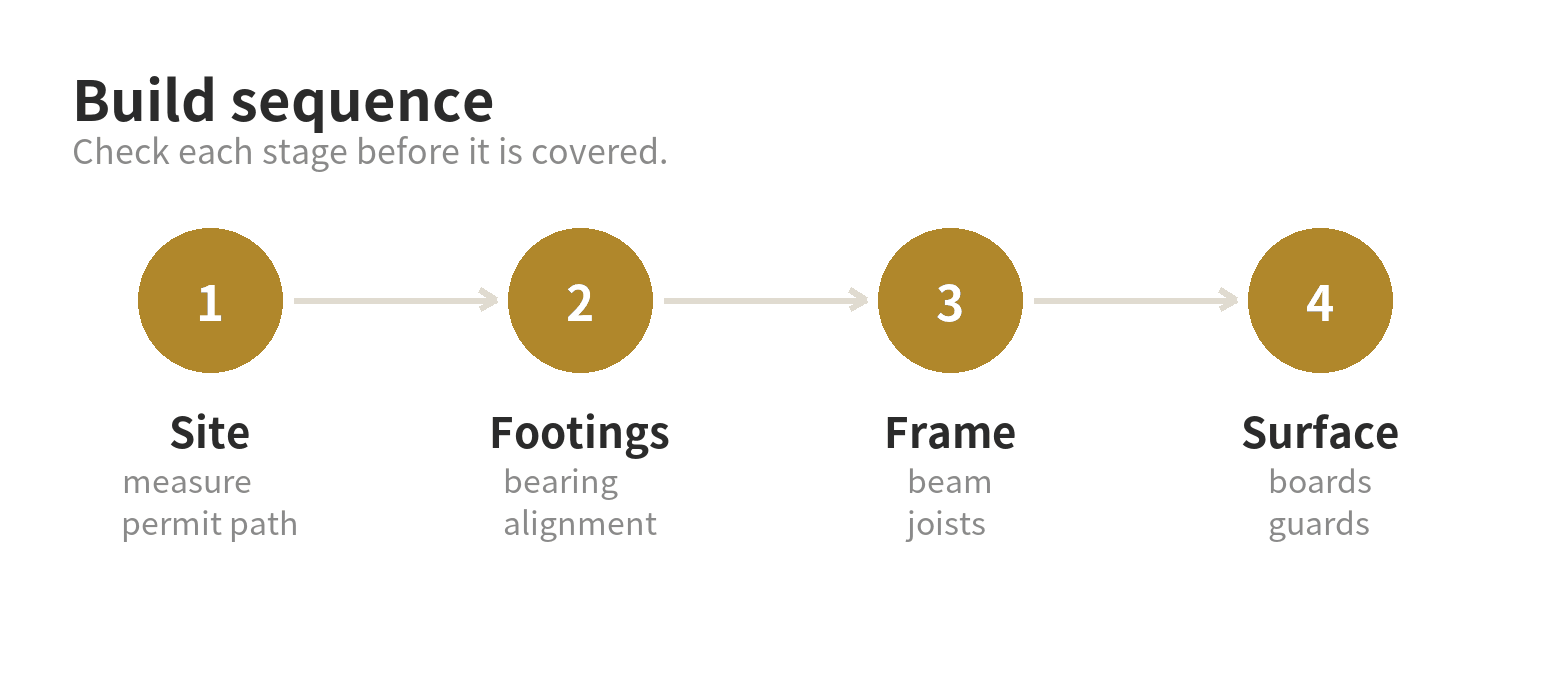
- Lay out the footprint. Square the corners, verify the finished height, and locate footings from the approved drawing.
- Install footings and posts. Confirm size, depth, bearing, drainage, and alignment before setting the beam.
- Set beams and frame the perimeter. Check level, bearing, post connections, and the planned stair opening.
- Install joists and blocking. Keep spacing consistent, crown lumber as appropriate, and install required hangers and lateral connections.
- Add the surface and edge details. Follow the decking maker’s gap and fastening instructions, then finish stairs, guards, and trim.
Pause after each structural stage for a measurement check. A small layout error at the footing stage can become a large stair or board problem later. Take photos of concealed flashing and connectors before covering them; the record helps with inspection and future maintenance.
Handle stairs, guards, and safety as structural work
Stairs need a clear rise-and-run layout, solid stringer support, a stable landing, and a handrail or guard arrangement that matches the local code. Do not cut stringers from a rough guess or let the decking thickness change the first or last step unexpectedly. Lay out the complete stair assembly on paper before cutting lumber.
Guards deserve the same attention as the deck frame. Posts, blocking, rails, infill, and their connections must resist the forces required by the adopted code. A decorative panel can still be a fall hazard if it is not attached as a guard system. Keep openings, stair guards, and handrails in the approved design rather than borrowing details from a different project.
If workers are exposed to a fall during construction, OSHA’s residential-construction guidance points employers to fall-protection requirements and methods such as guardrails, safety nets, or personal fall-arrest systems. OSHA identifies six feet above a lower level as the threshold in its cited residential-construction rule for conventional protection. Homeowners should also keep the work area barricaded, use stable access, and avoid standing on loose joists.
Inspect before the first chair goes outside
Use a closeout checklist: footing and post alignment, beam bearing, ledger flashing, structural fasteners, joist spacing, blocking, board ends, stair dimensions, guard connections, handrail continuity, drainage, and exposed sharp edges. Remove construction debris from gaps and keep soil, mulch, and stored materials away from the framing so water can dry.
Schedule the required inspection before concealment, if the permit authority requires it. Keep the approved plan, material labels, connector instructions, and photos together. For a deck attached to an existing house, uncertain wall framing, unusual soil, a tall platform, or a design outside a prescriptive guide, stop at the layout stage and use the building department or a qualified design professional.
FAQ
Can a beginner build a deck without designing every connection?
No. A beginner can organize a straightforward project, but the structural layout and connection details still need to come from an accepted prescriptive guide, the local building department, or a qualified professional.
Should deck boards be bought before the frame is built?
Choose the decking system before finalizing joist spacing, but delay the full order until the approved layout and takeoff are complete. Board dimensions, fastening method, waste allowance, and stair details can change the quantity.
Is a ledger always the best way to attach a deck to a house?
No. The wall construction, doors, flashing conditions, and local requirements may make a freestanding frame more suitable. An attachment detail must show how water is managed and how the loads reach the house framing.
When should a deck project use an engineer?
Use one when the deck is tall, unusual, heavily loaded, built on difficult soil, outside the prescriptive tables, or connected to uncertain existing framing. That decision belongs at the planning stage, before materials are cut.
Last updated: 2026-09.