If you are considering a pressure reducing valve (PRV), test the house’s static water pressure before choosing one. A hose-bib gauge can show whether the reading is high enough to investigate, while the valve’s flow capacity and connection details determine whether a particular unit fits the plumbing. For a new installation or adjustment, ask a licensed plumber to check the local code and the system’s thermal-expansion protection.
Start with a static pressure reading
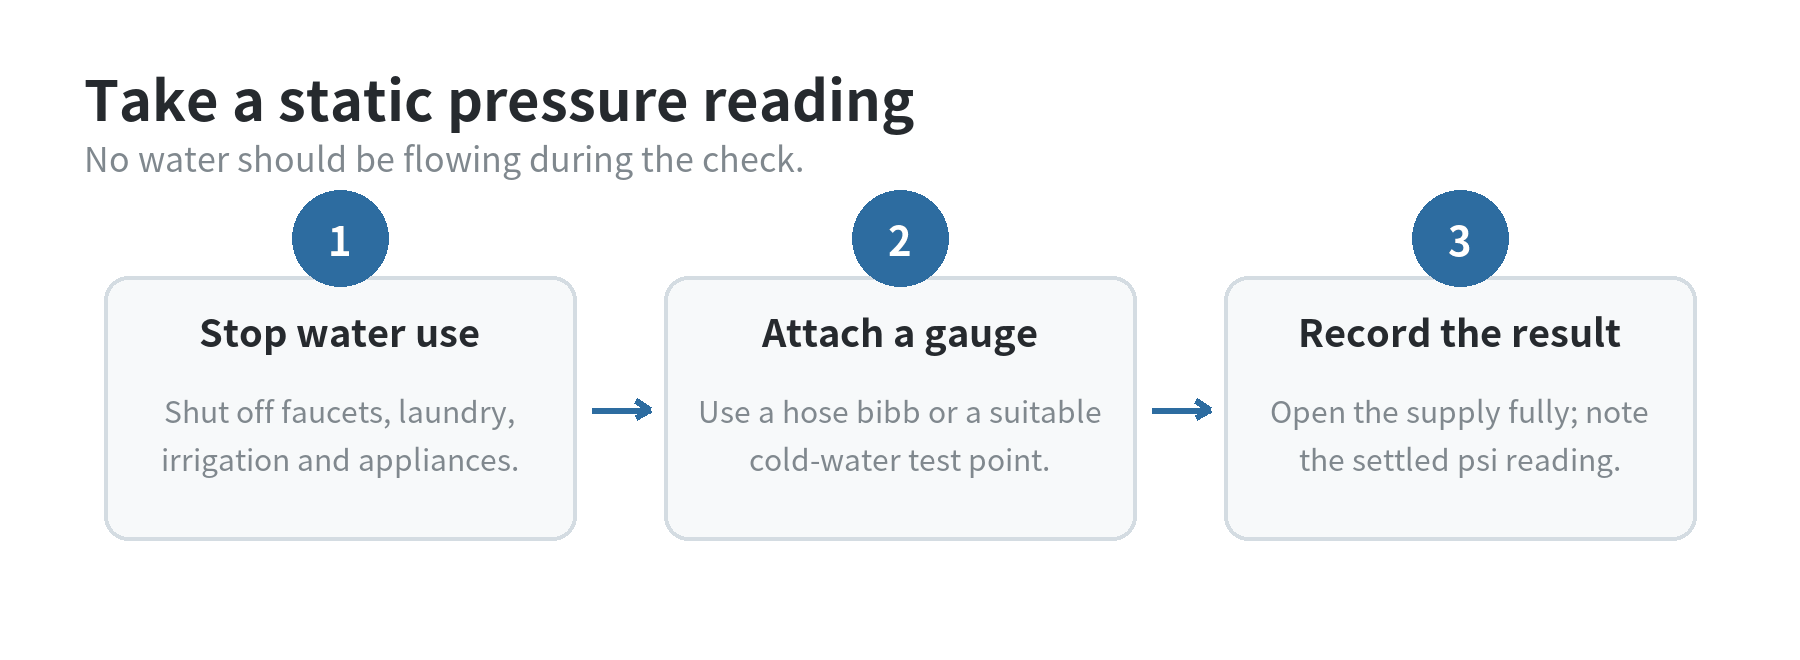
Static pressure is the pressure in a supply line when no water is flowing. Shut off faucets, showers, laundry, irrigation, ice makers, and other water-using equipment, then attach a pressure gauge to an outdoor hose bibb. If the home has no accessible hose bibb, EPA WaterSense also lists a washing-machine cold-water connection or a first-floor cold-water faucet as possible test points.
Open the supply fully and record the gauge reading. Also note whether the home uses public water or a private well. The EPA’s WaterSense guidance recommends incoming service pressure of 45 to 60 pounds per square inch (psi) for household fixtures and appliances. Treat that range as guidance, not a universal setting: local plumbing rules, the building layout, and equipment needs still matter.
For a first reading, write down the number and where you measured it. Repeat the check with the same gauge at another suitable cold-water point if you need to compare a second part of the home. Record whether the test was at an outdoor bibb, laundry hookup, or indoor faucet so a plumber can repeat the measurement.
Make the reading useful
A single gauge number is a screening measurement, not a diagnosis of every weak-flow complaint. If the house reading sits within the EPA’s suggested range, but one sink or shower still feels weak, note which locations are affected. Compare another fixture on the same floor and another on a different floor before calling a plumber.
Write down whether the problem appears at hot water, cold water, or both. That detail can help the plumber decide whether to inspect a fixture, a branch line, a mixing valve, or the incoming supply.
If the reading is much lower than 45 psi, WaterSense advises investigating the source of low pressure, including possible leaks. Contact the water utility if the home uses public water, and ask a plumber to check the building side if the utility confirms normal supply conditions. A PRV reduces pressure; it does not raise a low reading. A weak-pressure problem may need a different diagnosis. Our article on tracking weak water pressure around the house covers fixture-level checks.
If the pressure is above 60 psi, compare it with the local plumbing code and the PRV’s current setting, if one is installed. For example, a reading of 86 psi is above the 80 psi threshold in the 2021 International Plumbing Code; repeat the measurement and ask which local rule applies before choosing a valve.
The code says a building pressure above 80 psi static requires an approved PRV with a strainer to bring building distribution pressure to 80 psi or less. That is model-code language; jurisdictions adopt and amend plumbing codes locally, so confirm which rule applies to the address.
If the utility supplies water, ask whether its service pressure changes; if the property has a well or a separate irrigation feed, test and identify each supply separately. EPA WaterSense calls for checking each source when a home has multiple supplies.
Choose a PRV by the system, not the aisle label
Use the gauge result to decide what to ask, then match the valve to the actual plumbing. Start with the inlet pressure range and intended outlet setting. Next, confirm the pipe connection type and size, the valve’s rated flow capacity, and whether its performance range covers the home’s demand. EPA WaterSense says to select a regulator whose operating pressure falls near the middle of its rated range and not to size it from pipe diameter alone.
Flow capacity matters because a valve must serve the fixtures that may run together. EPA WaterSense relates minimum PRV flow to maximum desired flow. Ask for the manufacturer’s flow data at the planned outlet pressure, then have the plumber compare it with the home’s expected use.
For a replacement, compare the old valve’s label with the new valve’s published operating limits. A matching connection size does not establish that the pressure rating, flow capacity, or service access is also suitable.
| Check | What to confirm | Why it matters |
|---|---|---|
| Pressure range | Incoming pressure and target downstream setting | The valve must be rated for the pressure conditions at the house. |
| Flow capacity | Manufacturer’s flow curve or capacity data | Pipe diameter by itself does not show the flow the home needs. |
| Connections | Nominal pipe size, thread or solder type, and installation direction | The connection must match the existing line and fit the available space. |
| Service details | Strainer, gauge ports, service access, and thermal-expansion plan | The valve needs to be inspectable and compatible with the rest of the system. |
For drinking-water plumbing, check the product’s certification marks and documentation. EPA explains that NSF/ANSI/CAN 372 identifies compliance with the federal lead-free requirement; NSF/ANSI/CAN 61 also indicates that a product met leachate requirements for contaminants. Check the exact valve listing and its intended use rather than relying on a general “lead-free” label alone. Confirm whether the certification applies to the complete valve assembly and whether the listed connection matches the line.
Keep the manufacturer’s data sheet with the valve model information so the installer can verify pressure limits, flow rating, and service parts.
If the house already has a PRV, record its label, connection size, adjustment range, and any gauge-port information before discussing a replacement. A product page or installation sheet can provide rated details, but it cannot tell you the actual pipe arrangement or demand in your home. For fixture-specific pressure considerations, see our guide to reading shower-head pressure and flow specifications.
Leave installation and adjustment to a plumber
A PRV is installed in the home’s supply piping, and the correct location affects which branches it controls. EPA WaterSense places the valve downstream of the service connection and advises checking local requirements for thermal expansion. Watts’ installation instructions also call for an accessible location, correct flow direction, local-code compliance, and pressure-relief protection for a closed system.
If the existing valve has gauge ports, ask the plumber to check pressure on the inlet and outlet sides. Watts’ installation instructions recommend using a gauge to verify an adjusted setting, and Watts’ valve installation guidelines describe inlet and outlet gauges for monitoring a valve. That check helps document what the valve receives and what it sends to the house.
If an installed PRV has a downstream static reading above its set pressure, Watts lists thermal expansion, pressure creep, and debris on the valve seat as possible causes. A gauge reading alone does not identify which one applies; give the plumber the pressure, test conditions, and valve label.
Ask a licensed plumber to confirm whether outdoor hose bibbs, irrigation, or a fire-sprinkler line sit before or after the proposed valve. A valve that reduces pressure to indoor fixtures may not control a branch piped ahead of it. The plumber can also check whether a thermal expansion tank or another measure is required by local code, and verify the outlet setting with a gauge after installation.
Bring the recorded pressure, test location, whether water was off, and any existing valve markings to the conversation. Ask the plumber where the valve would sit relative to outdoor fixtures and irrigation, whether the local code requires a strainer or thermal-expansion control, how the target outlet pressure will be checked, and what access is needed for future servicing.
Those details make it easier to distinguish a house-wide pressure issue from a fixture-specific restriction and to compare the right valve specifications without guessing from a shelf label.
FAQ
Should I test water pressure while a faucet is running?
EPA WaterSense’s pressure test starts with water-using fixtures and systems shut off, so use a no-flow static reading for that comparison. A running fixture is a different check; record it separately if a plumber asks for it.
Why can a water heater drip after a PRV is installed?
A PRV can create a closed plumbing system, where heating water can raise downstream pressure. Watts explains that this pressure can reach the water heater’s relief valve; ask a plumber to check the expansion-control setup and the local code.
Does a house fire-sprinkler line belong downstream of the PRV?
Do not assume the answer from the household plumbing layout. EPA WaterSense says home fire-sprinkler piping must follow state and local requirements, so have the plumber confirm how that branch is protected before changing valve placement.