For a tank-style water heater, treat flushing and anode-rod inspection as two separate maintenance jobs: follow the exact schedule and shutdown steps in the unit’s
manual, flush only if the manual describes it, and inspect or replace the rod only when the model’s instructions call for it. A yearly reminder is a useful time to check the
manual, but it is not a universal service interval. The manufacturer’s instructions control because tank design, heating source, and water conditions differ.
The anode rod is a sacrificial metal component that helps protect the tank from corrosion. Flushing sends water through the tank to carry loose sediment toward the drain.
One does not replace the other: a clean-looking drain stream does not tell you how much anode material remains.
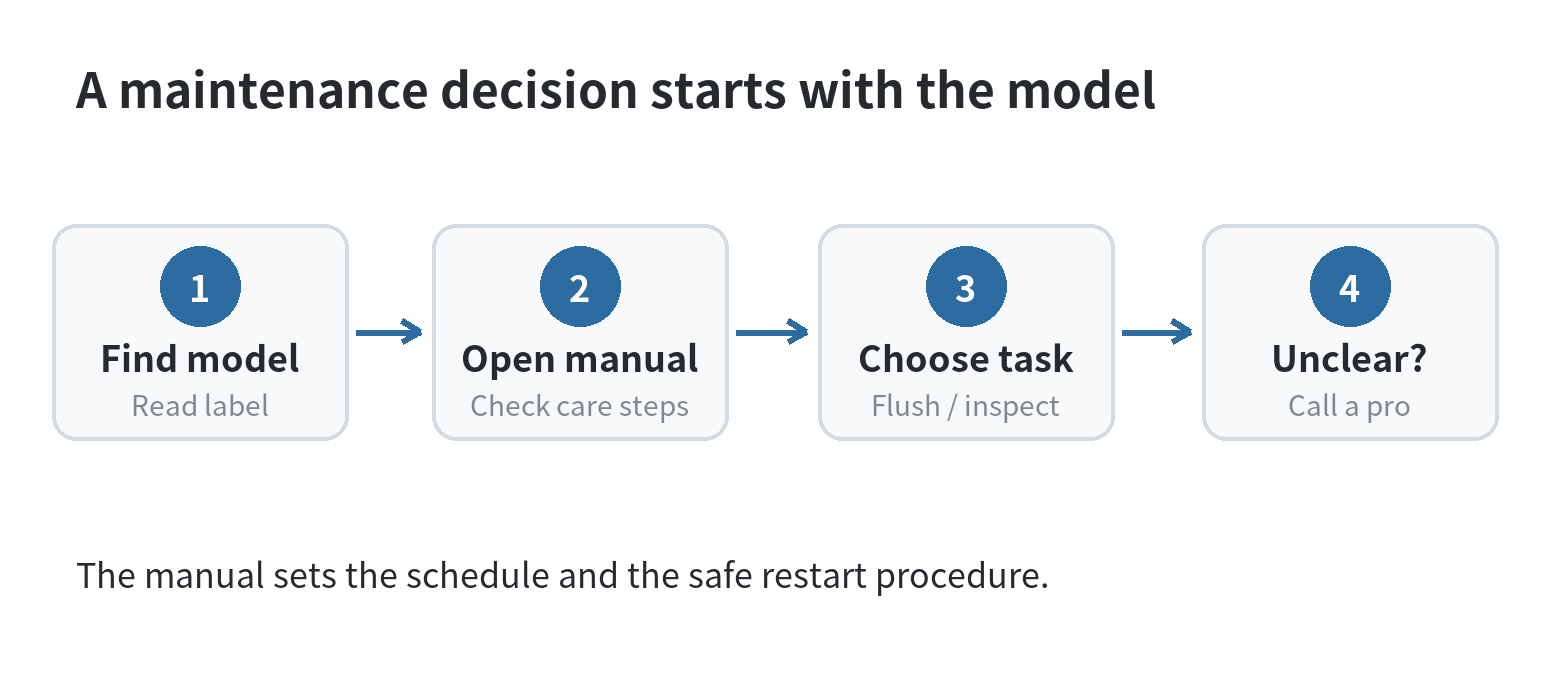
Start with the model label and owner’s manual
Find the model and serial label on the heater, then use the manufacturer’s documentation for that exact model. Search the manual for “maintenance,” “draining,”
“flushing,” and “anode.” The manual may call for a professional, describe a powered anode system, or give a schedule that differs from another model’s instructions.
Match the label to the manual before taking any step. A manual for a similar-looking heater can describe a different drain valve, access point, or control panel. Keep the
model number and the manual title together in your log so a later service visit starts with the right document.
Read the maintenance section from start to finish before gathering tools. Mark which instructions apply to your energy source and whether they require a shutoff, refill
check, or service access. If a diagram or term does not match the heater in front of you, pause and contact the manufacturer or a qualified technician.
Look for separate instructions for routine flushing, anode inspection, and anode replacement. Those tasks can have different prerequisites. A maintenance page may also
identify an anode system that is powered or inaccessible, which changes what an owner can inspect without removing covers.
Before setting a reminder, note the interval stated for the exact model and the condition that triggers service. A reminder can prompt a manual review; it should not replace
the manual’s stated conditions. When a technician recommends a different interval, ask for the reason and keep that note with the service record.
That difference matters. The manufacturer’s tank-care guidance lists draining, flushing, refilling, and anode inspection as maintenance tasks, then directs owners to
the unit’s Use and Care Manual for model-specific details. Another manufacturer’s service-manual guidance likewise points owners to the manual for recommended
maintenance. Some units use powered anodes, whose care differs from a removable sacrificial rod.
Stop when a task depends on equipment, access, or skills you do not have. The site’s DIY stop-point guide covers that boundary.
For installation questions, see the site’s water-heater installation overview.
What an annual check can—and cannot—tell you
Use the calendar reminder to review the manual, inspect for visible leaks, and note any unusual noise or changes in hot-water supply. These observations do not diagnose the
cause. Sediment can settle at the bottom of a tank. The manufacturer’s flushing bulletin explains that accumulated deposits can affect heat transfer or obstruct a drain
valve. Flushing can carry loose material out, but the bulletin cautions that it will not remove every trace of sediment.
Do not assume every tank needs the same interval. The manufacturer’s technical bulletin gives a six-month schedule as a general recommendation and notes that water
conditions, thermostat setting, and hot-water use can change the needed frequency. Its homeowner guidance says maintenance needs vary by product. Use the schedule in
your specific manual instead of treating a calendar rule as a warranty requirement.
A useful log separates what you observed from what work was done. Write “sediment visible at drain” or “no visible leak” as observations, then list the action separately,
such as “flushed per manual” or “technician inspected rod.” This distinction helps prevent a quick visual check from being mistaken for a completed service task.
Keep a copy of the manual’s maintenance page with the log, along with the model and serial numbers. If someone notices a change in recovery time or a new sound, record when it
began and whether it continues after a normal heating cycle. Those notes give a technician useful context without asking you to diagnose the heater.
A small maintenance log helps make that schedule useful. Record the service date, whether the tank was flushed or merely inspected, what the discharge looked like, and whether the drain valve or connections leaked afterward. A note such as “clear water” is an observation, not proof that the tank has no deposits or that the anode is sound. Keep the model number beside the entry so a technician can match later service to the right manual.
Anode inspection also has no single interval for every heater. Bradford White says recommended maintenance is listed in the service manual provided with each water heater, which is where to look for a
replacement threshold for those rods. That is model-specific guidance, not a rule for all tanks. Check your warranty and manual before setting a recurring inspection
date; keep the document with your household maintenance records.
Before a manual-approved flush
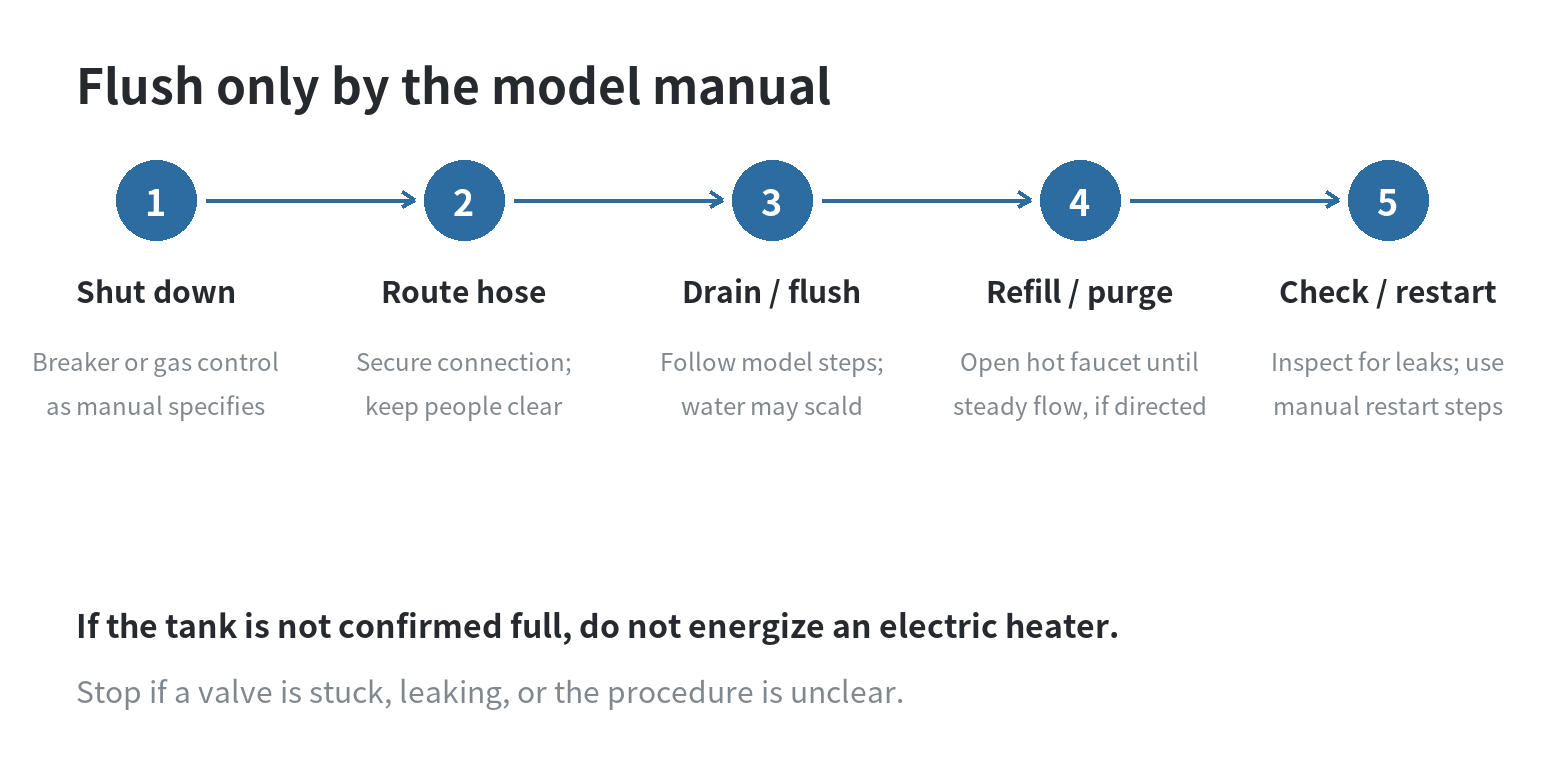
Do not begin while the tank is hot or while anyone could contact the discharge. The manufacturer’s flushing bulletin warns that flushing can expose you to scalding water. It
directs owners to shut off power at the breaker for an electric heater or the main gas line for a gas heater, attach a garden hose to the drain, and route the other end to a
suitable floor drain or outside location. Your manual may give different controls or steps, so follow it rather than copying a generic sequence.
For an electric unit, the heating elements must not be energized while the tank is empty. The manufacturer’s instructions keep power off during draining and restore it only
after a hot-water faucet produces a steady stream, indicating that the tank has refilled and air has been purged. Use the exact refill and restart instructions in your
manual. If you cannot confirm that the tank is full, leave the power off and contact a qualified professional.
Before opening a valve, clear the hose route and choose a drain point that can handle hot water without crossing a walkway. Keep children and pets out of the area, and stay
clear of the hose outlet while water is moving. Confirm that the hose connection is secure before opening the drain. If water escapes around the connection, close the valve
only if it is safe to do so, and stop the procedure.
Before draining, think through the path from the valve to the discharge point. A hose that kinks or ends where people walk can create a spill or contact hazard. Check that the
receiving drain is open and the hose end cannot move when water starts flowing. Stay nearby while water is moving so you can stop if the route leaks.
Once the manual says to refill, watch the hose connection and drain valve for seepage while the tank fills. Check again after closing the valve. If you see moisture, follow
the manual’s leak response; do not cover a wet fitting or restart an electric heater while the tank’s full condition is uncertain.
A service note should identify where you stopped if the procedure did not go as planned. Record that the valve would not turn or the discharge remained blocked, then leave the
next step to a service professional. This gives the technician useful context without repeated force on a stuck component.
Gas units have their own shutdown and relighting instructions. Do not improvise with the gas control or burner. Use the model manual’s procedure; if it is missing, unclear, or the heater has a powered vent or unfamiliar control, arrange service rather than guessing.
When to stop and call for service
Leave the job to a plumber if the drain valve will not open, leaks, or appears clogged; if the hose cannot be routed safely; or if the manual requires service access you are not
prepared to perform. Sediment can obstruct a drain, and forcing a stuck valve can turn a maintenance task into a leak.
Anode removal needs more than a quick visual check. The manufacturer’s replacement instructions warn about scalding, note that some models do not have an accessible rod,
and call for leak checks after replacement. The rod may be hot, and the work may involve removing covers or insulation. Ask a licensed plumbing contractor if access, tools,
model compatibility, or local code requirements are uncertain.
After any service, record the date, work performed, and the manual section used. Keep receipts and service notes with the warranty paperwork. If the heater is under
warranty, check its terms before authorizing work or using a replacement part; maintenance instructions and coverage conditions are not identical across
manufacturers such as Rheem (see “Keeping Your Water Heater at Its Best: Tank Edition”).
FAQ
Can I flush a tankless water heater the same way as a tank model?
No. Tankless units do not store a tank of water to drain through a bottom valve. Use the tankless model’s descaling and service instructions, or ask a qualified technician.
Does a powered anode rod need to be removed for inspection?
Not necessarily. A powered-anode system uses electrical components and has model-specific status checks. The service manual for one powered-anode model describes
checking a status indicator. Follow your own manual and do not substitute removable-rod instructions.
What if the water from the drain looks clear?
Clear discharge does not establish the condition of the tank or anode. Follow the unit’s maintenance schedule and get service if the valve, tank, or controls behave
unexpectedly.
Can I replace an anode rod with any rod that fits?
No. The manual or manufacturer must identify a compatible part and installation method for the model. Rod access and construction vary, and some heaters do not use a
standard removable rod.