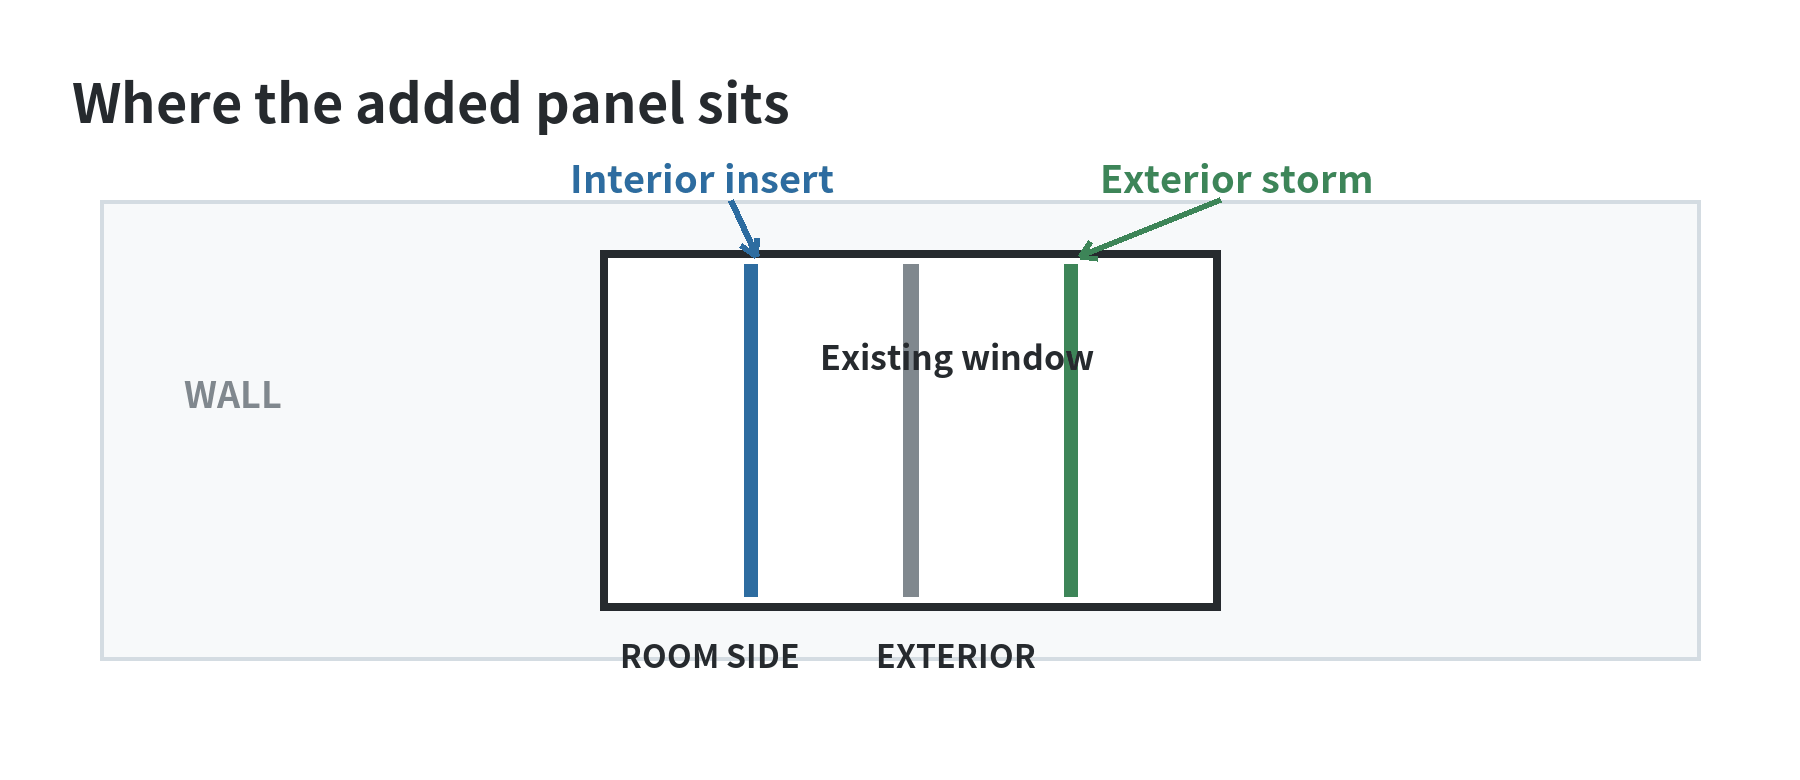
Storm windows add a second layer to an existing window; they do not replace the sash or frame. An interior insert sits on the room side and is measured at its own mounting surface. An exterior storm unit mounts outside and is sized for the exterior opening and trim. Before measuring, decide which side you can access, whether the primary window must still open, and which product’s instructions will set the final dimensions.
Interior insert or exterior storm: what changes?
The U.S. Department of Energy describes interior storm windows and insulating panels as attachments placed inside an existing window. They can add an air seal and insulating air space, but they do not shield the existing window from outdoor weather. An exterior storm adds that outer layer and can protect the primary window from weather exposure.
Interior units suit a window where exterior access is awkward or where exterior changes are restricted. They can also be removable panels or operable units matched to the existing sash. Check how the insert opens or comes out before choosing a fixed panel for a bedroom or another room where the window is part of an escape route. The Department of Energy notes that some interior products can hamper egress depending on how they operate.
Exterior units may be fixed or operable. The Department of Energy identifies triple-track, double-track, and fixed styles; operable storm windows can be selected to work with the primary window. This added outer layer can protect the original window, but installation needs a suitable exterior mounting surface and secure fastening. A loose or poorly sealed assembly can admit air or water.
Use the comparison below to narrow the type, then use the specific model’s installation sheet to confirm what to measure. “Storm window” can mean a framed exterior unit, while “window insert” often refers to an interior panel; product terminology varies, so check the mounting diagram before recording dimensions.
| Question | Interior insert | Exterior storm |
|---|---|---|
| Mounting side | Room side of the existing window | Outside face of the existing window |
| Primary role | Adds an interior air seal and air space | Adds an outer layer and weather protection |
| Measure at | The exact interior frame step or surface named by maker | The exterior opening or trim surface specified by maker |
| Check before ordering | Obstructions, depth, release method, window egress | Trim condition, mounting clearance, fastening, drainage |
Pick the measurement surface first
Do not start with a tape measure until you know where the product sits. An interior insert may press into a particular frame step, which is the ledge or flat surface inside the window frame. A manufacturer’s measuring guide instructs customers to take all dimensions on the same selected step. It also identifies clearance and obstruction requirements for its own insert. Those fit rules belong to that product, not to every insert.
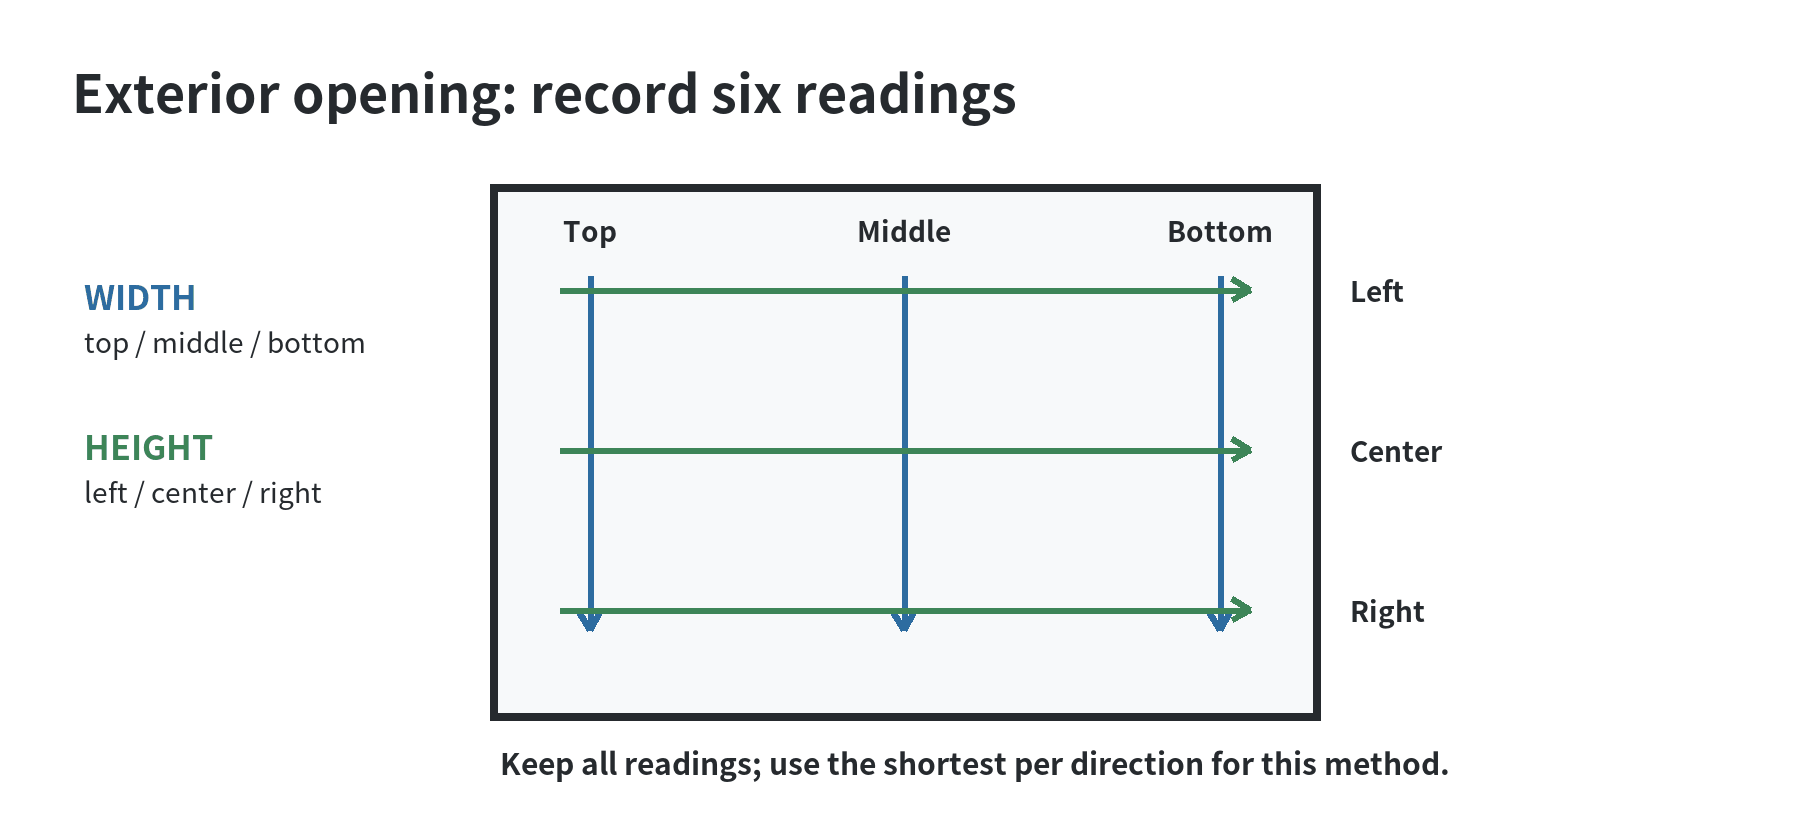
An exterior storm guide may instead call for measurements from the inside edges of the exterior trim. The “How to Measure Windows” guide gives this method: measure the width at the bottom, middle, and top, then use the shortest; measure height at the left, center, and right, then use the shortest. It says the shorter dimensions help the storm unit’s flanges fit within the exterior trim.
These methods are not interchangeable. If you measure an interior frame step for a storm unit whose flanges cover exterior trim, the dimensions describe the wrong plane. If you measure only the exterior opening for an interior insert, the panel may not fit its intended ledge. Find the model’s diagram and label the measurement surface on a sketch before taking any numbers.
Measure an exterior storm opening
For an exterior unit whose instructions match the general method above, identify the inside edges of the exterior trim and the sill first. Keep decorative interior casing out of the measurement. Measure width across the opening at the top, center, and bottom. Write down all three rather than choosing the one that looks easiest. Record the smallest width, then repeat the process for height at the left, center, and right.
Keep a separate row for every window, even when two openings look alike. Mark the room and location, such as “upstairs bedroom, left window,” so the measurements remain tied to the right opening. Record fractions as measured; do not round one window to match another. The final product instructions determine whether to subtract clearance or account for a mounting flange. Do not apply a generic deduction unless those instructions say to.
Inspect the outside trim while measuring. Note cracked, soft, or uneven areas, loose paint, and any obstruction that would keep a frame from sitting flat. A storm unit needs a sound mounting surface and its specified fastening pattern. If trim repairs or a special shape change the opening, pause and ask the manufacturer or installer which dimension to use.
Measure an interior insert at its frame step
For a made-to-fit interior panel, find the exact ledge where it will sit and confirm the product allows the available flat area, depth, and hardware clearance. Indow’s measuring instructions call this the frame step and caution that every dimension must use the same step. A different maker may define its measuring plane differently, so follow the sheet supplied for the insert you are considering.
Label one window, then record top and bottom widths, left and right heights, and both diagonal measurements if the maker requests them. Measure the frame itself rather than the glass. Use the same tape measure throughout, keep it straight and taut, and write down fractions. Recheck each reading before transferring it to a form. A bowed or out-of-square frame can have different dimensions at opposite ends, so include any irregularity the maker’s form asks you to report.
Check for handles, locks, blinds, shades, and trim that intrude into the selected ledge. Also check how the panel will be removed for cleaning and how the existing sash will operate. A fixed, tight-fitting panel can make access to the primary window harder. In a sleeping room, confirm that the window remains usable for emergency exit under local requirements before selecting a non-operable insert.
Keep a measurement sheet that prevents mix-ups
Use a separate line per opening and include the mounting side, frame step or exterior trim, and product name. This sample is a note-taking format, not a size rule:
| Room / window | Mounting surface | Width readings | Height readings | Notes |
|---|---|---|---|---|
| Office, north | Exterior trim | top / middle / bottom | left / center / right | trim and obstructions |
| Bedroom, east | Interior frame step | maker’s labeled points | maker’s labeled points | step, depth, hardware |
Take a photo of each opening and give the photo the same room label. That makes it easier to distinguish a left-side latch, a deep ledge, or a trim detail when comparing the sheet with the manufacturer’s diagram. Before submitting dimensions, compare the notes with the actual form field names. “Width” alone is not enough if the form separates top and bottom readings.
When the old window needs attention first
A storm window or insert attaches to an existing window; it does not repair a damaged sash, frame, or water-management detail. The Department of Energy’s window rehabilitation guidance says an interior storm relies on the original window to manage water, and that the interior assembly needs a tight interface to limit moisture movement into the space between layers. If you see water damage, a leak, or a frame that will not close, address that condition before treating an insert as the fix.
This project is also different from replacing the primary window. A replacement window removes or covers the existing unit as part of a separate installation. A storm attachment adds a layer to the window already there. If you are comparing those project scopes, see our room soundproofing guide for a related discussion of window sound control and our apartment noise reduction ideas for renter-friendly context.
Before you finalize a size, ask the maker to confirm the measuring surface, the number of readings required, how it handles an uneven frame, and whether any clearance deduction is already built into its sizing process. Send your labeled sketch or photos if the shape is unusual. Record the maker’s answer beside the window’s measurements so you can trace every dimension to the correct product instruction.
FAQ
Can I use one measurement set for several windows that look identical?
No. Measure each opening and label it by room and position. Even paired windows can differ in frame dimensions or mounting details.
Should I subtract a fraction from every measurement?
Only if the specific manufacturer’s instructions tell you to. The required clearance depends on the product and its measuring method.
Can an interior insert stay in place over a bedroom window?
It depends on whether the panel can be opened or removed and on applicable egress requirements. Check the panel’s operating method and local requirements before choosing a fixed unit.
What if the opening is out of square?
Report all dimensions and the frame condition using the product maker’s form. Ask the maker how it handles the variation before ordering a custom-fit panel.