
A shower door fits when the finished opening, the door’s adjustment range, and the room around it agree. Measure after tile or the wall surround is complete, write down the opening at several points, then compare every reading with the installation guide for the exact door style. A sliding panel, a pivot door, and a frameless design describe different features, so the words alone do not tell you the required opening size.
Start with the opening you actually have
Measure the finished shower, not a rough framing opening. Delta’s measuring guide starts at the completed threshold or tub edge and measures upward to the top of the tile or acrylic surround. For width, it calls for readings across the top and bottom. DreamLine’s guide asks for top, middle, and bottom readings and recommends checking whether the walls are plumb with a level. The instructions for your chosen door decide which readings and reference points apply.
Use a metal tape and keep it straight across the opening. Record the point each number describes rather than writing a loose list of widths. Include the inside-to-inside width at the top, middle, and bottom; the height at the left and right sides; and the threshold depth from front to back. A pivot door’s installation guide may also specify where the door sits on the sill. Delta’s guide, for example, treats sill depth as a separate measurement.
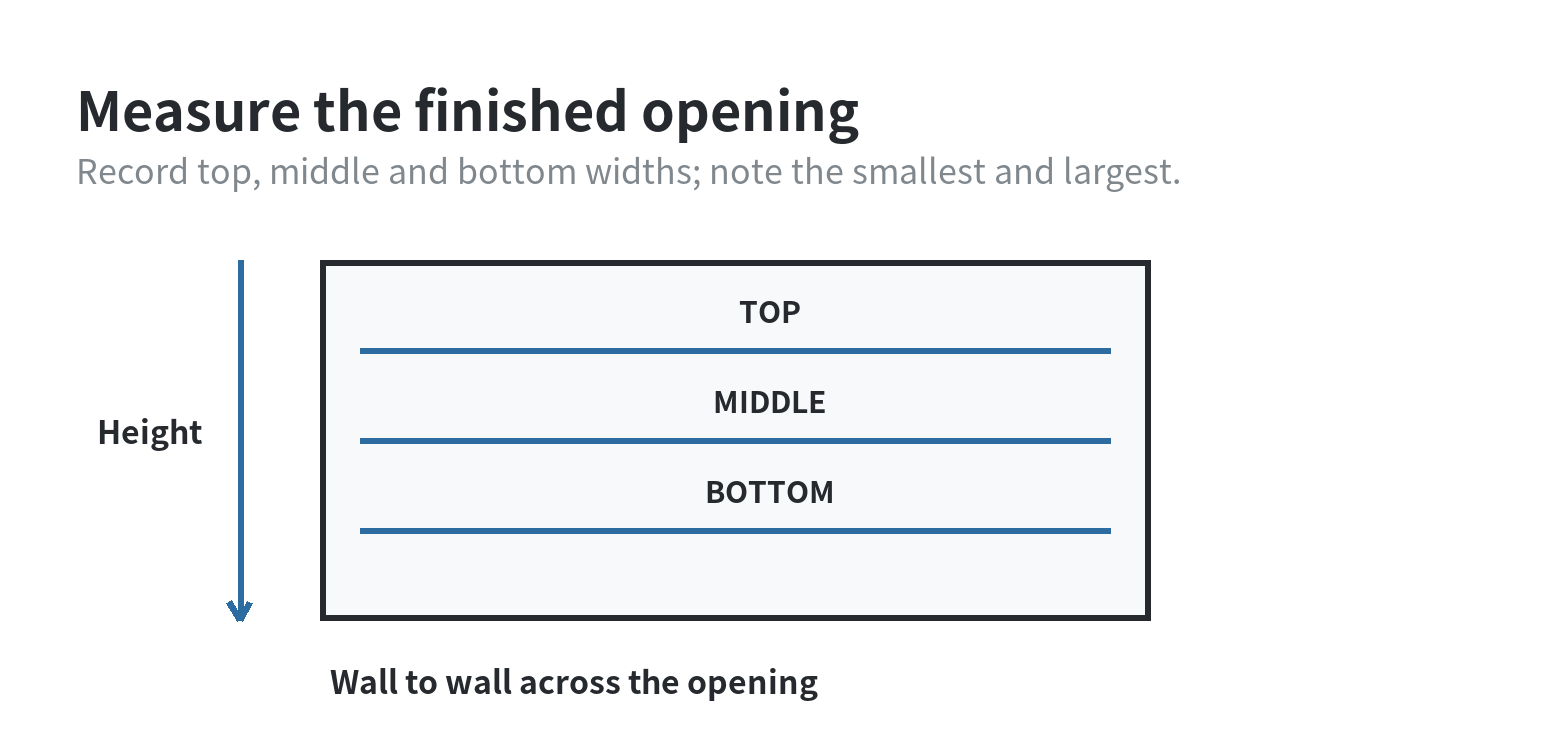
Take these readings only after surfaces that affect the opening are in place. Tile, wall panels, and a shower base can change the available dimensions. DreamLine’s guide distinguishes stud-to-stud dimensions from the finished door opening because wall layers occupy space. For remodel planning, see our overview of bathroom remodel planning. If you measure before the remodel is finished, label those numbers as rough dimensions and take a final set after the wall finish and base are installed.
Keep the widest and narrowest width in your notes. A difference between them can signal that the side walls are not parallel or not plumb. It does not automatically rule out a door: manufacturers specify adjustment ranges for individual models. Compare the complete set of measurements with that model’s guide instead of assuming a nominal label such as “60-inch” means the opening must measure exactly that.
Match the numbers to one product guide
Product dimensions are not interchangeable. Delta says its doors have defined installation ranges and directs readers to the specific product guide for exact requirements. DreamLine likewise notes that adjustment is limited and tells readers to use a level to inspect the walls. A door’s listed width may describe a nominal or maximum size, while its installation range is the usable opening range; check which figure the specification sheet identifies.
Before choosing a model, note each width and side height, sill depth, and overhead clearance. Sketch any sloped curb, seat, shelf, towel bar, or plumbing that projects into the doorway; these details can affect the layout even when the opening dimensions fit.
If one reading falls outside the product’s range, do not plan to bend a wall profile or trim glass to force a fit. The glass, track, brackets, and seals are designed as a system. Ask the manufacturer or a qualified installer whether a different configuration is intended for the measured opening. For a custom enclosure, provide the finished dimensions and a sketch showing the threshold and wall layout.
When the opening is out of square, write down the size of the difference instead of describing it as “a little off.” Some systems allow a stated amount of adjustment; that allowance belongs to the specific model. Delta publishes a limit for its doors, but that figure is not a general tolerance for every brand or style. If the variation exceeds the guide’s allowance, pause and get a fit assessment before selecting hardware.
Choose how the panel moves through the room
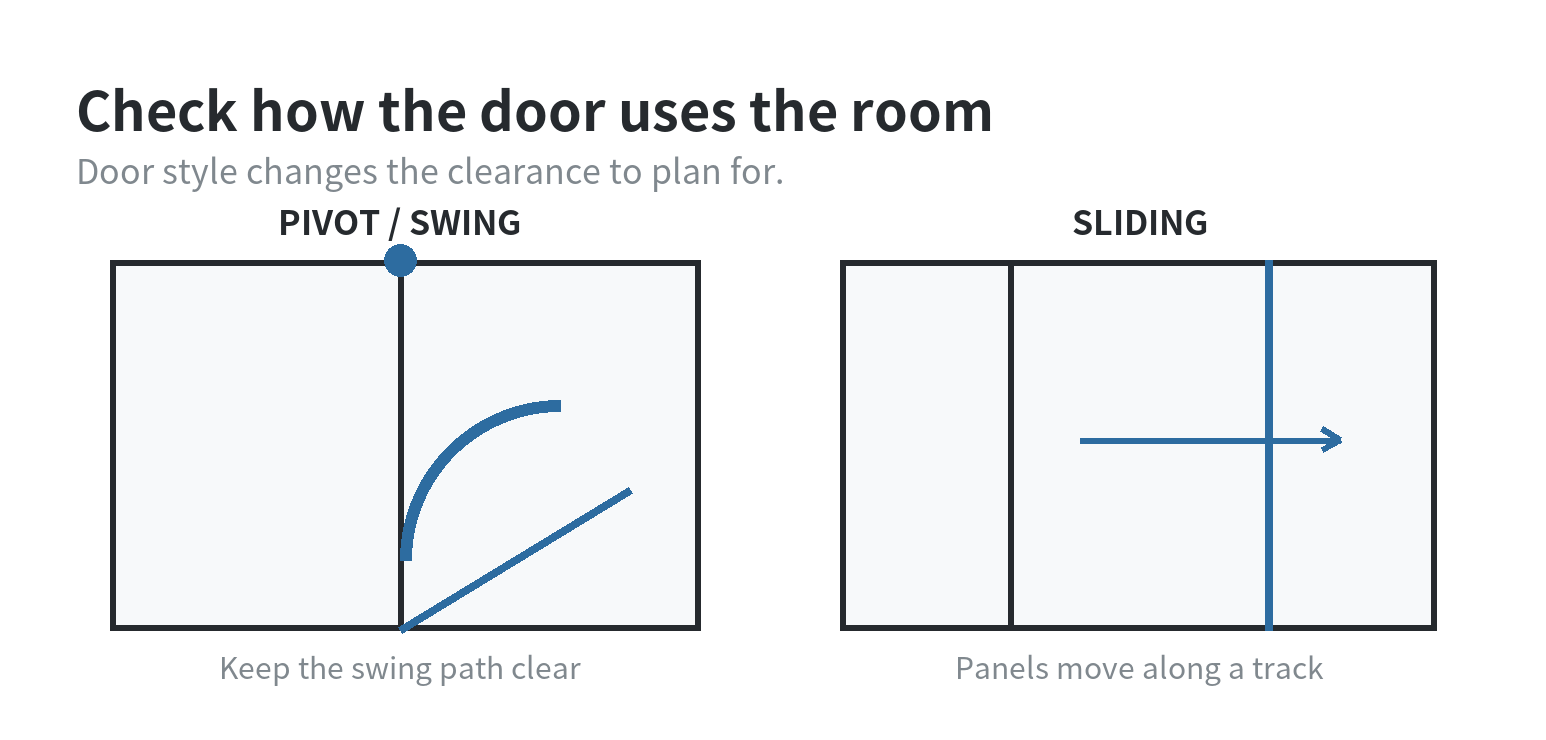
A sliding, or bypass, door uses panels that move along a track and pass in front of or behind one another. DreamLine’s glossary defines bypass doors this way. A pivot door turns on pivot hardware; its panel follows a swing path. Those differences matter in a tight bathroom: a pivot panel needs an unobstructed arc, while a sliding panel needs track space and room for its panels to overlap.
Stand outside the shower and check the space where the door will move. Mark the planned swing path with painter’s tape for a pivot style, then check the vanity, toilet, towel bars, and the person standing at the opening. For a slider, inspect the threshold across its length and consider where the panel handles will travel. Confirm the direction of opening and whether the model can be installed for either hand; a product guide may restrict the hinge side or configuration.
“Frameless” describes the frame treatment, not the way the door opens. DreamLine’s glossary explains that a frameless panel can still use hinges, brackets, a header, or a channel. A frameless door may pivot or slide, depending on its hardware. Ask what supports each glass panel and where the track, wall channel, or hinge attaches; the label alone does not establish the opening dimensions or installation method.
Check the actual configuration drawing, not only a product photo, to see fixed panels, openings, handles, and the threshold line. If sealing around the shower is part of the project, our overview of bathroom caulk and sealant choices covers that separate detail.
Check glass safety and installation requirements
Safety glazing is a separate check from door fit. The Consumer Product Safety Commission’s architectural glazing rule covers shower doors and enclosures. The current text of 16 CFR Part 1201 says covered architectural glazing products must be tested under the applicable provisions of ANSI Z97.1-2015. The standard describes minimum safety performance and test methods for glazing materials; it does not establish the correct dimensions for an opening.
Read the product label and specification sheet for the stated safety standard and glass type. Do not treat a “frameless” label as a safety certification; framing style and glazing performance are separate product details. ANSI Z97.1 also says conformance addresses the standard’s safety characteristics, not the material’s strength, durability, appearance, or installation method. Follow the installation guide for the door’s mounting requirements, including any specified wall support and hardware locations.
DreamLine’s Vision installation manual warns against lifting the glass by its handle because that can damage the glass or cause serious injury. It directs the installer to use an assistant or a professional glass suction cup. Follow the handling directions in the exact guide for your door. If that guide specifies wall support or a threshold condition, check that the bathroom matches those requirements before work begins.
Use this short fit check before deciding
- Confirm the shower base and finished wall surfaces are installed, or clearly mark measurements as preliminary.
- Record top, middle, and bottom opening widths, both side heights, and the sill depth.
- Check wall plumb and compare every reading with the selected model’s adjustment range.
- Map the pivot swing or slider track, including handles and nearby fixtures.
- Review the glazing standard, mounting requirements, and installation clearances in the product guide.
- If the opening is irregular or any reading is outside range, get a product-specific assessment before proceeding.
FAQ
Should I measure a shower door before or after tiling?
Take final measurements after the finished wall and shower base are installed. Delta’s guide uses the top of the tile or acrylic surround as the height reference, and DreamLine distinguishes finished opening dimensions from stud-to-stud measurements.
What if the top and bottom widths are different?
Write down both readings and compare them with the adjustment range for the exact model. Delta and DreamLine both describe checking the opening at multiple locations; neither supports applying one universal tolerance to every door.
Does frameless mean the shower door has no metal parts?
No. DreamLine explains that a frameless panel may still use hinges, brackets, a header, or a channel. Check the configuration drawing to see which supports and tracks the selected design uses.
Do shower doors need safety glazing?
Federal architectural glazing rules include shower doors and enclosures. The eCFR lists the applicable safety requirements in 16 CFR Part 1201; check the product’s specification sheet for its stated glazing standard and installation instructions.