Barn doors and pocket doors solve different space problems, so their “track length” measurements are not interchangeable.
For a single surface-mounted barn door, a manufacturer may specify a rail about twice the door width; a pocket-door frame uses a rough-opening calculation instead.
Measure the clear opening, door, wall, and nearby hardware first, then follow the installation sheet for the exact kit.
Start with the wall layout
A barn door slides along the face of the wall.
The wall beside the opening must have enough clear run for the panel to move out of the way, and the wall above it must support the rail.
A pocket door slides into a cavity inside the wall.
It needs a framed pocket with enough length for the panel to disappear, so existing wiring, plumbing, blocking, and wall structure matter before the drywall is opened.
Sketch the opening and mark which side the door will travel toward.
Note light switches, outlets, trim, baseboards, cabinets, and adjacent doors.
For a barn door, these items can limit how close the panel sits to the wall or how far it can travel.
For a pocket door, the cavity itself has to remain clear of obstacles.
If the planned route crosses a structural or service area, ask a qualified installer to assess the wall before cutting.
Measure the opening and the actual door
Measure the opening width at the top, middle, and bottom, then record its height at both sides.
Use the smallest width and height as the working opening dimensions.
Measure the door panel separately; the nominal label on a door does not tell you its exact finished width, thickness, or height.
For a surface-mounted panel, decide how much the closed door should cover the opening.
The panel needs enough overlap at the sides and above to cover the gap, while still clearing trim and flooring.
The needed overlap depends on the guide, handles, and the specific hardware instructions.
Record the total panel width required after adding the chosen side overlap to the measured opening.
For a pocket door, the opening in the wall is not the same as the passage opening after installation.
The frame, split studs, jambs, and door stop occupy space.
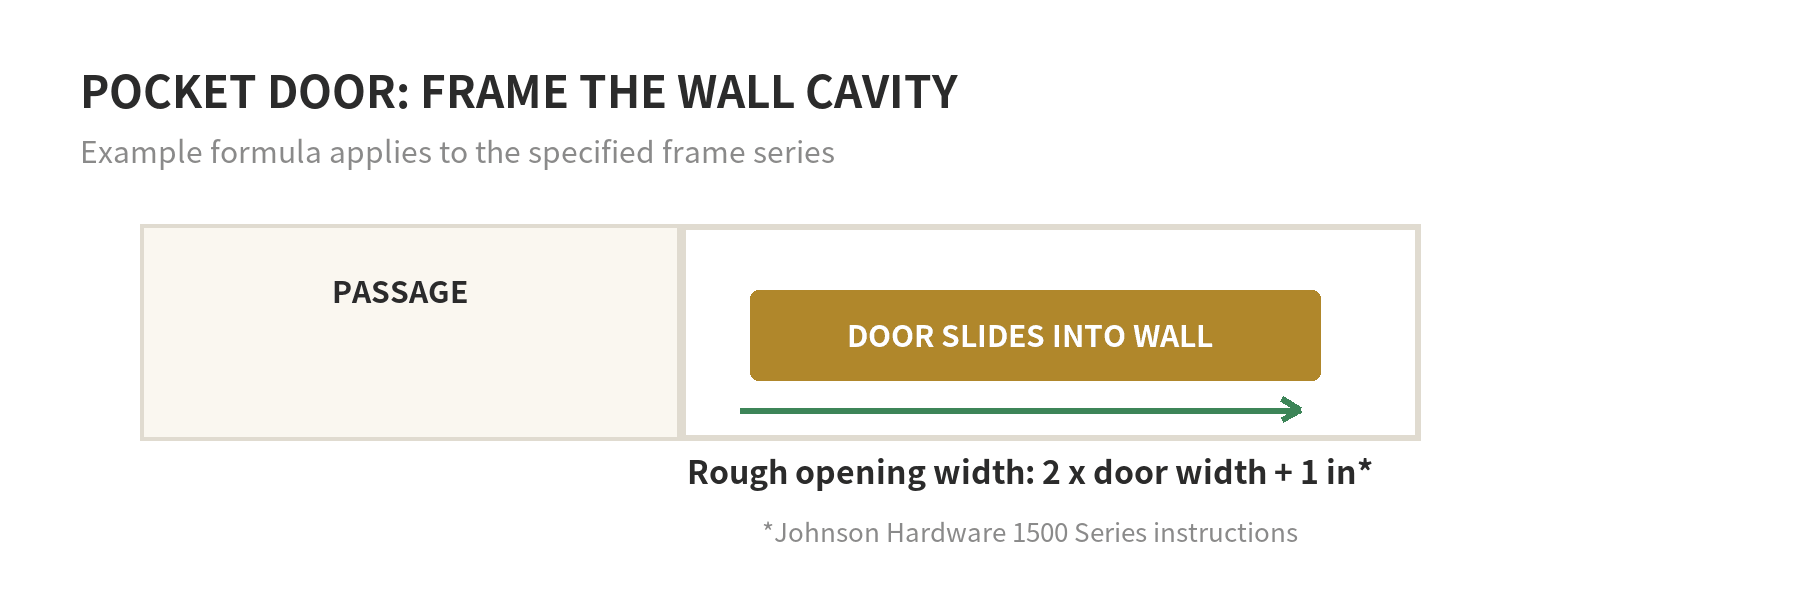
The 1500 Series installation instructions give a rough-opening width of two times the door width plus 1 inch,
And a minimum rough-opening height of 84 1/2 inches for the 80-inch door setup described there.
Those are model-specific dimensions, not a universal pocket-door formula.
Calculate the rail length for a barn door
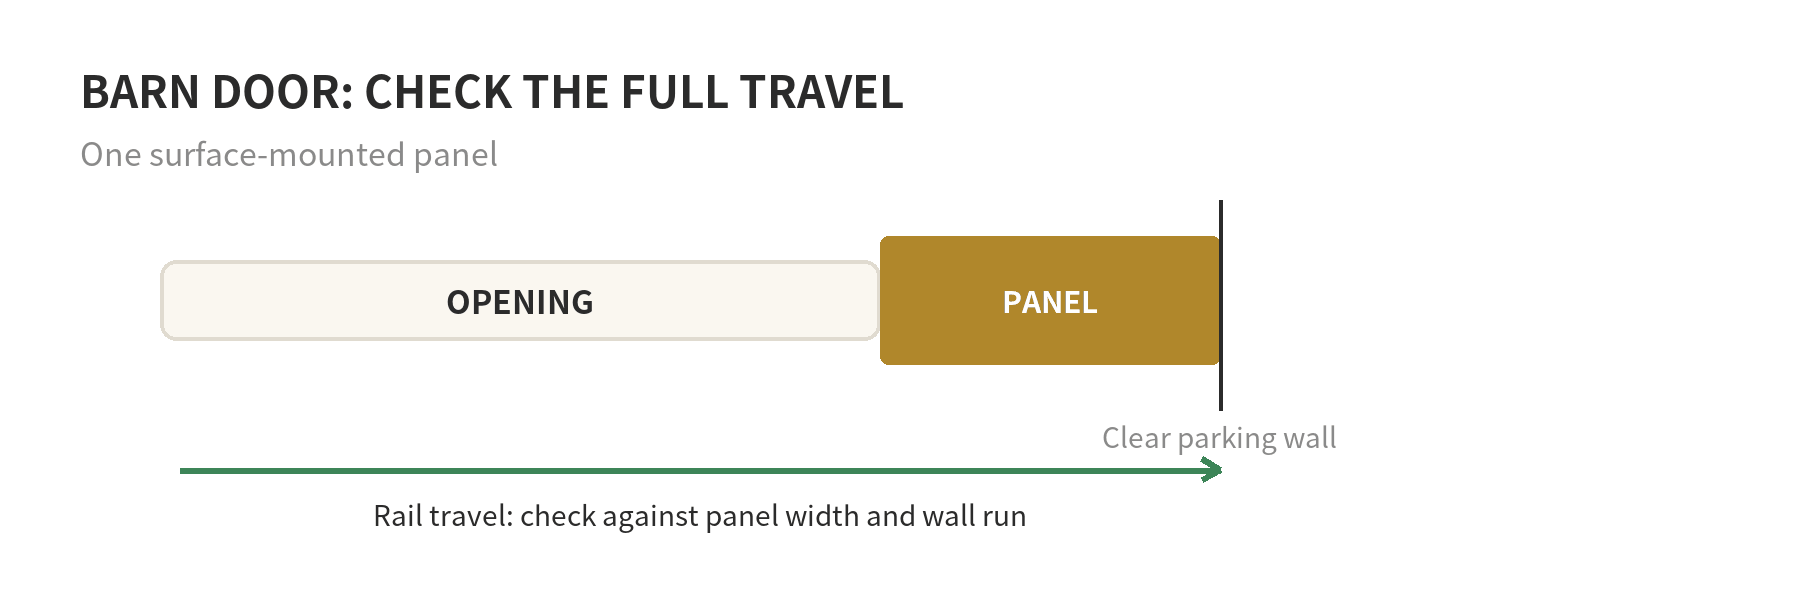
For one sliding barn door, a useful starting check is twice the planned door-panel width.
The CCL-410 specification sets the one-door rail at twice the panel width.
That lets a panel travel across the opening and park beside it, but the exact end positions, stops, and hardware can change the usable travel.
Example: if your measured panel is 36 inches wide, twice that width is 72 inches.
Compare that figure with the specific kit’s installation sheet and the available wall run.
Do not order or cut a rail from the arithmetic alone: some systems need extra length or use different stop positions, and a joined or bypass setup has its own instructions.
Check the path in both positions.
With the door closed, confirm it covers the opening as intended.
With it open, confirm the panel clears the passage and does not hit a corner, casing, furniture, or another door.
Include the handle projection when checking nearby walls and obstacles.
Size a pocket-door frame from its own sheet
A pocket-door kit defines the framed rough opening, not simply a loose track.
The 1500 Series installation sheet uses two times door width plus 1 inch for rough-opening width.
Its size chart lists, for example, a 24-inch by 80-inch door with a 49-inch by 84 1/2-inch rough opening.
That example belongs to that frame series; another kit may specify different clearances or dimensions.
Measure door thickness and weight as well as width and height.
The selected frame has to accommodate all four dimensions and fit the wall type.
The manufacturer’s 1500 Series instructions specify a range of door thicknesses and maximum door weight for that series; check the exact model sheet before choosing a frame.
A frame that is too small may not accept the panel, while a wider door needs a longer pocket and a wider framed opening.
Also check finished-floor height.
The 1500 Series installation instructions distinguish measurements from the finished floor and from the subfloor,
Because the floor finish changes the door clearance below the panel.
Establish the final floor level before setting the header height.
If the flooring is not installed yet, account for its planned thickness using the kit’s instructions.
Keep a measurement sheet with separate columns for the opening, panel, route, and frame.
This prevents a door label from being mistaken for a finished measurement.
For a barn-door plan, write down the opening width, panel width, overlap at each edge, and clear wall run on the parking side.
Then mark where the panel begins and ends.
The rail may span more than the opening because the panel has to move fully clear.
For a pocket-door plan, record the finished passage width separately from the rough opening.
The framed pocket takes up part of the wall, so a clear passage measurement does not describe the full framing footprint.
When the opening is uneven, keep each top, middle, and bottom reading instead of averaging them.
Compare the smallest opening measurement with the panel and frame sheet, then note which edge needs adjustment before installation.
Check the wall thickness against the frame drawing before buying materials.
The finished wall includes its framing and wall covering; the frame must fit that assembly while leaving its specified space for the panel.
In a remodel, look for the framing and services before opening the wall.
Mark the proposed pocket path on both faces, then identify outlets, switches, pipes, ducts, and framing that cross it.
A surface-mounted door avoids a wall cavity, but its rail still needs a suitable fixing surface and an unobstructed panel route.
If a measurement falls outside a stated range, resolve that mismatch before cutting or ordering; changing the opening later can affect trim, passage width,
And the floor clearance.
Compare the two systems before choosing
| Check | Surface-mounted barn door | Pocket door |
|---|---|---|
| Where the panel travels | Along the wall face | Inside a framed wall cavity |
| Key space to measure | Opening plus clear parking wall | Opening plus pocket/frame rough opening |
| Common sizing reference | Some one-door kits specify rail at 2× panel width | Frame-specific rough-opening chart or formula |
| Before installation | Check trim, floor guide, rail support, and full travel | Check wall cavity, services, framing, and floor height |
The choice comes down to what the wall can accommodate.
A barn door leaves the wall surface and nearby furniture in the travel zone.
A pocket door preserves that surface but requires a suitable cavity and framing work.
Neither layout is ready to size until the panel’s route is clear.
Think about privacy at the closed position
A sliding panel does not close into a hinged-door stop in the same way.
A barn door sits in front of the wall opening, so the panel edges and floor clearance remain part of the layout.
A pocket door meets jambs at the passage, but the frame still needs clearances for the panel to slide.
If the room needs a close-fitting door, compare the chosen kit’s jamb, latch,
And seal details rather than assuming the word “pocket” or “barn” means a particular level of sound or light blocking.
Make a kit-specific check before cutting
Write down these measurements: clear opening width and height; actual panel width, height, thickness, and weight; clear wall run; trim or handle projections;
And finished-floor height.
For a pocket installation, add the stud-wall depth and any known utilities in the proposed cavity.
Compare each measurement with the exact kit’s parts list and installation sheet.
Before making a cut or closing a wall, verify the rail or frame is level, the panel clears the floor, and the stops leave the opening accessible.
If the measured wall differs from the drawing, ask the kit manufacturer or installer which dimension controls.
FAQ
How much wall space should be clear beside a barn-door opening?
Plan for the full panel width to park beside the opening, then confirm the exact stop positions in the hardware instructions.
Measure around switches, trim, corners, and furniture that could block that route.
Can I use a barn-door track formula to size a pocket-door kit?
No.
A barn-door rail runs on the wall face, while a pocket frame sits inside the wall and has its own rough-opening dimensions.
Use the frame manufacturer’s chart for the chosen panel size.
What should I check if my pocket-door opening is already framed?
Measure the framed opening’s width, height, and wall depth, then compare them with the selected frame instructions.
Also identify anything inside the cavity that could interfere with the panel before installing the frame.
Does the door handle affect the required rail length?
It can affect clearance even when it does not change the rail calculation.
Check whether the handle could strike a wall, casing, or nearby object as the panel moves through its full travel.