What If the Only Thing Between You and the Life You Deserve Is a Hidden Wealth Code Waiting to Be Activated
>>> Open the Door <<<

Are you finding your phone keeps switching to mobile data even when you’re connected to WiFi? This can slow speeds, drain your battery, and raise data bills if you’re not watching carefully. In this quick intro, you’ll see why that happens and exactly what you can do to fix it.
We’ll start with a few simple checks you can do in minutes, like confirming you’re truly on a stable WiFi network and verifying any automatic switching features that might be enabled. You’ll also learn how to reset network settings safely, reconnect to the right network, and reduce how often apps pull data in the background.
By the end, you’ll have a practical plan to keep your phone on WiFi when it should be, plus tips to optimize data usage and identify when you should seek help from your carrier or device maker. This guide is written for everyday use, with clear steps that work on most Android and iPhone models.
Check Wi‑Fi basics and router health
To keep your phone from defaulting to mobile data, start with the fundamentals. This section covers how to verify you’re on the correct network, test Wi‑Fi performance across devices, and spot common router health issues that slow everything down. A clean, well‑maintained home network makes a big difference for every smartphone you own, and it’s easier than you think to keep things running smoothly.
There Is a Frequency That the Wealthiest Families Have Used for Generations and Most People Will Never Know It Exists
>>> Open the Door <<<

Confirm the device is connected to the right network and signal is strong
First, verify that your device is actually on the intended network. On Android, swipe down from the top of the screen to open Quick Settings, then look for the Wi‑Fi icon and tap it. Your current SSID (network name) will appear in the list, with a checkmark next to the connected network. On iPhone, open Settings > Wi‑Fi. The network with a blue checkmark is your current connection. If you see a different SSID, tap the intended network to connect and recheck.
Signal strength matters. A quick check shows how well your device talks to the router. On Android, you may see signal bars or a gauge in the notification shade; on iOS, you’ll see the Wi‑Fi status in the Control Center or the top-right corner of the screen. If the signal is weak, you’ll notice slower page loads, choppy video, and frequent buffering. A typical weak signal is when you see fewer bars or a low RSSI reading. For quick context, researchers and readers frequently reference practical guidelines for evaluating Wi‑Fi strength on mobile devices, including how to interpret signal indicators. See how to check Wi‑Fi strength on various devices for practical steps and context. For more on signal strength on iPhone and Android, you can explore these guides: How to Check WiFi Strength on Any Device and a straightforward guide for iPhone users here: How to Check Your Wi‑Fi Signal Strength on an iPhone or Android. If you want a deeper dive into SSIDs and finding the right network, this quick reference can help: How to Find SSID of WiFi on Phone: A Simple Guide.
If you don’t see the expected network name, retry connecting. A strong signal is typically in the -50 to -60 dBm range on most phones; anything worse than -70 dBm may cause noticeable slowdowns. For best results, keep your phone within a few rooms of the router when testing.
Test the Wi‑Fi with other devices and restart the router
A quick test across devices helps you separate phone issues from network problems. Try connecting a laptop, tablet, or another smartphone to the same network. If other devices experience similar slowdowns or disconnects, the problem is likely the router or service, not your phone.
If multiple devices are offline or struggle, perform a simple router restart. Power cycling is the fastest, least invasive fix to clear temporary glitches. Use this plain-language sequence:
- unplug the modem and router from power
- wait 30 seconds
- plug them back in
- wait a few minutes for all devices to reconnect
If you’re unsure how to power cycle your equipment, many guides walk you through the steps for common setups. For example, you can refer to a step-by-step guide on rebooting your home network, including both router and modem, here: How to Reboot Router: Power Cycling Your Router & Modem and a NETGEAR walkthrough that covers the full process: How do I power cycle my home network?. If you’d rather see a video demonstration, this tutorial provides a clear sequence: [How to Restart Your Router and Modem](https:// broadbandnow.com/guides/restart-router-modem).
In most homes, a quick router restart fixes many hiccups and gets devices back on track quickly. After reboot, check that all devices reconnect automatically and revisit your apps to confirm data flows again over Wi‑Fi.
Look for router issues and network congestion
Routers can slow down for simple reasons that are easy to fix. Common culprits include outdated firmware, crowded channels, and a misconfigured guest network. Here are plain‑language explanations and quick actions you can take.
- Outdated firmware: Routers rely on software in the device itself. Check the admin page of your router for a firmware update option. If an update is available, install it and then reboot the router. This often improves stability and performance.
- Channel congestion: The 2.4 GHz band gets crowded in dense areas because many devices share the same channels. If your router supports both 2.4 GHz and 5 GHz, consider using the 5 GHz band for activities that need higher speeds and shorter range. If you’re on 2.4 GHz, switching to a less crowded channel can help.
- Misconfigured guest network: A guest network is convenient for visitors, but it can accidentally cause interference with your main network if misconfigured. Make sure the guest network is separate from the main network and not consuming bandwidth that should go to devices on the primary network.
Keeping these basics in mind helps ensure your home network remains reliable for your smartphone and other devices. When you’re ready to dive deeper, these quick references can guide you through firmware updates and channel selection without technical jargon. As you optimize, remember to periodically review which devices are connected and ensure your main network stays prioritized for trusted devices.
To further improve reliability, you can look into reputable sources with practical steps on router health and common issues, including guidance on channel selection and basic troubleshooting: The Most Common Home Wi‑Fi Router Problems & How to Fix Them and a beginner friendly guide to restarting and diagnosing home networks: How do I power cycle my home network?. These resources reinforce simple fixes you can perform without specialized equipment.
If you’re unsure about a change, start with the least disruptive option—the router restart. It resets many minor conflicts and sets a clean slate for your devices, including your smartphone. Regular maintenance, like firmware checks and mindful guest network use, pays off in smoother, more consistent Wi‑Fi experiences.
External resources and guides referenced here provide practical steps and context to help you stay on top of home network health. For quick background on SSIDs and identifying the correct network on your phone, see the guides linked above. If you’d like to explore SSID basics in more depth, you can also check up on finding the SSID for different phone platforms: How to Find SSID of WiFi on Phone: A Simple Guide.
Disable automatic switching and let Wi‑Fi take priority
When you want to keep data use under control, the first step is ensuring your device sticks to Wi‑Fi when it’s available. This section shows how to disable automatic network switching on Android and iOS so your phone doesn’t flip to mobile data at the slightest Wi‑Fi hiccup. After making the changes, test the connection to confirm Wi‑Fi stays in the driver’s seat.
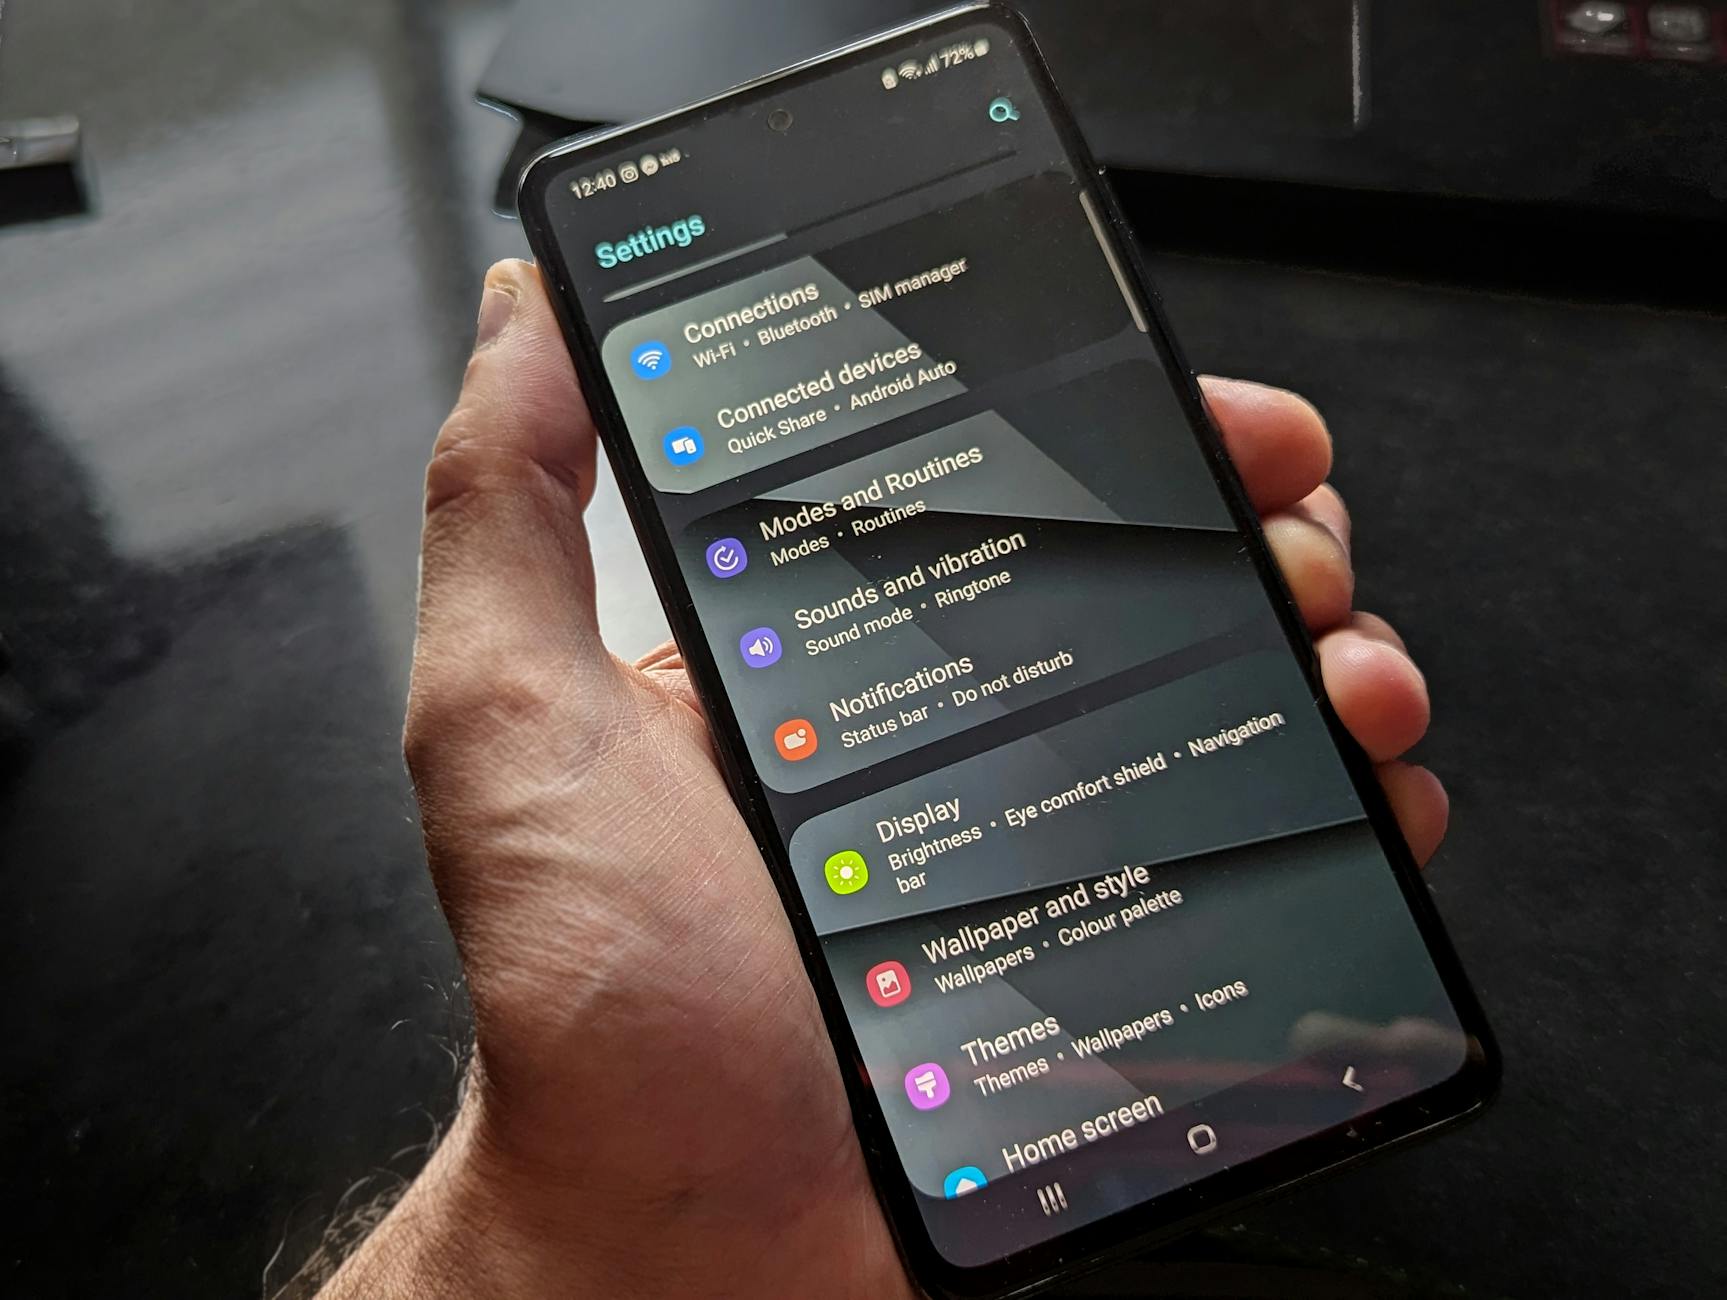 Photo by Watford London Media
Android: turn off Adaptive Wi‑Fi or Smart Network Switch
Android devices vary by maker and version, but the path to disable automatic network switching is generally straightforward. Here’s a practical route you can follow on most recent Android builds:
- Open the Settings app.
- Tap Network & Internet.
- Select Wi‑Fi.
- Tap Advanced (or the three-dot menu, then Advanced in some models).
- Look for a feature named Adaptive Wi‑Fi, Smart Network Switch, or a similar option.
- Toggle it Off.
Once you’ve disabled the feature, reconnect to your preferred network if prompted. Then run a quick check: turn Wi‑Fi off and back on to confirm the phone doesn’t automatically switch to mobile data when the signal dips. If you want to verify the exact wording for your device, you can consult manufacturer guides or support pages that cover “disable smart network switch” steps. For reference, many users find guides that describe turning off this feature useful for preventing unwanted data usage and improving call reliability on spotty networks. If you’d like to see how other Android users approach this, you can review guidance here:
- https://support.google.com/fi/thread/2635155/disable-smart-network-switch-avoid-bad-wifi-connections?hl=en
For ongoing reliability, keep an eye on your Wi‑Fi performance after the change. A firm, stable connection helps avoid sudden data shifts during video calls or streaming.
iOS: disable Wi‑Fi Assist and related settings
On iPhone, the equivalent to automatic switching is called Wi‑Fi Assist. It automatically hands off to cellular data when the Wi‑Fi connection is weak. Here’s how to disable it and keep Wi‑Fi as the default:
- Open Settings.
- Tap Cellular (or Mobile Data on some models).
- Scroll to the bottom and find Wi‑Fi Assist.
- Toggle Wi‑Fi Assist Off.
Turning off this feature means your iPhone will stay on Wi‑Fi as long as the connection is usable. It can reduce unexpected data usage on poor networks, but you’ll notice that apps may stall if the Wi‑Fi drops out. After turning it off, perform a quick test: connect to your Wi‑Fi network, then try a few websites or apps to ensure the connection holds up without automatically switching to mobile data. If you want deeper context on how Wi‑Fi Assist works and why some users disable it, Apple’s official overview is a good starting point:
- https://support.apple.com/en-us/102228
If you’re curious about how major providers present the option, additional reading explains how to toggle Wi‑Fi Assist on iPhones and what to expect in terms of data use:
- https://www.verizon.com/support/knowledge-base-206983/
If you’d like a broader look at Wi‑Fi Assist and related behavior, this guide offers clear explanations on what it does and when you might want it disabled:
- https://www.getnomad.app/blog/what-is-wifi-assist
After you disable Wi‑Fi Assist, re-check your connection on a couple of networks to confirm the phone isn’t grabbing mobile data in the background.
Test after changes to verify Wi‑Fi preference
With automatic switching disabled on both platforms, you should now have a more predictable Wi‑Fi experience. Plan a simple test to verify the change holds across real-world usage:
- Connect to your primary Wi‑Fi network.
- Open a few apps that use data in the background, like a messaging app, social feed, and a streaming app.
- Compare how quickly pages load and whether any app attempts to fetch data when the network signal wavers.
- If possible, test on a second network (home vs. work or a public Wi‑Fi) to confirm stability.
Document any noticeable differences. If you see moments where the app store or video streaming stalls when Wi‑Fi dips, you may want to toggle Wi‑Fi back on and off or move closer to the router. The goal is a consistent Wi‑Fi experience without unexpected data usage.
To round out the testing, perform a follow‑up with a quick mobility check. Disable the second network, then re-enable Wi‑Fi on your phone and re‑test. The goal is to confirm the device stays on Wi‑Fi where it should, across typical daily scenarios.
- Quick tip: keep a note of the SSIDs you trust most. If you frequently connect to multiple networks, you’ll want to ensure your device prioritizes your home or office network over public hotspots.
If you want a broader set of resources on network stability and how to approach this across different devices, these guides offer practical steps and context:
- How to Reboot Router: Power Cycling Your Router & Modem — handy for quick fixes that clear many minor connection issues.
- How do I power cycle my home network? — a friendlier NETGEAR walkthrough that covers the full process.
After completing these steps, you should feel confident that your phone prioritizes Wi‑Fi and uses mobile data only when there is no viable Wi‑Fi connection.
In case you run into persistent issues, a quick consult with your device maker’s support pages or your carrier can help. They can confirm whether a specific app or setting is contributing to the data drain and suggest any model‑specific adjustments. For reference, you can explore additional Android and iPhone help resources linked above to tailor the steps to your exact device.
If you’d like quick background on SSIDs and identifying the correct network on your phone, you can review the guides linked earlier. And if you want a broader context on Wi‑Fi habits and optimization, several practical articles provide step-by-step troubleshooting that fits into everyday life.
Images and articles referenced here provide practical steps and context to help you stay on the right network. For a deeper look at how to find and identify the correct network on your phone, see the guides above. If you’d like to explore SSID basics in more depth, you can also check up on finding the SSID for different phone platforms:
- https://forestvpn.com/en/blog/networking/how-to-find-ssid-of-wifi-on-phone/
What you do next matters. With these changes, your smartphone will stay on Wi‑Fi more reliably, saving data and reducing surprises on your bill. Keep testing on different networks to confirm your improvements and adjust as needed.
Reconnect to Wi‑Fi and reset network settings
If you want to keep your data usage in check, a reliable Wi‑Fi connection is essential. This section walks through practical steps to forget and reconnect to a Wi‑Fi network on both Android and iOS, then covers how to reset network settings on each platform and finally, how to verify everything is up to date. You’ll learn exactly what to tap, where to look, and how to test the results so your phone sticks to Wi‑Fi when it should.
Forget and reconnect to your Wi‑Fi network
Sometimes the simplest fix is to refresh the connection. Forgetting the network clears saved passwords and settings and then reconnecting prompts you to enter the password again. This resets the handshake with the router and often clears up stubborn connectivity quirks.
- Android
- Open the Settings app and go to Network & Internet.
- Tap Wi‑Fi and you’ll see the list of networks. The connected network usually has a checkmark or shows as connected.
- Long‑press the network you want to forget, or tap the gear icon next to it, then choose Forget.
- Reconnect by selecting the same network from the list, enter the password, and tap Connect.
- Test the connection: turn Wi‑Fi off and then on again, open a few pages or apps, and confirm data loads over Wi‑Fi. If you still see mobile data, repeat the process for any guest networks or other saved networks you’ve used.
- iPhone
- Open Settings and choose Wi‑Fi.
- Tap the network you’re connected to, then select Forget This Network and confirm.
- Rejoin by tapping the network name again, enter the password, and connect.
- Test the connection: once reconnected, browse a site, stream a short clip, and check that data stays on the Wi‑Fi network. If you switch networks often, you may also want to forget other networks you rarely use to streamline auto‑join behavior.
Tips for testing and avoiding repeats of the issue
- After reconnecting, run a quick internet test on multiple apps that rely on data in the background, such as messaging, social feeds, and video streaming.
- If you routinely switch between networks, note the SSIDs you trust most and ensure your device prioritizes those networks.
- If you’re on a complex home network with guest or mesh nodes, verify you’re connected to the main network during testing.
For quick reference on forgetting a network on iPhone, Apple’s guidance covers the exact steps: How to forget a Wi‑Fi network on iPhone, iPad, Mac, or Apple Vision Pro. You can read the official steps here: https://support.apple.com/en-us/102480. For Android devices, see general troubleshooting guidance on forgetting networks like How to Forget a Wi‑Fi Network on Android, iPhone, and More, which walks through common steps you’ll recognize on most devices: https://www.highspeedinternet.com/resources/forget-wifi-network.
If you want more detailed, device‑specific instructions, Apple’s QA version also covers Forget This Network and the lists of known networks you’ve joined: https://support.apple.com/en-qa/102480. And for Android users, the broader article How to forget a Wi‑Fi network on Android, iPhone, Mac, & More provides practical context that works across platforms: https://broadbandnow.com/guides/how-to-forget-wi-fi-network.
Reset network settings on Android
A full reset of network settings on Android is a powerful option when Wi‑Fi, mobile data, or Bluetooth behave erratically. It clears all saved networks and paired devices, and may prompt apps to re-authenticate after the reset. Think of it as a clean slate for how your device handles wireless connections.
What gets reset
- All Wi‑Fi networks and passwords
- Bluetooth pairings
- Cellular settings and data preferences
What to expect after the reset
- You’ll need to rejoin trusted networks with passwords
- Some apps may require you to sign back in or re‑authorize permissions
- Bluetooth devices need re‑pairing
Simple, non‑technical steps
- Open the Settings app
- Find System or General Management
- Tap Reset options or Reset
- Choose Reset network settings
- Confirm your action and wait for the device to restart
After the reset, re‑connect to your preferred networks and test data usage to confirm the fix. If you’re unsure about the exact steps for your model, manufacturer guides cover the sequence for your device. For reference, Sony’s Android guidance outlines how Reset Network Settings clears all connection data and restores default behavior: https://www.sony-asia.com/electronics/support/articles/SX670101. Motorola’s support page also provides a clear outline for resetting network settings: https://en-au.support.motorola.com/app/answers/detail/a_id/152152/~/reset-network-settings.
If you’re weighing the impact, remember this reset will remove saved networks and paired Bluetooth devices. You may need to re‑authenticate for apps that relied on stored credentials. The reboot gives you a fresh start, which often resolves stubborn connection problems.
Reset network settings on iPhone
Resetting network settings on iPhone is a straightforward, Apple‑approved path to fix a host of wireless issues. It resets Wi‑Fi networks and passwords, cellular settings, and VPN and APN configurations. After the reset, you’ll need to rejoin networks and re‑set up certain preferences.
Where to find the option
- Open Settings
- Tap General
- Choose Transfer or Reset iPhone
- Tap Reset and select Reset Network Settings
What gets erased
- Saved Wi‑Fi networks and passwords
- Cellular settings and data preferences
- VPN configurations and APN settings
- Bluetooth pairings
What to expect after the reset
- Rejoin your familiar networks with fresh passwords
- Reconfigure any VPNs or carrier settings if you use them
- Apps may prompt for re‑authentication if they relied on saved credentials
After the reset, test by connecting to Wi‑Fi and loading several sites or apps. If any device keeps defaulting to mobile data, perform a quick follow‑up test on multiple networks to ensure the connection stays stable on Wi‑Fi.
Apple’s official guidance covers the Reset Network Settings path and clarifies what is erased: Reset Network Settings on iPhone. For broader context on what happens during the reset and subsequent steps, Verizon’s knowledge base provides practical notes for iPhone users: https://www.verizon.com/support/knowledge-base-207110/.
Check for system updates
After performing resets or major networking changes, installing the latest OS updates is a smart move. Updates include bug fixes, security improvements, and sometimes fixes for known Wi‑Fi or cellular issues. Keeping the software current helps your device stay compatible with routers and networks you use daily.
Android
- Open Settings
- Tap System or About phone
- Look for Software update and follow the prompts to download and install any available updates
iPhone
- Open Settings
- Tap General
- Choose Software Update
- Install any available updates
Why this matters
- Updates fix bugs that can affect how Wi‑Fi and Bluetooth work
- Updated security patches reduce risk when connected to networks
- New features can improve compatibility with home routers and public networks
If you’ve just reset network settings, a quick OS update can prevent regressions and ensure the new setup runs smoothly. For more general guidance on updating Android devices, you can review Google’s support article: Check & update your Android version: https://support.google.com/android/answer/7680439?hl=en. For iPhone updates, Apple’s guidance discusses how to keep iOS current and how updates help with network compatibility: https://support.apple.com/en-us/102228.
As you apply updates, keep an eye on battery and data usage during the process. Plan updates when you’re on Wi‑Fi to avoid data overages, and plug in your device if possible.
External resources you may find useful
- How to Reset Network Settings on iPhone, a concise guide that covers the steps and outcomes: https://softwarekeep.com/blogs/how-to/reset-network-settings-on-iphone?srsltid=AfmBOop81vE7BNy-lkrvqDgZ-aqWU8b8dO3-bHhZLM1T5Q2N2sTRDy6D
- How can I update my device software and network settings, a user‑friendly overview that includes network settings and updates: https://support.optimummobile.com/hc/en-us/articles/5867629245975-How-can-I-update-my-device-software-and-network-settings
- Android and iPhone network reset guidance that explains what to expect and why it helps: https://androidpolice.com/reset-network-settings-android-ios/
What to do next
He Was Drowning in Bills and Burnout Until a Simple Daily Ritual Rewired His Brain for Wealth in Less Than a Week
>>> Start Your Shift Today <<<

- After any reset or update, test across multiple networks if possible (home, work, and a trusted public network) to confirm Wi‑Fi remains the primary data path.
- If you notice continued data shifting to mobile data, revisit these steps with a focus on the exact network names you use most and consider resetting only the relevant network settings on a targeted basis.
- If problems persist, contact your device maker’s support or your carrier. They can confirm if a particular app or setting is contributing to the data drain and offer model‑specific adjustments.
With these steps, your phone should favor Wi‑Fi reliably again. Keep testing across different environments to confirm the improvements and adjust as needed. For readers who want deeper background on SSIDs and finding the right network on your phone, you can review the guidance linked earlier. If you’d like more context on Wi‑Fi habits and optimization, several practical articles provide step‑by‑step troubleshooting tailored to everyday life.
Fine tune settings and test across networks
Keeping your phone on WiFi and avoiding unnecessary data use requires a few targeted tweaks and careful testing. This section walks you through practical adjustments you can make across devices and networks, plus simple tests to confirm everything sticks. You’ll finish with a reliable routine for staying connected to WiFi when it matters most, while still having data available when you truly need it.
Manage data saver and per‑app data usage
Data Saver features can curb background data, but they can also block essential app activity on WiFi or mobile data if misconfigured. Here’s how to review and adjust these settings so they work for you.
- Android
- Open Settings > Network & Internet > Data Saver.
- Turn Data Saver on to reduce data usage, then tap “Unrestricted data” or “Per‑app data access” to allow specific apps to bypass the saver when you need them online on WiFi.
- For critical apps like messaging or navigation, add them to the unrestricted list so they stay responsive even when Data Saver is active.
- If you’re troubleshooting, temporarily disable Data Saver to see if that resolves unexpected data shifts.
- iOS
- Go to Settings > Cellular > Cellular Data Options.
- Use Low Data Mode to reduce network activity in the background. If you’re choosing to limit background tasks, leave WiFi Assist off and monitor essential apps’ behavior on WiFi.
- Review each app under Settings > Cellular to ensure background data is allowed for important programs. You can also use Focus modes to limit app activity during work or sleep windows.
Quick tip to keep essential apps running on WiFi: create a short list of apps that must refresh in the background when connected to your home network. This keeps critical updates flowing while still saving data on other apps.
To help you spot patterns, monitor when data spikes occur. If you notice apps refreshing aggressively on WiFi, adjust per‑app access or switch off background refresh for less-used tools. For further context on managing background data across Android and iOS, see guides like Android Data Saver and related per‑app settings.
Helpful reads and references:
She Pressed Play on a Strange Audio Track and Within Days Her Financial Reality Started Shifting in Ways She Could Not Explain
>>> See How It Works <<<

- Android Data Saver overview and per‑app controls
- iPhone cellular data management and app-specific data controls
Update firmware on router and devices
Router firmware updates and device OS updates matter. They fix bugs, improve stability, and can reduce data inefficiencies caused by older software. Here are straightforward steps to check for and apply updates while staying on a stable connection.
- Router updates
- Access your router’s admin page via a web browser (the URL is usually something like http://192.168.1.1 or http://router_name).
- Look for a section labeled Firmware Update, Router Update, or System Update.
- If an update is available, start the process and avoid interrupting it. A stable wired connection to the router during updates is ideal; if you must use WiFi, ensure the signal is strong.
- After updating, reboot the router to ensure all new components load properly.
- Device OS updates
- Android: Settings > System > Software Update, then download and install if available.
- iOS: Settings > General > Software Update, then install any pending updates.
- Plan updates for times when you won’t need peak network performance. Keeping devices current helps routers and devices work together more smoothly.
Plain language reminder: updates are not optional if you want to keep a reliable network conversation with your smartphone. They fix known issues that can cause unintended data usage and improve compatibility with home routers and public networks.
Reference guidance and practical steps from major router brands and platforms can help if you’re new to this. For NETGEAR users, TP‑Link devices, and common Android and iPhone platforms, there are step-by-step resources that walk you through updating firmware and OS in plain language.
Test connectivity on a new network and monitor data usage
Testing across networks is a fast way to confirm you’ve reduced unintended data consumption. Try connecting to an alternative network with permission, then compare performance and note how apps behave.
- Test steps
- Connect your smartphone to a different network, such as a mobile hotspot or a neighbor’s network (with permission).
- Run a speed test on each network to compare latency and throughput. You can use a trusted speed test site or app.
- Open a few typical apps that use background data, such as messaging, social feeds, and streaming services. Observe whether data activity continues as expected on WiFi or shifts to mobile data during transitions.
- Track data usage for a day or two after the test to spot any lingering background activity.
- What to look for
- Consistent performance on the new network, with minimal background data drain.
- No automatic switch to mobile data when WiFi is available.
- Comparable or better speeds on the new network, indicating the issue was network related rather than device related.
If you notice different behavior on the new network, use those insights to refine settings. For example, you may decide to disable a background refresh for a line of apps or enforce stricter per‑app data access rules. As you test, keep an eye on how often the device taps data in the background after changes.
Practical tip: monitor data use with a reliable app. Some apps provide per‑app dashboards and alerts that help you see which programs are using data in real time. A quick audit after a network change helps you stay in control.
External resources that can help you compare networks and monitor usage include guides on testing WiFi and data monitoring across different platforms and devices.
Links to explore:
- How to monitor data usage and test networks across devices
- Apps that help you track data across hotspots and home networks
By systematically testing across networks, you’ll gain confidence that your phone stays on WiFi when it should. If you ever see mobile data taking the lead again, revisit the steps in this section to tighten up the controls and re‑test.
External links and context
- A range of guides on testing and verifying network connections across Android and iOS
- Practical data monitoring apps for smartphones
If you want to keep things simple, adopt a quick quarterly check: review Data Saver and per‑app access, verify OS and router updates, and perform one cross‑network test. That cadence helps you catch glitches before they become habits.
References and additional context
- How to update firmware on common router brands
- How to monitor app data usage on Android and iOS
This section gives you a compact, actionable playbook to fine tune settings and verify behavior across networks. Use the steps above to maintain consistent WiFi usage and minimize surprises on your data bill.
External links referenced in this section:
- How to update the firmware on a NETGEAR router with a web browser
- How to upgrade the firmware on TP-Link routers
- How to Update Router Firmware: an Easy Step-by-Step Guide
- How to monitor internet data usage for a specific network
- How to adjust cellular data for individual iPhone apps
- WiFi Around – Nearby Hotspots and network testing app overview
Note: If you want more device‑specific guidance, I can tailor these steps to your exact model and carrier.
Troubleshooting and next steps
You’ve done the essentials to keep your phone on WiFi. If problems persist, this section gives you a clear path forward. You’ll learn when to seek help, how to document what you try, and smart habits that prevent future headaches. The goal is to keep data on WiFi, save your plan, and stay in control of your network.
When to seek professional help
Some issues repeat despite careful troubleshooting, or you might suspect a hardware fault. If you notice any of the scenarios below, consider reaching out for targeted support:
- Persistent switches to mobile data across multiple devices on the same network. The root cause could be a faulty router, a misconfigured network device, or a service issue that needs the carrier or router maker’s insight.
- Recurrent hardware symptoms such as router not responding to apps, unexplained drops in signal strength, or odd battery drain during network activity. A technician can verify if a component needs replacement.
- Plan limits or outages. If you suspect an account or service problem, contact your carrier to rule out data caps, throttling, or a service outage.
- Router or device compatibility questions. Some routers require specific settings for optimal compatibility with certain phone models or OS versions. Contact the router manufacturer’s support team for guidance.
Options to pursue, in order of simplicity:
- Carrier support for data or outages and to verify plan status.
- Router manufacturer or store’s technical support for device-specific issues.
- A local technician for in-person diagnostics if hardware faults are suspected.
For reliable reference, you can review troubleshooting guidelines from reputable sources that cover when to escalate to a professional: why an issue might be persistent, and how to verify if it’s equipment related. If you want a quick practical starting point, check the guidance here: https://www.rvmobileinternet.com/guides/troubleshooting-tips
Document steps and keep a record
A short log helps you see what actually works and what doesn’t. It also makes it easier if you need to escalate the problem to support staff. Create a simple, repeatable template and fill it out as you test.
Template idea
- Date
- Problem observed
- Steps attempted
- Results
- Changes in behavior
Examples of how to fill it out
- Date: 2025-12-07 Problem: Phone keeps using mobile data when WiFi is available. Steps: 1) Disable Smart Network Switch on Android; 2) Turn off Wi‑Fi Assist on iPhone; 3) Forget and reconnect to home WiFi; 4) Reboot router. Results: WiFi stayed active for 60 minutes, then a brief switch to mobile data during a signal dip. Changes: Reconnected to main SSID; tested with multiple apps.
Why logging matters
- It helps you spot patterns, like issues only on certain times of day or with certain apps.
- It provides concrete evidence if you need to contact support or your carrier.
For quick reference, you can use a ready-made log template and adapt it to your devices and network. If you’d like a ready-to-use format, consider starting with date, problem, steps, results, and notes about any changes in behavior.
Pro tips for prevention and long term health
A few simple habits keep your network experience stable over time. Think of these as regular maintenance for your home WiFi and the devices that rely on it.
- Schedule router reboots. A monthly restart clears minor faults and refreshes connections. Keep a reminder on the calendar.
- Install OS updates promptly. Updates fix bugs that can affect how devices handle WiFi and background data activity.
- Review app permissions regularly. Periodically check which apps can use data in the background and adjust as needed, especially for critical apps like messaging and navigation.
- Keep a short list of trusted networks. If you switch networks often, your device should prefer your home or office network and avoid public hotspots that drain data.
- Test after changes. After any update or setting adjustment, run a quick test across a few apps to confirm the WiFi path remains primary.
A quick reference on fine tuning data usage shows you can enable Data Saver or similar features on Android, and on iOS you can use Low Data Mode and per-app controls. These controls help keep essential apps responsive while you save data on other apps.
Practical habits to adopt
- Monthly router checks: verify firmware is up to date and that the router isn’t crowded on the 2.4 GHz band.
- Regular OS hygiene: keep both Android and iPhone updated to stay compatible with router features.
- App hygiene: review background data for apps that don’t need it in the background, especially on WiFi networks.
To deepen your understanding, you can explore practical guides on router health, channel selection, and basic troubleshooting. For example, guides on troubleshooting and getting the most from home networks can offer clear, non-technical steps you can apply quickly. You can read more here: https://www.getnomad.app/blog/what-is-wifi-assist and related resources.
Images that illustrate this section
- A clean, organized desk with a smartphone on a router setup can visually reinforce the idea of ongoing maintenance. Photo by Brett Jordan.
Reconnect to Wi‑Fi and reset network settings
If you want to maintain a stable Wi‑Fi path, refreshing connections is a reliable move. Here’s how to forget and reconnect on Android and iPhone, and how to reset network settings when needed. After each change, test to confirm the phone stays on Wi‑Fi.
Forget and reconnect to your Wi‑Fi network
- Android
- Open Settings, then Network & Internet.
- Tap Wi‑Fi, pick the network, and choose Forget.
- Reconnect by selecting the network, enter the password, and connect.
- Test by turning Wi‑Fi off and on again and opening a few sites.
- iPhone
- Open Settings, then Wi‑Fi.
- Tap the connected network and Forget This Network.
- Rejoin by tapping the network name, enter the password, and connect.
- Test by loading a site or app to confirm Wi‑Fi stays active.
Tips for testing
- After reconnecting, run background-data tests with messaging, social feeds, and video apps.
- If you switch networks often, remember to forget rarely used networks to streamline auto-join behavior.
Guides and official steps
- Forgetting a Wi‑Fi network on iPhone: https://support.apple.com/en-us/102480
- Forgetting a Wi‑Fi network on Android: https://www.highspeedinternet.com/resources/forget-wifi-network
Reset network settings on Android
What gets reset
- All Wi‑Fi networks and passwords
- Bluetooth pairings
- Cellular settings and data preferences
What to expect
- You’ll reconnect to networks with new passwords
- Some apps may require re-authentication
- Bluetooth devices need re-pairing
Steps
- Settings > System or General Management > Reset options > Reset network settings
- Confirm and wait for restart
Android reset references
- Sony: Reset Network Settings guide
- Motorola: Reset network settings guide
Reset network settings on iPhone
What gets erased
- Saved Wi‑Fi networks and passwords
- Cellular settings and data preferences
- VPN configurations and APN settings
- Bluetooth pairings
Steps
- Settings > General > Transfer or Reset iPhone > Reset > Reset Network Settings
iPhone reset references
- Reset Network Settings on iPhone guide
- Carrier and network guidance from major carriers
Check for system updates
After resets or major changes, update your OS. Updates fix bugs and improve compatibility with routers and networks.
- Android: Settings > System > Software Update
- iPhone: Settings > General > Software Update
Why it helps
- Fixes Wi‑Fi and Bluetooth glitches
- Improves security and compatibility
- Adds features that help with home networks
If you’ve just reset network settings, an update can prevent regressions. For general guidance on updates, see these resources: Android updates and iPhone updates.
Recommended next actions
- Test across multiple networks after updating
- Schedule updates when you’re on Wi‑Fi and plugged in
External reading
- How to monitor app data usage on Android and iOS
- How to update router firmware and OS for devices
Images that fit this part
- Optional: a simple diagram showing the steps to reset network settings on Android or iPhone
- If you choose to include an image, use the same credited photo as above to maintain visual consistency.
Test connectivity on a new network and monitor data usage
Testing across networks confirms you’ve reduced unwanted data use. Try a different network with permission and compare performance.
Test steps
- Connect to a new network (for example, a home guest network or a mobile hotspot)
- Run a speed test and open typical apps that use background data
- Compare results to your primary network and watch for any automatic switches to mobile data
What to observe
- Consistent performance on the new network
- No automatic switch to mobile data when WiFi is available
- Similar or better speeds, indicating the issue was network related
Practical tip
- Use a data monitoring app that offers per-app dashboards and alerts to spot background activity in real time
External links
- Monitoring data usage and testing networks guide: https://www.optimum.com/articles/mobile/how-to-decrease-mobile-data-usage
Final note
- If you still see mobile data taking the lead, revisit the steps in this section and re-run tests across different networks to tighten controls.
Images
- If you include an image here, place it near the test steps to illustrate testing on a new network. Credit the image if used.
Conclusion
Sticking to Wi‑Fi when it’s available is the biggest win for speed, reliability, and data savings. After trying each fix, test your connection to confirm the change holds and that the phone stays on Wi‑Fi rather than sliding to mobile data. The key steps cover checking the network, disabling automatic switching, refreshing connections, resetting settings, and keeping software up to date. A simple habit like testing on multiple networks and logging results helps you spot drift before it becomes a pattern. If you found these tips helpful, share the article or try the steps on your own smartphone to see the impact firsthand.
She Pressed Play on a Strange Audio Track and Within Days Her Financial Reality Started Shifting in Ways She Could Not Explain
>>> See How It Works <<<