There Is a Frequency That the Wealthiest Families Have Used for Generations and Most People Will Never Know It Exists
>>> Open the Door <<<

You’ve just tapped a link to check the latest news or snag a shopping deal on your phone. The page won’t load. Instead, you see a frustrating “server not found” error.
This message means your phone browser can’t locate the website’s address. Network glitches or browser cache often cause it. Smartphones face this a lot during weak signals or when data builds up.
Don’t worry. You can fix it with quick steps that work for Chrome on Android and Safari on iPhone. Start by restarting your browser and phone. Then check your connection and clear cache.
Next, tweak DNS settings or disable VPNs if you use them. User reports show these solve most cases. Follow our guide, and you’ll browse smoothly again.
She Pressed Play on a Strange Audio Track and Within Days Her Financial Reality Started Shifting in Ways She Could Not Explain
>>> See How It Works <<<

We’ll cover each fix in detail. No tech skills needed. Just follow along, and get back online fast.
Start with These Quick Network Checks
When a website won’t load on your phone, the fastest path back online is a quick network check. You can often fix the issue with a few simple steps that reset the network stack, refresh your connection, and rule out common causes. Below are three focused checks you can perform right away. They work whether you’re using an Android smartphone or an iPhone, and they don’t require any advanced technical knowledge.
Toggle Airplane Mode to Refresh Connection
Airplane mode is a fast, reliable way to reset your device’s network components without digging into settings. Here’s how to use it effectively:
- On Android: Swipe down to open Quick Settings, or pull down twice to access the full panel. Tap the Airplane mode icon to turn it on for 10 to 30 seconds, then tap again to turn it off.
- On iPhone: Access Control Center by swiping down from the top right (iPhone X or newer) or swiping up from the bottom edge (older models). Flip Airplane mode on for a brief moment, then switch it off.
Why it helps: turning on Airplane mode briefly resets the device’s wireless radios and clears minor conflicts in the network stack. It’s often enough to push a stuck page to load again. If you want to dive deeper, you can read about DNS flushing as a complementary step to clear cached addresses on your device. How to Flush DNS: Your Complete Guide
Restart Your Phone and Router
A fresh start can make a big difference. It clears memory, resets network connections, and forces devices to renegotiate their terms with the network.
- Restart your phone: Hold the power button, select Restart, and wait for the device to reboot completely.
- Restart your router: Unplug the router, wait about 30 seconds, then plug it back in. Give it a minute to come back fully online.
Tips for a smoother reset:
- After the reboot, reopen your browser and try loading the page again.
- If you share Wi-Fi with others, a quick router reset can clear up congestion or misrouted traffic that affects the entire network. For more Android-specific guidance, see the Android Help article on fixing internet connection problems. Fix internet connection problems on Android devices
Switch Networks to Test the Issue
If the problem persists, it helps to determine whether the issue is network-specific or device-specific. Try a different connection and see if the page loads.
- Switch from Wi-Fi to mobile data: Turn off Wi-Fi in the device settings and attempt to load the page using cellular data.
- Use another Wi-Fi network: If you have access to a different network, connect and test again.
- Test with a portable hotspot: If available, connect via a hotspot to rule out issues with your home or workplace network.
If you’re frequently managing Wi-Fi problems, a dedicated guide on fixing Wi-Fi connection problems can be a helpful resource. For broader tips that apply to various networks, consider checking resources like those from Google Fi Wireless Help. How to fix Wi-Fi connection problems
Additional note on troubleshooting networks: if you notice the problem occurs mostly on certain apps or websites, it might be worth flushing the DNS cache on your device. This can clear stale addresses that lead to “server not found” messages. Here’s a practical primer if you want to explore this further: How to Flush DNS: Your Complete Guide
If you’d like more practical fixes from users and tech writers, Android Authority has a solid roundup of common Wi-Fi and connectivity problems with quick fixes. Wi-Fi not working on your phone? Try these fixes
Note on smart devices: a quick network refresh is not a substitute for a full tech audit, but it often resolves the majority of early issues. If you’re troubleshooting on the go, these checks keep you moving without hunting for cables or tools.
Clear Browser Cache to Remove Old Data Blocks
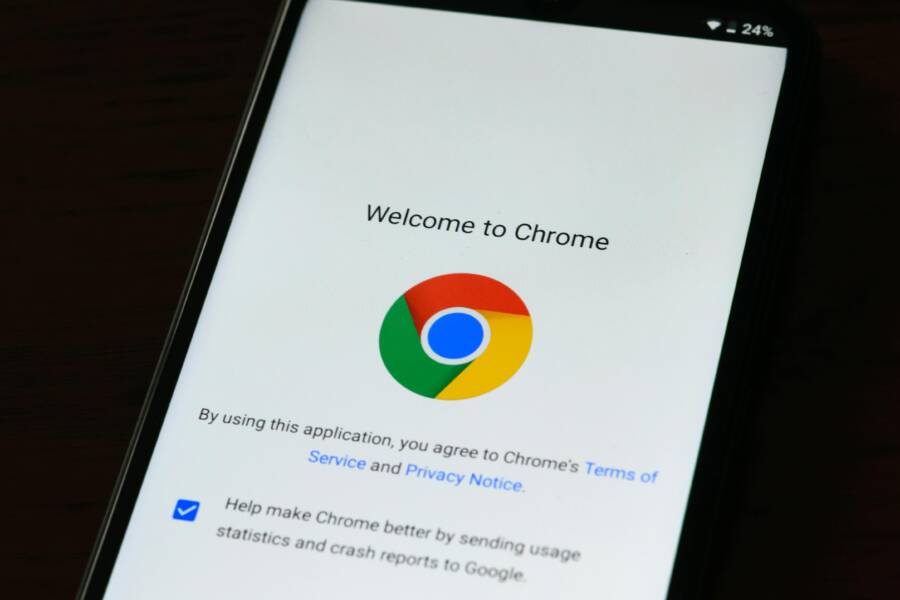
When websites load slowly or misbehave, the browser cache might be storing outdated files. Clearing the cache forces the browser to fetch fresh content, which can fix “server not found” or loading issues. This section provides precise, step-by-step instructions for Chrome on Android and Safari on iPhone. A quick cache refresh can be a game changer, especially on mobile where data and apps compete for space.
 Photo by AS Photography
Step-by-Step for Chrome on Android
Clearing cache in Chrome on Android is straightforward and quick. Here’s the fastest path to get rid of old blocks and force fresh data for websites.
- Open the Chrome app.
- Tap the three dots at the top right to open the menu.
- Go to History.
- Tap Clear browsing data.
- Choose a time range. For a thorough refresh, select “All time.”
- Check at least Cached images and files. If you want to also remove cookies and site data, include Cookies and site data.
- Tap Clear data. Confirm if prompted.
- Reopen Chrome and load the page again to see if the issue is resolved.
If you prefer more control, you can use the Advanced options to pick exactly which data types to delete. For a quick reset, clearing cached images and files alone often solves stubborn loading problems. If you want official guidance from Google on the process, you can review their article on deleting browsing data in Chrome for Android. Delete browsing data in Chrome – Android
Step-by-Step for Safari on iPhone
Safari on iPhone uses a couple of built-in options to clear data. A clean slate helps when a site keeps pulling in old blocks or corrupted files.
- Open the Settings app on your iPhone.
- Scroll down and tap Safari.
- Tap Clear History and Website Data. Confirm when prompted.
- If you prefer not to remove history entirely, you can use the option to Advanced > Website Data and remove data from specific sites.
- After clearing, close Settings and reopen Safari. Try the site again to verify the fix.
If you’d rather follow Apple’s official steps, Apple Support provides a detailed guide on clearing your Safari history, cache, and cookies on iPhone. Delete your Safari history, cache, and cookies on iPhone
Additional context from Apple’s resources shows how to manage data selectively, which can be helpful if you want to keep some browsing history while removing problematic site data. For a direct reference to clearing Safari data, Apple’s support article is a reliable starting point. Delete your Safari history, cache, and cookies on iPhone
By clearing cache on either browser, you reduce the chance of encountering stale blocks that trigger server not found errors. If you continue to see problems after a cache purge, the next steps involve DNS checks or network adjustments, which we cover in the upcoming sections.
Change DNS Settings for Better Site Lookup
When you run into “server not found” errors on your phone, changing the DNS can help your browser locate websites faster. DNS acts like a phone book for the internet, translating domain names into the numeric addresses devices use. By pointing your device to a faster or more private DNS server, you can improve reliability and speed, especially on networks that struggle with routing or caching old addresses. Below are two practical, device-specific steps to set up a improved DNS experience on Android and iPhone.
Set Google DNS on Android
Using Google Public DNS can reduce lookup times and improve reliability on many networks. The quickest path to set this up is through your Android Wi-Fi settings, where you can pin DNS1 and DNS2 values to a static configuration.
- Detailed path: Settings > Network > Wi-Fi > network > Advanced > IP static > DNS1/2.
- DNS choices: Enter Google Public DNS addresses, typically 8.8.8.8 and 8.8.4.4, or use other trusted resolvers if you prefer.
Tips to keep in mind:
- After you save the changes, reconnect to the Wi-Fi network to ensure the new DNS take effect.
- If you switch networks often, you may want to note which DNS works best on each network so you can switch quickly.
- For an official overview of Google Public DNS and how to get started, see the Google Developers guide to Public DNS.
External resources for deeper context:
- Get started with Public DNS: https://developers.google.com/speed/public-dns/docs/using
Set DNS on iPhone Wi-Fi
Configuring DNS on iPhone lets you direct the device to use a preferred DNS server when connected to a particular Wi-Fi network. This is especially useful in places with flaky local DNS or privacy concerns.
- How to configure: Settings > Wi-Fi > (i) > DNS > Manual > + Add Server.
- DNS entries: Add the server addresses you want to use, such as 8.8.8.8 and 8.8.4.4 for Google Public DNS, or other providers you trust.
- Apply and test: After adding the servers, save the changes and try loading the site again on Safari or your preferred browser.
Helpful notes:
- You can remove the default DNS and keep only your chosen servers if you want strict control.
- For Apple’s guidance on general Wi-Fi setup and related tips, you can review how to connect devices to a Wi-Fi network, which includes DNS considerations on iOS.
- Additional guidance on iOS DNS settings and how to tailor them for reliability is available from reputable tech sources that walk through the steps with screenshots.
External resources for deeper context:
- How to change DNS Settings on iOS: https://www.bitdefender.com/consumer/support/answer/84759/
- Apple support on connecting iPhone to Wi-Fi: https://support.apple.com/en-us/guide/iphone/iph3a6d6a3/ios
- How to configure DNS on iOS with step-by-step visuals: https://o-series-support.lightspeedhq.com/hc/en-us/articles/31329294956059-How-to-change-DNS-Settings-on-iOS
By applying these DNS tweaks, you give your smartphone a clearer map to the sites you want to visit. If the page still won’t load after adjusting DNS, consider testing on a different network or temporarily disabling any active VPNs, then rechecking the site.
Turn Off VPN, Firewalls, and Security Blocks
If you’ve tried basic checks and a page still won’t load, the culprit could be a VPN, firewall, or security app blocking traffic. On a smartphone, these tools can subtly reroute or block requests, leading to a “server not found” message even when your connection is working. The good news is you can test this quickly by turning off VPNs or security layers temporarily and reloading the page. This section explains practical steps for Android and iPhone users, plus what to do if a security feature is the true blocker.
She Pressed Play on a Strange Audio Track and Within Days Her Financial Reality Started Shifting in Ways She Could Not Explain
>>> See How It Works <<<
Temporarily disable VPN on Android and iPhone
VPNs protect your data, but they can also interfere with how some websites reach your device. A quick test is to turn off the VPN and see if the site loads normally. If the page comes up, you’ve identified the VPN as a potential culprit. Then you can decide whether to use a different server or switch to a trusted VPN with better compatibility.
- On Android: Open the VPN app and disconnect, or go to Settings > Network & internet > VPN and toggle off the active connection. If you rely on a built-in VPN in your Wi‑Fi setup, disable it there as well.
- On iPhone: Open the Settings app, tap VPN, and switch the status to Off. If you’re using a VPN app, you can also disable it from the app itself.
What to watch for after turning off VPN: some apps or sites may still behave oddly if the VPN left behind cached DNS or security blocks. If you suspect this, flush DNS on the device or restart the phone to ensure a clean state. For deeper DNS guidance, check the step-by-step guide to changing DNS settings on iOS. How to change DNS Settings on iOS
Why this matters: a VPN can mask quirks in local networks or cause routing hiccups. By turning it off, you’re testing a direct path from your device to the web, which often resolves server not found errors on a smartphone.
Check and temporarily disable firewall and security apps
Firewalls and security apps screen traffic for threats. Occasionally, they block legitimate requests from certain apps or networks, especially on corporate or school networks. Disabling them temporarily helps you confirm if they’re the cause.
Thousands of People Were Struggling With Money Until They Discovered This One Ancient Secret Hidden in Sound
>>> Unlock It Now <<<

- Android: If you use a security suite, open the app and look for a temporary disable or “Pause protection” option. You can also review any firewall features in the app and turn them off for a moment.
- iPhone: iOS has built‑in protections, but third-party security apps can still impact connectivity. Open the security app and locate a disable or pause feature. If the app requires elevated permissions, follow the prompts to disable it safely.
After you turn off firewall or security protections, retry loading the page. If it loads, you’ll want to adjust the app’s settings rather than leaving protection disabled. Consider whitelisting the site or allowing explicit traffic rules for your browser.
For a broader perspective on security software and connectivity, see Apple’s guidance on VPN and third party software. If your device has network connectivity issues, check for VPN and other third-party security software
When to reintroduce protections and how to test safely
Turning off protections is a diagnostic step, not a permanent change. After confirming a block is caused by VPNs or security apps, reintroduce protections with targeted adjustments.
- Reenable the VPN or security app.
- Create a site-specific exception or whitelist for the browser you’re using.
- Test loading the problematic site in a private or incognito mode to rule out cached data as the cause.
- If you still see issues, try a different browser. Some websites perform better with lighter clients.
If you’re navigating VPN issues on iPhone, Norton’s guidance outlines simple options for turning VPNs on and off. This can help you decide when to keep using a VPN and when to disable it briefly for testing. How to turn off a VPN on an iPhone (3 simple options)
When to seek deeper help
If disabling VPNs and security layers doesn’t fix the problem, you may be facing DNS misconfigurations, network routing issues, or site-specific blocks that require a closer look. In many cases, adjusting DNS or testing on a different network resolves the root cause.
- For DNS related fixes, revisit our DNS change steps on Android and iPhone. A clear DNS path helps your smartphone translate domain names quickly and accurately.
- If you want a broader reading list on VPN and browser issues, guides from guides like Guiding Tech offer practical, step-by-step fixes for Chrome and VPN conflicts. 3 Ways to Fix Google Chrome Not Working With VPN
By methodically turning off VPNs and security blocks, you can quickly identify if these tools are behind the server not found errors. Keep the testing short, and always reapply essential protections after you finish troubleshooting.
External resources for deeper context:
- Can’t access Google web page unless I turn off my VPN: https://support.google.com/websearch/thread/260214423/can-t-access-google-web-page-unless-i-turn-off-my-vpn?hl=en
- How to Fix ERR_TUNNEL_CONNECTION_FAILED in Chrome: https://kinsta.com/blog/err_tunnel_connection_failed/
- How to turn off a VPN on Android and iPhone: https://nym.com/blog/disabling-vpn-on-android-and-iphone
If you’ve followed these steps and still can’t load a page, the next section dives into how DNS tweaks can stabilize lookups and improve reliability on both Android and iPhone.
Reset Network Settings or Check Site Issues
If you’ve tried the quick network checks and cache clears but the page still won’t load, the culprit may lie in your device’s network settings or in something on the site’s end. This section helps you decide when to reset network settings, what that actually does, and how to reconfigure your connections so pages load reliably again. Think of it as a targeted tune-up for your smartphone’s network brain.
What a network reset does and when to use it
A network settings reset is like sweeping the slate clean for Wi‑Fi, mobile data, and Bluetooth connections. It erases saved networks, paired devices, and custom network preferences, returning them to default. It’s a strong option when a stubborn connection problem persists after other basics, such as restarting the phone or clearing the browser cache.
- When to consider a reset: repeated “server not found” errors across multiple sites, apps failing to connect after switching networks, or you notice odd Bluetooth or cellular behaviors alongside internet issues.
- What you’ll lose: saved Wi‑Fi passwords, Bluetooth pairings, and any custom VPN or APN configurations. You’ll rejoin networks and reconfigure preferences afterward.
For smartphone users who deal with flaky networks often, a reset is a reliable next step after you’ve ruled out glitches in the browser and the local network. If you want a quick, official rundown, Apple and Android guides provide steps that map to most devices. For Android, you’ll find “Reset Wi‑Fi, mobile & Bluetooth” in the Settings area. For iPhone, you’ll see a similar option under General or Reset. See more here: Reset iPhone settings to their defaults
How to perform a network reset on Android
Running a reset on Android is simple, but it can look slightly different by manufacturer. The core steps are consistent:
- Open Settings and look for a section like “System,” “Reset,” or “Backup & reset.”
- Select “Reset network settings” or “Reset Wi‑Fi, mobile & Bluetooth.”
- Confirm your choice and let the phone reboot.
After the reset, reconnect to your preferred networks and re-enter passwords. It’s normal to need a couple of minutes for everything to reinitialize.
If you’d like a quick visual walk-through, this Android-focused guide covers the exact taps and prompts you’ll see. It’s a practical companion to the steps above. Reset Network Settings on Android
How to perform a network reset on iPhone
On iPhone, a network settings reset clears similar items, including saved networks and VPN configurations. You’ll rejoin Wi‑Fi networks and re-enter passwords after the device restarts.
- Go to Settings > General > Transfer or Reset iPhone.
- Tap Reset > Reset Network Settings.
- Enter your passcode and confirm.
Expect a short reboot. After, test your browser again on the same page to confirm the fix. If you’d like Apple’s official steps, here’s a reliable reference: Reset iPhone settings to their defaults
Reconnecting and reconfiguring after a reset
A reset restores basic connectivity but not the specifics you used before. Plan to:
- Reconnect to trusted Wi‑Fi networks and re-enter passwords.
- Reestablish Bluetooth peripherals and any device pairings you rely on.
- Reconfigure VPNs, if you use them, and test sites in a private or incognito window to verify the changes.
If a particular site still won’t load after a reset, it might be a site issue rather than a device issue. In that case, you can verify by testing with another browser or a different device on the same network.
Image: smartphone network reset concept

Photo by Andrey Matveev
This image conveys the idea of adjusting a phone’s settings and network controls, a useful visual for readers who are following along with device-based steps.
Quick checks to do after a reset
If you reset network settings but a page still won’t load, run a few quick verifications to isolate the issue:
- Test with the site loaded on another device on the same network. If it works there, the problem is likely with the original device or browser.
- Try a different browser on the same phone to see if the issue is browser-specific.
- Revisit DNS settings if you’ve recently changed them. Sometimes a reset helps, but a stale DNS cache can still hold you back.
If you want deeper DNS guidance, you can revisit the DNS section and reassess Google Public DNS or iPhone DNS settings for stability. For a structured look at iOS DNS options, this guide is helpful: How to change DNS Settings on iOS
When resetting is not the answer
Sometimes the problem isn’t the device but the site itself or the network path your carrier uses. If a page loads on Wi‑Fi but not on cellular data, contact your carrier’s support. If the problem is only with one site, it could be a DNS hiccup on that site’s end or a misconfigured redirect. In those cases, waiting a short while before retrying can help, or using a different DNS provider on your device for a trial period. For a broader look at VPN and browser interactions, consider this practical guide: 3 Ways to Fix Google Chrome Not Working With VPN
By following these steps, you can systematically rule out the most common causes and restore reliable access to the web on your smartphone. If the issue persists after a network reset, the next section covers targeted DNS tweaks to improve site lookups and overall reliability.
Conclusion
Fixing “server not found” on your phone browser is about small, repeatable steps that restore trust in your connection. Start with quick toggles, then clear the cache, and finally test a DNS change; test after each step to see what actually fixes the issue. Keeping your apps and phone OS updated helps prevent these problems from returning, because software updates tighten security and improve compatibility with new network standards.
Bookmark this checklist so you can revisit it quickly next time you’re on the go. When you encounter a stubborn page, try switching networks first, then reset the browser data, and only then consider DNS tweaks. This order keeps your smartphone habits simple and effective, not overwhelming.
If the issue reappears, try a different browser or a different device on the same network to narrow down where the problem lies. Sharing your experience in the comments helps others with the same trouble and builds a helpful community around smart troubleshooting.
She Pressed Play on a Strange Audio Track and Within Days Her Financial Reality Started Shifting in Ways She Could Not Explain
>>> See How It Works <<<