Is your phone stubborn about charging unless you hold the cable just right? You’re not alone. A charging hiccup like this is a common sign that a port problem is at fault, not a stubborn battery.
In this guide you’ll learn practical, at home fixes that tame the issue without guesswork. We’ll start with simple cleaning and move to parts that may need professional help. By the end you’ll know what to try first, what to replace, and when to seek a pro.
A quick reality check before you dive in: if the phone only charges at an angle, the problem is almost always a contact issue. Dust, bent pins, or a loose port can all cause inconsistent charging. Don’t force the cable to fit; that can make things worse and extend the repair time.
First steps are inexpensive and safe. Clean the charging port carefully using a flashlight and a gentle tool to remove debris. Try a different cable and charger, then test on multiple power sources. If it still only charges at one angle, the fault may be more serious and you’ll want to consider a repair.
This guide helps you decide what to fix yourself and when to call in a professional. You’ll get actionable, low frustration steps that fit real life, whether you’re at home or on the go. For most people, these fixes restore reliable charging without the stress of a big repair bill, and you’ll learn how to protect your smartphone from future charging issues.
Why Does Your Phone Only Charge at Certain Angles?
When a charger seems to work only at a specific tilt, the likely culprit is a contact issue inside or around the charging port. Debris, loose connections, or worn components can all create angle-dependent charging. The good news is you can usually diagnose and fix many of these problems at home with careful steps. Below are focused sections that cover common causes and practical fixes, with a clear path from simple checks to when professional help is warranted.

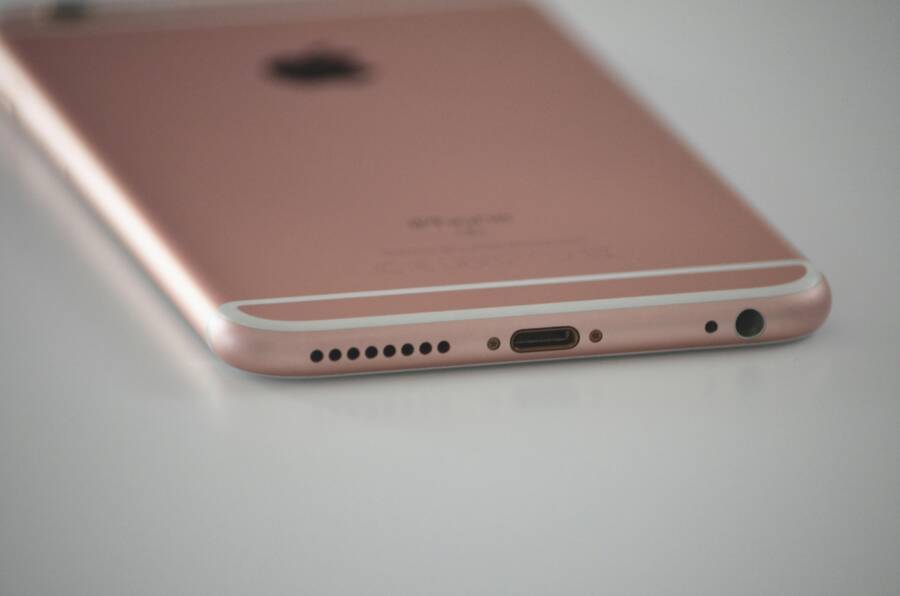
Photo by John Tekeridis
Dirt and Lint Buildup in the Port
Pocket lint and dust love charging ports as much as you do. A small collection of fibers and debris can block the metal contacts that carry power, making charging dependent on how the plug sits. This is one of the most common, non dramatic causes you’ll encounter.
To handle this, start with a gentle approach. Use a flashlight to inspect the port and a soft, non-metal tool to gently tease out visible particles. Do not poke hard or insert sharp objects—damage is easy to cause and often invisible at first. If you see loose lint near the opening, remove it with a light touch. After cleaning, try a different cable and charger and test on multiple power sources. If the issue persists, the problem may be more than surface dust and you’ll want to continue with the next steps in this guide.
What to remember about cleaning port lint:
- Gentle first: light motions, small tools, and no hasty scrapes.
- Don’t force the connector to fit through stubborn debris.
- Verify results with another cable or charger before assuming a deeper fault.
For deeper guidance on when cleaning is enough and when it isn’t, see How to Clean Your Android Charging Port and Fix Charging Problems. This resource walks through signs of a dirty port and step-by-step cleaning methods, helping you avoid unnecessary fixes.
Bent Pins or Physical Damage
If you notice wobbly cables, intermittently charging even when the plug looks centered, or visible misalignment of the port pins, you may be dealing with bent or damaged connectors. This kind of damage often stems from rough insertion, yanking the cable, or a drop that shifts the internal alignment.
Avoid DIY pin straightening. Bent pins can snap or create more harm if you attempt to bend them back into place. If you suspect physical damage, the safer route is to stop trying to force the cable and seek professional help. A technician can assess whether the port needs a repair or a full replacement.
Key signs to watch for:
- The charging icon appears only when the cable sits at a precise angle.
- The plug feels loose or wobbly in the port.
- Visual inspection shows bent or recessed pins.
If you’re unsure whether the problem is mechanical or electrical, consult a repair service. For quick guidance on diagnosing charging port damage and typical repair paths, you can review resources such as 5 tell-tale signs your charging port is damaged from Asurion.
Worn-Out Port from Heavy Use
Over time, frequent plugging and unplugging wears the female port’s connectors and the internal traces that carry power. This gradual erosion can loosen the fit between the plug and the contacts, creating charging that only works at certain angles. It’s not uncommon for a port to loosen after months or years of daily use, especially if a device is often carried in a tight pocket or bag where the connector rubs against fabric.
What you’ll notice:
- Reduced charging efficiency or longer time to reach full charge.
- The need to hold the cable at a specific angle to maintain a connection.
- Visible wear around the port edges or a port that feels loose when touched.
If you suspect wear, assess whether a port replacement is cost-effective for your device. In many cases, a skilled technician can replace the port module without replacing the entire motherboard, preserving most of the device’s value. This is a common service offered by reputable repair shops and manufacturer-authorized centers.
Helpful context on port wear and repair practices can be found in guides and diagnostics discussions such as Charging Port Repair: Simple Steps to Get Your Device Working which cover why physical interfaces fail and how technicians approach restoration.
If you’re evaluating repair options, consider your device age, warranty status, and how critical charging reliability is to your daily life. In some cases, a port replacement is a smart investment that prevents repeated grief from loose connections.
If you’d like, I can tailor this section further to align with your preferred style or adjust the balance between practical steps and diagnostic guidance.
Quick Fixes You Can Try at Home Right Now
If your phone only charges when the cable is at a certain angle, you don’t have to panic or rush to a repair shop. Many at home fixes address common port issues and can restore reliable charging in minutes. Start with the simplest checks and moves up to a potential component replacement if needed. These steps are practical, non-destructive, and designed to fit real life.
Clean the Charging Port Safely
Dust, lint, and pocket debris are sneaky charge blockers. A quick clean often resolves angle dependent charging without any tools beyond what you already have. Always power off your device before you start, then work in a well-lit area so you can see what you’re doing.
- Tools and approach: use a soft brush or a wood/plastic toothpick to gently lift debris from the port. A small flashlight helps you spot particles that hide inside the opening.
- Cleaning motions: insert the tool at the port opening and make light, sweeping motions to dislodge lint. Avoid prying or poking hard into the metal contacts. If you see lint clinging to the edges, tease it out rather than forcing it.
- Verify results: after a light clean, try a different cable and charger and test across a couple of power sources. If charging is still angle dependent, you’re likely dealing with a deeper issue.
For additional guidance on safe port cleaning techniques, see resources like How to Clean Your Charging Port in 5 Easy Steps and How to safely clean your phone’s charging port. These guides emphasize gentle handling and proper disposal of debris to keep contacts intact. You can also reference a practical overview of safe cleaning practices here.
When dirt cleaning isn’t enough, the issue could be more than surface dust. If the port still only accepts a connection at a precise tilt, move on to the next checks.
Test with a New Cable and Charger
Cables wear out, especially if you bend them at the connector too often. A faulty or frayed cable can mimic a port problem by delivering inconsistent power depending on how the plug seats in the port.
- Choose certified options: always buy cables and adapters from reputable brands or retailers. Look for official certification or compatibility notes for your device.
- Check both ends: inspect the USB end and the phone end for any signs of wear, corrosion, or loose connectors. A snug fit on both sides is essential for stable charging.
- Try a fresh setup: test with a new cable and a compatible charger. If the issue goes away, the old cable was the culprit. If the problem persists, the port or internal circuitry may be at fault.
Reliable charging cables and certified chargers reduce the odds of intermittent charging. For further reassurance, consult guides about replacing damaged cables and cables that meet manufacturer or safety standards. If you’re unsure, visiting a reputable retailer or service center can help you pick the right parts.
Links to additional readings on choosing safe, certified cables and testing charging setups are included above. They provide concrete tips on what to look for in connector quality, shielding, and safety ratings, so you can shop with confidence.
Restart and Check Software Glitches
Software quirks can also affect charging behavior. A quick restart resets any stuck processes that might be misreporting power status or interrupting the charging routine.
- iPhone restart: press and hold the side button and either volume button, then slide to power off. After the device shuts down, press and hold the side button again until the Apple logo appears.
- Android restart: hold the power button, then tap Restart. If the device is unresponsive, a forced restart (power + volume down for about 10 seconds) can help. After reboot, plug in the charger to test if charging is stable.
- Post-reboot check: use multiple power sources and cables to verify consistency. If the angle issue vanishes after reboot, a software setting or background process could have been the culprit.
If rebooting helps only briefly or not at all, the fault may be hardware related. In that case, consider scheduling a diagnostic with a repair professional. For additional guidance on handling charging port issues after a reboot, you can consult practical how-to guides that cover both iPhone and Android devices.
Notes on software considerations: many devices offer battery optimization features that influence how charging proceeds. If you notice the phone stops charging at roughly 80% or changes charging pace after a reboot, check battery health settings and look for any “optimized charging” features that might be active. Adjusting these settings can sometimes restore straightforward charging behavior.
External resources provide deeper dives into reboot strategies and common software factors that influence charging. See linked guides for hands-on steps and real-world scenarios. And if you want to explore more about the common causes of charging irregularities, you’ll find practical discussions in recommended troubleshooting articles.
Advanced Troubleshooting for Stubborn Issues
If your phone only charges when the cable sits at a precise angle, you’re not imagining things. The problem usually boils down to a contact or port issue rather than the battery itself. This section dives into two targeted approaches you can take to narrow down the cause and decide whether you can fix it at home or if a pro is needed. Think of it as a practical, step-by-step sieve that moves from quick checks to more involved diagnostics.
Inspect and Handle Bent Pins
When the plug almost fits, but not quite, bent or misaligned pins inside the charging port are often to blame. You might notice the charger only works if the cord is positioned just so, or you may see the port look slightly off-center when you peek inside. Bent pins can happen from rough insertion, yanking the cable, or a drop. It’s one of those problems that looks simple but can do real damage if you try to fix it yourself.
What to do first
- Power off the device and work in a well-lit area. Use a small, soft tool to visually inspect the port with a flashlight. Look for pins that appear pressed in, skewed, or missing their proper alignment.
- Avoid DIY straightening. Attempting to bend pins back can create more harm than good. A pinned misalignment can crack a delicate internal circuit or fracture the port housing.
- Clean gently, then re-test. If you see loose debris, remove it with a plastic prying tool or a soft brush. After cleaning, try a different cable and charger. If the issue persists, the port or internal components are likely at fault.
When you should seek professional help
- The port feels loose, wobbly, or the plug only seats correctly at a precise angle. This pattern often means a damaged port module or a loose connector inside the device.
- Visual inspection shows bent or recessed pins that do not spring back with careful handling.
- You’ve tried multiple cables and chargers, and the charging behavior remains inconsistent.
Professional diagnosis and repair
- A technician can determine whether the port needs a replacement module or if the fault lies deeper on the motherboard. In many cases, a port module replacement preserves most of the device’s value and avoids a full board change.
- If you’re unsure about the extent of the damage, a pro can perform non-destructive tests to confirm whether the issue is mechanical or electrical.
Helpful context and confirmation from reputable guides
- If you want a quick, consumer-friendly read on diagnosing charging port damage and common repair paths, consider resources that outline signs of a damaged port and typical fixes. These guides reinforce that visible signs like wobble, misalignment, and a charging icon that only appears at certain angles are red flags for likely hardware issues. For practical insights, you may explore discussions from consumer tech resources that cover how technicians approach port restoration and the typical costs involved.
- You’ll frequently see the recommendation to avoid attempting to bend pins back into place. This rule protects both the port and the device’s internal circuitry from further harm.
In addition to visual cues, you can cross-check with diagnostic content from repair-focused sites that explain how to interpret symptoms like “charging only at a precise angle” and why a port replacement often becomes the most cost-effective solution. If you’re weighing options, a local authorized service center can provide an itemized quote for a port module replacement versus more extensive motherboard work.
When to call a pro sooner rather than later
- If you’ve confirmed bent or recessed pins and cleaning hasn’t helped, delay further DIY experiments. A professional can safely evaluate whether the port or internal traces have sustained damage and can perform precise replacements without risking collateral damage.
External references that can help you understand common port damage and repair approaches include reputable guides on charging port cleaning and port repair. These resources explain how technicians assess the port, what a replacement entails, and typical timeframes to get you back up and running.
Try Wireless Charging as a Test
Wireless charging is a useful diagnostic tool. If your device charges reliably on a wireless pad, the problem almost certainly lies with the charging port, not the battery or the phone’s power management system. However, if wireless charging also behaves inconsistently or fails to start, the issue may be more complex and involve software, battery health, or internal circuitry.
How to run the test
- Place the phone on a certified wireless charger and watch for the charging indicator. If it begins smoothly and increases battery level, your device supports wireless charging correctly and the port is the likely culprit.
- Confirm consistency by trying multiple pads and different power adapters. A single pad or adapter that works intermittently isn’t proof of a port issue; test with a few reputable setups to rule out a faulty charger.
- Compare charging behaviors. If wireless charging works but wired charging remains angle dependent, focus on the physical port, its connector, and related components.
What this test tells you
- Wireless success strongly suggests a port or cable issue. It means the battery and main charging circuitry can handle power input, and the fault is more likely confined to the USB-C, micro-USB, or Lightning port and its immediate surroundings.
- If wireless charging fails as well, you should broaden the scope to software settings, battery health, and potentially a battery replacement or deeper hardware diagnosis.
Practical steps after the test
- Revisit the basics. Ensure that the phone’s software is current and that no power-saving features are throttling charging. Some phones include “Optimized Charging” or similar features that modify charging behavior to preserve battery health. If these features are on, try disabling them temporarily to test charging stability.
- Clean or replace components as needed. If the port is visibly dirty, clean it carefully as described in the previous subsection. If the port looks damaged or loose after cleaning, a professional port replacement is warranted.
- Consider a professional diagnostic if the issue persists. A technician can verify whether a damaged port, a failing battery, or internal circuitry is the root cause and propose the most cost-effective repair.
External resources that offer practical guidance on wireless charging troubleshooting
- Guides on why a phone might not charge on a wireless pad and how to fix common issues are helpful for quick checks. These resources typically cover common causes like misalignment, dirty pads, or compatibility problems that prevent wireless charging from starting.
- You can supplement your troubleshooting with authoritative write-ups from charger manufacturers and reputable tech sites that walk through step-by-step tests. These sources help you understand how to isolate a wireless charging problem from a traditional wired charging issue.
Takeaway: using wireless charging as a test is a smart, non-invasive way to triage the problem. If wireless charging works, you’ve narrowed the field to the port, the cable, or the plug itself. If not, you’ve confirmed that the fault might be stuck deeper in the device’s hardware or software. In either case, you’ll be better prepared to decide between DIY fixes and professional repair. For further reading, explore reputable guides on wireless charging troubleshooting that align with your device model and charger type.
When to Get Professional Help and Prevent Future Problems
If your phone only charges when the cable sits at a precise angle, you’re not alone. It’s a sign that the charging port or its immediate surroundings could be wearing out. You can often fix a lot of issues with simple steps, but there are clear signals that point to a professional repair. This section helps you read the signs, decide when to book a service, and learn habits that keep charging ports healthy for as long as possible.
Signs Your Port Needs Replacement
When charging stops working reliably, the first question is this: is the port the root cause? The most telling signs fall into two categories: no charging at all and overheating during charging. Both scenarios usually indicate a hardware issue that goes beyond a quick cleaning.
- No charge at all or extremely sporadic charging
- The phone refuses to recognize the charger, even after trying different cables and adapters.
- You’ve replaced the cable and charger, tested across multiple outlets, and the problem persists.
- The charging icon may flicker or disappear entirely unless the plug is held in a certain position. This pattern often means the port’s internal contacts are damaged or loose.
- Heat during charging
- The device becomes unusually warm while attempting to charge, even with a high-quality charger.
- Heat buildup while plugged in can signal a compromised port or a short in the charging circuit.
- If you notice warmth that persists after unplugging, it’s a red flag that the port or nearby components are stressed.
Other indicators that you should consider a replacement:
- Visible wear around the port, such as widened gaps, chipped plastic, or a looser fit for the connector.
- Wobbling or “give” when you insert or remove the cable, not just when you tilt the phone to a certain angle.
- The phone only charges when the connector sits at a precise angle and immediately loses power if moved.
If these symptoms show up, schedule a diagnostic with a reputable repair shop or the device manufacturer’s service center. A port replacement is generally less costly than replacing the motherboard and can preserve most of the device’s value. It’s also worth checking warranty status; some devices have coverage for port damage if it’s clearly due to a manufacturing defect rather than accidental damage.
Pro tips for a quick decision:
- Compare repair quotes. If the cost is close to buying a used port or a certified repair, you may want to explore a replacement device instead.
- Ask about parts and labor. A port module replacement is common and preserves most of the device’s functionality and data.
- Confirm data safety. If the repair involves the internal connector, ensure the technician takes steps to back up data if needed and to protect privacy.
Tips to Keep Your Port in Good Shape
Prevention beats repair, especially when it comes to your phone’s charging port. A few small daily habits and the right accessories can dramatically extend port life and reduce the chances of future charging headaches.
Daily habits that protect the port
- Gentle insertion and removal
- Always align the plug with the port and push straight in or straight out. Avoid wiggling or forced movements.
- Keep the area clean
- Regularly inspect and clean the port to remove lint and dust. A clean port means better contact with the connector and fewer angling quirks.
- Avoid tugging on cables
- Use a short, sturdy cable and avoid pulling on it to disconnect. If you need to move the device while plugged in, unplug the cable first and then relocate the device.
- Mind the environment
- If you work around dust or metal shavings, protect your device with a case that seals the port area when possible and wipe the exterior often to prevent grit from entering.
Accessory choices that help
- Use certified cables and adapters
- Look for third-party options that meet the device’s official standards. Certified cables reduce the risk of poor power delivery that mimics port problems.
- Port protection accessories
- Consider a dust plug or magnetic keeper for the port when you’re not charging. These simple add-ons can block debris without interfering with charging.
- Case compatibility
- A well-fitted case can reduce micro-movement inside the port when you move around. Avoid bulky cases that press on the port area.
Smart habits for ongoing protection
- Schedule periodic checks
- Set a reminder every few months to inspect the port for debris and wear. Early detection makes repairs easier and cheaper.
- Keep a spare charger
- Having a backup charger helps you confirm whether a charging issue is device-related or cable-related. It also reduces the temptation to wedge the cable into awkward positions to make it work.
- Store devices properly
- Never leave a phone plugged in while it sits in a pocket or bag where it can rub against fabric. Movement can wear the port over time.
Real-world considerations
- If you rely on fast charging, make sure your accessories match the fast-charging protocol your device supports. Mismatched power levels can heat the port and impact longevity.
- Temperature matters. If you notice your device gets hot quickly while charging, try a different charger first and inspect the port for debris. Consistent heat is a sign to pause and reassess.
Troubleshooting routine that fits real life
- Start with a clean port and a fresh cable
- A quick wipe, followed by a test with a new cable, can save you a lot of guesswork.
- Test power sources
- Try a different wall outlet or a USB-C hub if you’re charging through a computer. Some ports on hubs or adapters don’t deliver stable power.
- Check software
- While hardware is the most common cause, don’t skip a quick software check. Some devices throttle charging or misreport status due to a software glitch. A reboot or a quick software update can clear this up.
By adopting these daily habits and choosing the right accessories, you can keep your port functioning longer and avoid the frustration of slow or inconsistent charging. If you do end up needing a repair, you’ll be prepared with the right questions and a clear sense of what a port replacement involves.
If you want more guidance on choosing safe, certified cables and the best accessories for protecting charging ports, you can explore practical checklists and consumer guides from reputable tech sites. These resources offer concrete tips on evaluating cable quality, charging standards, and protective accessories that strengthen port longevity.
Conclusion
Cleaning the charging port is the first and simplest move. A careful wipe or gentle removal of lint often restores stable charging and saves a lot of trouble. If cleaning helps, you’ve gained control and saved time and money.
If the issue persists, swap in a new cable and charger to rule out a faulty accessory. A fresh setup confirms whether the port or internal hardware needs attention. This step prevents wasted DIY attempts and guides your next move with confidence.
When testing continues to fail, consider a port inspection or a professional diagnosis. A loose or bent port is common after years of daily use and can require targeted replacement. You’ll protect the device’s value and avoid further damage to the motherboard.
Empowerment comes from action, not fear. By following the sequence—clean, test accessories, then seek professional help if needed—you’ll keep your smartphone charging reliably. If you’ve tackled this before or have tips that worked for you, share your experiences to help others facing the same issue.