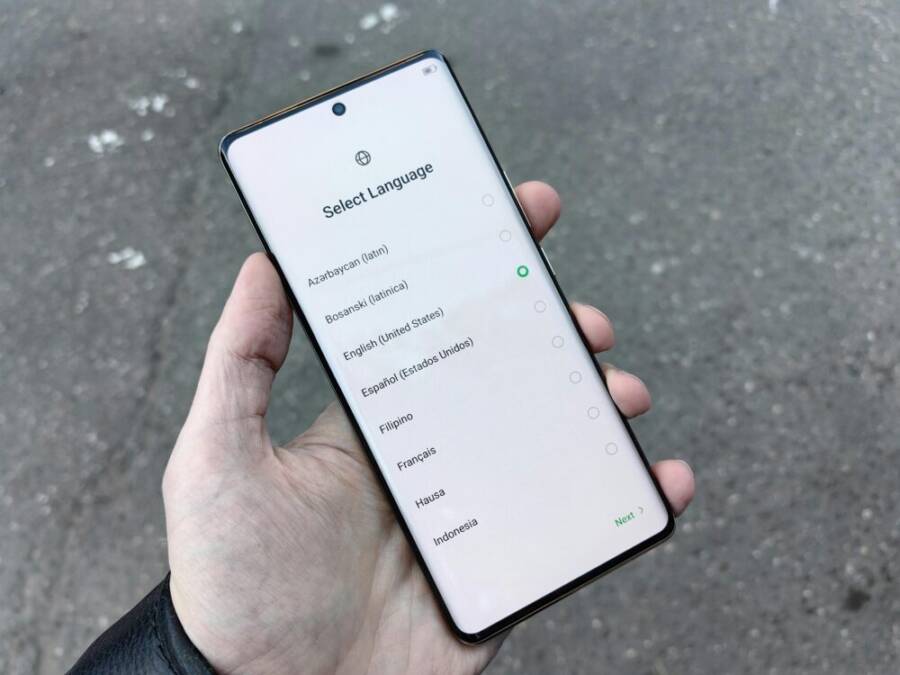
Changing the language on your smartphone can be a simple unlock for a better user experience. If you’re learning a new language or just want apps to match your day to day, adjusting language settings helps you read prompts, menus, and tips more clearly. This guide shows where to find the options and how to apply them on most phones.
You’ll usually set the system language from the main settings menu, but you can also adjust keyboard language for easier texting. Some phones even let you run different languages per app, which is handy when you mix languages at work or school. In a few minutes, your smartphone will feel more familiar and personal.
If you’re using a shared device or traveling, changing language settings can improve accessibility and comprehension. It supports learning by exposing you to new words in context and helps you navigate apps in a way that makes sense to you. With the right setup, your smartphone becomes a smoother tool for daily life, travel, and communication.
language settings can make a big difference in how you experience your device.
Find Language Settings on iPhone and Android
Changing the language on your smartphone can transform how you interact with apps, menus, and prompts. The steps are simple, but the exact path can vary a little by brand and OS version. Below you’ll find straightforward, reliable routes for both Android and iPhone devices, plus practical tips if a language option seems to be missing. This section is designed to be a quick reference you can follow anytime.
Android: Accessing Language Settings
Most Android devices share a familiar route, though some brands place language options in slightly different menus. Use this concise path to reach the language controls on the majority of devices:
- Open the Settings app
- Tap System
- Select Languages & input (on some devices you may see Languages directly under System)
- Tap Languages and then Add a language to bring in a new option
- Drag or move the chosen language to the top of the list to set it as the primary language
If your device uses a different menu structure, look for language settings under Settings > General Management or Settings > Device preferences. Some brands place language in these areas rather than under System. For a quick reference, check the official guidance from Google and related support resources that describe setting a primary language and optionally adding secondary languages. You can also configure language for Google apps separately if needed, for example by visiting the Language & region settings within Google apps to adjust display language there as well. Practical steps for adding and ordering languages are described here: Change app language on your Android phone. If you plan to use multiple languages across your experience, you can also set how Google Assistant responds in different languages: Change your language or use multiple languages – Android.
Tips to keep in mind
- After you add a language, you can drag it to the top to make it the primary language.
- Some apps may keep showing previous language prompts until they refresh in the foreground or after a restart.
- If you rely on a specific input method, you might also want to adjust keyboard languages in a separate settings area.
iPhone and iPad: Language Settings
iPhone and iPad users often find the language settings in a clean, centralized place. Here is a simple, repeatable path that works across iOS devices:
- Open Settings on your iPhone or iPad
- Go to General
- Tap Language & Region
- Choose Add Language to install a new option, then select it
- Use the handle or reorder to set your preferred language as the primary language
Changing the main language can affect how prompts and menus appear, and some apps may adjust their content accordingly after you confirm the change. If you’re traveling or working with different regional formats, you might also adjust the Region setting within the same screen. Region settings influence formats like date, time, numbers, and currency, which can make your device feel more familiar in a new place. For a quick reference, see Apple’s guidance on language and region settings and how to reorder languages if you need to switch between them easily.
What to do if a language option is missing
Sometimes a language option isn’t visible where you expect. Here’s a practical checklist to troubleshoot quickly and avoid frustration:
- Verify you’re looking in the main Settings area, not inside a particular app. Language options usually live in system settings, not within individual apps.
- Check for software updates. An OS update can bring new languages or restore missing options.
- Try a quick restart. A simple reboot can make the language list appear correctly when the device boots up.
- Confirm you’re using a compatible mode or profile. Some devices or carriers hide language options in specific modes, profiles, or enterprise configurations. If you’re using a work device, check with your IT administrator in case language control is restricted.
- If the device is brand new or reset recently, ensure you completed the initial setup screen where language prompts are offered. A second pass after setup often reveals the full language menu.
- If you still can’t find the option, consult the built-in help or official support pages for your model. You’ll often find model-specific paths that differ from the general guidance.
If you’d like to explore more about language settings across Android and iPhone, you can review the official Android support articles and related resources that cover language and input configurations, as well as Google’s guidance on Google app language settings. Browsing these sources can confirm your device’s exact route and help you understand how to apply the changes smoothly. For instance, the Android language settings and related topics are detailed here: Change your language on the web – Android. Additional insights on adjusting language within Google apps and services can be found here: Change your display language on Google – Android. Finally, for guidance on setting multiple languages and interacting with Google Assistant in different tongues, see Change your language or use multiple languages – Android.
In sum, whether you’re using Android or iPhone, you can tailor your device’s language to your needs with a few taps. The key is to locate the correct system area, add any new language, and set the preferred order. With the right setup, your smartphone becomes more intuitive and aligned with how you use it every day. If you want, you can share your device model and OS version, and I’ll tailor the exact path to your phone.
Choose Language and Keyboard Settings
Setting the right language and keyboard setup is like choosing the best lens for your phone. It helps you read prompts clearly, type faster, and navigate apps without friction. In this section, you’ll learn how to pick a primary language, add or switch keyboard languages, and adjust regional and accessibility options. The goal is a smooth, personal smartphone experience that fits how you use your device every day.
Selecting the main language
Your device’s main language drives most menus, prompts, and system messages. If you’re learning a new language or simply want apps to mirror your daily rhythm, setting the primary language correctly matters.
- How to set it on most devices: Open Settings, locate Language and Region or Languages, then choose your preferred option and confirm. Some systems require you to drag the selected language to the top of the list to set it as default.
- Confirming the change: After you pick a language, the system usually reloads, and menus refresh with new text. This can take a moment, especially on older devices.
- What to expect after the change: Some apps may still display content in the previous language until they refresh in the foreground or after a restart. This is normal and usually resolves quickly.
- Practical tip: If you use multiple languages, consider keeping a secondary language handy for messaging or work apps. It’s common to switch back and forth depending on context.
If you want a quick reference for Android and iPhone, remember that Android often labels the path as Settings > System > Languages & input or Settings > General Management, while iOS uses Settings > General > Language & Region. You’ll find official guidance and model-specific notes helpful if a path seems different on your device.
For deeper guidance on Android language options and how to manage language in Google apps, see the official resources here:
- Change app language on your Android phone: https://support.google.com/android/answer/12395118?hl=en
If you plan to use multiple languages across your experience, you can also set how Google Assistant responds in different languages:
- Change your language or use multiple languages – Android: https://support.google.com/assistant/answer/7394513?hl=en&co=GENIE.Platform%3DAndroid
Key takeaway: making the main language your default reduces friction in daily use. It’s the foundation before you fine tune keyboards and regional formats.
Adding or switching keyboard languages
Typing in your preferred languages should feel effortless. Most smartphones let you add several keyboards and switch between them with a quick gesture or shortcut.
- How to add languages: In Settings, go to Language and Input or on-screen Keyboard. Add the languages you want to support. Some keyboards, like Gboard, let you install multiple languages directly through the keyboard’s settings.
- Switching between keyboards: You’ll usually see a globe icon or a dedicated language shortcut on the keyboard. Tapping it rotates through your enabled keyboards. On some devices you can long-press the space bar to switch languages quickly.
- Quick toggles and shortcuts: Glove-friendly options include Ctrl Space on a physical keyboard or a dedicated button on the on-screen keyboard. These toggles save time when you mix languages in messages, notes, or emails.
- Impact on autocorrect and suggestions: Each language has its own autocorrect rules and vocabulary. When you switch languages, you’ll notice changes in word suggestions and spelling corrections. If you frequently switch, enable auto-switch for the current keyboard to keep suggestions relevant.
If you’re using Android, you’ll often find keyboard language management under Settings > System > Languages & input > On-screen keyboard > Gboard (or your keyboard of choice). For Samsung devices, you can add a second language via Settings > General Management > Language and input > On-screen keyboard > Samsung Keyboard. Quick-step guides are available from device-specific support pages and can save you time when setting up new phones.
- Android quick reference: Type in a different language – Android Gboard Help: https://support.google.com/gboard/answer/7068494?hl=en&co=GENIE.Platform%3DAndroid
- Samsung keyboard setup: Adding a second language to the keyboard: https://www.samsung.com/au/support/mobile-devices/adding-second-language-to-keyboard/?srsltid=AfmBOoohtvt0jGT2bvSAfC5eo-JUOA4d0991bbZYaXb0-RWEZeeEN4j6
Want a faster way to switch languages on the fly while typing? Some devices support a long-press on the space bar or a dedicated globe button to cycle through enabled keyboards. Practice a few taps, and you’ll keep your message flow smooth without hunting through menus.
Central formats and voice options
Language choice reaches beyond menus. It also shapes how your device formats dates, times, numbers, and currencies, which makes a big difference when you travel or work across regions.
- Regional formats: Once you pick a primary language, you’ll often lock in regional formats like date and time. If you travel, you may want to adjust Region to reflect your location for accurate formatting. This helps when you’re reading tickets, itineraries, or reservations.
- Voice assistants and speech: Language settings extend to voice features. If you use a voice assistant, confirm it speaks in your chosen language and that speech recognition is tuned for your accent. Some devices let you run multiple language profiles for assistants or set one primary language for speech to text.
- Practical example: If you live in Taiwan and frequently switch between Traditional Chinese and English, set the display language to Chinese while using English for keyboard input and certain apps. This balance keeps prompts readable while preserving your preferred typing experience.
To explore official guidance on regional formats and voice options, check these resources:
- Change your language on the web – Android: https://support.google.com/accounts/answer/32047?hl=en&co=GENIE.Platform%3DAndroid
- Change your display language on Google – Android: https://support.google.com/websearch/answer/3333234?hl=en&co=GENIE.Platform%3DAndroid
- Change your language or use multiple languages – Android: https://support.google.com/assistant/answer/7394513?hl=en&co=GENIE.Platform%3DAndroid
Take note of how your device presents dates, times, and numbers after you switch languages. If you rely on voice commands or dictation, run a quick test to confirm accuracy and adjust as needed.
Accessibility language settings
Language settings also support accessibility, helping readers and listeners engage with content more comfortably.
- Text to speech language: Choose the voice for screen readers and spoken prompts. Matching the text to your preferred language helps ensure correct pronunciation and understanding.
- Display language for accessibility: Some devices offer dedicated accessibility options that allow you to keep navigation in one language while reading content in another. This separation can reduce confusion for bilingual users.
- Practical benefit: For users with reading difficulties, targeted display and speech options can make menus, notifications, and app prompts easier to follow.
If you want targeted help with accessibility options, consult the built-in accessibility guide for your device model. You’ll often find language-specific voice and display settings that complement your overall language setup.
Key accessibility tip: Run a quick test by turning on screen reader features and listening to a few prompts. If the pronunciation feels off, adjust the TTS language to align with your reading preferences.
In this section you’ve learned how to choose a main language, manage keyboards, and align regional and accessibility options. With these settings in place, your smartphone becomes a more reliable tool that supports how you work, travel, and stay connected.
Sources and practical references:
- Android language settings and related topics: https://support.google.com/accounts/answer/32047?hl=en&co=GENIE.Platform%3DAndroid
- Google app language settings: https://support.google.com/websearch/answer/3333234?hl=en&co=GENIE.Platform%3DAndroid
- Multiple languages and Google Assistant: https://support.google.com/assistant/answer/7394513?hl=en&co=GENIE.Platform%3DAndroid
If you’d like more precise steps tailored to your exact device model and OS version, tell me your phone brand and current OS, and I’ll tailor the paths to match your setup.
Manage App Language and Regional Behavior
Setting language at the app level can dramatically improve readability and usability. When apps support per‑app language, you can read prompts in one language while keeping system text in another. This section explains how per‑app language works on Android and iPhone, what to do if an app doesn’t support it, and practical tips to keep your device’s regional formats aligned with your needs. Whether you’re traveling, studying, or bilingual at work, these options help you tailor your experience without sacrificing convenience.
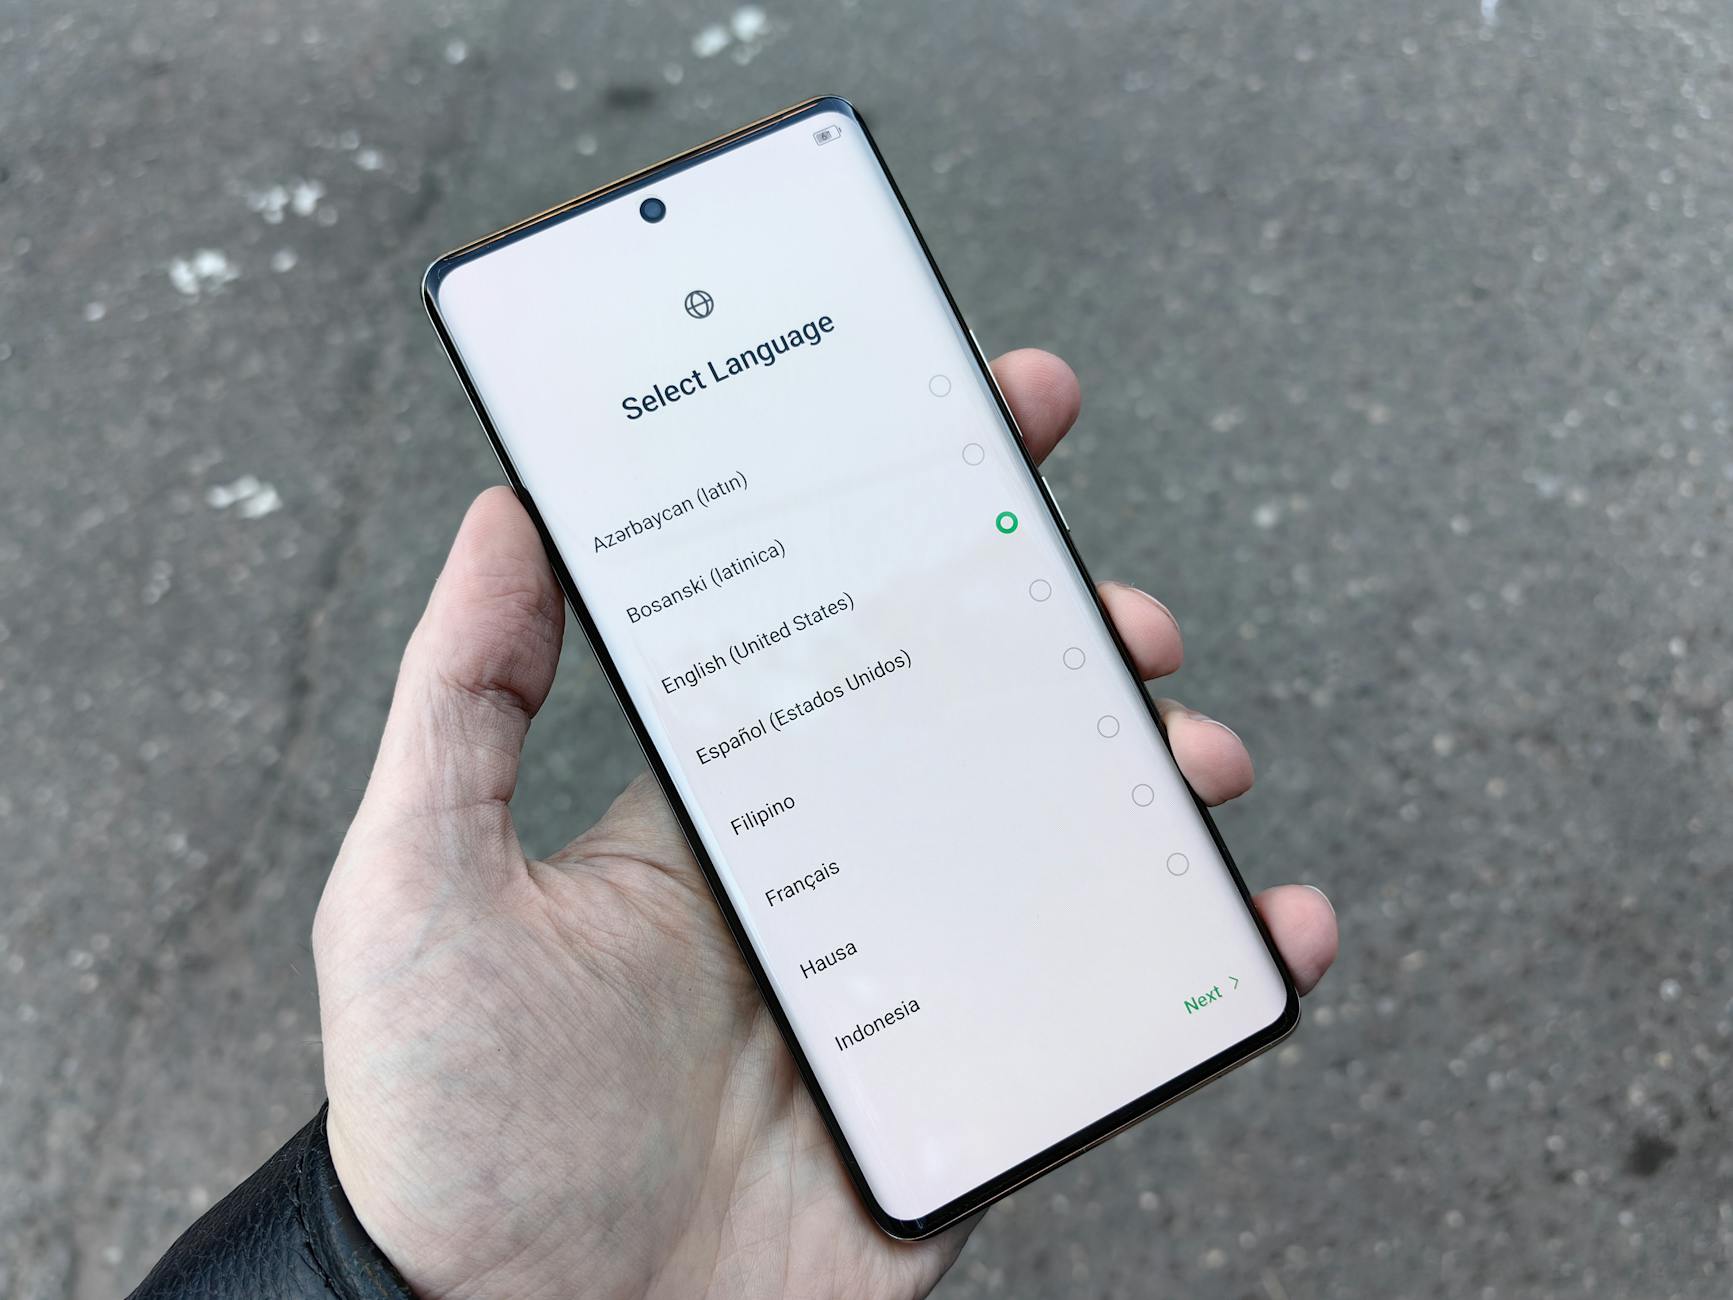 Photo by Andrey Matveev
Per app language options on Android
Android 13 and newer introduce a centralized way to set languages for individual apps, making it easier to run some apps in one language while keeping the rest in another. Here’s how to access and use these options on most devices:
- Locate the per‑app language settings: open the Settings app, then choose System or General Management, and look for Languages & input or Apps with language preferences. Some devices expose per‑app language directly under Settings > Apps > [App] > Language.
- Enable and prioritize: select the app you want to customize, pick a language from the list, and confirm. Android 13+ typically lets you set a different language for that app than the system default.
- Common workflow: after selecting a language, restart the app to ensure the new text is loaded. If you don’t see the change, a device restart or updating the app can help.
A quick reference for common paths:
- Settings > System > Languages & input > Per‑app language (Android 13 and newer)
- Settings > General Management > Language for apps (varies by brand)
If you want to explore official guidance, see Google’s resources on per‑app language preferences. Practical pointers and examples are here:
- Per‑app language preferences – Android Developers: https://developer.android.com/guide/topics/resources/app-languages
- Change your language or use multiple languages – Android (Google Assistant): https://support.google.com/assistant/answer/7394513?hl=en&co=GENIE.Platform%3DAndroid
Tips to remember
- A per‑app language is a great way to keep work apps in your preferred language while enjoying media in another.
- Some apps may still show content in the device’s primary language until they refresh or restart.
- Use this feature alongside keyboard language options for a smoother typing experience across languages.
Per app language options on iPhone
iOS handles per‑app language in a slightly different way. Availability depends on iOS version and app support. When available, you can set a specific language per app, or rely on a system level language that the app respects.
How to check per‑app language on iPhone:
- Open Settings and browse to the app you want to customize. If the option exists, you’ll see a Language entry or a dedicated per‑app language setting.
- Alternatively, some apps expose a language choice within their own settings screen, independent of iOS system settings.
Note that not all apps support per‑app language, and the feature may appear only on newer iOS releases or for certain app families. If you don’t find a per‑app option, you can still influence app behavior by setting the device language and region, then rechecking the app after updates.
For a concise overview, you can refer to Apple’s guidance on language and region settings and how to reorder languages as needed.
What to do if an app does not support its own language
Sometimes an app doesn’t offer a per‑app language option. In that case, you can still tailor your experience with a few practical workarounds:
- Use the system language: set your device language to your preferred one. Many apps will mirror the system language by default.
- Restart the app: close the app completely and reopen it after changing language settings. This helps the app pick up the new language pack.
- Reinstall the app: removing and reinstalling can trigger an update to language resources if the app fetches them on first launch.
- Accept the default: some apps are designed with a fixed language chosen by the developer and do not offer a language toggle. In this case, you’ll see content in that fixed language across sessions.
If you want to explore deeper options for Android language behavior, you can check developer guidance and support pages. Examples and official articles provide paths that differ by model and OS version:
- Android language settings and related topics: https://support.google.com/accounts/answer/32047?hl=en&co=GENIE.Platform%3DAndroid
- Change app language on your Android phone: https://support.google.com/android/answer/12395118?hl=en
- Per‑App Language Preferences – Part 1 (Android): https://android-developers.googleblog.com/2022/11/per-app-language-preferences-part-1.html
Important takeaway: even when an app cannot switch languages on its own, you can often influence your overall experience by aligning the system language, updating apps, or reinstalling when needed. This keeps your workflow smooth and predictable across apps and conversations.
Images and quick notes
- If a particular app supports only one language, your best bet is to rely on the system language for that app and use per‑app language for others when available.
- When traveling or using a shared device, test the language settings with a few typical tasks like messaging or a headline feed to confirm the setup works as you expect.
To learn more about regional formats and voice options that accompany language choices, see these resources:
- Change your language on the web – Android: https://support.google.com/accounts/answer/32047?hl=en&co=GENIE.Platform%3DAndroid
- Change your display language on Google – Android: https://support.google.com/websearch/answer/3333234?hl=en&co=GENIE.Platform%3DAndroid
What to expect after changing language settings
Once you set a new language, expect some prompts to refresh or reload. This usually happens automatically, but on older devices a quick restart can speed up the process. If you mix languages, you may notice different apps switching at different times. That’s normal and simply means you’re tailoring your device to your daily setup.
One practical tip is to test key tasks in your new language setup. Open messages, calendar entries, and a couple of apps to confirm that formatting and terminology feel natural. If something seems off, return to the language settings and adjust as needed.
In the next section, we’ll look at choosing a language and keyboard setup that makes typing and navigation even easier. You’ll see how the right combination of system language and keyboard layouts keeps you productive without sacrificing readability.
Sources and practical references:
- Android language settings and related topics: https://support.google.com/accounts/answer/32047?hl=en&co=GENIE.Platform%3DAndroid
- Google app language settings: https://support.google.com/websearch/answer/3333234?hl=en&co=GENIE.Platform%3DAndroid
- Multiple languages and Google Assistant: https://support.google.com/assistant/answer/7394513?hl=en&co=GENIE.Platform%3DAndroid
If you’d like more precise steps tailored to your exact device model and OS version, share your phone brand and current OS version, and I’ll tailor the paths to match your setup.
Troubleshooting and Quick Tips
When language settings behave oddly, a calm, methodical approach wins. This section provides practical, bite sized guidance to keep your smartphone speaking the way you want. You’ll find actionable steps, quick checks, and reliable references to verify your path. Think of it as your short, high impact troubleshooting toolkit for language and input behavior.
Language does not change after update or restart
A language change should stick, but updates or restarts can sometimes leave prompts in the old tongue. Here’s how to verify and fix it quickly.
- Confirm the change in both system language and keyboard language. Sometimes you’ll need to set the primary language and then separately configure keyboard languages. If the system shows the new language everywhere but the keyboard, adjust the keyboard settings specifically.
- Restart apps. Some apps cache language data. Close them completely, then reopen to apply the new language pack.
- Reboot the device. A full restart helps the system reload language resources and apply the new configuration cleanly.
- Check for pending OS updates. A missing update can cause language resources to fail to load properly.
What to do next if it still acts up
- Open Settings and look for any pending updates. Apply them and test again.
- If the issue persists, try a light reset of app preferences or a full device reset only after backing up data. Major fixes can reset language preferences, so proceed with caution.
- When you need deeper help, reference guides from Google and Apple that describe language and input configurations for your exact device. For example, Android users can review how to Change app language on your Android phone, while iPhone users can follow the Language & Region guidance from Apple.
Helpful references
- Change app language on your Android phone
- Change your language or use multiple languages – Android
Takeaway: if you’ve updated OS or restarted the device, a quick double check across system and keyboard language, plus a restart of affected apps, fixes most hiccups.
Some apps keep old language
Apps don’t always mirror the system language instantly. They may keep cached language data, or load resources in a slightly different cycle. Here’s how to align them with your preferred language.
- Clear app cache and data. This forces the app to fetch fresh language resources from the server or local pack on next launch.
- Update the app. Developers push language packs with updates; keeping apps current reduces misalignment.
- Reinstall the app. If the language still lags, reinstalling can trigger a clean language install on first start.
- Verify per app language settings. If the app offers its own language option, set it to match your system language or choose a preferred alternative.
What to do if the app lacks an internal language option
- Rely on the system language. Many apps default to the device language unless they store their own setting.
- Close and reopen the app after changing the device language. Some apps don’t refresh until they’re relaunched.
- Consider reinstalling the app. A fresh install can pull in the latest language resources that match your device.
Practical tips
- When using multiple languages, keep a couple of apps that you frequently use in each language. It’s common to see watchful delays in some apps while others switch smoothly.
- If you rely on a specific keyboard for typing, ensure the keyboard language is aligned with the app language for a consistent experience.
Useful resources
- Per app language preferences for Android and related guidance
- Per‑app language preferences – Android Developers
- https://developer.android.com/guide/topics/resources/app-languages
- General Android language and app guidance
- Change app language on your Android phone
- https://support.google.com/android/answer/12395118?hl=en
Key takeaway: expect some apps to lag behind system language briefly. A quick cache clear or update usually resolves it.
When to reset or update firmware or OS
If you still struggle after the basics, a more thorough solution may be a firmware or OS update. This is a bigger step, so approach with caution.
- Back up data first. A reset or major update can affect files and settings.
- Only reset or update when other fixes fail. Consider this a last resort after trying smaller tweaks.
- Major updates can reset language preferences. After the update, reconfigure your preferred language settings.
- Follow device specific guidance. Brand and model differences matter, so use official support pages to guide exact steps.
Before you proceed
- Ensure you have enough battery or keep the device plugged in during the process.
- Confirm you have a stable internet connection for the update.
- Verify that you’re applying the correct update for your exact model and region.
If you want reassurance from official sources, you can check Android and iPhone guidance on language and region behavior, which often includes notes about how updates can influence language settings.
References and further reading
- Android language settings and related topics
- Google assistant and language settings
Important note: backing up data is essential. A firmware or OS reset is a powerful fix, but it comes with the risk of data loss if you haven’t saved important items.
What you’ll gain after a successful update
- A clean slate where language choices apply consistently across system and apps.
- Stronger alignment between regional formats and your location or travel needs.
- A smoother typing and input experience as keyboards and language packs refresh.
Final pointers
- If you’re unsure about the exact steps for your device, share your brand and model with me. I’ll tailor the update or reset path to match your setup.
- After any reset or major update, re-check all language and region preferences. A few minutes here save hours of confusion later.
External references for deeper reading
- Android language settings and related topics
- Per‑app language preferences and related guidance
- Change your language or use multiple languages – Android
If you want, I can tailor these steps to your exact device model, OS version, and carrier. Just share your phone brand and current software version.
Quick Start Guide and Real World Scenarios
This section helps you move quickly from setup to practice. You’ll get a fast path to change language and keyboard for travel, plus real world situations that show how these tweaks make daily tasks easier. Whether you’re planning a trip, teaching family members, or just trying to read menus more clearly, these practical steps keep your smartphone tasks smooth and predictable.
Two minute setup for travelers
When you’re abroad or moving between regions, a quick language and keyboard setup pays off fast. Here’s a fast path to get you moving in minutes:
- Set the display language first: open Settings, find Language and Region (Android) or Language & Region (iPhone), and choose your preferred option. Drag it to the top (Android) or confirm (iPhone) to apply.
- Add a second keyboard: in the keyboard settings, enable the languages you’ll type in. A quick globe icon or space bar gesture lets you switch languages on the fly.
- Review regional formats: adjust date, time, and currency formats to match your travel location. This helps with tickets, itineraries, and receipts.
Why this matters: regional formats and keyboard layouts influence not just prompts but how you read maps and navigate apps. If you rely on mapping or transit apps, keep the local language for prompts while using your home language for tips and notes. For reference, see Apple’s guidance on language and region settings and how to reorder languages for quick switching, which helps when you’re jumping between places. You can also fine tune Google app language settings to ensure maps and search results appear in the right tongue.
Practical tip: test a couple of tasks before you travel. Send a quick message, check a map, and open a calendar entry in the new setup. If something feels off, adjust the keyboard language or regional format. Handy article links for quick reference include Apple’s Language & Region guidance and Android’s language management steps.
- Apple: Change the language and region on iPhone https://support.apple.com/guide/iphone/change-the-language-and-region-iphce20717a3/ios
- Android: Change a language or add one for your device https://support.google.com/accounts/answer/32047?hl=en&co=GENIE.Platform%3DAndroid
- Android: Change app language on your Android phone https://support.google.com/android/answer/12395118?hl=en
Two quick checks you can perform right after this setup:
- Open a map or transit app and confirm directions appear in the correct language.
- Type a short message in a second language to confirm the keyboard switch works smoothly.
Takeaway: a two minute setup sets you up for smoother travel, fewer misreads, and faster input while you’re on the move.
Language tips for families and kids
A shared language setup helps the whole household stay aligned, while kids learn by exploring different keyboards. Here’s a practical way to balance family use and learning:
- Keep a household device in a single, familiar language. This reduces confusion for parents and younger members when reading system prompts or instructions.
- Let kids experiment with keyboard switching. Allow them to add and switch between keyboards, which reinforces vocabulary through real typing practice.
- Enable accessible reading options. Increase font size, enable high contrast, and use screen reader language that matches the family’s needs.
In practice, you can assign one device to a single primary language for family routines, then let kids toggle keyboards for spelling games or language exercises. This approach helps children connect words with sounds while staying comfortable with the main device language. For families sharing a device, coordinated language settings reduce miscommunication and make prompts easier to follow.
Helpful pointers to consider:
- Keyboard management remains quick with a globe icon on the keyboard. A quick tap cycles through languages, making bilingual messages easier.
- Autocorrect adapts to each language. When kids switch languages, the suggestions change accordingly, which aids learning and accuracy.
- Accessibility settings shine here. Larger text and high contrast improve readability for readers of all ages.
If you want an official reference on per app language and accessibility features, explore the linked guidance for Android and iPhone. It helps you tailor language behavior to a family setting while preserving a smooth experience for younger readers.
- Android per-app language preferences: https://developer.android.com/guide/topics/resources/app-languages
- iPhone per app language concept: see Apple language guidance in the linked Apple article above
Key takeaway: a family-friendly setup centers readability and learning. Keep one device in the primary household language and let kids explore keyboards to build confidence with new words.
Accessibility and readability best practices
Language settings influence how accessible your device is and how easy it is to read. Here are best practices to boost readability and make language choices a practical tool:
- Font size and legibility: increase text size for menus, notifications, and app prompts. A comfortable font size reduces eye strain and speeds comprehension.
- High contrast: enable a high contrast theme to sharpen text against backgrounds. This helps in bright outdoor conditions and for readers with visual challenges.
- Screen reader language: align the TTS (text-to-speech) language with the display language so spoken prompts sound natural. When the spoken word matches written text, understanding improves immediately.
- Consistency across formats: after changing language, review dates, numbers, and currency formats so they align with the region you’re in. This reduces surprises in receipts and tickets.
These adjustments are not about fancy features. They’re about making reading and navigation effortless, especially for travelers, students, and older readers. When you pair accessibility with the right language settings, your device becomes easier to use every day.
Practical examples:
- If you’re traveling in a non-native language, set the device display to your own language while leaving maps and translation apps in the local language. This helps you read prompts while understanding local signs.
- For screen reader users, test a few prompts in your chosen language to confirm pronunciation and cadence feel natural.
Useful resources for deeper settings and verification:
- Android accessibility settings and language options: https://support.google.com/accounts/answer/32047?hl=en&co=GENIE.Platform%3DAndroid
- Apple accessibility and language features: Apple’s guidance on accessibility settings
Key takeaway: accessibility improvements are not extra features; they make language choices practical and comfortable for everyone.
Real world earners of time and confidence
- Quick travelers benefit from faster onboarding and fewer confusion moments at airports, hotels, and transit hubs.
- Families gain smoother shared-device use and more confident language exploration for kids.
- Readers with visual or cognitive considerations get clearer text, better contrast, and reliable screen reader behavior.
External references for deeper reading
- Android language settings and related topics https://support.google.com/accounts/answer/32047?hl=en&co=GENIE.Platform%3DAndroid
- Per-app language preferences and related guidance https://android-developers.googleblog.com/2022/11/per-app-language-preferences-part-1.html
- Change your language or use multiple languages – Android https://support.google.com/assistant/answer/7394513?hl=en&co=GENIE.Platform%3DAndroid
If you’d like, share your device brand and OS version and I’ll tailor these steps to match your exact setup.
Conclusion
Changing your phone’s language is a quick, straightforward upgrade to daily use. In short, open Settings, locate Language and Region, add or pick a primary language, and adjust the keyboard if needed. A few taps on your smartphone can make prompts, maps, and messages easier to read and navigate. Try the steps above, and share your tips or questions in the comments to help others on the same path.