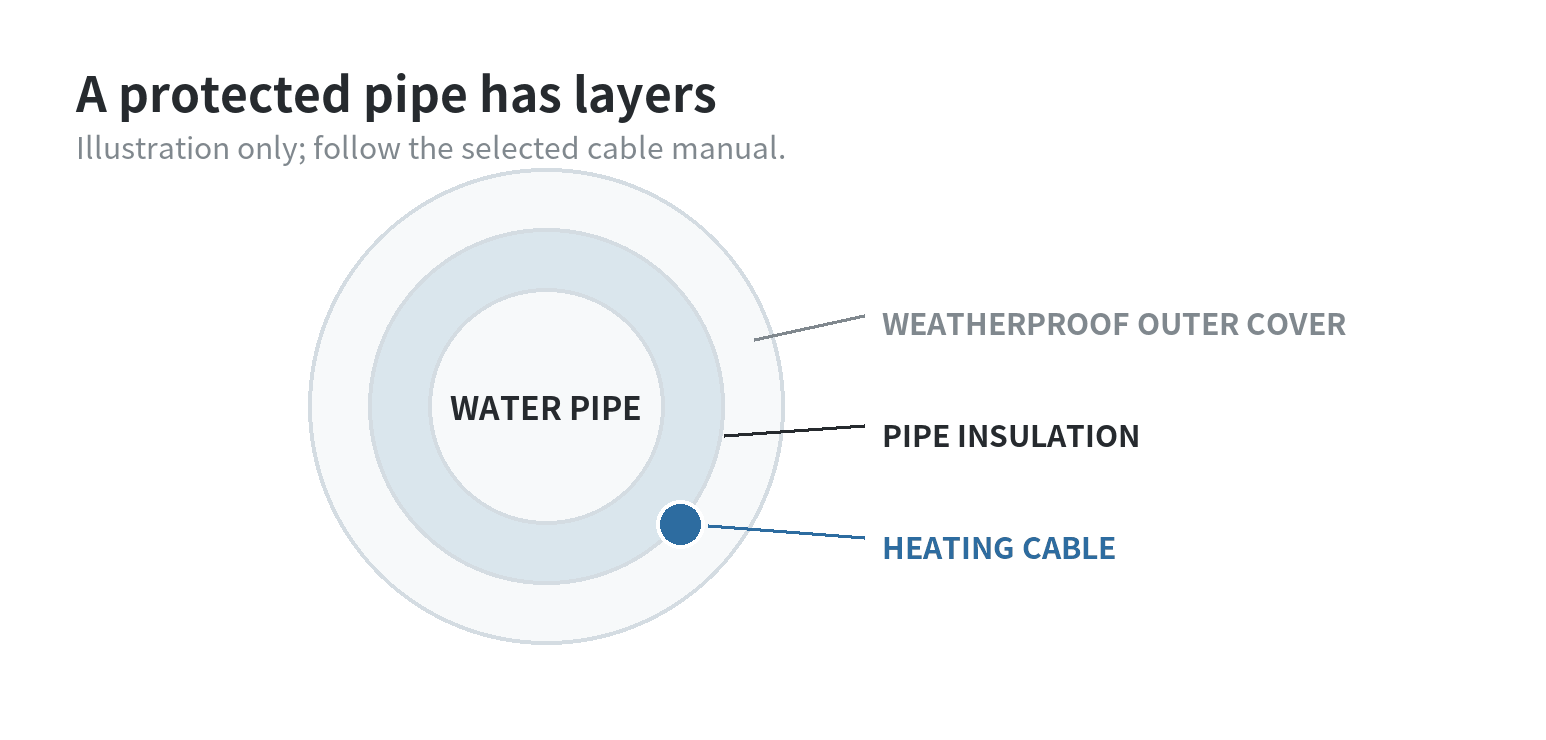
Start with the exposed pipe, its material, and the coldest conditions it faces. Foam insulation slows heat loss;
a pipe heating cable adds controlled heat when the cable is approved for that pipe and installed exactly as its manual directs.
A vulnerable run in an unheated crawl space or garage may call for both insulation and a compatible cable.
Find the cold path before choosing materials
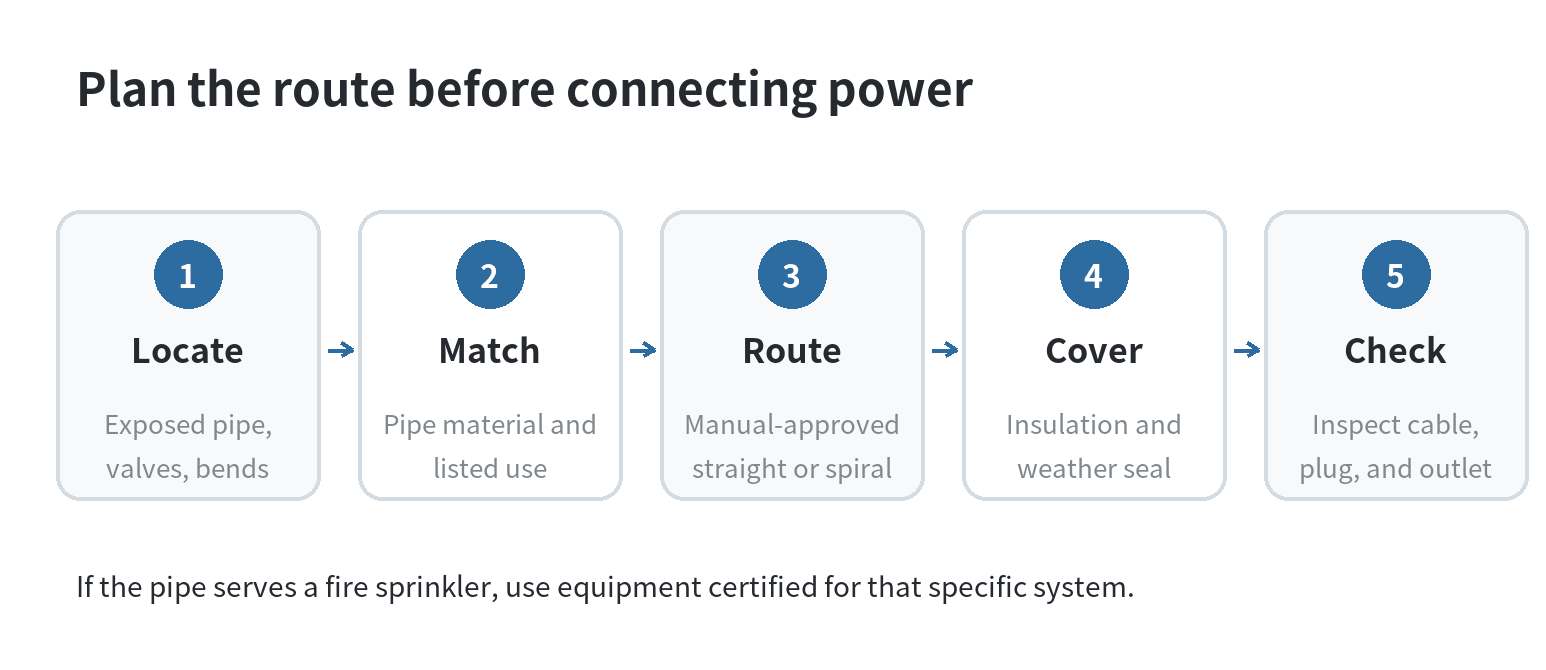
Trace the water line from the heated part of the house toward the exterior. Mark sections in an attic, crawl space, garage, basement, or near a wall opening.
Also note elbows, valves, tees, and the pipe material. Those details affect how insulation fits and whether a cable manual permits the route.
Look for gaps where outdoor air reaches the pipe. Air sealing a penetration and insulating the line address different parts of the problem:
sealing limits drafts, while pipe insulation slows heat transfer through the pipe assembly. Keep access to shutoff valves, drain points, and equipment labels.
Do not bury a fitting that you may need to inspect or operate.
A simple foam sleeve can fit a straight, accessible pipe.
Measure the pipe’s outside diameter and the full run, then check that the sleeve is intended for that pipe size and location.
A split seam should close along its full length.
At elbows and tees, use compatible fittings or cut the sleeve so the joint remains covered without leaving a large opening.
The U.S.
Department of Energy’s Building Science Education page on pipes in exterior walls, checked October 16, 2026,
says to match the pipe’s outside diameter with the sleeve’s inside diameter for a snug fit.
It also recommends air-sealing wall cavities around pipes and placing cavity insulation behind the pipe when the line must run in an exterior wall.
That detail matters: a warm room on one side of the wall does not prevent cold air from moving through an unsealed cavity.
Know what insulation can and cannot do
Insulation does not generate heat.
It slows heat moving between the pipe and surrounding air, so it cannot by itself make a pipe warm indefinitely in a space that stays below freezing.
It also cannot correct a strong cold-air leak or a section of pipe left uncovered. The U.S.
Department of Energy describes pipe insulation as a way to reduce heat loss from hot-water pipes;
for freeze protection, the practical question is whether the full pipe assembly is suited to the site conditions.
Check the package for pipe material compatibility, indoor or outdoor use, temperature range, and whether the insulation is rated for the intended exposure.
A product intended for an indoor plumbing run may not be suitable where rain, condensation, sunlight, or physical damage can reach it.
Keep insulation away from appliance vents and components where the appliance instructions require clearance.
For an outdoor section, think through the whole route rather than just the easy straight portion.
Fittings, supports, and wall entries can leave small bare areas if the sleeve ends short or shifts.
A protective outer covering can help keep the insulation assembly in place and shield it from weather, but it must suit the insulation and cable system.
Do not seal in moisture or cover an access point that needs inspection.
When a heating cable belongs in the plan
A cable is a separate electrical heating system, not an insulating wrap.
It may be useful on a vulnerable run where passive insulation alone does not provide the design protection, but cable type matters.
Read the label and manual before treating a cable as suitable for a water pipe:
the permitted pipe materials, cable length, wattage, installation pattern, thermostat, and insulation requirements vary by model.
The SRP cable installation manual, checked October 16, 2026, calls for the pipe to be dry, the cable jacket to be protected from sharp surfaces,
and the cable to be attached with approved materials. Its drawing shows a cable on the lower half of the pipe for a straight run;
the manual also provides its own spiral method. These are instructions for that system, not a universal pattern.
Use the route and spacing in the manual for the exact cable in hand.
Do not overlap or cross cable unless the specific manual explicitly permits it. Avoid pinching it under clamps, sharp edges, or tight bends.
Do not shorten, splice, or alter a preassembled cable unless its instructions allow that work.
If the line has valves or fittings, check how the manufacturer handles those shapes instead of improvising extra loops.
Before laying out the cable, compare the cable length with the pipe run and the manufacturer’s diagram.
Mark the start, finish, branches, and fittings on a quick sketch. The cable may need to pass a valve in a specified pattern or leave a fitting clear.
If the route cannot be completed without crossing, doubling, or cutting the cable, stop and confirm an approved layout rather than forcing a fit.
Check the cable, insulation, and power as one system
Before covering the cable, inspect its jacket and connections for damage.
The SRP manual specifies weatherproofed insulation for its system and instructs installers to inspect the cable before adding insulation.
It also states that its product’s power connection depends on the particular voltage model.
Follow the manual for your cable’s voltage, grounding, overcurrent protection, and any ground-fault protection;
do not select an outlet or breaker based on a different model’s instructions.
Do not assume that “self-regulating,” “thermostat controlled,” or “UL” on a package removes the need to check the complete label and installation instructions.
The certification body explains that certifications cover specific end uses.
Its guidance for fire-sprinkler pipe says equipment needs certification for that particular application;
a cable listed for ordinary plumbing does not automatically qualify for a sprinkler system.
Have sprinkler piping handled under the applicable fire-protection requirements.
Once installed, keep any caution label visible where the manual calls for one. Record which line the cable serves, where its connection is, and which manual applies.
That helps a future owner or repair technician identify that electrical heat tracing is present before cutting or replacing pipe insulation.
Decide whether the job is a sleeve, a cable, or a pro
| Pipe situation | Useful next step |
|---|---|
| Straight indoor section with compatible pipe size | Fit a correctly sized insulation sleeve and close seams. |
| Cold, exposed run where the cable manual lists the pipe | Plan the cable route, insulation, and power using that manual. |
| Wet, damaged, inaccessible, or unusual pipe | Repair or identify the pipe before adding electrical heat. |
| Fire sprinkler line or hardwired connection | Use a qualified professional and equipment approved for that system. |
If you cannot identify whether a pipe is copper, PEX, PVC, or another material, pause before installing cable.
A manual may exclude a material or require a particular arrangement.
The same applies when the cable is too long, the run has several branches, or the outlet and electrical protection are uncertain.
An electrician or plumber can match the cable and connection to the actual line.
Prepare the line before the next cold spell
Check exposed pipes before freezing weather, while the line is dry and accessible.
Replace crushed or split insulation, close open seams, and look for water entry at the outer cover.
If a cable is installed, inspect visible sections and the plug or connection for wear, then test it only as its manufacturer specifies. Do not energize a damaged cable.
Keep the shutoff location clear and know how to turn off water to the affected branch.
If a pipe has already frozen, adding insulation or switching on an unfamiliar cable does not resolve the blockage. Avoid open flame or improvised high heat;
call a plumber if you cannot safely locate the frozen section or if the pipe shows a leak or damage.
FAQ
Can pipe insulation go over a heating cable?
Only when the cable manufacturer permits the insulation type and thickness. The SRP manual specifies insulation requirements for that system;
another cable may have different limits. Keep labels and connection points accessible as directed.
Can one cable work on metal and plastic pipe?
Some cable systems list more than one pipe material, while others have restrictions.
Confirm the exact model’s instructions and the pipe material before installation.
Does UL listing mean any cable can go on sprinkler pipe?
No. The certification body says sprinkler systems require trace-heating equipment certified for that specific application.
Ask a fire-protection professional to verify the system requirements.
Last updated: October 2026
Last updated: 2026-10