
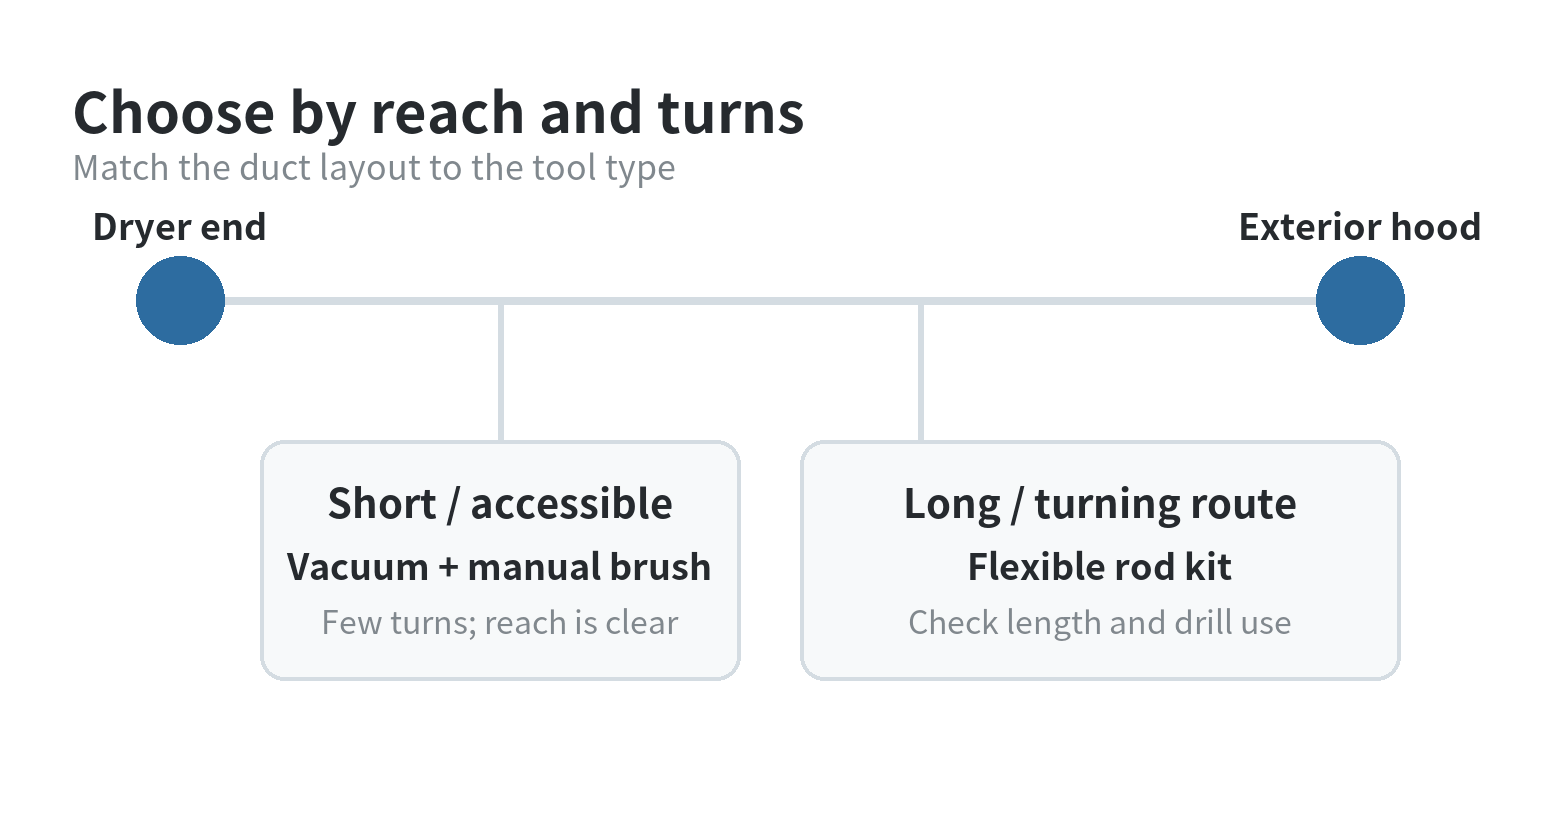
A practical dryer-vent cleaning setup is a vacuum hose plus a flexible brush kit matched to the vent’s length and turns. Short, straight runs can use a manual brush.
Longer runs or routes with several turns are easier to reach with threaded flexible rods. The product pages linked below list lint-removal kits, drill-powered brush kits, small-duct kits, and separate brushes, so the useful comparison is tool design—not brand or review score.
What the tool needs to reach
A dryer vent has more than one cleaning point: the lint-screen housing, the duct behind the dryer, and the exterior exhaust opening. The official cleaning guide recommends a vacuum for the opening behind the dryer and says a vent kit or brush is an alternative when the duct is too long for a vacuum alone. Its cleaning sequence also starts by disconnecting the duct and ends by reconnecting it.
Before choosing a kit, note whether the dryer is electric or gas, whether the vent exits through a wall or roof, and how much room exists behind the appliance. For a gas dryer, follow the appliance manual before moving or disconnecting the unit. A tool cannot compensate for a crushed duct, a blocked exterior hood, or a vent route that needs repair.
Access determines the useful starting point. A rear connection that is visible from the floor favors a vacuum and a short brush. A duct that disappears into a wall favors a flexible system that can be withdrawn without leaving a brush head behind. If the exterior hood is the only practical opening, choose a tool that can be controlled from that side and keep the appliance manual nearby.
Three tool types in the official catalog
| Tool type | Best fit | Check before using |
|---|---|---|
| Vacuum attachment and lint brush | Lint-screen housing, the area around the dryer, and short accessible sections | Vacuum connection, opening size, and whether the hose can reach without kinking |
| Manual flexible brush | Short runs where you can work from the dryer end or exterior hood | Brush diameter, rod flexibility, and access to both ends |
| Rod-and-brush kit | Longer runs or ducts with turns that need more reach | Rod length, turning radius, drill requirement, and the duct material |
The catalog includes a lint-removal kit with a duct brush, a lint-trap brush, and a vacuum attachment. It also lists a drill-powered kit that extends to 8 feet with flexible rods, and a small-duct kit with two 2-foot extension rods. These are catalog specifications, not a promise that every kit fits every vacuum or vent layout: the lint-removal kit page, the 8-foot rod-kit page, and the small-duct kit page describe different reach and attachment designs.
These designs solve different access problems. A vacuum attachment is useful where loose lint can be captured at the opening. A manual brush gives direct feedback when you meet resistance. Flexible rods extend reach, but they also add joints that must stay tight while passing through a turn. Match the tool to the route you can actually reach, not to the longest specification on a package.
How to choose without overbuying
Start with access, not the included piece count. If the lint screen slot and the rear duct opening are easy to reach, a vacuum attachment and a slim brush may cover the job. If the duct runs farther behind a wall or makes several turns, prioritize flexible rods and a brush head that can be pushed or pulled from an accessible opening.
Next, check the cleaning direction. The official cleaning guide says to identify whether the interior or exterior opening is higher and begin brushing from the higher side so gravity helps loosen lint.
That matters when the duct is long or the debris is compacted. A kit with rods may be more practical than a short brush, but only if the rods can be assembled securely and turned without binding.
Finally, confirm the attachment method. Some kits are manual; others can connect to a cordless drill. If a drill is required, the drill is an extra tool, and the manufacturer’s instructions should control speed and use. Never force a brush around a turn or keep rotating when a rod stops advancing.
Think about where the loosened lint will go before brushing. Working toward an open, reachable end lets a vacuum collect debris as it comes out. Working into a closed section can push lint farther into the duct. A brush that fits the opening but cannot be withdrawn smoothly is the wrong match, even if its listed reach is sufficient.
Safe cleaning sequence
- Stop and isolate the dryer. Unplug it before maintenance. If it is a gas model, follow the manual’s shut-off and reconnection instructions. Whirlpool’s official procedure says to unplug the appliance and use two or more people when moving it.
- Separate the duct. Move the dryer only far enough to access the connection, then remove the clamp or tape according to the installation instructions. Do not pull on a gas line or a damaged duct.
- Vacuum loose lint. Clean the rear opening, the lint-screen housing, and the duct section you can reach. Keep the vacuum close so loosened lint is captured rather than pushed deeper.
- Brush from an accessible end. Use a manual brush for a short run or add flexible rods for more reach. Work slowly through turns, withdraw the brush, and vacuum the loosened material.
- Check the exterior hood. Remove lint around the outside opening and confirm the flap can move freely. Reconnect the duct securely. For a gas dryer, have a qualified technician handle any gas-line reconnection unless the appliance manual expressly gives a safe owner procedure.
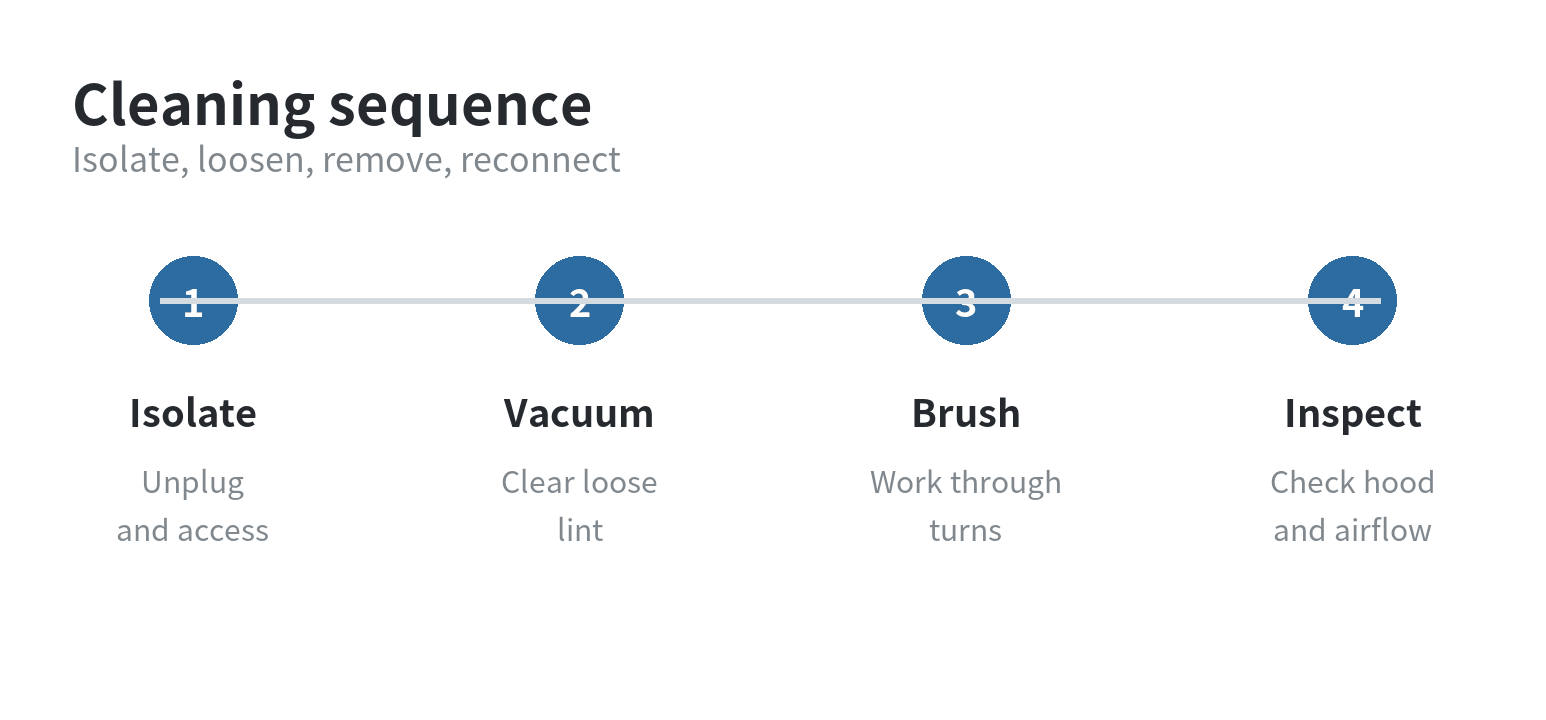
After reconnecting the duct, inspect the joint for gaps, kinks, or a loose clamp. Run the dryer only after the connection is secure.
A clean brush head does not prove that the entire route is clear. During a brief test, check that the exterior flap opens and that there is no unusual noise, odor, or visible lint escaping from the joint.
When a kit is the wrong tool
Stop and arrange qualified service when the duct is inaccessible, damaged, crushed, disconnected inside a wall, or difficult to route safely. The U.S. Fire Administration says to clean dryer ductwork every year.
Its appliance-fire guidance identifies failure to clean as the leading contributing factor in residential clothes-dryer fire ignition for 2018–2020. That percentage is a fire-reporting statistic, not a prediction for an individual home.
The Consumer Product Safety Commission also tells households to clean the dryer vent, exhaust duct, and lint screen or filter periodically. Its dryer-fire safety alert is a reason to maintain the system, not a reason to use a tool beyond its instructions.
If airflow remains poor after cleaning, have the full vent path inspected.
A kit is also a poor choice when the opening cannot be reached without unsafe lifting, roof access, or work inside a wall. In those situations, the task includes access and inspection, not just lint removal. Stop when the rod binds, the duct shifts, or the outlet remains blocked after the reachable section is clean.
What to check before selecting a kit
- Measure or estimate the accessible duct length.
- Count major turns and note whether the duct is rigid or flexible.
- Confirm the brush diameter will fit the opening.
- Check whether the kit uses a vacuum, manual handle, or drill.
- Keep the appliance manual available for shutdown and reconnection steps.
For a simple, reachable vent, choose the smallest tool set that covers the lint-screen housing and duct opening. For a longer route, choose reach and controlled flexibility. The useful decision is whether the brush can travel through the actual duct and whether loosened lint can be removed, not how many accessories are printed on the package.
FAQ
Can I clean a dryer vent with only a vacuum hose?
Use a vacuum for loose lint and accessible openings, but a brush or rod kit may be needed for a long duct or multiple turns. The official cleaning guide recommends a vacuum and describes a brush kit as an alternative when the duct is too long for vacuum access alone.
Do drill-powered dryer vent kits require a cordless drill?
Follow the kit instructions to determine whether a drill is required. Do not infer compatibility from a generic product description. Stop if the brush binds in a turn; a drill should add controlled rotation, not force.
How often should I clean the dryer vent?
Follow the dryer manual and the duct layout. The cleaning guide recommends annual dryer-duct cleaning, while appliance guidance can specify a different interval for a particular model.
Clean sooner when airflow is restricted, the exterior flap does not open properly, or the dryer shows an unusual change in operation.
What if the exterior vent is on a roof?
A roof outlet changes the access and fall-risk problem, so a consumer brush kit may not be appropriate. Use the appliance and building instructions, and arrange qualified service when the outlet cannot be reached safely from the ground.
Last updated: 2026-09