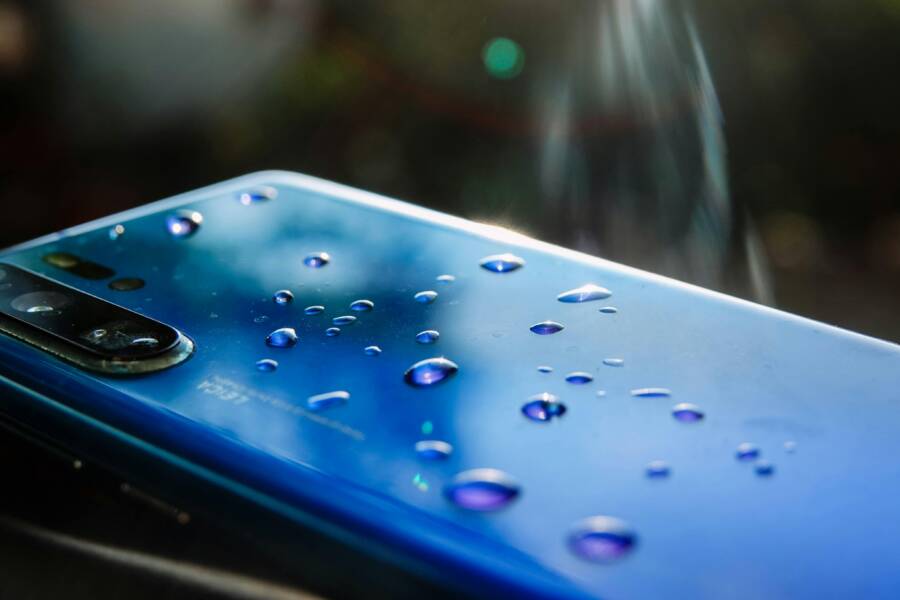
Foggy camera on a phone after water exposure is more common than you may think, and the fix often isn’t as hard as it seems. This guide walks you through fast, practical steps to dry out the device and restore clarity, with clear checks to avoid further damage.
You’ll learn what to do right away to prevent short circuits, how to use silica gel to pull moisture from the camera module, and device specific tips for iPhone and Android. By following simple, step by step actions, you can often salvage the phone camera without a costly repair.
If fogging persists after the initial drying window, the guide also highlights when to seek professional help and how to prevent future haze. The goal is a confident, action oriented path to a clean, usable camera again, so your photos stay sharp and your everyday life stays on track.
Immediate actions to stop further damage and reduce foggy lens
When your phone has been exposed to water, acting fast can save the camera from permanent haze and the device from lasting damage. This section lays out clear, practical steps you can take right away. The goal is to stop currents, wick away moisture, and set the stage for a safe dry-down. You’ll find the advice here aligned with trusted guidance and real-world best practices.
Power off right away
Turning the phone off stops electrical current from flowing through damp circuits. This simple move reduces the risk of short circuits and corrosion inside the device. Do not press other buttons or try to restart the phone during moisture exposure. Keeping the power off prevents sparks and minimizes the chance of trapped moisture turning into bigger problems later. For more on immediate steps after water exposure, see practical guides like this step-by-step rescue resource.
- Action tip: If the device is on when water hits it, power it off as quickly as possible.
- Why it matters: Electricity and moisture together can cause shorts that damage the motherboard, battery, or camera module.
Wipe the lens and exterior gently
Moisture on the lens itself can trap fog and distort photos. Use a soft microfiber cloth to dry the camera lens and the phone’s exterior. Don’t press hard or scrub the ports. Excess pressure can push water into openings or smear moisture across the lens, worsening the fog. Keeping the lens clean helps you assess how much moisture remains and whether you can see clearer as the device dries. If you want a quick reference on safe exterior drying, consult reputable how-to guides from established tech sites.
- Technique: Gently dab, don’t wipe in circles with heavy pressure.
- Why it helps: A clean lens surface makes moisture easier to spot and measure during the drying window.
Create a drying environment with silica gel
Silica gel is a reliable desiccant that pulls moisture from inside the device more effectively than rice. Place the phone in an airtight container with several silica gel packets and keep it there for 24 to 48 hours. Keep the phone upright to help moisture drain away from the camera module and other critical components. If you don’t have silica gel on hand, avoid rice as a drying agent; it’s messier and far less effective. This approach aligns with widely shared advice from trusted outlets that emphasize proper desiccation over DIY shortcuts.
- Setup: Airtight container, phone upright, silica packets surrounding the phone.
- Why silica gel over rice: Better absorption, less risk of residue getting into ports, and a cleaner drying process.
- Timing: 24 to 48 hours is typical, depending on how much moisture remains.
What not to do during drying
Drying a phone requires patience and restraint. Some actions can make the problem worse or cause new damage. Avoid heat sources like hair dryers or ovens, as high heat can warp plastics or push moisture deeper. Do not shake the phone in an attempt to loosen water. Do not insert objects into ports in a frantic effort to clear them. And most importantly, don’t power the device on too soon. Let the drying process proceed and reassess after the recommended window. If the fog persists after several days, professional help may be needed to safely open and dry the interior.
- Important don’ts: No heat, no shaking, no improvised tools, no premature power-ons.
- What to watch for: If you notice odd behavior after the drying window, such as persistent fog or audio/video issues, seek expert assistance.
External resources offer additional practical checks and reminders about safe drying methods. For example, reputable outlets recommend avoiding the rice myth and focusing on proper moisture removal strategies. You can read more about the recommended approach here.
- Learn more about safe drying practices from experienced repair guides: What to Do If Your Phone Falls in Water: A Step-by-Step Rescue Guide
- See a concise discussion on the rice myth and safer alternatives: Phone wet? Skip the rice. Do this instead to dry your device
- For a broader rescue perspective, including do’s and don’ts, explore this coverage: Here’s the Right Way to Rescue a Soaking Wet Smartphone
By following these steps, you reduce the risk of further damage and improve the odds of restoring camera clarity as the device dries. If fog reduces after the drying window but returns later, or if you notice performance issues, professional service may be the prudent next move. For more detailed guidelines on when to seek help, consider exploring manufacturer and repair resources.
Drying duration and how to know if the fog is gone
After a water exposure, the big question is how long moisture will stay inside the camera housing and when you can expect the fog to disappear. The drying window depends on the amount of moisture, the device model, and how well you manage the drying environment. Patience matters here because rushing the process can trap moisture inside and raise the risk of short circuits or corrosion. Below you’ll find practical guidance to estimate drying time, confirm clarity returns, and avoid guesswork that could cost you a camera module.
 Photo by Erlan
What to expect in the drying window
Moisture inside a phone doesn’t vanish overnight. How long moisture takes to leave the camera housing varies for a few reasons:
- Amount of liquid absorbed: A quick splash may evaporate faster than a full submersion. If water seeped into tight gaps around the camera module, drying takes longer.
- Device design and seals: Some phones have snug seals around the camera and back glass. These can trap moisture longer, especially if the device has a sealed housing or fluid contact points.
- Internal airflow and venting: The phone’s internal layout can hinder or help moisture movement. If air paths are blocked, drying slows.
- Desiccant effectiveness: Using silica gel or similar desiccants helps absorb residual moisture from inside the enclosure. The more moisture present, the longer you’ll need.
- Ambient conditions: Warmer, drier air speeds evaporation. Humidity and low temperatures slow the process.
- Device age and battery health: Older devices may retain moisture in harder-to-reach areas. A healthy battery reduces risk of thermal issues during the dry-down.
Patience reduces the risk of short circuits and other damage. If you’re unsure, extend the drying window rather than powering on to test the camera too soon. Realistic expectations help you avoid repeating the fogging cycle, which can happen if moisture pockets linger and then heat up when the device warms.
In the meanwhile, keep the device in a controlled dry environment. An airtight container with silica gel packets is a simple, effective setup. Keep the phone upright to encourage moisture to migrate away from the camera module. Typical guidance suggests 24 to 48 hours for a reliable baseline, but you may need more time if you see ongoing fog, moisture around the lens, or unusual internal condensation when you inspect ports. For a deeper dive into safe drying methods and what to avoid, consider trusted guides from established tech outlets. What to Do If Your Phone Falls in Water: A Step-by-Step Rescue Guide
If the fog clears within 24 hours, you still want to recheck after a second drying cycle to confirm the haze won’t reappear. Fog that returns after a brief clearing may indicate deeper moisture or seal breaches that require professional attention. For more on safe drying practices and do-it-yourself steps, you can review general guidance from reputable sources that cover moisture removal and when to seek help. Skip the rice — here’s how to dry your water-logged phone
When fog is gone, how to confirm
Clear lens visibility is the telltale sign that the moisture is mostly gone. Here’s a quick verification routine you can run once you think the device has dried:
- Visual check: Look through the lens from various angles. If the lens looks evenly clear and there’s no faint haze at the edges, you’re likely past the worst of it.
- Microphone and speaker test: If you hear muffled audio or see crackling, moisture might still be present in the speaker grill or near the camera module.
- Camera app test: Open the camera app and take a few sample photos in good light. Look for consistent sharpness without color tint shifts, blur, or ghosting.
- Video capture check: Record a short clip and review motion blur, autofocus behavior, and color accuracy. Any wobble or misfocus can signal residual moisture or internal water damage.
- Lens inspection under light: Shine a bright, even light at the lens to spot any lingering damp spots or fog in the housing.
If the camera remains foggy after the initial drying window, don’t rush a re-test. Internal moisture can hide in places the eye cannot easily see. In that case, review the decision tree below and consider professional inspection if fog persists beyond the typical drying window. For further context on when to seek professional help, this guide offers actionable steps and cautionary notes. What to Do If Your Phone Gets Wet
Practical signs that moisture is truly gone
- Clear, stable photos with accurate color reproduction in multiple lighting scenarios
- No fogging when you switch between photo and video modes
- No condensation visible inside the camera housing after a careful external wipe
- Consistent autofocus performance without hesitation or backtracking
If you still notice fog after trying these steps, it’s a signal to pause and evaluate further. Internal moisture may need tools and processes beyond home care. A professional tech can perform controlled drying, inspection, and, if needed, a camera module replacement. For a detailed overview of professional options and why internal moisture matters, see expert recovery guides. What to Do If Your Phone Falls in Water: A Step-by-Step Rescue Guide
Images and visual cues to help you assess
- Use a bright, steady light to check for haze around the edges of the lens. A magnifying glass can help you spot tiny droplets that standard lighting might miss.
- Take a test shot against a plain, neutral background. Look for uniform color, sharp edges, and no ghosting or halos.
If you want a concise synthesis of safe drying practices and quick checks, you can consult a few reliable resources. Here’s the Right Way to Rescue a Soaking Wet Smartphone
Testing the camera after drying
Once the device feels dry, run a careful test before you declare victory. The goal is to confirm the lens is clear and the camera system operates normally without hidden moisture causing later trouble. Follow these steps to minimize risk and maximize the chance of a clean result:
- Power on and open the camera app in good lighting. Observe the initial image for haziness or distortion as the sensor wakes up.
- Capture a few still photos of a high-contrast scene. Check for sharpness, color fidelity, and any unusual artifacts such as purple fringing or white blobs.
- Record short videos in different lighting. Look for smooth autofocus, stable exposure, and consistent color throughout the clip.
- Test other camera modes (portrait, panorama, slow-mo) to ensure autofocus and exposure behave normally across modes.
- Inspect for color shifts or tint changes. A fog-free image should not display a washed-out look or unnatural color cast.
- Check seams and edges around the camera module. Any light leaks or residual moisture might show up as faint halos or specks.
If you detect any abnormal fog, color issues, or autofocus inconsistency, treat it as a sign that moisture may still be present or that the camera module has sustained some internal exposure. In such cases, consider repeating the drying cycle or seeking professional assessment. For broader guidance on post-drying testing, you can review general rescue tips from reputable outlets. Here’s the Right Way to Rescue a Soaking Wet Smartphone
What to do if fog still appears
If fog returns after an initial clearing, follow this decision framework to determine the next steps. The goal is to avoid forcing a solution that could cause deeper damage.
- Repeat the drying cycle: Return the device to a dry environment with silica gel for another 24 to 48 hours. Sometimes moisture hides in hard-to-reach pockets and needs another pass to escape.
- Reassess in a controlled environment: After re-drying, conduct the same testing sequence. If fog persists, it’s likely internal moisture or seal breach.
- Consider professional inspection: A technician can disassemble the device in a controlled setting, remove moisture, and assess corrosion risk.
- Explain why interior moisture needs tools: Internal moisture often settles behind shields or under the camera module. Specialized tools help extract it without causing further damage.
If the fog persists after repeated drying and testing, professional service becomes the prudent option. It protects the device from long-term issues such as corrosion or damaged sensor elements. For a broader take on when to seek help and what to expect from a repair, you can explore trusted guidance. What to Do If Your Phone Gets Wet
Images can help illustrate the drying progress and test results. A photo of a camera lens under bright light showing minimal haze can be very instructive for readers. If you’d like, you can include a before-and-after comparison to emphasize the difference the drying window made.
If you want more context on safe, practical steps and professional considerations, this resource offers a comprehensive rescue perspective. Skip the rice — here’s how to dry your water-logged phone
In summary, the drying window varies by device and moisture exposure, but a methodical approach—careful external drying, controlled desiccation, and structured testing—gives you the best chance to recover a fog-free camera. If fog returns, follow the decision tree and seek expert help when needed. You can learn more about safe drying practices from experienced guides and repair resources: What to Do If Your Phone Falls in Water: A Step-by-Step Rescue Guide
Images and references:
- Image as above. Photo by Erlan.
SECTION_0 h3 What to expect in the drying window SECTION_0_TITLE What to expect in the drying window SECTION_0_INSTRUCTIONS Explain how long moisture can take to leave the camera housing and why some devices need more time. Mention that patience reduces the risk of short circuits.
SECTION_1 h3 Testing the camera after drying SECTION_1_TITLE Testing the camera after drying SECTION_1_INSTRUCTIONS Provide steps to safely test the camera once the device seems dry. Include checking photo and video capture, autofocus, and any abnormal fog or color issues.
SECTION_2 h3 What to do if fog still appears SECTION_2_TITLE What to do if fog still appears SECTION_2_INSTRUCTIONS Give a clear decision tree: repeat drying, consider professional inspection, and explain why internal moisture may need specialized tools.
Device specific guidance: iPhone vs Android
Water can fog up a phone camera on either platform, but the path to relief differs slightly. Below you’ll find concise, actionable steps tailored to iPhone users and Android users. Both paths emphasize safe drying, careful testing, and knowing when it’s time to seek professional help.
iPhone specific steps
When moisture intrudes around the camera, act fast and methodically. Start by cutting the electrical risk and guiding the moisture out.
- Power off immediately: Press and hold the side button and either volume button, then slide to power off. Do not press any other buttons or try to reboot while damp.
- Dry the exterior, then inspect the lens: Gently wipe the camera lens with a clean microfiber cloth. Check the lens for visible condensation or droplets as a baseline before you start the drying process.
- Use a silica gel desiccant: Place the iPhone in a sealed container with several silica gel packets. Keep the device upright so any moisture near the camera module can migrate away from critical components. Leave it for 24 to 48 hours.
- Check moisture indicators: If your iPhone has a Liquid Contact Indicator (LCI), inspect it after drying. If the LCI has turned red, it confirms exposure to liquid, which may influence service options. See Apple’s guidance on liquid exposure and LCIs for specifics: https://support.apple.com/en-us/109350
- Avoid rice and heat: Do not use rice, hair dryers, ovens, or other heat sources. These can introduce dust, push moisture deeper, or warp components.
- Plan for professional review: If fog persists after the drying window, or if you notice odd camera behavior, moisture around the lens, or degraded performance, seek Apple support or a certified repair shop. Apple’s service policies and at-home indicators can guide your next steps: https://support.apple.com/en-us/109350
Tips for the drying window:
- Keep the phone in a dry, temperature-stable environment during the 24–48 hour window.
- Do not power on to test too soon. Re-check the camera after each drying cycle.
- Use external light and a clean lens to help you monitor progress without opening the device.
What to expect if professional care is needed:
- A certified technician can disassemble the device in a controlled setting to remove residual moisture and inspect the camera module for corrosion.
- If the lens or sensor shows signs of water damage beyond home repair, a module replacement may be required.
- Manufacturer guidance for liquid exposure will shape your repair or replacement options. For official policy details and possible warranty considerations, visit Apple’s support page linked above.
Quick reference to useful resources:
- Apple support on water damage and LCIs: https://support.apple.com/en-us/109350
- General guidance on safe drying and when to seek help: https://ifixandrepair.com/blogs/news/what-to-do-if-your-phone-falls-in-water-a-step-by-step-rescue-guide
- A practical look at avoiding common myths like rice in drying: https://thenextweb.com/news/skip-the-rice-heres-how-to-dry-your-water-logged-phone-syndication
Android specific steps
Android devices vary by brand and model, but the core drying approach remains consistent. The steps below are broadly applicable and note brand-specific nuances where relevant.
- Power off and remove accessories: Turn the device off immediately and unplug any accessories. If your model uses a removable SIM tray or SD card, only handle them when the device is completely dry.
- Wipe the exterior and inspect the camera: Use a microfiber cloth to dry the exterior and the camera housing. Look for visible moisture or condensation around the lens.
- Apply a desiccant the same way you would for iPhone: Place the Android device in an airtight container with silica gel packets. Keep it upright and avoid shaking. A 24 to 48 hour dry-down period is typical, but thicker moisture pockets may need extra time.
- Be mindful of variations by brand:
- Samsung devices often feature water resistance ratings, but moisture can still seep into the camera module if seals are compromised.
- Google Pixel phones rely on robust design, yet condensation in the camera housing can occur after submersion or splash exposure.
- OnePlus and other brands follow similar steps; the key is to avoid heat and to extend the drying window if you notice lingering fog.
- Do not rely on rice or heat sources: Rice is unreliable and risky for ports, while heat can warp plastics and push moisture deeper.
- Test after drying and decide on professional help: If fog persists or if you observe audio or camera issues, professional service is warranted. Some manufacturers and repair shops offer quick diagnostic options that can save the camera module or device.
When to seek professional service:
- Fog returns after cleaning and a drying cycle.
- You notice irregular autofocus, color shifting, or inconsistent exposure across modes.
- The moisture indicator on your device shows sign of liquid exposure or you see corrosion signs inside ports.
Helpful references for Android users:
- Google Pixel support thread on condensation in the lens (guidance from the official help center): https://support.google.com/pixelphone/thread/280611747/camera-not-working-after-condensation-in-the-lens?hl=en
- General guidance on water impact and safe drying for Android devices: https://ifixandrepair.com/blogs/news/what-to-do-if-your-phone-falls-in-water-a-step-by-step-rescue-guide
- Brand-specific forum discussions and troubleshooting (OnePlus, Samsung): https://community.oneplus.com/thread/1273263
Endgame: drying, testing, and deciding when to repair Whether you’re team iPhone or team Android, patience and careful checks are your best allies. A measured drying period followed by a controlled test gives you the best chance to reclaim a fog-free camera. If fog persists, don’t push your luck. A professional assessment protects the device from longer term damage and helps preserve sensor and lens integrity. For more background on when to seek expert help and what to expect from a repair, see the practical guides linked above.
Prevention tips and myths to avoid
Water damage can fog up a phone camera long after the incident. This section focuses on practical prevention that works and clears up common myths that lead readers astray. With the right habits, you protect the camera module and keep your photos sharp. Think of prevention as a small, consistent investment that pays off when you need reliable imagery in wet or humid days.
Smart prevention steps that work
Taking proactive steps today reduces the risk of foggy optics tomorrow. Start with a sturdy defense and simple habits that fit into daily life.
- Use a good waterproof case: A robust case with sealed ports minimizes splash exposure and helps keep moisture out of sensitive areas. Look for products with independent IP ratings and reliable port covers. For readers frequently near water, a reputable waterproof case is worth the investment.
- Keep ports dry and seals clean: After exposure to humidity or splashes, wipe ports and seals gently with a lint-free cloth. Regularly inspect the camera housing seals for dust, grime, or wear that could compromise moisture resistance.
- Clean seals regularly: Build a routine to check the integrity of gaskets and door flaps. If you notice cracks or stickiness, replace or service the case promptly to maintain a tight seal.
- Avoid rapid temperature changes: Moving from a cold environment to a warm room can cause condensation inside the lens and housing. If possible, acclimate the device slowly before handling it aggressively.
- Check water resistance ratings: Even with a case, devices have limits. Know your phone’s official rating and understand that water resistance is not a permanent shield after drops, impacts, or seal breaches. Manufacturer guidance offers clear boundaries for use and care.
- Dry storage mindset: When not using the device near water, store it in a dry, temperature-stable spot. A small desiccant pack in your bag can help manage incidental moisture during travel.
- Regular test routines: Quick lens checks and app tests in good light can catch haze early. If you see any fogging after exposure, start a careful drying plan rather than waiting for it to worsen.
These preventive actions are reinforced by trusted resources that emphasize desiccation over improvisation. For a broader view on safe drying practices and when to seek help, see reliable guidance from established outlets: Apple’s official approach to liquid exposure and LCIs offers concrete indicators and next steps, while tech outlets reinforce safer drying methods and the risks of quick fixes. Apple support on water exposure and LCIs
Beyond official guidance, independent reporting stresses the value of skipping rice and using proper desiccants. If you want a concise overview, you can read practical breakdowns from reputable tech media. Here’s the Right Way to Rescue a Soaking Wet Smartphone
For a quick, consumer-focused reminder about not overreacting to moisture with DIY shortcuts, see coverage about safe drying practices. Skip the rice — here’s how to dry your water-logged phone
- Key takeaway: Prevention is about consistent care, smart accessories, and realistic expectations of moisture limits. A well-sealed case, careful handling, and awareness of ratings give you a reliable margin when accidents happen.
Myths vs reality
The internet is full of quick fixes that almost always backfire. Clearing up these myths helps you avoid make-it-worse mistakes and protects your camera from lasting haze.
- Myth: Rice dries the phone from the inside. Reality: Rice can absorb surface moisture but rarely reaches internal components. Dust and starch residue can enter ports, and the method doesn’t address internal moisture or corrosion. Many experts warn against relying on rice as a drying solution. See industry-accepted guidance debunking this myth. Rice is a Myth for Wet Electronics – Here’s Why
- Myth: Shaking the device accelerates drying. Reality: Shaking can push moisture deeper into the device and damage seals or internal components. Gentle handling is safer, especially around the camera module and charging port.
- Myth: High heat speeds up drying. Reality: Heat can warp plastics, warp seals, or trap moisture inside. Mild, indirect drying methods are preferred, not hot air from a dryer or oven.
- Myth: If there’s no visible water, the device is fine. Reality: Internal moisture pockets may linger behind shields or under the camera module. A fog-free exterior doesn’t guarantee internal dryness. If fog returns, seek evaluation from a repair professional.
- Myth: Water resistance guarantees protection in all scenarios. Reality: Water resistance tests are for specific conditions and do not replace careful handling. A damaged seal or dropped device can lose its protective capability quickly.
Concise evidence from credible outlets supports these corrections. For a more skeptical view of the rice method, see reputable tech coverage that debunks popular drying myths. Apple Warns Against Rice Method for Wet Phones, Debunking Phone Drying Myths and Here’s Why You Shouldn’t Use Rice To Dry Out Your Wet Smartphone
- Key takeaway: Rely on proven methods like desiccants and controlled drying. Avoid popular but risky shortcuts that can introduce dust, heat up internal parts, or trap moisture.
External factors to keep in mind while you plan preventive steps:
- Water exposure can happen anywhere, from a splash at the sink to a day at the beach. A compact, well-fitting waterproof case is a smart investment for travel and outdoor activities. See marketplace guides and reviews to pick a case that fits your phone and lifestyle. Best Waterproof Phone Cases and Pouches
- If you frequently photograph near water, consider accessories like waterproof pouches for quick access without removing your phone from its case. A few trusted review sources have tested a range of pouches for real-world protection. The Waterproof Pouch I Trust to Keep My Phone Dry
- For travelers, a well-chosen case can be part of a broader moisture management plan during flights or beach trips. A concise overview of top picks helps you compare options quickly. The 5 Best Waterproof Phone Pouches of 2025, Tested
By adopting smart prevention steps and avoiding common myths, you minimize the risk of foggy optics and keep your photos crisp when moisture inevitably makes an appearance.
If you want to dive deeper into device-specific safeguards or run through a quick, end-to-end prevention checklist, the next subsections will guide you through practical actions and quick-reference tests you can perform anytime. For more context on when to escalate to professional help, see the rescue-focused guides above and in the linked resources.
Conclusion
Most foggy camera issues after water exposure can be resolved with a careful drying process, and professional help is a solid option when needed. Patience matters because internal moisture can hide in hard to reach spots, and rushing testing can trigger new damage. A measured approach gives your camera the best chance to return to its sharp, true color. If you’re unsure, a quick professional assessment protects the lens and sensor, and can prevent long term haze.
Save this quick checklist and share the article so others can fix their smartphone faster. With the right steps, you can keep taking clear photos even after a splash.
- The camera lens is dry and visually clear
- External drying completed, desiccants used, device kept upright
- No fog remains after a 24 to 48 hour drying window
- Camera app tests show sharp images, accurate color, no unusual artifacts
- If fog returns or you notice odd behavior, seek professional help
If you’re deploying this guide for friends or clients, a quick pass through the steps helps them feel confident about their next move.