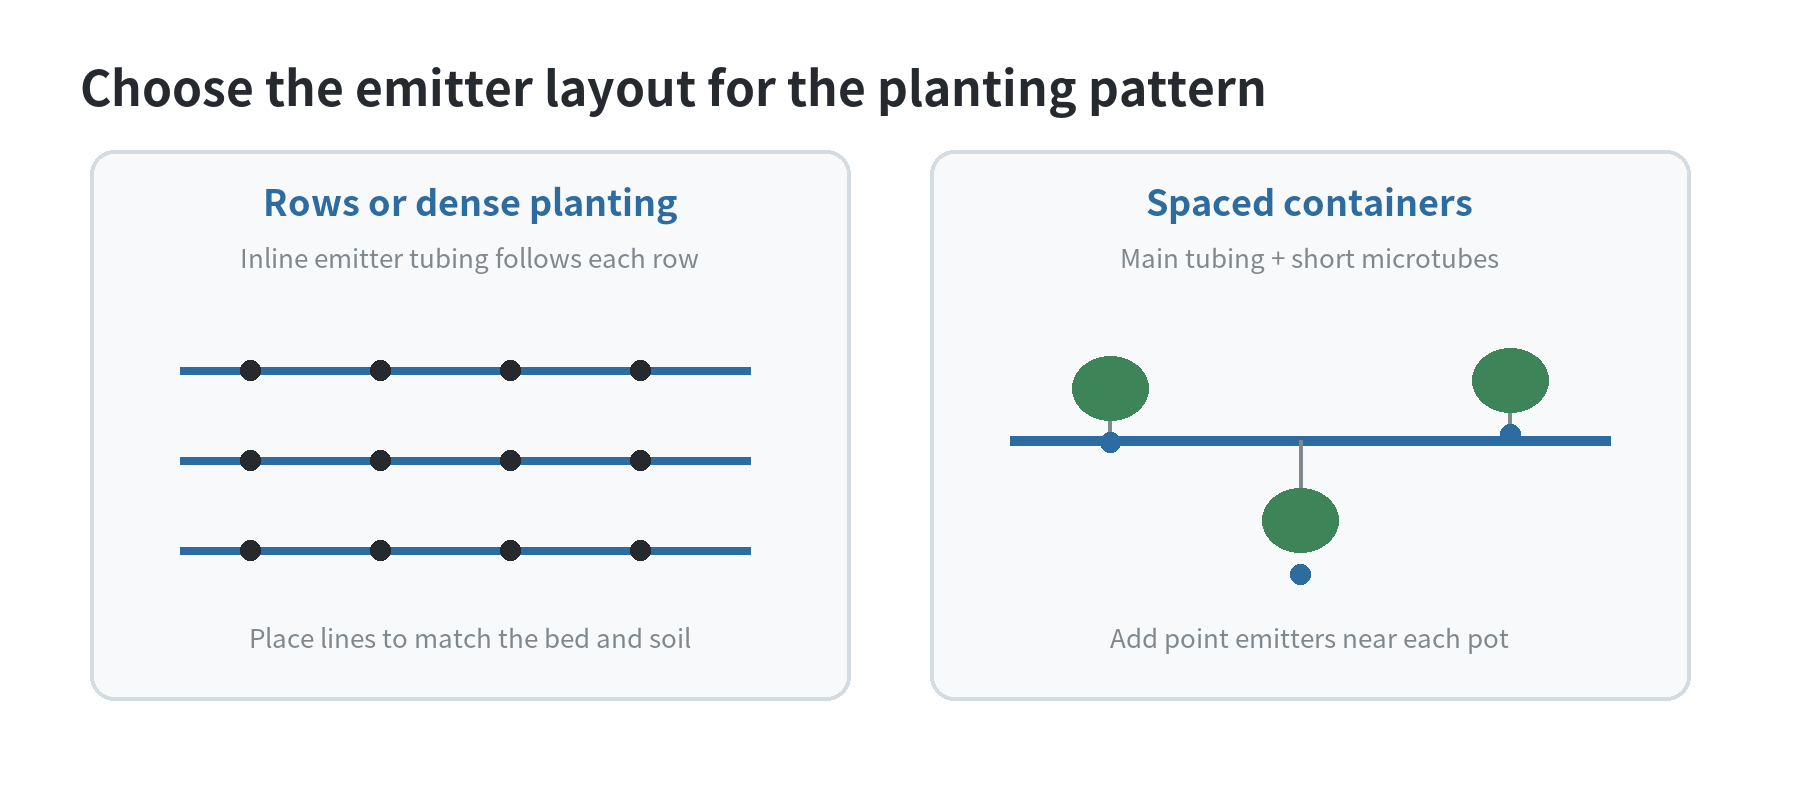
A drip irrigation kit works when its tubing layout matches the way plants are arranged. For a row or densely planted bed, look at inline emitter tubing; for pots spaced apart, a main tube with short microtubes and individual emitters is easier to route. Before comparing kits on an e-commerce platform, map the beds, count the rows or containers, and check what fittings the kit includes.
Utah State University Extension’s backyard drip guide describes both layouts and explains how filters, pressure regulation, and emitter choice fit into the system (checked October 22, 2026). Minnesota Extension’s irrigation overview also covers pressure regulators, filtration, and drip tape spacing (checked October 22, 2026).
Start with the bed, not the kit box
Sketch each growing area as a simple rectangle. Mark where the water connection sits, the direction each bed runs, and the location of individual pots or shrubs. Add the approximate length of each run. A kit’s advertised coverage can be hard to compare if one package assumes a dense grid and another assumes widely spaced plants.
For a vegetable bed planted in straight rows, a supply tube can run along one edge, with emitter tubing branching down each row. In a bed where plants are evenly spaced across the whole surface, a grid of inline tubing may make more sense. For a patio with six containers at different distances from the faucet, a larger main tube can follow the wall and narrow microtubes can reach each pot.
These are layout examples, not fixed prescriptions. A long, narrow bed and a compact raised bed can have the same area but need different tubing routes. Make sure the sketch includes turns, gaps between beds, and any path where a hose or feet could catch exposed tubing.
Parts to identify in a kit
| Part | What it does | What to check |
|---|---|---|
| Faucet adapter or hose connector | Connects the system to the outdoor water source. | Thread type and whether the kit’s connector matches your faucet or hose. |
| Backflow prevention device | Helps prevent irrigation water from flowing back toward the supply. | Local plumbing rules and the kit instructions; requirements depend on the setup. |
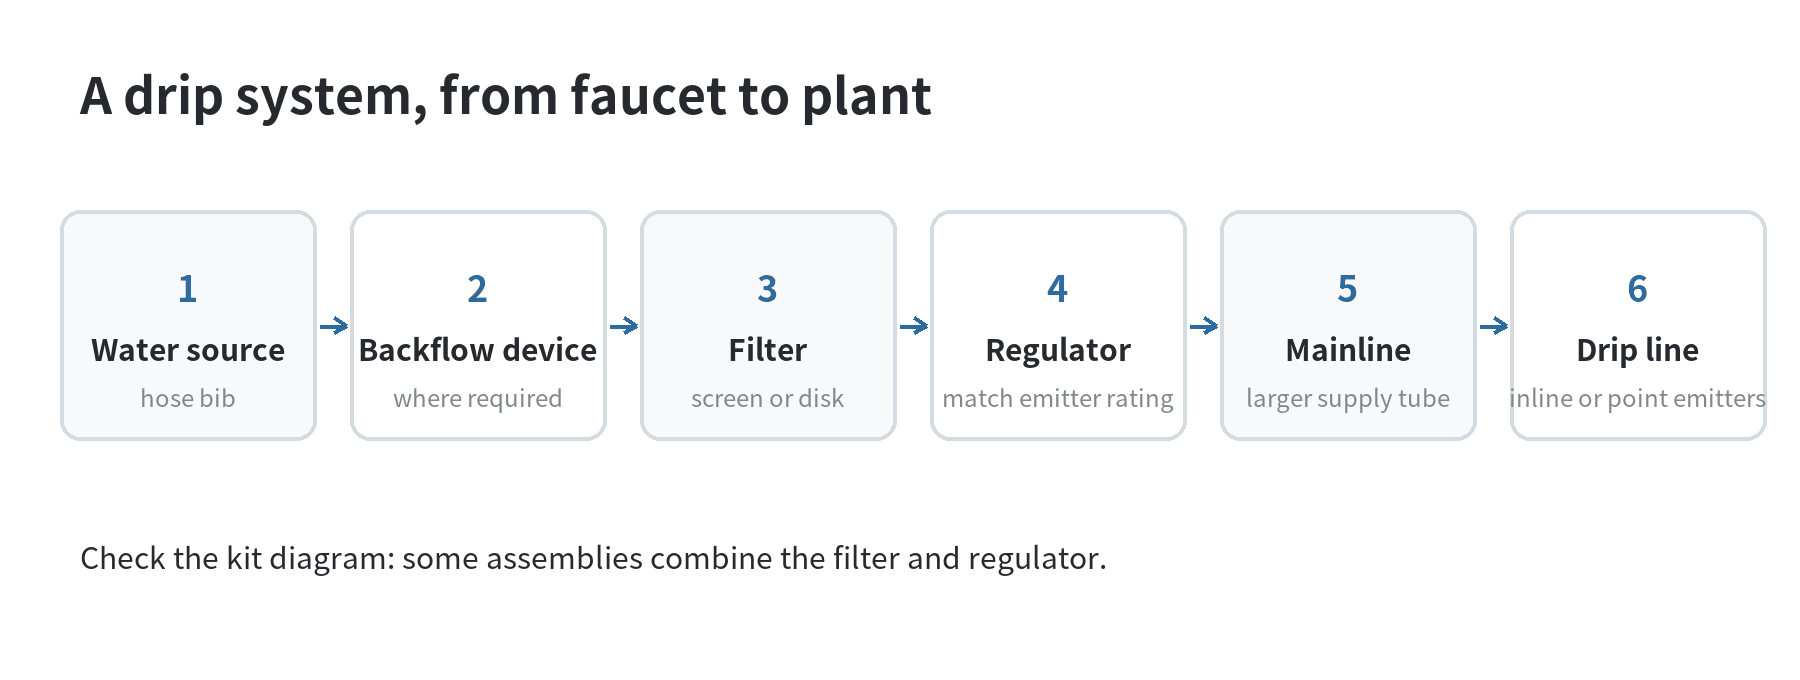
| Filter | Captures sediment that could obstruct small emitter openings. | Filter type, flow capacity, and whether the assembly includes one. |
| Pressure regulator | Reduces incoming pressure to the range the drip components are designed for. | Its rated pressure must match the tubing or emitters, not just the faucet. |
| Mainline and fittings | Carry water from the connection to the bed or container branches. | Tube diameter, included tees, elbows, end caps, and repair couplers. |
| Emitter tubing or point emitters | Release water along a row or at selected plant locations. | Inline spacing versus removable emitters, flow rating, and compatibility. |
| Flush end or end cap | Closes a line and may allow debris to be flushed during maintenance. | Whether it opens easily and fits the tubing size. |
Utah State Extension explains that filters belong on the supply side and that regulators should match the pressure rating of the emitters. The guide describes screen and disk filters and notes that some drip valves combine a filter with other controls. Minnesota Extension likewise says filtration depends on sediment, pressure, and line size. Those details are useful when a package lists separate parts versus a combined filter-regulator assembly.
Inline tubing or individual emitters?
Inline tubing has emitters built into the line at set intervals. It is convenient for rows and evenly planted beds because the holes are already spaced along the tube. Check the listed emitter spacing against the distance between plants and rows. Utah State’s guide describes spacing choices that vary by product; treat the spacing printed for the specific tubing as the deciding detail rather than assuming all drip lines are alike.
Point-source emitters attach at selected spots on a main tube. They are handy when containers are spread out, plants have different positions, or the route needs a short branch to reach a pot. The Utah State guide describes using a punch to insert emitters into the main supply tube and microtubes to extend the reach. Check that the kit contains the punch, emitters, microtubing, and plugs needed to close unused holes.
Make a parts list from a sample layout
Imagine a raised bed with three planting rows and a patio with four pots. A workable planning list might include one faucet connection, a filter and regulator assembly if not built in, a main tube to reach both areas, three inline runs for the bed, and four small branches with point emitters for the pots. Add connectors for each branch, end caps for the line ends, and a few stakes to hold tubing in place.
This example gives you a way to compare package contents, not a universal kit recipe. The actual number of tees and line lengths depends on where the faucet is and how the tubing travels. Leave slack for turns and allow access to connections so a leak or clog can be inspected without pulling up the whole layout.
Read the package’s component list carefully. “Tubing included” may refer to a single supply line rather than emitter tubing, and a kit may include fewer emitters than the number of containers you plan to water. Separate the parts into three groups on your sketch: water connection and controls, trunk tubing, and the outlet pieces that reach each plant.
Check capacity before adding every line
Adding emitters increases the system’s total demand. If a kit or emitter label gives a flow rate, add the listed rates for the emitters you plan to run at once, then compare that total with the product’s stated operating range. If a product page does not provide enough information to make that comparison, ask the manufacturer or the seller’s support team for the technical sheet instead of guessing from package size.
Utah State Extension describes measuring available flow with a bucket and timing how long it takes to fill, then converting that measurement to an hourly rate. The guide also notes that available flow can vary with the supply line and use elsewhere. For a small home layout, the useful lesson is to avoid assuming a faucet can run an unlimited number of branches at once. If you have multiple beds, separate valves or zones can let you run one section at a time, provided the kit supports that arrangement.
Pressure and flow are different checks. A pressure regulator addresses pressure; it does not create more water capacity. Choose a regulator for the emitter system’s specified operating pressure, and use compatible tubing and fittings. Utah State Extension gives a broad range for home irrigation and drip components, while exact requirements depend on the product instructions. Do not transfer a pressure figure from one tape or emitter model to another.
Before the first watering
- Lay out the tubing above ground and connect each branch before securing it.
- Check every connection and end cap while the system is running.
- Look along the lines for emitters that do not release water or fittings that leak.
- Flush the line if the instructions provide a flushable end, then close it securely.
- Inspect and clean the filter according to the manufacturer’s schedule; Utah State Extension advises regular inspection, with frequency adjusted to the source water and sediment conditions.
Recheck the layout when containers move or beds are replanted. A line that once ran beside a row may end up watering bare soil after the planting pattern changes. Keeping a simple sketch with connector locations makes future adjustments easier and helps you identify the exact part to replace if a fitting cracks or an emitter clogs.
What to compare across packages
Compare the connection type, filter and regulator inclusion, tubing diameter, emitter style, emitter spacing, total included length, number of branches, and repair parts. A longer roll is not automatically a better fit if most of your plants sit in separate pots; a package with many point emitters may be awkward for long, evenly planted rows. Product diagrams and instructions are often more useful than the kit name.
If you are unsure between two layouts, draw the planned route over your bed sketch and label each connector before choosing. That small planning step exposes missing tees or adapters while the system is still on paper. Once the fittings, tubing pattern, and pressure rating line up with your garden, the kit is much easier to evaluate on its actual included parts.
Frequently asked questions
Can a drip kit connect to a standard garden hose?
Many home kits are designed to connect to an outdoor faucet or hose connection, but adapters vary. Check the connector type and the kit instructions for compatibility with your specific water source.
Do containers need inline emitter tubing?
Not necessarily. A mainline with short microtubes and point emitters can reach containers spaced apart. Inline emitter tubing is often easier to route through continuous rows or dense planting.
Does every kit include a filter and regulator?
No single package list applies to every kit. Inspect the included-parts list and determine whether the filter and regulator are separate pieces or part of a combined assembly.
How often should I clean the filter?
Follow the kit maker’s instructions. Utah State Extension recommends regular filter inspection during the growing season and says dirtier source water can call for more frequent checks.
Last updated: 2026-10