How to Choose the Best Phone Stand for Kitchen Cooking Videos
Choosing the right phone stand can make or break your kitchen tutorials. The right setup keeps shots steady, protects your device from steam and spills, and fits your filming style. Below you’ll find practical guidance to pick a stand that suits your space and how you film.
Key Features That Make a Stand Kitchen Safe and Flexible
A good kitchen stand combines stability, heat resistance, and easy maneuverability. Here are essential features to look for and why they matter in real cooking conditions.
- Stable base and locking legs: A weighted base or legs that lock in place prevent wobbles when you’re chopping, pouring, or sweeping up flour. In a busy kitchen, a sturdy base keeps the frame from tipping during spills or steam bursts from pots.
- Non-slip feet: Rubberized feet grip countertops and prevent creeping as you move the camera or adjust the angle. This helps keep your shot consistent even when your hands are slick with olive oil or water.
- Heat resistant materials: Kitchens are hot places. A stand made from heat resistant plastics or metals stays firm and won’t soften near the stove or boiling pots. This protects both your device and your footage.
- Wide tilt and pan ranges: Flexible tilt and pan ranges let you capture overhead views or close-up angles without moving the stand. You can follow a simmer, flip a pancake, or drizzle glaze without repositioning the entire setup.
- 360-degree rotation: A full rotation allows you to switch between overhead and front-facing shots quickly. This can save time during demonstrations and keeps your workflow smooth.
- Easy quick-release phone grips: A secure grip that you can release with one hand makes swapping between devices or changing orientations effortless. It reduces the risk of accidents when you’re mid-scene.
- Clear cable management: Built-in channels or clips to guide charging cables keep cords tidy and prevent accidental pulls that could topple the stand.
- Compact footprint for small kitchens: If counter space is tight, a smaller base or a stand that folds away after filming helps prevent clutter on your work area.
- Compatibility with phone sizes: Make sure the grip accommodates the width of your smartphone, plus any case you use. A flexible clamp that fits most devices saves you from buying a new stand every year.
These features help you stay in control when steam rises, a spill happens, or a pot lid bangs shut. They also reduce setup time, so you can film more content with less friction.
If you want to see practical examples in use, explore overhead and countertop options that balance stability and reach. For overhead rigs, look for stands with robust arms and low-profile bases. For front-facing demonstrations, seek stands that can raise to eye level and tilt for clear product visibility. You can check real-world reviews and options here: Cooking Phone Holder and [Phone Stand For
Top Types of Stands for Overhead Cooking Shots
When you film overhead cooking shots, the right stand changes everything. It can keep your camera steady, give you a clean line from above, and allow quick angle changes as you work through a recipe. Below are the top stand categories you’ll encounter, with practical guidance on when to choose each and how to set them up for clear, engaging footage.
Tall Adjustable Tripods with Overhead Capability
Tall adjustable tripods are a reliable workhorse for overhead cooking shots. They typically feature a long central column, a sturdy head, and a mounting bolt that fits most smartphones or cameras. When you set one up for overhead shooting, position the tripod over your prep space so the lens sits just above eye level with the bowl or cutting board fully in frame.
- How they work: Extend the leg sections and raise the center column high enough to clear your table. Some models offer a dedicated overhead arm or a clamp on top to hold the phone at a precise angle. A few have a recessed or low-profile base that prevents tipping from light steam or a quick nudge of a spatula.
- Height range and positioning: Expect a height range from roughly 3.5 to 7 feet, depending on the model. For overheads, place the camera just above the action, aiming straight down or at a shallow angle to highlight texture on ingredients. If you need a front view later, many tall tripods can pivot to include a side shot without moving the base.
- Tradeoffs to consider:
- Size and footprint: These stands are sturdy but can dominate a small kitchen. If counter space is at a premium, choose a model with a foldable or retractable column.
- Setup time: It takes a minute or two to level the tripod, attach the phone, and adjust the tilt. If you film often, a quick-release plate can shave seconds off your routine.
- Price: Expect a wide range. Entry-level tall tripods are affordable and fine for casual content, while pro-grade options offer smoother pans and heavier payloads.
- Best use cases: Large kitchens with dedicated filming corners, where you want a polished, studio-like feel. They work well for recipes that involve moving pots or pans and you want to keep the whole station in frame.
- Quick tip: Look for a model with a stable base and a smooth tilt. A tripod with a built-in bubble level helps you align shots quickly. For reliable overhead consistency, balance is key; a heavy base reduces wobble when you reach across the counter.
- Real-world reference: If you’re evaluating options, consider a tall tripod that supports a phone with a gooseneck or quick-release mount. See examples here: Tripod For Cooking Videos. For additional perspectives on putting a tall tripod to work in kitchen videos, you can also review expert recommendations here: Best Tripod for Cooking Videos.
While tall adjustable tripods deliver broad coverage and stability, they can be larger than other options. If you shoot in tight spaces, you may value more agile equipment that can squeeze into corners without blocking your work area.
Overhead Arms and Gooseneck Stands
Overhead arms and gooseneck stands give you a high degree of control without needing a tall frame. The phone secures at the end of a flexible arm that can bend and twist to align with your bowls, pans, or ingredient bowls. This setup excels when space is at a premium or you need precise framing for close-ups.
- How they work: The arm attaches to a base that sits on the edge of the counter or clamps to the desk. The phone holder can tilt and swivel, letting you angle the lens toward the prep zone or the finished dish. The gooseneck design makes micro-adjustments fast, so you can fine-tune the shot while you cook.
- Benefits for tight spaces: The flexible neck lets you avoid crowding steam vents or heat sources. You can pull the camera in close for a dramatic macro shot of a whisking motion or a drizzle over a sauce, then pull back for a wider view with a simple twist.
- Balancing light and shadows: Overhead arms can help you position lights to minimize shadows on the face and food. If the light sits behind you, angled arms reduce glare on glossy surfaces. Consider a small LED panel that can be angled to fill shadows without washing out color.
- Setup tips:
- Ensure the base is secure and won’t tip when you adjust the arm.
- Use a lightweight phone grip with a one-handed release to swap devices quickly.
- Check cable management if you’re charging during filming to avoid accidental tugging.
- Best use cases: Close-up detailing, like sprinkling spices, whisking a sauce, or plating techniques. The flexible reach makes it ideal for highlighting texture and color without losing context.
- Quick reference links for real-world options and reviews: Adjustable Gooseneck Cellphone Holder and practical reviews in other weigh-ins here: THE BEST PHONE CAMERA TRIPODS – A REVIEW FOR ….
Gooseneck stands are not as bulky as tall tripods, but they may have weight limits that rule out larger phones or cameras. If you shoot predominantly with a smartphone and want quick repositioning, this category is a strong fit.
Flexible Mini Tripods and Desk Stands
Mini tripods and desk stands offer sheer portability and speed. They’re ideal when you want a quick set-up for tabletop filming or a highly controlled close-up shot without moving a lot of space around.
- How they work: A small base holds a short column or a flexible leg system that can bend to fit flat surfaces. The phone mounts at the top with a clamp that secures from both sides. Some models include a weighted base for extra stability, while others rely on the friction of the grip.
- Best use cases: Ingredient prep, small-batch sauces, or top-down shots on compact counters. They’re perfect when you want to switch between overhead and front-facing views in short order without heavy equipment.
- Stability considerations: Lightweight stands can topple if you reach or lean. They’re best on stable, flat surfaces and shouldn’t be relied on for long shoots with vigorous motion.
- Quick setup tips: Place the stand at the edge of the counter for maximum reach, then adjust the angle to cover the bowl and cutting board in one frame. If you need to, add a small non-slip pad under the base to reduce sliding.
- Ideal for: Beginner creators, quick recipe clips, or on-the-go filming in smaller kitchens. They also work well for behind-the-scenes footage that capitalizes on spontaneity.
- Real-world reference and further reading: For a quick comparison of compact options and how creators use them in real kitchens, see this guide: Overhead Photography Tripod and related reviews here: THE BEST PHONE CAMERA TRIPODS – A REVIEW FOR ….
If you’re starting out, a flexible mini tripod can be a great way to test framing without heavy investment. As you gain confidence and a consistent workflow, you can upgrade to larger setups that give you more control and a more polished look.
If you’d like, I can tailor this section to match your preferred brand names, specific models you’re considering, or a target price range. I can also weave in more hands-on filming tips, like how to stage your workspace for the camera, how to manage steam and splatter on lens, and how to maintain a consistent look across overhead and front-facing shots. For additional ideas and inspiration on overhead setups and professional-grade angles, you might find useful real-world examples and product reviews in the sources linked above.
Practical Setups for Different Video Styles
When you film in a kitchen, the right setup helps your recipe shine. Whether you want a clean overhead view of chopping and mixing or a clear front-facing demonstration of the finished dish, the stand you choose should be versatile, stable, and easy to adjust mid-session. Below you’ll find practical guidance for two common video styles. Each subsection includes actionable tips you can apply right away to improve clarity, texture, and engagement in your cooking videos.
Overhead Recipe Videos Setup
A top-down angle is a staple for recipe tutorials. It puts the cutting board, knife work, and ingredient textures front and center. To get the best results, start with a stand that places your phone or camera just above the action and a few inches back from the edge of the prep area.
- Positioning the stand: Set the base close to the edge of the counter and center it over your prep zone so the widest part of the cutting board stays fully in frame. The lens should sit slightly above eye level with the board parallel to the floor. If you tilt the camera, keep the edges of bowls and the ingredients within the frame to avoid a cropped look.
- Best angle for cutting boards and ingredients: A shallow downward angle, around 15 to 25 degrees, preserves vertical texture without exaggerating shadows. A straight-down shot works well for even slices, while a slight tilt helps highlight finely minced herbs or grains.
- Avoiding arm shadows: Position your arms to stay off the main plane of the frame. If your forearms cast shadows, raise the stand a little higher or shift the camera to the side to keep hands out of the central food area. Consider using a light source that sits to the side or slightly above, not directly over the hands.
- Managing steam and heat glare: Steam can blur the lens quickly. Filming with a slightly higher shutter speed helps reduce blur. Keep pots off to the side of the frame when you can; if you must angle over a pot, pause briefly to wipe the lens and lower the steam before continuing. Use a small, quiet LED light facing the work surface to illuminate textures without washing out color.
- Lighting and glare tips: Place a key light at a 45-degree angle to the left or right of the board. A secondary fill light from the opposite side reduces harsh shadows. If you notice glare on glossy ingredients, adjust the light angle slightly or rotate the phone holder to change the reflection.
- Practical setup checklist:
- Stable base with non-slip feet.
- Quick-release mount for one-handed device swap.
- Cable management to keep charging cables out of frame.
- Compact footprint for small kitchens.
Images can dramatically improve comprehension. The following setup example shows a compact overhead rig in action, delivering a clean, top-down perspective while keeping steam and heat away from the camera.
 Photo by Polina Tankilevitch
For further reference, consider real-world guidance on overhead rigs and stability. See reviews and options here: Overhead Phone Tripod for Cooking Videos and industry perspectives in this roundup: THE BEST PHONE CAMERA TRIPODS – A REVIEW FOR ….
- Quick-real-world tip: If space is tight, look for overhead arms with low-profile bases. A gooseneck or folding arm can bring the camera into frame without crowding the workspace.
If you want more precise recommendations for specific models or price ranges, I can tailor suggestions to your kitchen size, typical recipes, and preferred phone sizes.
Front Facing Cooking Demonstrations
Front facing demonstrations are ideal when you want to engage the viewer with the cook’s expressions, step-by-step plating, and the final dish. This setup works best when you want to show technique up close without blocking the food.
- When to use a front facing stand: Choose this setup when your audience benefits from seeing your hands in action, tasting, or presenting finished textures. It’s particularly effective for quick technique clips, plating moments, and close-up texture shots.
- Aligning the camera with the pot or pan: Elevate the phone so the lens sits roughly at eye level of the cook. Angle the camera slightly downward toward the food to capture both the ingredients in the pan and the active motions you make with utensils.
- Keeping hands and utensils in frame without blocking the food: Position your hands to the sides of the pan when possible, and lean slightly toward the camera so the food remains visible as you work. Use a shallow depth of field only if you want the background to blur; otherwise, keep the entire activity in sharp focus.
- Quick lighting pointers for texture: Use a warm, neutral key light placed to one side and a fill light on the opposite side to minimize shadows. A small LED panel with adjustable color temperature helps you maintain consistent color across shots. Avoid lighting that creates hot spots on glossy sauces or slick surfaces.
- Managing camera height and angle: Set the stand to a height that keeps your face and the pan in frame without tilting the camera too steeply. If you’re plating, a slight downward angle provides a satisfying view of the final arrangement.
- Practical setup tips:
- Use a front-facing mount that can tilt to optimize the dish view.
- Ensure easy hand access to switch between shots without leaving the frame.
- Keep a towel nearby to wipe splatters and lens condensation quickly.
- Best use cases: Sauces, whisking, and plating techniques where the texture and finish matter. This setup helps you communicate technique with clarity and confidence.
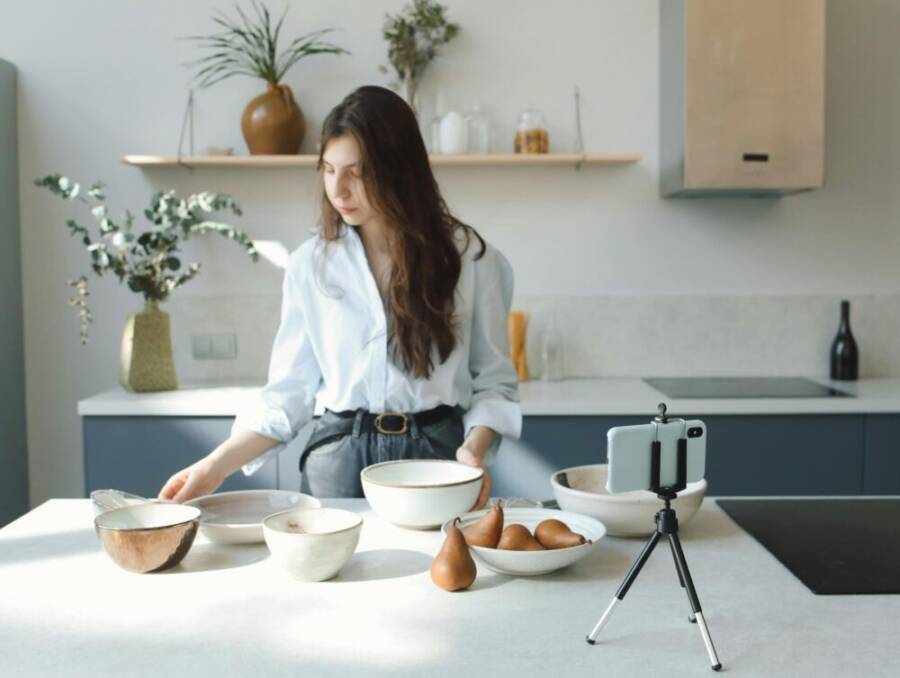
Images can illustrate how eye-level framing enhances audience connection. The following image demonstrates a front-facing shot in a bright kitchen, highlighting hands and food with clear texture.
Photo by Polina Tankilevitch
For practical references, you can explore how creators optimize front-facing setups with smartphone gear and stable stands. Real-world guidance and reviews can be found here: The Best Tripod for iPhones and Other Smartphones and a hands-on look at practical cooking video gear here: How To Shoot Cooking Videos Using Just Your Phone.
- Quick-start checklist for front-facing shoots:
- Align the camera with the pan so the food stays in the center.
- Keep utensils and hands partially in frame to show technique.
- Use two lights at 45-degree angles for even texture and color.
If you’re just starting out, a lightweight front-facing setup can be a fast way to build a consistent filming routine. As you gain confidence, you can mix front-facing and overhead shots to deliver a dynamic viewing experience.
Images and links above provide starting points for evaluating equipment that fits your space and style. If you’d like, I can tailor this section to your preferred brands, specific models, or a target budget. I can also weave in more hands-on filming tips, like staging your workspace for the camera, managing steam on the lens, and keeping a consistent look across overhead and front-facing shots.
Budget, Phone Size and Compatibility Guide
Choosing the right budget, phone size, and grip strategy is the foundation of a smooth cooking video workflow. In this section, you’ll learn how to balance cost with performance, understand which phone sizes fit different stands, and ensure your grip is secure during busy moments at the stove. The goal is to help you make a confident, informed choice so your footage stays steady, clear, and engaging.
Choosing by Budget
Budget ranges shape what you can expect in terms stability, features, and durability. Here’s a practical map of what you get at each tier, and why mid-range options often hit the sweet spot for kitchen filming.
- Under $25 – entry-level simplicity: You’ll find compact desk mounts and basic mini tripods that are light, portable, and easy to set up. These stands usually have limited tilt ranges and smaller phone grips. They’re good for beginners testing overhead or front-facing shots, but they may wobble with vigorous action or steam. Expect simple clamps and plastic construction. If your aim is to test formats without a large upfront investment, this tier works well. For example, compact desk stands and flexible mini tripods can be found in affordable bundles that let you try overhead framing without committing to a heavy rig.
- $25–$70 – solid mid-range versatility: This range unlocks more stable bases, better grip mechanisms, and greater adjustability. You’ll typically gain a longer arm, a more secure quick-release, and better cable management. The mid-range often includes gooseneck options that give precise micro-adjustments without adding bulk. If you film frequently, these stands reduce setup time and keep your shot steady during fast-moving sequences. They also handle a wider range of phone sizes and cases, which saves you from buying a new stand every year. See options in this tier that emphasize stability and practical usability for kitchen work.
- $70–$150 – premium reliability and convenience: Premium stands deliver smoother pan and tilt, stronger materials, and thoughtful extras like integrated LED mounts or advanced cable channels. You get more robust gooseneck arms, higher payloads for larger phones, and often better heat resistance. In kitchen filming, premium features translate into less fiddling between takes, cleaner angles, and longer friendship with your gear. If you shoot professionally or plan to scale up to more ambitious setups, this range provides the biggest return on investment. Look for quick-release systems, heat-tolerant materials, and bases that resist tipping when you reach across the counter.
- Beyond $150 – pro-level stability and customization: At this level you’ll find professional overhead rigs and modular systems. Expect heavy-duty bases, modular arms, and accessories like lighting mounts and advanced clamps. These setups are built to run hours of shoots in busy kitchens, with minimal drift and maximum repeatability. They’re ideal if you’re turning cooking videos into a steady, studio-like production.
Key mid-range advantages you’ll often notice
- Better balance and wobble reduction thanks to heavier bases or reinforced columns.
- More ergonomic grip options, making it easier to swap devices or switch orientations mid-scene.
- Improved cable management, helping keep cords out of the shot and reducing accidental yanks.
- Increased compatibility with a wider range of phone sizes and cases.
If you want a quick recommendation, start with a mid-range stand that offers a solid base, a flexible arm, and a reliable quick-release system. It gives you durability without locking you into a heavy setup. For real-world comparisons and user experiences, you can explore reviews and options here: The Best Tripod for iPhones and Other Smartphones, Phone Holder For Kitchen While Cooking, and a practical starter guide here: Overhead Photography Tripod.
Ethical note: always pick a stand that fits your space. If your kitchen is small, a compact mid-range model with folding or retractable features often beats a bulkier, more expensive rig.
Phone Size and Grip Considerations
Your phone size and grip mechanism are the heartbeat of a secure, interruption-free shoot. Kitchens are full of motion, steam, and occasional splashes, so a reliable hold matters more than you might think.
- Phone size compatibility: Most modern stands offer adjustable clamps that cover a broad range of widths. The goal is a clamp that accommodates a typical modern phone with or without a case. If you’re moving between devices, look for a stand with a wide grip range and a smooth one-handed release.
- Grip mechanisms that work in real kitchens:
- Quick-release clamps let you swap devices in seconds, reducing the chance of accidental drops mid-scene.
- Rubberized or textured clamps grip without scratching and stay steady even when your hands are busy or damp.
- Gooseneck arms give you micro-adjustments so you can fine-tune the angle without bumping the tripod.
- A secure, pressure-based grip helps you keep a phone steady while you adjust lighting or tilt.
- Secure hold during busy moments: When you’re whisking, flipping, or pouring, a firm grip matters. Look for:
- Anti-slip contact surfaces on clamps.
- A dual-clip design that grips both sides of the phone to prevent sideways slip.
- A limit on tilt that prevents sudden droops when you reach across the counter.
- A one-handed release that lets you swap between devices without re-mounting.
- Quick testing checklist before you start recording:
- Attach your phone and tighten the grip firmly but not overly tight.
- Gently rock the setup to test stability; if it moves, tighten further or readjust the base.
- Wiggle the phone sideways and up and down to confirm there is no wobble.
- Simulate a busy moment by pressing the arm slightly and ensuring no slippage occurs.
- Confirm cable management won’t pull on the phone if you’re charging during filming.
- Check that the lens is clean and not blocked by a clamp or mount.
- Compatibility with popular sizes: Most stands accommodate phones from about 4.7 inches up to 7 inches in screen size. If you use larger or smaller devices, confirm the clamp’s adjustable range and consider models with flexible arms that can adapt to nonstandard sizes.
For practical guidance on grip and security, these sources provide tested options and hands-on reviews: The Best Phone Stands | Tested & Rated – Tech Gear Lab, Gooseneck Phone Holder Clip Mount, and Phone Holder For Kitchen While Cooking. If you want to pair grip tests with a specific phone model, I can tailor a quick-start grip test for your exact device.
Helpful note: smartphone design is evolving quickly. If you upgrade devices soon, choose a stand with a generous grip range so you’re not buying a new mount with every new phone. A mid-range model with robust clamps and a flexible arm typically outlasts cheaper, more brittle options.
Section-ready takeaway
- For most home kitchens, a mid-range stand with a wide grip, quick-release, and a stable base delivers the best blend of price and performance.
- Always test the grip with your typical cooking motions before filming. It saves you from mid-scene surprises and noisy re-shoots.
External references and further reading
- Overhead setup guidance and gear reviews: Overhead Phone Tripod for Cooking Videos
- In-depth tripod recommendations and practical comparisons: THE BEST PHONE CAMERA TRIPODS – A REVIEW FOR …
- Comprehensive stand testing and ratings: The Best Phone Stands | Tested & Rated – Tech Gear Lab
If you’d like, I can tailor recommendations to your exact budget, phone model, or filming style. I can also add quick-start checklists for different kitchen layouts or filming goals to keep your shoots fast and consistent.
Quick Start Checklist and Maintenance
Getting your kitchen filming setup ready should be fast and reliable. Use this quick start checklist to establish a stable overhead or front facing rig, then follow simple maintenance steps to keep everything performing smoothly. Think of it as a routine you do before every shoot to save time and protect your gear. A well maintained stand stays steady, reduces glare, and minimizes lens smudges, so your footage stays sharp from start to finish.
Quick Start Checklist
- Stable base and non-slip feet in place. A solid foundation cuts wobble during busy moments.
- Phone grip secured with a one-handed release. Quick swaps without risking a drop.
- Cable management ready. Tidy cords prevent accidental pulls and clutter in the frame.
- Mount aligns to your preferred angle. Overhead or front facing, confirm the lens sits where you want it.
- Arms or gooseneck positioned for easy adjustments. Micro-movements help you frame on the fly.
- Lens and screen checked. Clean the lens and ensure the display isn’t blocked by clamps.
- Space suitable for heat and steam. Ensure pots and pans don’t push heat toward the device.
- Quick test wobble and tilt. Lightly nudge the rig to confirm stability before filming.
For quick guidance on setup ideas and real world usage, see practical overhead and front facing options here: Overhead Phone Tripod for Cooking Videos and The Best Tripod for iPhones and Other Smartphones.
Setup Maintenance
- Inspect the base before each shoot. Look for loose screws or wobbly legs and tighten as needed.
- Check the clamp grip. Wipe clean and test the one-handed release to ensure smooth operation.
- Test tilt and pan range. Make sure there’s no binding or excessive play in the joints.
- Keep cables tidy. Use clips or channels to route charging cables away from moving parts.
- Clean the lens and screen. A microfiber cloth removes steam residue and fingerprints that dull clarity.
- Inspect heat exposure areas. If you film near heat, verify that plastics or metal aren’t softening or warping.
Maintenance routines are simple but pay off in footage quality and gear longevity. For a deeper care guide, see tripod maintenance basics: How to clean a tripod: 3 tips you need to remember and Tripod Maintenance Guide: Keep Your Gear in Top Shape.
Cleaning and Care
- Regular wipe down: Use a soft cloth with a mild cleaner on metal and plastic parts. Avoid harsh chemicals that can degrade finishes.
- Clamp care: If clamps get sticky, wipe the contact surfaces and apply a tiny amount of silicone-safe lubricant to moving joints.
- Gooseneck tightening: Check the tension on flexible arms. If they sag, tighten the joint or re-balance the stand with the base.
- Base checks: Debris in the feet can reduce grip. Clean the contact points and ensure non-slip pads are intact.
- Cable channels: Clear any dust from grooves to prevent snagging during a shoot.
Useful reference for keeping gear clean and functional: How to clean a tripod: 3 tips you need to remember and practical maintenance guidance here: Ask Megan: Cleaning and Tripod Maintenance.
Troubleshooting Common Issues
- Wobble after a busy shot: Recheck the base and tighten any loose screws. If needed, redistribute weight with a heavier base or add a stabilizing pad.
- Lens fog or condensation: Power off briefly, wipe the lens, and allow a moment for the surface to clear. Angle lighting to minimize glare.
- Slipping clamps during action: Switch to rubberized clamps or add a protective sleeve to the phone grip to increase friction.
- Cables pulling the mount: Reroute cables through dedicated channels and consider a shorter charging cable for less tension.
- Limited tilt range: If you regularly need unusual angles, upgrade to a model with a wider range or a more flexible arm.
For extra reassurance, compare tested stand options and reviews: The Best Phone Stands | Tested & Rated – Tech Gear Lab and Overhead Phone Tripod for Cooking Videos.
Quick Tips and Best Practices
- Test with smartphone in-hand before filming. A quick dry run helps catch hidden wobble or glare.
- Keep the frame fresh. Switch between overhead and front facing shots to maintain audience interest.
- Stage your workspace. Clear the area around the camera to create a clean, distraction-free background.
- Protect lens from steam. A small lens hood or a brief fan can reduce moisture buildup during long takes.
- Have a standby plan. If your current mount fails, know a backup option that can be set up in minutes.
If you want tailored recommendations for specific brands, models, or a budget, I can align the quick-start and maintenance guidance with your gear. For broader setup ideas and product comparisons, check these starter references: How To Shoot Cooking Videos Using Just Your Phone and Overhead Photography Tripod.
Conclusion
Choosing a kitchen phone stand that fits your space and filming style pays off in cleaner, steadier footage and less setup time. A mid range stand with a wide grip, stable base, and easy quick release gives you reliable performance without weighing you down. For overhead and front facing shots, a flexible option that balances reach with sturdiness keeps both your hands free and your smartphone secure. Try a recommended setup that combines a stable base, a gooseneck arm, and good cable management, then share your tips or questions in the comments to help others.