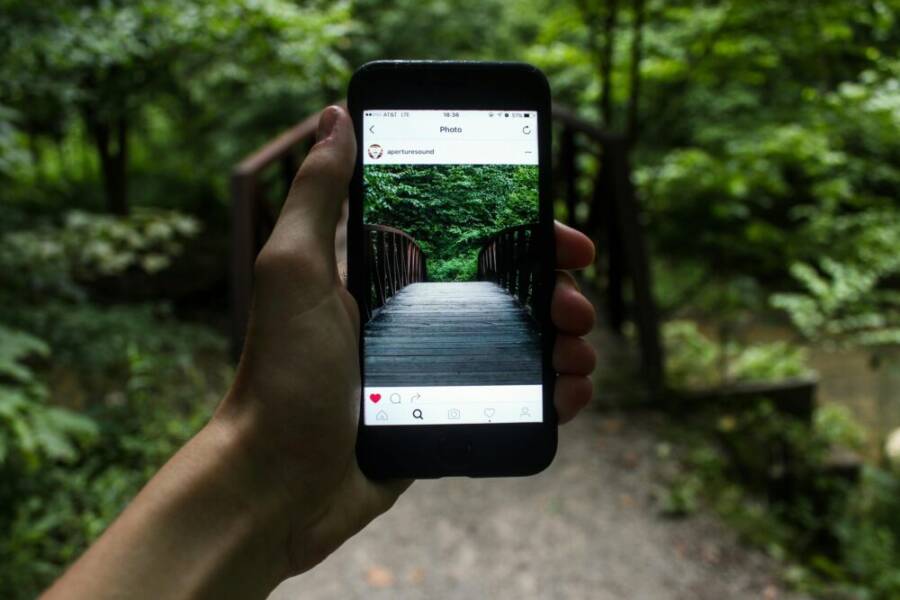
Can your pocket device replace a bulky camera for learning photography? For beginners, the answer is increasingly yes, thanks to smarter sensors and smarter software in every phone.
This post explains why smartphone cameras are now an appealing starting point. You’ll learn what makes phones so easy to pick up, what upgrades matter, and where a dedicated camera still makes sense.
By the end, you’ll know when to shoot with your phone for quick, real world results and when to consider a traditional camera to push your skills further.
Why Beginners Are Choosing Phones Over Traditional Cameras
For many newcomers to photography, a phone is the simplest path to learn, practice, and share. Phones combine capture, edit, and distribution in one pocketable device. They reduce the friction between spotting a moment and posting it, which encourages more frequent practice. Below are the key reasons this shift is happening and what it means for your learning journey.
No extra gear needed
A single device handles shooting, editing, and sharing without the burden of carrying a bag of lenses or a bulky camera. Your phone is already with you, which reduces missed moments and keeps you in the flow of everyday life. You can snap, quickly adjust, and post all from the same device. This all-in-one approach makes it effortless to experiment with composition, light, and timing without worrying about gear decisions. For many beginners, this is the decisive advantage that keeps photography enjoyable and repeatable.
Simple shooting modes and guides
Modern smartphones ship with friendly, automatic modes that do most of the heavy lifting. Scene recognition adapts exposure and color for people, landscapes, or night scenes, so you don’t have to guess the settings. Guided shooting tools walk you through each step, from framing to focus, and often provide real-time tips as you shoot. On the screen, you see a live preview, and overlaid hints guide your choices. This blend of automation and support makes it easy to produce solid images while you learn the fundamentals.
Fast editing and easy sharing
Editing on a phone is fast and intuitive. Built-in tools offer quick tweaks to exposure, contrast, and color, plus filters that can help you study different looks. One-tap posting lets you push your best shots to social media or messaging apps in moments. Cloud backup keeps your library safe, while privacy checks help you decide what to share and with whom. The workflow is naturally social, so your progress is visible and reinforced through feedback from friends and followers.
Cost and learning curve
Using a phone you already own is the most budget-friendly option for beginners. A dedicated camera plus lenses, bodies, and accessories adds up fast. The learning curve for phone photography is gentle: you experiment with composition, lighting, and timing in small, repeatable steps. This steady pace helps you build confidence before investing in more gear. If you outgrow your phone, you’ll have a clear sense of what you want to improve with a traditional camera. See how cost-effective the transition can be by exploring initial setups and gradual upgrades, rather than jumping straight to pro gear. For more perspective on cost comparisons and beginner-ready options, you can review practical discussions at reputable photography communities and guides. Also consider the AI-assisted features many phones now offer to boost your early results, which can accelerate learning while you stay within a familiar toolset.
Links for further reading:
- Learn how mobile photography can rival dedicated cameras with portable gear and smart processing: https://www.adobe.com/creativecloud/photography/type/mobile-photography.html
- How smartphone shooting helps you improve overall photography skills: https://digital-photography-school.com/how-using-your-smartphone-camera-can-help-improve-your-photography/
What Smartphones Do Best for New Photographers
Smartphones have become reliable learning tools for beginners. They combine intuitive controls with smart software that guides you toward better shots. This section breaks down the areas where phones shine when you’re just starting out, and how to use them to build solid fundamentals without extra gear.
Automatic settings and guides
Phones handle exposure, focus, and color automatically, so you can think about composition first. A tap on the screen usually sets focus and exposure for you, while live previews show you exactly how light affects the scene. Gridlines help with balance and alignment, making it easier to apply the rule of thirds. If you’re new, start by letting the camera choose the scene mode, then try switching to a Portrait or Landscape setting for different looks. Simple guides within the app walk you through framing, lighting, and timing, turning practice into quick wins. For practical tips on getting started with smartphone photography, see Smartphone photography 101: A guide to stunning shots. https://thewholeu.uw.edu/2024/09/23/smartphone-photography-101/
Computational photography and AI
Behind the scenes, phones use HDR to balance bright and dark areas, reduce noise in low light, and optimize scenes with smart processing. HDR blends multiple exposures so skies stay blue and shadows remain visible without clipping. Noise reduction smooths grain in dim light, while scene optimization tweaks color, contrast, and detail based on what the camera recognizes in the scene. For beginners, these features mean cleaner results with less manual fiddling. You’ll often see quicker improvements just by leaving these tools on and learning how they influence different subjects. A straightforward primer on how AI influences phone photography can help you set expectations and practice smarter, not harder. How AI (Artificial Intelligence) work with smartphone photography: a beginner’s guide. https://focus.picfair.com/articles/how-does-ai-artificial-intelligence-work-with-smartphone-photography-a-beginners-guide
Versatile lenses and zoom on pocket devices
Many phones now offer multiple lenses in one slim body: wide for expansive scenes, ultra wide for tight interiors, and zoom options for distant subjects. This versatility means you can adapt on the fly without swapping gear. Wide and ultra wide lenses encourage creative framing for landscapes, architecture, and crowds. Zoom through software or optical steps can help you fill the frame when distance is a constraint. Experiment with different focal lengths to learn how perspective changes mood and composition. For a practical look at how these lenses perform in real life, consider how lens flexibility supports quick learning and better storytelling. iPhone camera features: From basics to pro techniques. https://skylum.com/blog/iphone7-for-photographers
Video features for beginners
Phones capture smooth video with good stabilization, often in 4K, which makes it a strong companion for learning motion and storytelling. Basic editing on the device lets you trim clips, adjust exposure, and apply simple color corrections without leaving your phone. Quick sharing workflows mean you can post highlights or drafts in minutes, inviting feedback from friends or followers. Practice with short clips, then review what you see to refine your approach to motion, pacing, and transition. For a reader-friendly guide to ongoing practice, see Smartphone photography guide and related tutorials. https://teemusphoto.com/tutorials/smartphone-photography-guide/
Where Traditional Cameras Still Shine
Even as smartphones grow more capable, traditional cameras still offer advantages that matter in certain scenarios. This section highlights four areas where a dedicated camera can deliver superior results, especially for projects with tight deadlines, large prints, or demanding conditions. If you’re weighing a learning path that starts on a phone but might move to a traditional body, these points help you decide when the upgrade makes sense.
Large prints and image quality
For large prints and serious image quality, sensor size and lens selection matter. Bigger sensors capture more detail and better color reproduction, especially in challenging light. They also provide cleaner cropping options without introducing noise or detail loss. When you print at large sizes, the difference in dynamic range and tonal separation becomes more noticeable, giving you flexibility in post. If you’re planning exhibitions or wall displays, a traditional camera can help you preserve sharpness and depth. For a deeper look at how sensor size and lens quality affect print outcomes, see DXO Mark’s comparison of smartphones and cameras. https://www.dxomark.com/smartphones-vs-cameras-closing-the-gap-on-image-quality/
Manual control and creative options
Manual controls unlock precise creative expression. With a traditional camera, you can set shutter speed, aperture, and ISO to shape motion, depth of field, and exposure exactly the way you envision. RAW shooting preserves every bit of tonal data, giving you maximum latitude in post processing. This level of control is essential for serious projects where you want consistent results across a series of shots or when working with studio lighting. If you’re moving beyond automatic modes, you’ll quickly appreciate the tactile feedback and direct dial access that professional bodies provide. For a practical look at how DSLRs and mirrorless cameras compare in control, explore articles on manual shooting advantages. https://digital-photography-school.com/advantages-dslrs-have-over-smartphones/
Durability and battery life
Traditional cameras are built to withstand outdoor shoots and rough handling. They often feature rugged bodies, weather sealing, and heat management that keep performance steady in challenging environments. Battery life tends to be longer when you’re shooting without the constant trial-and-error of on-screen menus and AI processing. This endurance matters on long shoots, remote assignments, or travel days where access to charging isn’t guaranteed. If you plan multi-location projects or weather-exposed work, a traditional setup can reduce the risk of missed moments due to power or hardware issues.
Situations where a proper camera is safer or better
Certain scenarios demand the reliability and speed of a dedicated camera. Fast action events, remote or studio shoots, and professional assignments benefit from quick, predictable performance. A traditional camera offers robust autofocus, consistent frame rates, and dependable handling when timing is critical. You’ll also find more reliable accessories and a broader range of lenses to suit specific subjects, from sports to macro work. For readers seeking a deeper dive into when DSLRs or mirrorless bodies outperform phones, the discussion around manual controls and image quality remains central. https://www.digital-photography-school.com/advantages-dslrs-have-over-smartphones/
Practical Tips to Start with a Phone Camera
Starting with the phone you already own is a smart move. It lowers friction, builds a habit, and lets you practice core ideas before investing in gear. Use these practical tips to get solid results fast, then decide what upgrades, if any, make sense for your goals. Below, each subsection gives a focused action plan you can apply today.
 Photo by Jeremy Levin
Pick a capable phone you already own
Start with the device in your pocket and learn its strengths. Your current phone is enough to master framing, light, and timing. If you’re considering an upgrade, prioritize camera features over hype. Look for a reliable night mode, decent optical zoom, and good HDR performance rather than chasing the latest headline specs. Practice with what you have, then upgrade purposefully when you know which gaps to fill. This approach keeps learning affordable and focused.
Learn the basics with auto modes
Auto modes are your friendly tutors. Let the phone handle exposure, focus, and color at first, then study the outcomes. Scene modes can tailor settings for people, landscapes, or low light, helping you see how different conditions respond. Use gridlines to guide composition and give yourself a simple rule to follow: frame, shoot, review, and adjust. As you grow, experiment with Portrait or Landscape modes to see how they alter depth and texture. For a solid starter guide, check out beginner tips from reputable sources.
Edit with simple apps
Begin with beginner-friendly apps that feel familiar and non-intimidating. Simple edits like brightness, contrast, and color balance are enough to reveal how small changes shape mood. Apps with guided workflows help you learn how adjustments translate to real scenes. Start by correcting exposure, then experiment with subtle color tweaks to see how a scene changes with lighting. If you want a trusted starting point, many beginners gravitate to free tools that offer powerful basics.
Practice composition and lighting
Good composition is more than luck; it’s about framing and light. Practice the rule of thirds to guide where the subject sits in the frame, then adjust your position to balance foreground and background. Look for natural light and pay attention to its quality: soft, directional light creates flattering shadows, while harsh sun can wash out details. Practice with everyday scenes, noting how angles, shadows, and reflections alter the story you tell with a single shot.
Back up and organize your shots
Create a simple, repeatable workflow for storage and privacy. Back up photos to the cloud or your computer so you don’t lose work. Rename or use folders by topic to keep a growing library easy to navigate. Regularly review your gallery to delete duplicates and weak photos, and rotate your highlights into a dedicated collection. While you practice, check app privacy settings to control who can see and share your images, especially if you post from shared devices or public networks.
Links for further reading:
- Learn how mobile photography can rival dedicated cameras with portable gear and smart processing: https://www.adobe.com/creativecloud/photography/type/mobile-photography.html
- How smartphone shooting helps you improve overall photography skills: https://digital-photography-school.com/how-using-your-smartphone-camera-can-help-improve-your-photography/
Additional quick reads for practical setup and tips:
- Smartphone photography 101: A guide to stunning shots: https://thewholeu.uw.edu/2024/09/23/smartphone-photography-101/
- How AI (Artificial Intelligence) work with smartphone photography: a beginner’s guide: https://focus.picfair.com/articles/how-does-ai-artificial-intelligence-work-with-smartphone-photography-a-beginners-guide
If you want beginner-friendly guidance on post-shoot edits, explore these resources:
- The Best Photo Editing Apps to Use Right Now: https://themframes.com/features/the-best-photo-editing-apps-to-use-right-now/
- The Best Mobile Photo Editing Apps We’ve Tested for 2025: https://www.pcmag.com/picks/best-mobile-photo-editing-apps
Images and visuals can accelerate learning. A simple, well-lit desk shot or outdoor scene helps you compare auto results with edited outcomes. Consider creating a small, labeled archive of your practice sessions to measure your progress over time.
Want to compare your phone’s performance with a traditional camera? A few trusted analyses offer side-by-sides on image quality, noise, and color handling that can help you set expectations as you learn. For a deeper dive, see expert reviews and datasets from established photography resources.
From Phone to Simple Gear: A Practical Growth Path
Moving beyond your phone doesn’t mean abandoning simplicity. This section outlines a practical, incremental path for beginners who want small, affordable upgrades that noticeably improve results without overhauling their setup. Think of it as a stepping stone program: you keep practicing with what you have, then add targeted tools that fit your style and goals. The idea is to build confidence and skills first, then decide if a traditional camera fits your next chapter. For further reading on affordable enhancements, explore starter gear guides linked throughout this section.
Starter add ons if you outgrow your phone
If you’re getting serious but not ready for a full camera kit, start with three small, affordable upgrades. A compact tripod stabilizes your shots on desks, benches, or on the ground in nature. Clip-on lenses expand your focal options without swapping gear, making landscapes and close-ups more engaging. A basic lighting spray or compact LED light helps you tame harsh shadows and bring warmth to scenes. These items are budget-friendly, portable, and quick to learn with. For practical comparisons and options, see the guides on clip-on lenses and mini tripods.
- Clip-on lenses can broaden your perspective without bulky glass. The best lenses for iPhone and Android phones
- Mini tripods: stability without a heavy bag. The best mini tripods in 2025
- Affordable lighting to lift low light shots. Xenvo Pro Lens Kit
Budget friendly upgrades
Upgrading with purpose keeps costs reasonable while sharpening your craft. Start with affordable lenses that add wide or macro perspectives, then pair them with a compact tripod you can carry anywhere. A portable LED panel or clip-on light can balance color and exposure when natural light is scarce. These tools are easy to learn and quick to implement in your daily shooting routine. As you get more confident, you’ll notice steadier frames, more dynamic angles, and crisper highlights. For quick guidance on tripod picks, see practical recommendations here.
- Lenses that travel light and widen your options. The best lenses for iPhone and Android phones
- Small tripods that fit in a bag pocket. Best phone tripod picks
- Portable lighting solutions to boost color and contrast. The best mini tripods and mounts
A simple project to practice
Pick a small, repeatable project to build skill without pressure. A weekly photo series or a mini photo essay encourages consistency and visual storytelling. Each week, shoot the same subject in different lighting or angles, then choose one image to edit slightly and publish. This routine teaches framing, light management, and editing decisions in a calm, iterative way. After a month, you’ll see progress in subject handling and a clearer sense of your preferred setup. If you want a starter read on ongoing practice, check out practical guides to smartphone photography basics.
- Weekly photo series idea and structure. See practical smartphone photography tips. Smartphone photography guide
Conclusion
For beginners, smartphones are the fastest way to learn and practice. They bundle capture, editing, and sharing in one pocketable tool, which lowers barriers and keeps the practice fun. Start with auto modes on your current phone, study the results, and gradually bake in basic composition and lighting lessons. A few quick edits on a familiar device can reveal how small changes influence mood and storytelling.
A real camera still matters when you want better image quality and more creative control. If you plan large prints, shoot in tricky light, or want precise manual settings and a wider kit of lenses, a traditional camera becomes a solid next step. It gives you deeper learning opportunities and steadier results in demanding situations.
If you’re deciding where to begin, pick up a simple phone project and see how far you can push your skills in a week. Try a small, repeatable assignment like a weekly photo series to build consistency and confidence. Share your progress to invite feedback and keep momentum going.
Interested in trying this approach? Start with a phone project this week, then outline one small upgrade you’d like to test next. Your best camera is the one you actually use, so begin where you are and let your curiosity lead.