He Was Drowning in Bills and Burnout Until a Simple Daily Ritual Rewired His Brain for Wealth in Less Than a Week
>>> Start Your Shift Today <<<

Why brightness keeps changing while filming
Filming with a smartphone means your screen brightness can react to what the camera sees in real time. That automatic dance between light and dark can create flicker, sudden jumps, or a washed-out look if you’re not prepared. In this section, we’ll unpack why this happens and set you up with practical ways to keep brightness steady during your shots.

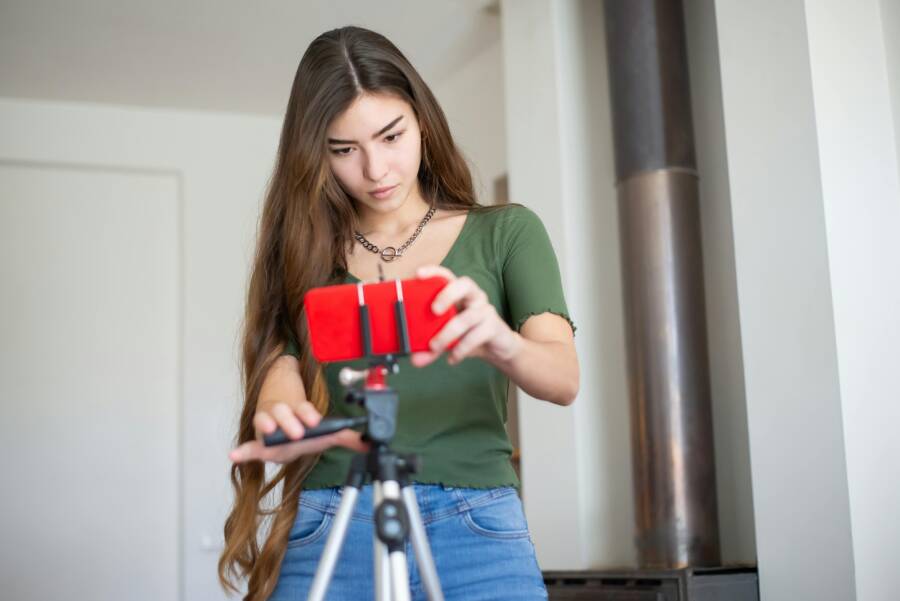
Photo by Kampus Production
Auto brightness and sensor behavior
Smartphones rely on light sensors to decide how bright the screen should be at any moment. When you point the camera at a bright window or a dark corner, the phone’s sensors read the ambient light and instruct the display to adjust accordingly. This is convenient for everyday use, but it can feel unpredictable when you’re filming.
- How it works in plain terms: a light sensor checks the amount of light around you. If it detects a lot of brightness, the screen brightens for visibility. If it detects dimmer surroundings, the screen dims to save battery and reduce glare.
- Why it changes during filming: as you move the camera or the scene light changes, the sensor keeps re-evaluating. A quick glance toward a lamp, stepping into shade, or a shift from indoor to outdoor lighting triggers a new brightness setting.
- The flicker effect: sudden brightness changes can show up as a quick flash or jump in brightness on your screen and in the final video. Even if you don’t notice it while shooting, viewers may notice it in playback.
To keep things consistent, avoid letting the phone continually chase light. Instead, you can lock brightness or control ambient lighting to reduce those automatic tweaks. If you’re curious about real-world examples, this issue often appears across devices and is discussed in user forums and support pages Pixel brightness fluctuations during video playback and other vendor guides.
He Was Drowning in Bills and Burnout Until a Simple Daily Ritual Rewired His Brain for Wealth in Less Than a Week
>>> Start Your Shift Today <<<
Exposure metering in video mode
Your camera doesn’t just track brightness globally. It meters exposure by evaluating what it thinks is most important in the frame. In video mode, the camera tends to prioritize the area it considers the main subject or the brightest highlight. When the scene shifts, the exposure calculation shifts as well.
Thousands of People Were Struggling With Money Until They Discovered This One Ancient Secret Hidden in Sound
>>> Unlock It Now <<<

- What this means for filming: if a person moves from a dark corner into a sunlit area, the camera recalibrates exposure to keep that subject properly visible. The result can be a noticeable lift or drop in brightness from one moment to the next.
- How it shows up in practice: you start filming a subject against a bright window; the camera might underexpose the subject to prevent the window from blowing out. When the subject steps away from the window, the camera rebalances and the scene looks brighter.
- Simple fixes to reduce drama: use a consistent lighting setup when possible, pick a stable exposure target by tapping on the screen to set focus and exposure, or enable exposure lock if your device supports it. You can see similar discussions from users who notice auto exposure shifts during video capture on various platforms Apple discussions on brightness during videos.
Common filming scenarios that trigger brightness shifts
Certain everyday situations are notorious for triggering brightness changes. Being aware of them helps you plan and prevent jumps in your footage.
- Moving from a bright room to a dim one: the phone quickly adjusts to the new light level, often causing a noticeable brightness shift mid-shot.
- Facing a bright window or direct sunlight: backlit scenes push the camera to brighten the foreground, which can underexpose the background or create a glow that looks uneven.
- Mixed lighting: when you have several light sources with different temperatures and intensities, the camera’s metering tries to balance them all, sometimes producing inconsistent brightness across the frame.
- Low battery or power-saving modes: these can subtly affect camera performance, including exposure and brightness adjustments.
- Quick camera movement: panning or tilting can reveal new lighting reflections and cause the exposure to rebalance rapidly.
If you’re encountering brightness changes more than expected, you’re not alone. These patterns show up across devices and operating systems. For further reading, you can explore user experiences on real-world forums and vendor advice pages Realme support on automatic brightness and community discussions about auto brightness behavior in video contexts [Android Central forum on camera brightness].
What this section covers next
- Practical steps to stabilize brightness in real shoots
- Quick workarounds that don’t require heavy setup
- When to rely on post-production adjustments versus on-device controls
This gives you a solid foundation. In the next sections we’ll translate these concepts into actionable fixes you can apply right away, whether you’re filming a talking head, a scenic shot, or a fast-moving action scene.
Lock brightness by controlling exposure and white balance
When you’re filming with a phone, you can keep brightness steady by taking control of exposure and white balance. These settings determine how bright the image will look regardless of sudden light changes in the scene. Below you’ll find practical, device-agnostic steps to lock these parameters so your footage stays consistent from start to finish.
 Photo by IslandHopper X
Use manual or pro video mode
Switching to manual or pro mode gives you direct control over exposure, focus, and color temperature. On iPhone, look for the Video or Cinematic mode controls and switch to a manual or pro option if your model supports it. You can also open the Camera app and tap options to reveal exposure and focus controls, then lock them to avoid automatic changes during recording. On Android, many devices offer a Pro, Expert, or Manual video mode right in the camera app. If your device supports Cine mode or third-party apps, those can provide even finer control over brightness and color.
- Why this helps: manual controls prevent the phone from constantly adjusting to every minor lighting shift. The result is a smoother, more stable brightness in your video.
- Quick tip: after dialing in your preferred exposure and focus, use the lock or AE/AF lock option if available. This keeps the camera from re-tuning when you tilt or reframe.
If you want deeper guidance, see Apple’s guide for adjusting video recording settings on iPhone and similar instructions from Android camera communities. These sources walk you through enabling manual settings and explain how they impact brightness during long takes. https://support.apple.com/guide/iphone/change-video-recording-settings-iphc1827d32f/ios
Lock exposure and focus
Locking exposure and focus is the simplest way to stop brightness from jumping mid-shot. Here are straightforward, device-agnostic steps you can apply, plus notes for popular phones.
- General steps: frame your shot, tap and hold on the area you want to meter (subject or background) until you see an AE/AF lock or exposure exposure indicator. Confirm the lock if your device prompts you.
- How to do it on iPhone: in the Camera app, tap to focus, then press and hold until you see “AE/AF Lock.” You’ll often see a small lock icon indicating exposure and focus are fixed.
- How to do it on Android: tap the screen to focus on your subject, then look for a lock or a dedicated AE/AF lock option in the on-screen controls or in the camera settings. Some devices call it “Lock Exposure” or “Lock Focus.”
- Where to find it on popular phones: iPhone users will find it in the standard Camera app or in Cinematic mode on newer models. Android users typically find AE/AF lock within the camera’s advanced or pro modes.
Tips for consistency:
- Set a stable frame and lock before you start recording.
- If you need to reframe, briefly pause and re-lock to prevent a brightness shift.
- Avoid moving between very different light zones during a single take unless you re-lock exposure after every major change.
For more on locking white balance and exposure on iPhone, see Apple’s instructions here: https://support.apple.com/guide/iphone/change-video-recording-settings-iphc1827d32f/ios
Lock white balance and color temperature
White balance fixes the color tone across your footage. If you shoot in varying light, white balance can drift and make your scenes look too warm, cool, or greenish. Locking a fixed white balance or color temperature ensures color remains steady, no matter where you point the camera.
- Quick approach: choose a preset that matches your lighting, such as Daylight or Tungsten, and lock it if your device supports WB lock. This works especially well when you know you’ll stay under similar lighting conditions.
- Fixed WB for long takes: if you’re filming indoors under bulbs, set a warm color temperature (around 3200K to 3600K). For outdoor daylight, use a cooler setting (around 5200K to 6500K). Lock the WB so the phone sticks to that temperature even as you move.
- How to enable WB lock on common devices: on iPhone, you may find this under advanced video settings or through third-party apps that expose WB lock as a dedicated control. On Android, look for a white balance lock in the pro or manual camera modes.
Practical tips:
- If you must switch lighting, do it gradually and re-lock WB after the change.
- Avoid mixed lighting when possible; a single light source or a consistent setup reduces color shifts.
- When in doubt, use a simple gray card or white card as a reference and set WB to neutral based on what the card reads in your scene.
If you’d like more context on when to lock white balance and how it interacts with color temperature, you can explore related discussions and tutorials from reputable sources and creators. https://discussions.apple.com/thread/256146875
Additional reading and related settings:
- For iPhone users, adjusting video color and exposure in different modes can impact the final look. Learn more here: https://www.youtube.com/watch?v=wkdT9jeQcNE
In practice, locking exposure, focus, and white balance gives you a reliable baseline. You can then adjust lighting with external lights or reflectors without fighting the camera’s auto adjustments. In the next sections, we’ll align these controls with common filming scenarios and share quick workflows you can use in real shoots.
Stabilize lighting and your scene for consistent brightness
Consistent brightness makes your videos look professional and keeps viewers focused on what you’re saying or showing. The goal here is to minimize how much your lighting and camera settings fight each other. With steady light, you’ll reduce flicker, avoid harsh contrasts, and keep skin tones natural across takes. Below are practical, room-to-room techniques you can apply quickly, whether you’re filming indoors or outdoors.
 Photo by PNW Production
SECTION_0: Set up constant lighting
Using steady light sources helps keep brightness steady from the first frame to the last. Lamps, LED panels, or a small light bank can replace or supplement your ambient light. Position lights at about head height and at a 45-degree angle from your subject to create even illumination without hard shadows.
- Place a key light slightly off to one side of the camera so the subject’s face is softly lit.
- Add a fill light on the opposite side to reduce deep shadows, keeping the balance natural.
- If you’re using a single light, bounce it off a wall or ceiling with a diffuser to soften the look.
- Avoid flicker by using constant, not pulsing, light sources. If you must use a dimmer, test at your filming distance to confirm the brightness remains stable.
Pro tip: keep a spare lamp with a stable bulb on standby in case your main light angle shifts during a shoot. This keeps the scene from looking inconsistent if you move your tripod or change framing.
- Lighting setup quick-check: stand in your usual recording position and run a short test clip. Watch for any shifts in brightness as you move or reframe.
For a deeper dive into reliable lighting setups, see expert guides on steady LED lighting for smartphone video.
- What to know about LED lighting for phone video (example reference)
SECTION_1: Avoid backlight and glare
Backlight and glare are common culprits of uneven brightness. The easiest fix is to control where light enters the frame and how the camera sees it. Start by defeating bright windows and direct sun unless you can place the subject between the light and the camera.
- Camera angle: tilt the camera slightly to keep bright windows behind or to the side, not directly in the shot.
- Diffusers: use a soft diffuser over windows or place a white sheet or translucent panel in front of harsh light to soften reflections.
- Window management: draw blinds or curtains to even out outdoor light, especially during mid-day sun.
- Reflective surfaces: watch for shiny desk surfaces or white walls that can bounce light into the lens. If needed, adjust the angle or place a diffuser to tame the bounce.
Practice scenario: you’re filming a talking head near a window. Move the subject so the window is not directly behind them, and use a light panel or a reflector to fill shadows on the face. This keeps brightness balanced without forcing the camera to compensate.
When you can, choose shooting times with consistent ambient light. If you anticipate glare, preface your shot with a quick brightness test and adjust your diffuser or camera angle accordingly.
SECTION_2: Use reflectors and color temperature matching
Reflectors are simple tools that bounce light into shadowy areas, smoothing brightness across the frame. They also help balance color so your subject doesn’t look too warm or too cool if you’re using multiple light sources.
- Use a white or silver reflector at about a 45-degree angle to fill shadows under the chin or around the eyes.
- Place a warm reflector opposite a cool light to balance color temperatures, especially when mixing daylight with artificial light.
- If your lights have adjustable color temperature, aim for a consistent temperature across all sources. Mixing 3200K tungsten with 5600K daylight can create odd tints unless you correct it.
Color temperature consistency matters because color shifts look unprofessional on playback. Locking in a single temperature across lights helps keep skin tones natural and avoids sudden hue changes as you move.
Additional reading on practical lighting tools and color balance can help you refine your setup.
- ND filters for bright outdoors provide a path to steadier exposure in bright sun, which supports consistent brightness in the final clip.
SECTION_3: Consider ND filters for bright outdoors
When you film outside under strong sun, the camera can struggle to hold a steady exposure. An ND filter reduces the amount of light entering the lens, letting you keep your shutter speed and aperture within ideal ranges without blowing out highlights.
She Pressed Play on a Strange Audio Track and Within Days Her Financial Reality Started Shifting in Ways She Could Not Explain
>>> See How It Works <<<

- Result: steadier exposure, less risk of clipping bright areas.
- How to use: screw or clip the ND filter onto your lens and adjust exposure settings to taste. You’ll have more headroom to keep both the subject and background properly exposed.
- Best practice: pair ND use with a fixed white balance and a consistent light setup to avoid color shifts while maintaining a balanced brightness.
If you’re curious about the practical applications of ND filters for smartphone filmmaking, check resources like ND filter guides from lighting and photography sources.
- What ND filter should I use in bright sunlight?
Images and practical examples can help you visualize how ND filters trade light for control, allowing you to shoot steadier outdoor scenes without sacrificing depth of field or color accuracy.
What to do next
- Run a quick brightness test in your usual recording space with your planned lights. Note any flicker or jumps and tweak placement or diffusion as needed.
- Keep a simple setup ready for on-the-go shoots: a compact LED panel, a small diffuser, and a white reflector can cover most scenarios without adding bulk.
- Practice a standard workflow that starts with a quick lighting test, followed by a short test clip with exposure and white balance locked.
For more background on balancing white balance and exposure in varied conditions, explore Apple’s guidance on video recording settings and related camera controls.
- Apple guide to adjusting video recording settings
Images can help readers visualize a practical setup. Use a photo like the one above to illustrate a simple three-point lighting arrangement and keep the caption concise.
If you’re ready to transcript these ideas into a real-world shoot, you’ll find that a steady lighting plan makes all the difference. In the next section, we’ll translate these concepts into a practical on-camera workflow you can apply during a shoot, whether you’re filming a quick update, a tutorial, or a short interview.
Device and app tips for more control
When you’re chasing stable brightness while filming, hands-on control matters more than fancy gear. This section breaks down practical, easy-to-follow ways to take command of exposure, white balance, and lighting on both iPhone and Android. You’ll also find curated app and accessory recommendations to expand your toolkit without breaking the bank.
iPhone tips for manual controls
Accessing manual controls on iPhone unlocks a steady, repeatable look for your videos. Here’s how to get there quickly and reliably, with a focus on consistency.
- Use built-in cine and pro modes: Open the Camera app and switch to Cinematic or Video mode. On supported models, you’ll see controls for exposure, focus, and color temperature. Tap to reveal them, then adjust and lock when possible. This keeps brightness stable as you move the frame.
- Lock exposure and focus: Frame your shot, then tap and hold on the subject area until you see the AE/AF Lock indicator. This locks exposure and focus, preventing constant re-tuning as light shifts.
- Lock white balance when possible: If your device offers a WB lock, enable it after selecting a matching light preset (Daylight, Cloudy, or Tungsten). This prevents color shifts as you shoot under mixed light.
- Quick access to exposure control: On many iPhone models, you can slide the exposure control (a small sun icon) to fine tune brightness. Lock it if you plan a long take in steady light.
- Consider third-party apps for additional control: If you need more granular control over shutter speed, ISO, and white balance, try reputable iPhone camera apps that expose full manual controls. For reference, Apple’s official guidance covers adjusting video settings and explains how these controls impact brightness during recording. See: https://support.apple.com/guide/iphone/change-video-recording-settings-iphc1827d32f/ios
- Practical tip for consistency: Do a quick lighting test before you start. If you must reframe, re-lock exposure to avoid a brightness jump mid-shot.
If you’re curious about cine mode workflows and deeper iPhone controls, Apple’s official camera guidance offers straightforward steps and context. You can also explore tutorials that compare iPhone pro modes with third-party apps to extend what you can do with a smartphone. For a broader look, see: https://support.apple.com/guide/iphone/record-video-in-cinematic-mode-ipha0706e2bc/ios
Android tips for deep control
Android devices vary by manufacturer, but most offer solid pro or manual modes that let you dial ISO, shutter speed, and white balance. Here’s a simple path to reliable control.
- Switch to Pro or Manual mode: In the stock camera app, look for Pro, Expert, or Manual video mode. This is your gateway to direct control over exposure, focus, and color temperature.
- Set ISO and shutter speed deliberately: Start with a low to mid ISO to minimize grain. Pair a shutter speed that matches your frame rate (for example, 1/50 or 1/60 seconds for 24/30fps) to avoid flicker and preserve motion clarity.
- Adjust white balance: Choose a WB preset that matches your lighting (Daylight, Cloudy, Tungsten) or set a custom temperature if your app supports it. Lock or fix WB when you’re shooting a scene with consistent light.
- Focus control: Use manual focus to keep critical subjects sharp, especially when depth of field matters or the scene has shifting elements.
- Use Cine or dedicated modes if available: Some devices include Cine or cinema-like profiles with more precise control. If your phone supports third-party apps, they can provide even finer adjustments for brightness and color.
- Quick reference resources: Android camera communities and guides explain how exposure, WB, and shutter interact in real-world shooting. For a pro-oriented start, you can view practical tutorials that walk through Pro Video Mode usage: https://www.youtube.com/watch?v=mreSrTG26rE
If you’re after a hands-on walkthrough, look for tutorials that compare built-in pro modes across popular Android brands. They’ll help you map features to your device without guessing which menu holds the right slider.
Best apps and accessories to gain control
To push past the limits of stock controls, there are reliable apps and affordable accessories that unlock deeper control and steadier brightness. Some options are free, others paid, but all are designed to be approachable for real-world shoots.
- Manual camera apps worth trying
- iPhone friendly: Halide and Pro Camera by Moment are widely recommended for their granular controls and reliable performance. These apps offer advanced exposure, focus, and white balance adjustments that go beyond the stock camera. Pros: deep control, color accuracy. Cons: some features may require a one-time purchase or subscription.
- Android-friendly: Pro VideoCam and Open Camera are popular for exposing ISO and shutter speed manually. Pros: broad device compatibility, ongoing updates. Cons: UI can be a bit dense for beginners.
- Quick note: many great apps exist, and some are free while others are paid. Check recent reviews to confirm current features and pricing.
- Accessories that make a real difference
- Ring light tripod: a compact setup provides stable, even lighting with minimal space. Pros: fast setup, portable. Cons: can be single-source light if not moved around.
- External LED lights: small panels or pocket LED kits offer adjustable brightness and color temperature. Pros: precise control, portable. Cons: may require extra batteries or power.
- Small tripods and clamps: keep your phone steady in tight spaces or during on-the-move shoots. Pros: stability, flexibility. Cons: not as sturdy as full-size rigs.
- Diffusers and reflectors: softening harsh light and bouncing light back to the subject helps balance brightness. Pros: inexpensive, effective. Cons: adds a bit of gear to carry.
- Quick pros/cons snapshot
- Free apps for quick starts: easy to test, then decide if you want more features with a paid app.
- Paid apps with advanced features: often provide the most precise control and better color management.
- Accessories: small, affordable additions can dramatically improve lighting consistency without weighing you down.
Here are some ready-to-check options for gear and apps you can explore:
- Apps: The Best Camera Apps for iPhone and Android, including Halide for iPhone and Pro VideoCam for Android
- Lighting: Lume Cube Mobile Creator Kit 2.0 and compact ring light tripods
- Quick reads and tutorials: guides on pro mode usage and best practices for smartphone video
For an overview of high-quality camera apps for iPhone, see The Best Camera Apps – App Store, which highlights options like Halide and Pro Camera by Moment: https://apps.apple.com/us/story/id1681936349
If you want a broader look at practical lighting tools and color balance, you can explore recommended LED lighting solutions and how they integrate with a mobile setup: https://lumecube.com/products/mobile-creator-lighting-audio-kit?srsltid=AfmBOordXeeQENkg1iiuERROJ74bnkCUf5BZEiHNOJ2_eXDJXWXmulZZ
For casual testing on a budget, an affordable ring light tripod can be a strong starting point. Check options like Ring Light Tripod on major retailers: https://www.amazon.com/ring-light-tripod/s?k=ring+light+tripod
When you’re ready to go deeper, a few well-regarded camera apps for iPhone and Android can unlock reliable manual control, while accessories like LED panels or diffusers help you maintain consistent brightness across scenes. A quick comparison of apps and gear can save you time and money as you build your kit.
What to do next
- Pick one device path (iPhone or Android) and practice the steps described to lock exposure and WB in a short test clip.
- Try a simple three-point lighting setup with a compact LED panel and a diffuse reflector.
- If you shoot outside, consider an external light or ND filter to keep brightness stable without sacrificing color accuracy.
In the next section, we’ll translate these tools into a practical on-camera workflow. You’ll learn a repeatable sequence you can follow on any shoot to keep brightness steady from first frame to last.
Troubleshooting common brightness issues in the field
Balancing brightness in the real world is part art, part technique. When you’re on location, you can’t rely on perfect studio lighting. The key is understanding how light behaves, then applying quick, repeatable steps to keep brightness steady. Below are practical, field-tested guidelines that work whether you’re filming with a phone or a dedicated camera. We’ll cover common indoor window setups, harsh outdoor sun, and what to do if brightness shifts mid shot.
Filming indoors near windows
Indoor shoots near windows offer beautiful light, but they also invite dramatic brightness swings. The goal is to blend natural light with your artificial sources so the exposure stays stable.
- Create a simple light balance: place a key light at about head height and 45 degrees to the subject, with a diffuse fill on the opposite side. This gives you consistent illumination while the window softens the look.
- Use the window as a base, not the sole source: keep the window behind or to the side, not directly in the shot. This reduces glare and prevents the camera from overcompensating for the bright window.
- Add reflectors or diffusion: a white card or small diffuser can bounce light onto the face, evening out shadows without blowing out highlights.
- Lock exposure and white balance after a quick test: tap to focus on the subject, then lock AE/AF and WB if your device supports it. This prevents the phone from chasing light as you reframe.
- Simple checklist you can print or bookmark:
- Position subject near but not directly in front of the light source.
- Diffuse window light with a translucent panel or diffuser.
- Add a secondary light to fill shadows softly.
- Lock exposure and white balance before rolling.
- Do a quick 3–5 second test clip and review.
If you want a deeper look at indoor natural light, this guide highlights practical approaches to harness available light while keeping color accurate: Mastering Natural Light for Indoor Shooting and for practical balance tips, see LinkedIn Learning on natural light for interior scenes.
Additional quick reference: white balance can drift when mixed with artificial light. To minimize shifts, set WB to a fixed preset that matches the dominant light, then lock it. A gray card can serve as a reliable reference.
Filming outdoors in harsh sun
Bright sun poses a real test for brightness control. The aim is to keep detail in both the subject and the background without blowing out highlights or creating harsh contrast.
- Use ND filters to reduce light entering the lens: a neutral density filter lets you keep your shutter speed and aperture in ideal ranges without overexposing the scene. This is especially helpful when you want to preserve natural motion without flicker.
- Seek shade when possible: position the subject in shade or use a light modifier to soften direct sun. If you can’t avoid sun, angle the camera so the sun is not directly behind the subject.
- Lock exposure after lighting adjustments: after applying ND and choosing a framing, lock exposure to keep a stable brightness level. FiLMiC Pro and other pro apps offer exposure reticles to help with this.
- Balance white balance with your light sources: in bright outdoor conditions, daylight white balance is usually reliable. If you mix light types, set WB to a fixed temperature to avoid color shifts during the take.
- Quick action steps you can apply on the fly:
- Attach a variable ND filter or a fixed ND to your lens.
- Frame and meter, then lock exposure.
- If you move into shade, recheck WB and lock again.
- Use a diffusion panel or reflector to even out harsh shadows.
- Practical tip: when you must shoot in direct sun, keep the subject’s face well lit by filling shadows with a white reflector. This helps maintain consistent brightness across the frame.
For a deeper dive into using ND filters in bright sunlight, see guides like ND Filters Explained and beginner tutorials on smartphone ND usage. You can also explore practical demonstrations in videos such as the beginner guide to smartphone ND filters.
If you’re curious about simulating window light outdoors, you can study how professional setups recreate soft, directionally even light in outdoor environments with reflectors and diffusers. A good reference on how to manage natural light outdoors is linked here: ND Filters Explained: How They Work & Use Them.
What to do if brightness keeps changing mid shot
Mid-shot brightness shifts can kill the mood of your footage. When exposure drifts, your audience notices even if the scene is visually compelling. Here’s a clean, fast action plan to regain stability without breaking the rhythm of your shoot.
- Pause briefly to reassess: stop moving and take a moment to re-evaluate lighting and camera settings. A short pause is worth the smoothness you gain.
- Re-lock exposure and focus: re-tap to meter the subject, then lock AE/AF again. If your device supports manual exposure, switch to manual and confirm the lock before you continue.
- Check white balance and color temperature: if the light has shifted, re-set WB to the closest preset or lock a fixed temperature. If you’re mixing light sources, avoid abrupt color changes by keeping WB stable.
- Use a quick exposure check mid-take: a 1–2 second preview can confirm the brightness looks right on a calibrated monitor or phone screen.
- Keep a simple workflow handy:
- Pause if something changes in the lighting.
- Re-lock exposure and focus.
- Re-check WB and color temperature.
- Resume with a short test clip.
- If you must reframe, do a brief re-lock after the move.
For reference, many creators share practical tips on keeping brightness consistent during video capture. Apple’s guidance on adjusting video recording settings can help you understand how these controls interact with the camera’s tone mapping: https://support.apple.com/guide/iphone/change-video-recording-settings-iphc1827d32f/ios. If you’re using Android, you can find similar discussions in camera communities and tutorials that cover Pro or Manual modes.
In the field, the fastest fixes come from a habit you can repeat: a quick lighting test, a consistent setup, and a lock on exposure and white balance before you roll. This trio keeps brightness from bouncing around, so your content looks intentional rather than accidental. When you’re ready, the next sections will translate these habits into a practical, step-by-step workflow you can apply on any shoot.
Conclusion
Stabilizing brightness while filming comes down to three things: take control of exposure, lock white balance, and set up steady lighting. Using manual or pro video modes prevents the phone from chasing every light shift in the scene. Locking exposure and focus gives you a predictable baseline you can trust across takes. A fixed white balance keeps colors from drifting as you move.
Pair these controls with a consistent lighting setup. A simple three point arrangement, a diffuser, and a reflector can dramatically reduce brightness jumps. When you shoot outdoors, an ND filter helps you keep exposure steady without losing color accuracy. With a steady light plan, your smartphone footage reads as intentional and professional.
Try this on a real project and compare the results. If you can, share what worked and what didn’t so others can learn from your experience.
Thousands of People Were Struggling With Money Until They Discovered This One Ancient Secret Hidden in Sound
>>> Unlock It Now <<<