Are you trying to capture clear voice on a phone while the room buzzes with background noise? It’s a common problem that makes even a good performance sound muddy. The good news is that you can still get crisp results with the right approach.
This introduction shares practical steps you can apply right away. You’ll learn how small changes to your space, smart phone technique, and simple apps can dramatically improve clarity. A few minutes of setup before you record can save hours of editing later.
First, optimize the space. Choose a quiet room, close doors, and move away from noisy appliances. A soft surface, like a blanket or rug, helps reduce echo. Then switch to a close mic technique, holding the phone close to your mouth and speaking a natural, steady pace. If you have an external mic, use it; it can boost warmth and reduce spill.
Next, choose the right tools. Look for apps that offer gain control, noise suppression, and a clean, linear recording path. After you’re done, a quick post processing pass—gentle noise reduction, light compression, and EQ—can lift voice from the noise floor without sounding extra processed.
By combining space tweaks, careful mic technique, and practical apps, you can produce clear voice recordings with a smartphone even in a noisy room. You’ll sound more confident and your message will land with less distraction, whether you’re pitching, teaching, or sharing ideas.
Understand the noise in the room and set a clear goal for phone recordings
Before you press record, take a quick inventory of the room and decide what you want to sound like. The more you know about the noise around you, the easier it is to shape your voice so it cuts through cleanly. This section breaks down how to identify common disturbances, choose a practical mic distance, and define a concrete voice target. You’ll find real-world examples and quick checks you can apply right away.
Identify the main noise sources
Noise comes from many places, and each type affects your voice differently. Look for:
- Mechanical hums: air conditioners, fans, refrigerators. These steady tones can sit in the background and create a constant buzz that competes with your voice.
- High-frequency clutter: computer fans, distant traffic, keyboard taps. These sharp sounds can thin your voice or make consonants harsher.
- Room reflections: hard surfaces like glass, tile, or bare walls. Echoes can smear your words, making speech sound hollow or distant.
- Close sources: someone talking nearby, pets moving in the background, a phone buzzing. These compete with your mic and pull focus from your voice.
Quick checks you can run:
- Stand where you plan to record and clap once. If you hear a noticeable echo, you’re getting room reverberation; you’ll want soft furnishings or a closer mic strategy.
- Turn off or mute appliances one by one and listen for changes in the room’s “noise floor.” If a single device drops the noise floor a lot, plan a quick setup tweak around it.
- Do a short test recording and play it back at normal listening level. If your voice sounds muffled or distant, you likely need to adjust distance or reduce reflections.
For deeper reading on how room noise behaves in real spaces, see how researchers study room noise in telephone locations and related work. https://ieeexplore.ieee.org/document/6770081/
Set a realistic mouth to mic distance and speaking level
A practical range to start with is about 4 to 8 inches from mouth to phone mic. This distance keeps your voice strong without overloading the mic. Speak at a natural, conversational level, not shouting. If you place the mic too close, you’ll notice pops, sibilance, or muffled sound as your breath and plosives overwhelm the capsule.
Tips to maintain a steady, clean capture:
- Keep your head and shoulders relaxed; don’t lean into the mic.
- Breathe steadily and avoid big breaths directly into the microphone.
- If you must adjust, do it between phrases, not mid-sentence, to avoid abrupt changes in level.
Define your target voice quality
Aim for a voice that sounds clear and natural with minimal background noise and little room echo. A simple target helps you measure progress quickly.
- Before: a recording where the room noise overwhelms the voice and echoes smear syllables.
- After: you hear a warm, direct voice with clean articulation and little ambience.
Quick before/after example:
- Before: “This is a test in a noisy room.” with a distant, airy tone.
- After: “This is a test in a quiet, controlled space,” delivered close to the mic with a steady cadence.
A good reference point is to compare your recordings against established standards for smartphone recordings in noisy environments. For a broader view of strategies and challenges, see this overview of collecting speech data in noisy environments: https://waywithwords.net/resource/collecting-speech-data-noisy-environment/
If you’d like practical tips on listening for quality shifts, another concise guide covers strategies to improve noisy speech recognition and can help you calibrate your expectations: https://www.forasoft.com/blog/article/speech-recognition-accuracy-noisy-environments
This section provides a clear, actionable framework you can apply in minutes. The goal is to train your ear and your setup to deliver a voice that stands out for all the right reasons. For more on how smartphone recordings stack up against professional benchmarks, see this study on the quality of mobile recordings: https://pmc.ncbi.nlm.nih.gov/articles/PMC10545813/
Create a quieter recording setup for clearer phone recordings
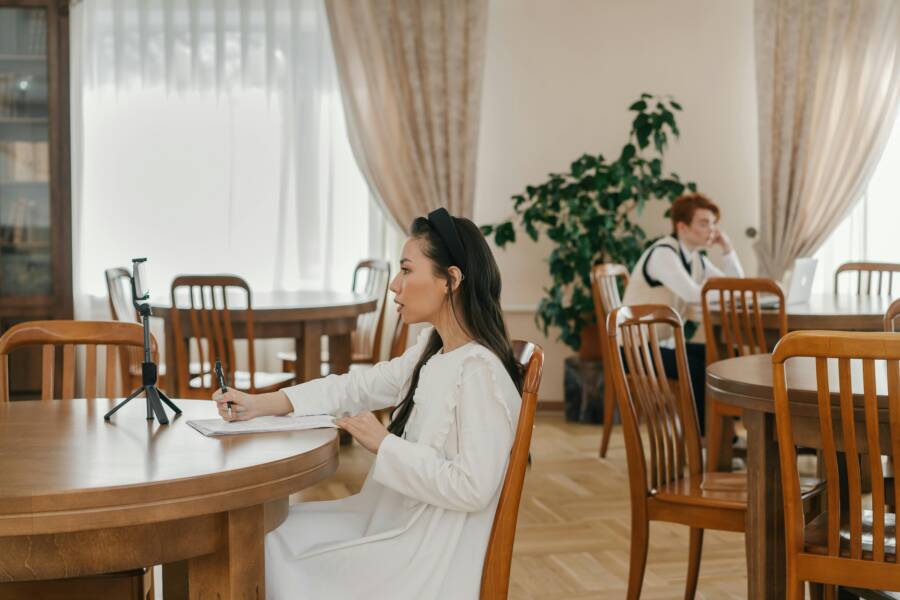
A calmer, more controlled recording environment goes a long way toward clarity. In a noisy room, your voice can drown in the background and the listener tires quickly. This section shows practical steps to create a quieter setup that you can implement in minutes. We’ll cover selecting the right space, eliminating distractions, and fixing mic alignment with a stable stand. Together, these tweaks help you capture clean, natural voice so your message lands with confidence.
 Photo by Mikhail Nilov
Choose a room with less echo and fewer distractions
A room with soft surfaces makes a big difference. Look for a space with carpet, curtains, or a couch to absorb sound. If you can’t change the room, add quick fixes like a thick blanket over a chair or a rug on the floor to cut reflections. A quiet corner near a wall can work well because the wall helps dampen sound from the room while you stay out of the open, echo-prone area.
How to spot the best spot quickly:
- Position yourself away from hard, reflective surfaces like glass or bare tile.
- Put a lightweight blanket or quilt on a chair or table behind you to calm reflections.
- Aim for a small, sheltered area where ambient noise stays low, such as a corner by a bookshelf or a couch.
Practical tips you can apply today:
- If you have a closet or wardrobe nearby, consider a quick improv setup there for its dense fabrics and built-in padding.
- Use a doorway as a natural sound trap by placing your back near the door while keeping the mic in front.
- Avoid drafty windows and noisy electronics that sit near your speaking position.
A simple test helps you decide quickly. Record a 5-second spoken line and clap once nearby. If you hear a distinct echo or the voice feels distant, move to a softer spot or add more absorption. For more science on room acoustics and noise behavior in everyday spaces, check out introductory resources on room acoustics and speech recordings in quiet environments.
Turn off or minimize source noises and distractions
The goal is to lower the ambient noise floor as much as possible. A short checklist keeps you on track and ready to press record.
Checklist to run before you start:
- Switch off fans, HVAC, air purifiers, and other constant noise sources.
- Mute or silence phone notifications and computer alerts.
- Close windows to block street or outdoor sounds.
- Delay tasks that create noise, like keyboard clacking, printer whirs, or nearby conversations.
Timing matters. If you can, plan recordings during the quietest parts of the day. Dim the house around you and avoid splashing noise from appliances that might cycle on and off. A calm environment makes the close mic technique more effective and reduces post-production work.
If you need a quick reference, keep this practical reminder in mind: a quieter room equals less work in post, and a few minutes of upfront setup can save you editing time later.
Position the phone on a stable stand for ideal mic alignment
Stability is as important as the mic distance. A small tripod or phone stand keeps the device from shifting and helps you maintain consistent mouth-to-mic alignment. Set the phone to chest height so the mic points slightly upward toward your mouth. This angle minimizes breath plosives and keeps the voice centered in the recording.
How to optimize stance and distance:
- Place the phone about chest height and angle the top of the phone toward your mouth.
- Keep the mouth-to-mic distance steady, ideally 4 to 8 inches from the lips.
- Avoid touching the phone during recording and resist adjusting the angle mid-sentence.
A steady setup reduces inconsistent levels and reduces the chance of breath noises spoiling a take. If you use an external mic, connect it to your phone and test a quick line before committing to a full take. The goal is a clean, direct voice path with minimal spill from surrounding sounds.
Tips to maintain consistency:
- Stand or sit with a relaxed posture; avoid leaning into the mic.
- Use a light touch on the mic if you share the same space, preventing accidental bumps.
- Do a quick one-phrase test after any minor position change to confirm the level remains stable.
If you’d like a deeper look at mic distance and alignment, you can explore practical guides on mic placement for handheld recording and close-mic technique. While smartphone behavior varies by model, the core idea stays the same: steady distance, steady angle, steady posture.
Images and practical examples can help you visualize the setup. For a real-world look at a quiet, well-organized recording space, see visuals of close mic technique in action.
What to do during actual recording:
- Keep your breathing even and natural.
- Speak at a consistent tempo, avoiding bursts of loud talk that can saturate the mic.
- If you pause, don’t move the phone; a brief silence is better than a messy volume shift.
By combining a quieter room, minimized distractions, and a stable phone stand, you create a solid foundation for clear voice recordings on a smartphone. This approach makes the noisiest rooms workable, so your message comes through with warmth and clarity. For reference on how these practices align with broader best practices in phone-based voice capture, review examples of effective close mic setups and room treatment strategies.
Capture clean voice with your phone
In noisy rooms, the phone can still be your best friend for clear voice capture. The key is a practical mix of technique, space management, and smart use of built in features. Below you’ll find four concise subsections that keep things actionable and repeatable. Each part builds on the last so you can apply the guidance in real time, whether you’re recording a quick voice memo, a podcast, or a tutorial.
Use close mic technique and correct mouth distance
Close mic technique means bringing the mic (your phone) close enough to your mouth to dominate the sound of your voice over the room noise, without introducing pops or breath sounds. A reliable rule of thumb is 4 to 8 inches away from the lips. This distance creates a direct voice path and reduces reverberation from the room.
- Maintain a steady pace and consistent distance as you speak. If you drift closer or farther, you’ll notice level shifts that are hard to fix in post.
- Avoid breathing directly into the mic. Breath sounds can become loud and distracting, especially when the mic is so close.
- Keep your jaw relaxed and speak at a natural speed. The goal is clarity, not loudness.
Tip: if you have to adjust distance mid take, do it between phrases. Small, deliberate movements preserve the continuity of your vocal level.
Angle, posture and breathing to reduce reflections
How you sit or stand changes how your voice hits the mic and how room reflections bounce back. A slight tilt of the head and a relaxed posture help keep your voice centered and reduce sibilance from consonants.
- Sit or stand with your spine straight but not rigid. Let your shoulders rest naturally.
- Tilt the head slightly downward and toward the mic so your mouth points toward the phone. This angles your voice toward the capsule and helps keep it direct.
- Breathe from the diaphragm. Diaphragmatic breathing gives you steadier air flow and steadier volume, which reduces mouth and throat noise on each syllable.
Keep the setup simple: a calm posture and a light breath control routine can make a surprising difference. For a practical look at mouth breathing and vocal control, you can review breathing tips for voice work. https://web.tapereal.com/blog/voice-over-breathing-5-control-tips/
If you want to explore how posture affects sound in more depth, consider broader breathing and vocal practice resources. https://www.whisperroom.com/blog/how-to-make-clean-vocal-tracks-sound-amazing
Leverage built in phone features and apps for gain and noise control
Your phone offers tools that make close mic work easier. Use gain control to avoid clipping, enable noise reduction to quiet background sounds, and try voice isolation to keep the speech prominent.
- Gain control: Adjust so your voice sits in a healthy range without distortion. If your voice peaks, back off slightly.
- Noise reduction: Activate a mode that suppresses background hum and hiss without dulling your voice.
- Voice isolation: On iPhone, look for voice isolation or conversational mode to minimize ambient chatter. Android devices offer similar options in many phones and third party apps.
A quick test after enabling these features helps confirm you’re getting a clean path from voice to file. If you’re exploring apps, note that there are several well regarded options for noise suppression and voice processing. For a guide on noise cancellation apps, see industry overviews and comparisons. https://iris.audio/blog/5-best-noise-cancelling-apps
If you’re curious about using a dedicated mic adapter with your phone, there are simple, compatible solutions that let you connect a lavalier or compact shotgun mic. https://saramonicusa.com/lavmicro-u3a-ultracompact-clip-on-lavalier-microphone-with-usb-c-for-android-mobile-devices-computers-with-6-6-2m-cable-right-angle-adapter
When possible, connect an external mic for better sound
An external microphone often delivers warmer tone, fields noise more effectively, and reduces spill from nearby sources. A lavalier mic clipped near the collar picks up the speaker’s voice consistently. If you prefer a compact shotgun mic, it can provide directional focus and suppress off axis noise.
- Choose a lavalier for hands free operation and close capture; many models work directly with smartphones via USB-C or Lightning adapters.
- A small shotgun mic can offer tighter pickup and better rejection of side noise when you’re in a busy room.
- Check compatibility with your phone and the adapter you plan to use. Simple USB-C adapters or Apple certified cables often do the trick.
Practical compatibility notes and easy adapters are widely available. For example, lavalier options compatible with modern smartphones can be found from reputable brands, with adapters that fit iPhone and Android devices. https://saramonicusa.com/ LavMicro U3A Lavalier Mic page provides a concrete example of a compact mic that works with multiple devices.
A simple, effective setup might be: clip the lavalier on, run a short USB-C or Lightning cable to the phone, and perform a quick line test before you begin recording. You’ll notice immediate gains in clarity and consistency, with less room noise bleeding into the track.
Images can help you visualize a clean, close mic arrangement. If you’re publishing this section with visuals, the quiet setup photo below fits well where you discuss a calm recording environment.
- Photo: A quiet recording setup with a smartphone on a stabilizing stand Credit: Photo by ANTONI SHKRABA production Source: https://www.pexels.com/photo/pexels-photo-8412297 Caption: A steady smartphone setup ready for a close mic recording
By combining a steady technique, simple room tweaks, and the right tools, you can capture clear voice on a smartphone even in a noisy room. External mics are a practical upgrade when you have the option, and the right app features can help you dial in a professional sound more quickly.
External resources can provide deeper context on close mic practice and mobile audio capture. For broader guidance on best practices in phone based voice capture, see a study comparing mobile recordings with professional benchmarks. https://pmc.ncbi.nlm.nih.gov/articles/PMC10545813/
For a practical roundup of smartphone audio workflows, including apps and hardware options, you might also find this overview useful. https://peekatthis.com/capture-audio-smartphone-iphone/
This section gives you a concrete framework to improve voice clarity right away. The next part adds more practical spacing and setup ideas you can apply in minutes to keep your recordings clean from the start.
Improve clarity with apps and post processing
After you finish a clean close mic recording on a smartphone, a small amount of post processing can make a big difference. The goal is to preserve natural voice while reducing distractions from the room. Keep it simple and repeatable so you can apply the same steps to future recordings. Think of this as fine tuning your hard work rather than rebuilding it. Below you’ll find practical steps for gentle EQ, light compression, noise reduction, and a soft limiter, along with tips for saving and exporting. You’ll also find a few credible resources to deepen your understanding if you want to experiment further.
Quick post processing steps after recording
A quick pass after recording can lift your voice above the noise floor without making it sound artificial. Here are straightforward steps you can apply in minutes.
- Gentle equalization to tame harsh frequencies. A subtle dip around 2.5 to 5 kHz can reduce sibilance and edge, while a gentle boost around 80 to 120 Hz adds warmth if your voice sounds thin. Avoid drastic EQ changes; small nudges work best on close mic captures.
- Light compression to even levels. Set a low ratio (2:1 or 3:1) with a slow attack and release. This helps control peaks without flattening dynamics. Listen for a natural win and avoid a processed feel.
- Small amount of noise reduction only if needed. Use the minimum necessary to remove residual hum or hiss without dulling the voice. Preview the result at normal listening levels to ensure consonants stay crisp.
- Apply a soft limiter at the end. A tiny ceiling bump to -0.5 dB prevents clipping on loud phrases while keeping the loudest moments in check.
- Export formats and naming. Save a high quality WAV copy first, then create a lighter MP3 version for quick sharing. Name files with a simple scheme like:
Voice_NoisyRoom_YYYYMMDD_01.wavand increment the suffix for different takes. For quick guidance on formats and settings, see expert discussions on common formats and practical export choices.
If you want a deeper dive into the right order for processing steps, there are expert discussions on when to apply noise reduction relative to EQ and compression. These conversations emphasize keeping the natural voice intact while reducing room noise. For a practical overview, check this resource: https://sound.stackexchange.com/questions/34332/when-to-apply-noise-reduction-before-or-after-other-processing
When you’re ready to try specific settings, a concise guide on compression and noise management can help you dial in the balance without overdoing it: https://www.theaudiopod.com/blog/fixing-problems-using-audio-compression-tips-and-settings
For a quick sanity check, compare your processed version to a clean reference track. If the voice sounds overly dull or too bright after processing, back off the EQ a notch and reset the compression to a lighter setting.
Mistakes to avoid when processing
Post processing is easy to overdo. The goal is clarity, not a studio polish that masks character or introduces artifacts. Here are common missteps and how to fix them quickly.
- Overly aggressive noise reduction. Too much noise reduction can create a robotic, hollow, or “watery” sound. If you hear a metallic or underwater tone, back off and instead focus on a gentle high shelf and a narrow noise-reduction only on the problematic band. A practical guide on when to apply noise reduction helps you gauge the right balance: https://sound.stackexchange.com/questions/34332/when-to-apply-noise-reduction-before-or-after-other-processing
- Heavy compression that removes life. High ratios and fast attack can flatten dynamics and make the voice sound dull. If you hear pumping or a rubbery feel, reduce the ratio to 2:1, slow the attack, and listen for natural amplitude movement.
- Too much equalization. Slamming a broad boost or a deep cut can change the character of the voice and emphasize sibilance. If the voice sounds unnatural, reset to a flat EQ and reintroduce only small, targeted tweaks.
- Excessive processing chain. Layering multiple effects can accumulate phase shifts and introduce odd artifacts. Keep it simple: start with a clean capture, apply one or two gentle corrections, then recheck differences after each change.
- Ignoring headroom. Clipping or pushing levels in mastering can distort consonants and vowels. Always leave headroom of a few dB and recheck with a peak meter.
If you want concrete examples, a discussion on how subtle adjustments can worsen results is a good reference. It shows how quick fixes can become a problem when overused: https://soundonsound.com/forum/viewtopic.php?t=71787
When you need quick, practical fixes, a reputable guide on compression tips and settings can help you recover a dull or overly bright take without losing natural tone: https://www.theaudiopod.com/blog/fixing-problems-using-audio-compression-tips-and-settings
Tips for saving and exporting the final file
Saving and exporting correctly preserves your hard work and keeps files ready for sharing or uploading. Use a straightforward workflow that you can repeat.
- Save in WAV for the master copy. WAV preserves all your adjustments with full dynamic range, making it ideal for archiving.
- Export a clean MP3 for distribution. A 192 kbps to 256 kbps MP3 strikes a balance between quality and file size for most podcasts and voice memos.
- Choose a sensible sample rate. For phone voice, 44.1 kHz is standard; 48 kHz is fine if you’re matching video workflows.
- Set a reasonable bitrate for MP3. 192 kbps gives clear voice with small file sizes; 256 kbps is better if you want near-CD quality.
- Simple naming convention. Use clear names like
Voice_NoisyRoom_Processed_20250828_01.wavfor the master, andVoice_NoisyRoom_Processed_20250828_01.mp3for the delivery file. Consistency makes version tracking easy.
If you’re curious about how professional formats are chosen for different contexts, a practical guide reviews common choices and their tradeoffs. https://www.masteringbox.com/learn/audio-formats
For Android users, a guide on recording high quality audio on Android devices provides practical tips that align with our approach here: https://borisfx.com/blog/how-to-record-audio-on-android-good-quality-guide/
Audacity users often find it helpful to compare formats and settings. This discussion on MP3 and WAV formats can be a quick reference: https://forum.audacityteam.org/t/mp3-and-wave-formats/63702
Putting these steps into a simple routine helps you stay consistent. Save a high quality master, then render smaller delivery files for sharing, and keep a clean naming convention so future edits go smoothly.
External resources can expand your toolbox as you grow more confident with post processing. A broader study of mobile audio workflows and practical comparisons offers useful context for smartphone based voice work: https://peekatthis.com/capture-audio-smartphone-iphone/
If you want a compact, repeatable checklist, consider building a short post processing template. It ensures you apply the same adjustments every time, which saves time and preserves voice consistency across episodes or projects.
In the next section, we’ll explore practical spacing and setup ideas to keep your recordings clean from the start. You’ll find tips you can apply in minutes, even in a busy home or office.
Conclusion
Clear voice in a noisy room is achievable with a simple, repeatable setup. Start by shaping a quieter space, use a close mic approach with a steady distance, and enhance with built in phone features or a compact external mic when possible. Quick post processing keeps the natural tone while cutting remaining room noise, so your message stays front and center. Practice these steps with your smartphone, refine your settings, and you’ll hear steady improvements over time.
Printable quick checklist
- Choose a softer room or add absorption (carpet, blanket, curtain)
- Silence constant noise sources and notifications
- Set mouth to mic distance to 4–8 inches
- Stabilize the phone on a stand at chest height
- Enable gain control, noise reduction, and voice isolation if available
- Record a short test and adjust as needed
- Do a light post edit: gentle EQ, light compression, small noise reduction
- Save master as WAV and deliver a shared MP3 version
If you try these tips, share your results or questions in the comments. I’d love to hear what worked for you and what you’d like to improve next.