Thousands of People Were Struggling With Money Until They Discovered This One Ancient Secret Hidden in Sound
>>> Unlock It Now <<<

Ever posted a photo on Instagram and felt it miss the sharpness or color you saw in the moment? You’re not alone. Low quality uploads are a common frustration, but you can fix most of this right from your phone with simple, practical steps that don’t require fancy gear or extra apps.
In this guide you’ll learn how to get cleaner details, more accurate colors, and smaller file sizes that still look great on feed. We’ll cover quick checks before you snap, smart export settings, and easy editing tweaks that preserve quality as you share. You’ll discover why shooting in good light matters and how to use your phone’s built in features to keep your photos crisp. The goal is to help you post consistently sharp images whether you’re on an iPhone or an Android device, so your feed looks polished every time.
Along the way you’ll pick up practical habits that fit real life. Simple things like choosing the right aspect ratio, avoiding over compression, and understanding when to resize can make a big difference. We’ll also outline a straightforward workflow so you can repeat it across different smartphones without guesswork. By the end, you’ll have a clear, repeatable process that helps your visual storytelling stay strong from post to post.
If you want better results from your edits and a smoother publishing routine, this guide is for you. It’s written with plain language, real world tips, and a focus on quick wins you can apply today. Whether you post mainly from a smartphone or juggle content between devices, you’ll walk away with practical steps to keep your Instagram uploads looking their best.
He Was Drowning in Bills and Burnout Until a Simple Daily Ritual Rewired His Brain for Wealth in Less Than a Week
>>> Start Your Shift Today <<<

Prepping Your Photos: Start with a High Quality Source
Begin with a solid capture. The best Instagram posts start with a high quality source, not a clever edit. If you want crisp detail, accurate color, and plenty of headroom for cropping, you’ll want to optimize how you shoot from the moment you press the shutter. Below you’ll find practical steps to ensure your photos have the best possible starting point before you move on to editing or posting.
Capture at the Best Resolution
Your first move is to set the camera to the highest resolution your phone supports and avoid any built in compression tricks that degrade image quality. If your device offers RAW capture, use it. RAW preserves more detail and color information, giving you a stronger foundation for post work. After shooting in RAW, you can convert to JPEG later for sharing without losing the benefits of the higher quality data you captured in the moment.
- Set the camera to the highest resolution available in your device’s settings. This is typically found under Camera or Video settings, and may be labeled as “Photo Resolution,” “Image Size,” or similar. For many iPhones, you’ll find this in the Camera settings, and you can choose the maximum megapixels your model supports. If your phone supports RAW, enable it when you know you’ll want more latitude in editing.
- Avoid digital zoom entirely. Digital zoom crops the image digitally, which reduces sharpness and introduces artifacts. Instead, move closer to the subject when possible, or plan to crop during editing.
- When RAW isn’t available or convenient, shoot at the highest JPEG quality. If you’re curious about how to enable RAW on iPhone, see guidance from Apple’s camera settings articles and RAW photography resources. For more detail, you can explore resources like Apple’s guidance on taking ProRAW and related settings, and RAW photography tutorials from reputable photography guides. For quick beginners’ context, a strong starter is understanding the difference between RAW and JPEG and how to switch resolutions on modern devices. See examples and how-to guides here: https://www.idownloadblog.com/2025/03/14/how-to-take-raw-photos-iphone/, https://support.apple.com/en-mt/guide/iphone/iphae1e882a3/ios, and https://digital-photography-school.com/smartphone-raw-photography/.
Concrete example: shooting at 12 MP with RAW gives far more detail than capturing a quick 1080p thumbnail and hoping it scales up. If you’re posting to Instagram, you’ll usually end up exporting to JPEG at a resolution Instagram optimizes for your feed, but starting from a higher resolution keeps your options open for cropping and adjustments later.
- If you want to dive deeper into RAW vs JPEG and model support, a comprehensive guide can be found here: https://digital-photography-school.com/smartphone-raw-photography/.
- For a practical path to shooting RAW on iPhone, check out the step-by-step article here: https://www.idownloadblog.com/2025/03/14/how-to-take-raw-photos-iphone/.
When you shoot with the highest quality source, your editing decisions become about refinement, not recovery. You’ll thank yourself later when you’re trying to preserve detail in highlights and shadows.
Keep Lighting Consistent and Steady
Lighting is the single biggest lever for image quality. Consistent, flattering light makes colors pop and reduces the need for heavy editing to fix exposure. Plan ahead and set yourself up for success.
- Use natural light whenever possible. A bright, diffused window light often yields clean skin tones and accurate color. If you’re outdoors, seek shade during the middle of the day to avoid harsh sun.
- Avoid harsh backlight. If the subject is lit from behind, the face can look underexposed or silhouettes can drown the details. If you can’t avoid backlight, position the subject so the light is in front or at a 45-degree angle.
- Lock exposure and focus when you can. Many phones offer an AE/AF lock or a simple exposure lock on the capture button. This is especially helpful in scenes with changing light or strong contrasts. For iPhone users, the Camera Control features provide DSLR-like exposure control in certain iOS versions. See resources on locking exposure and focus here: https://www.macrumors.com/how-to/iphone-adjust-double-click-speed-camera-control/ and https://www.idownloadblog.com/2024/11/13/apple-ios-18-2-iphone-camera-control-lock-focus-exposure/.
- Stabilize the phone to prevent blur. A steady shot is a sharp shot. Use a tripod, a stable surface, or a simple handheld grip. If you’re shooting without a tripod, tuck your elbows in, plant your feet, and press the shutter gently to minimize shake. A timer or remote shutter can further reduce motion blur when you’re hands-free.
A steady, well lit scene gives you a much better base to work from. Don’t rush the lighting. Even a modest two or three minute setup can dramatically improve your final result.
Avoid Digital Zoom and Blur
Digital zoom is almost always a bad idea for high quality photos. It enlarges the image digitally, which effectively crops the picture and resamples the data, leading to softer edges and more artifacts. Instead, apply a simple rule: get closer when you can, then crop later if needed.
- Move in closer rather than zooming. If you can’t physically get closer, you’ll want to crop in editing rather than zooming at capture time.
- Use a tripod or a stable surface. A steady setup minimizes shake and helps you hold a steady frame, especially in lower light or with longer shutter speeds.
- Use a timer or a remote shutter to minimize movement. A quick tap can introduce small shakes; a timer or Bluetooth remote keeps things still.
In practice, this means you’ll often crop your shot during editing to frame the subject just right. The crop can be used to adjust composition and emphasize the most important details without sacrificing overall image sharpness. The goal is a clean, balanced frame that remains crisp when Instagram compresses it for the feed.
If you want more context on why digital zoom harms image quality and how to approach close-ups, see articles that explain digital zoom and the value of moving closer: https://www.essentialdigitalcamera.com/2024/07/smartphone-photography-tip-of-week_02135006929.html and https://makeuseof.com/smartphone-photography-mistakes-to-avoid.
Key takeaways for this section:
- Start with the highest resolution and consider RAW when possible.
- Keep lighting even and avoid strong backlight.
- Stabilize the phone to prevent blur and use a timer or remote shutter.
- Avoid digital zoom; crop in editing instead.
Links for further reading and practical steps:
- How to capture resolution options and RAW on iPhone: https://www.idownloadblog.com/2025/03/14/how-to-take-raw-photos-iphone/
- Apple guide for ProRAW and camera settings: https://support.apple.com/en-mt/guide/iphone/iphae1e882a3/ios
- RAW photography basics and device examples: https://digital-photography-school.com/smartphone-raw-photography/
As you move to the next section, you’ll see how to fine tune exposure and keep your subject crisp while staying within Instagram’s upload limits. A stable, well lit capture is the cornerstone of a feed that looks polished from the first tap. For now, keep your smartphone handy in good light, steady your shot, and resist the urge to zoom in digitally. Your future posts will thank you.
Export and Size for Instagram
Getting your images to look their best on Instagram starts long before you press post. It begins with how you export from your phone or computer and the size you deliver. In this section, you’ll learn practical export settings, the right aspect ratios, how to crop for the grid, and a light sharpening step that helps preserve detail after compression. These moves keep your photos crisp, color accurate, and ready for the IG algorithm to love.
Export as JPEG in sRGB
Color accuracy matters on Instagram, and it starts with color space. sRGB is the most consistent color profile across phones, tablets, and web browsers. Exporting in sRGB helps reduce color shifts that can creep in during compression and viewing on different devices. When you export from common apps, aim for a quality setting that balances detail with file size. A practical range is around 80 to 90 on the quality slider. This keeps edges clean without creating huge files that IG has to compress again.
- Why color space matters: Most devices read sRGB the same way, so your reds pop and blues stay true across screens.
- How to export in practice: In your camera or photo editing app, choose JPEG, set color space to sRGB, and adjust the quality slider to about 80–90. This preserves detail while keeping the file manageable for IG’s processing.
- Quick checks: After export, view the image on a phone screen and a computer screen to confirm the colors feel right and not washed out or oversaturated.
If you want a straightforward reference, many photographers rely on this workflow for consistency across devices. For a deeper dive into export settings and what works best for social sharing, see a practical guide on smartphone export practices and color space choices. You can explore examples and guidance here: https://www.adorama.com/alc/instagram-export-settings/
Use the Right Aspect Ratio for Posts
Instagram supports several aspect ratios, and choosing the right one helps your photo fill the screen without awkward crops. The main options are:
- 1:1 (square)
- 4:5 (portrait)
- 16:9 (landscape)
- 1:1 is solid for a clean grid and when the subject looks balanced in a square frame. It’s a timeless choice for product shots or portraits where symmetry matters.
- 4:5 is the standard for most feed posts. It uses more vertical space, which can command more attention as viewers scroll.
- 16:9 is great for wide scenes or cinematic looks, but be aware IG may crop if the composition isn’t centered.
A good rule of thumb is to keep the long edge at 1080 pixels. This matches IG’s display width for most devices and helps avoid unnecessary scaling. If you’re cropping, plan so the main subject remains inside the safe area of the chosen ratio.
- Practical example: If you shoot a landscape, a 16:9 crop with an 1080 px long edge keeps the image crisp without introducing extra compression artifacts.
- Quick tip: Many editing apps let you lock a 1:1, 4:5, or 16:9 preset so you can crop precisely before export. For more on post sizes and ratios, you can consult guides like the Complete Guide For Instagram Post Sizes (2025) for up-to-date dimensions: https://analyzify.com/hub/instagram-post-sizes
When you export with the right aspect ratio and 1080 px on the long edge, you reduce the chance of Instagram cropping or resizing in ways that surprise you. It also helps your gallery look cohesive when viewers tap through your grid.
Crop and Resize for Best Fit
Cropping to the Instagram safe area ensures the most important details stay visible, no matter how Instagram might scale or crop the image in different views. Start with a 1080 px width as your constant, and adjust height to match the chosen ratio.
- 1:1 crop: 1080 x 1080 px
- 4:5 crop: 1080 x 1350 px
- 16:9 crop: 1080 x 607 px (approximate, since IG may show a slightly different height on certain devices)
Avoid overly tight crops that trim away essential details. A little breathing room around key subject matter helps the image feel balanced once IG compresses it.
Simple steps to crop on your phone:
- Open the photo in your editor.
- Choose the aspect ratio you want (1:1, 4:5, or 16:9).
- Make sure the subject sits away from the edges so it remains visible after compression.
- Save or export as JPEG with sRGB color space and a quality around 80–90.
If you want a broader reference on safe cropping and fit, a current guide on Instagram safe area and crop practices is useful here: https://orichi.info/instagram-reel-size/
Apply Gentle Sharpening Before Upload
A touch of sharpening before you post helps preserve edge detail when Instagram compresses the image. Think of sharpening as fine-tuning the clarity that might get softened during processing. The trick is to keep it light.
- Why light sharpening works: JPEG compression can soften fine details. A gentle pass helps edges stay crisp without creating halos or noise.
- Simple rule of thumb: Use a light sharpening setting and a low radius. In many editors, a strength of around 20–35% with a radius of 0.3–0.5 pixels gives a natural look.
- How to apply in common apps: Look for a Sharpen or Structure slider. Start with a small amount and compare before/after. If you see halos around edges, back off a bit.
If you’d like a practical resource that covers sharpening strategies and how to balance detail with noise reduction, check a guide focused on sharpening for social media uploads. For additional context on sharpening techniques and apps, you can view a helpful overview here: https://ventureintothewoods.com/the-ultimate-guide-to-photo-editing-apps-for-instagram/
Key takeaways for this section:
- Export in JPEG with sRGB and a quality around 80–90 to keep detail without excessive file size.
- Use the right aspect ratio and aim for 1080 px on the long edge to minimize cropping.
- Crop to the safe area before exporting to preserve composition.
- Apply a light sharpening pass to counteract compression without introducing artifacts.
Links for further reading and practical steps:
Thousands of People Were Struggling With Money Until They Discovered This One Ancient Secret Hidden in Sound
>>> Unlock It Now <<<
- Practical export settings for Instagram photos: https://www.adorama.com/alc/instagram-export-settings/
- Complete guide for Instagram post sizes and ratios: https://analyzify.com/hub/instagram-post-sizes
- How to fit the whole picture on Instagram without cropping: https://www.kapwing.com/resources/how-to-fit-the-whole-picture-on-instagram/
- Sharpening tips for social media uploads: https://ventureintothewoods.com/the-ultimate-guide-to-photo-editing-apps-for-instagram
As you move to the next section, you’ll see how to fine tune exposure and keep your subject crisp while staying within Instagram’s upload limits. A precise export and fit strategy is the bridge between a great shot and a great post.
Phone and App Settings to Protect Quality
Your Instagram uploads start on your phone. Small tweaks to settings can preserve sharper detail, truer color, and consistent quality from tap to post. In this section, you’ll learn practical changes you can make in the app and on your device to keep your images looking their best, even when network conditions aren’t perfect. The goal is to minimize compression and data tricks that degrade your photos while staying easy to implement on both iOS and Android devices.
Enable High Quality Uploads
Turning on high quality uploads tells Instagram to preserve more detail when you publish. You’ll notice crisper edges and better color handling, though the files may use more data. If you’re on a limited plan or often edit on the go, you can manage this by syncing with Wi Fi when available and using data wisely.
- In Instagram, go to your profile > menu > Settings > Account > Cellular Data or Data Usage. Look for an option labeled something like “Upload at Highest Quality” or “High Quality Uploads” and toggle it on.
- If you don’t see the exact label, enable the closest option that prevents aggressive compression during uploads. Some devices show the feature under a broader data usage or media settings area.
- For iPhone and Android users, this change is typically a toggle you flip once and forget. After you enable it, test by posting a photo and comparing the result to a previous upload to confirm the improvement.
- Keep in mind that higher quality uploads will use more data. If you’re on cellular, consider turning this on only when connected to Wi Fi and revert to data saver settings when you’re mobile.
If you want additional context on how to enable high quality uploads, you can review guides that cover iPhone and Android paths, such as this explainer and related how-tos: https://nerdtechy.com/how-to-high-quality-uploads-instagram and https://osxdaily.com/2023/12/09/how-to-upload-high-quality-video-photos-to-instagram-for-iphone/. For a broader help center perspective, see Instagram’s information on data usage and related upload options: https://help.instagram.com/379494505495970/?cms_platform=iphone-app&helpref=platform_switcher.
Limit Data Saver and Upload on Wi Fi
Data saver features can reduce image quality because they bias the app toward smaller, faster transfers. Uploading on a stable Wi Fi connection minimizes interruptions and compression artifacts that show up when a upload fights to finish over spotty cellular data. When mobile data is the only option, there are practical steps to keep quality higher.
- Data saver can throttle image and video quality. If you’re seeing grain or muddy colors, check your device or app data settings and disable aggressive data caps for Instagram during uploads.
- Upload on Wi Fi whenever possible. A steady connection reduces the chance of partial uploads that lead to re-encoding by Instagram.
- When you must use mobile data, try these tweaks:
- Pause other app updates and streaming to free up bandwidth.
- Upload mid-day when network traffic is lighter if your carrier throttles during peak times.
- Use the device’s built in data usage controls to cap background activity from other apps during your upload window.
In practice, keeping a stable, strong connection helps Instagram deliver closer to your original capture. If you want to explore methods to reduce data while still delivering quality, see guides like How Much Data Do You Use with Instagram and steps to reduce Instagram data usage: https://saily.com/blog/how-much-data-does-instagram-use/ and https://circles.life/sg/blog/phone-guide-steps-to-reduce-instagram-data-usage.
Keep Instagram and OS Updated
Bugs and stale codecs can soften or distort uploads. Keeping the Instagram app and your phone’s operating system up to date reduces this risk and ensures you’re running the latest improvements for image handling, encoding, and color processing.
- Check for app updates weekly or enable automatic updates on Wi Fi. If an update is pending, install it before making a major post.
- Update your phone OS when prompted. System updates often include camera and graphics stack improvements that affect photo quality.
- Do a quick 2–3 step sanity check after updating:
- Open Instagram and confirm you’re on the latest version.
- Open a photo in the feed and compare it to a recent post to confirm color fidelity looks stable.
- Take a quick test shot and share to a private audience or your own story to verify encoding remains clean.
To help with updates, you can consult resources on how to update Instagram on Android and iOS, such as guides from Android Authority and Beebom: https://www.androidauthority.com/update-instagram-3130586/ and https://beebom.com/how-update-instagram/. If you run into issues after an update, Instagram’s troubleshooting page can provide practical steps: https://help.instagram.com/370569449686414. Regular updates keep compatibility with the camera and editing apps intact, which protects quality over time.
Key takeaways for this section:
She Pressed Play on a Strange Audio Track and Within Days Her Financial Reality Started Shifting in Ways She Could Not Explain
>>> See How It Works <<<

- Enable high quality uploads to preserve detail, accepting higher data use.
- Use stable Wi Fi for uploads; limit data saver impact when possible.
- Keep Instagram and your OS updated to avoid bugs that affect image quality.
Links for further reading and practical steps:
- Use less data on Instagram (data saver guidance): https://help.instagram.com/379494505495970/?cms_platform=iphone-app&helpref=platform_switcher
- How to Enable High Quality Uploads on Instagram (general guidance): https://nerdtechy.com/how-to-high-quality-uploads-instagram
- How to Upload High Quality Video & Photos to Instagram for iPhone: https://osxdaily.com/2023/12/09/how-to-upload-high-quality-video-photos-to-instagram-for-iphone/
- Troubleshooting Instagram (latest app and OS guidance): https://help.instagram.com/370569449686414
As you move forward, you’ll apply these settings in a way that suits your typical posting workflow, ensuring your smartphone captures and posts look as good on Instagram as they do in your camera roll. With high quality uploads enabled, a stable connection, and current software, you’re laying the groundwork for consistently sharp, vibrant posts.
Editing Tricks That Keep Quality
Great editing keeps your Instagram uploads looking sharp without turning the process into a chore. In this section, you’ll find practical tricks to maintain detail, color, and natural skin tones while keeping edits quick and repeatable. Think of these tricks as guardrails that help you preserve quality from capture to feed. You’ll notice how small adjustments can make a big difference, especially when you’re working from a smartphone.
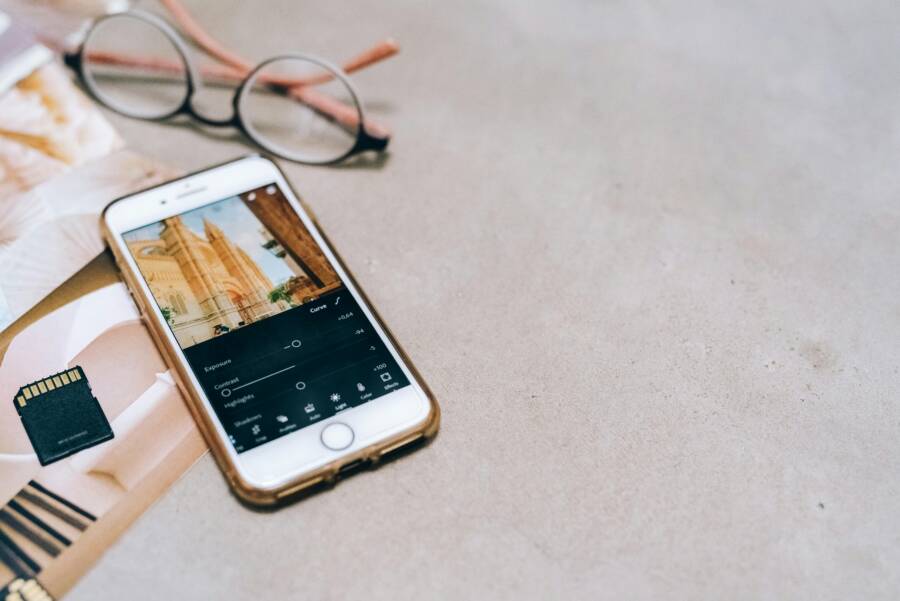
 Photo by Leeloo The First
Balance Exposure and Color
Under or overexposed shots are the easy fix to miss, but you can correct them with simple slider moves. Start with exposure first to bring the image to a natural baseline, then tweak the white balance to restore true color.
- Exposure: If highlights are blown, pull exposure down a touch. If shadows look muddy, nudge it up just enough to recover detail without washing midtones.
- White balance: Use two quick sliders this way: Temperature to warm or cool the overall image and Tint to adjust green or magenta shifts. Keep things subtle; you’re aiming for skin tones that look natural rather than artificially warm or cyan.
- Practical tips: Check the histogram if your editor shows one. A balanced histogram often means fewer blown highlights or crushed shadows. When in doubt, compare a before and after on your phone screen to ensure colors stay true.
For a deeper look at white balance on mobile, you can explore guides that explain quick adjustments in iPhone and Android workflows. See practical guidance like white balance adjustments for natural tones and how to apply them during post, such as this overview: Adjust White Balance on iPhone for Natural-Looking Shots and a broader primer on white balance in smartphone photography: 4-White Balance.
Tip: shoot in soft, even light whenever possible. A solid base makes these edits cleaner and more predictable.
Sharpening and Noise Reduction Without Overdoing It
The goal is crisp edges without halos and kept noise in check. A simple rule helps you stay balanced: apply sharpening only where you want to draw attention and avoid pushing it to areas that already look smooth or flat.
- Rule of thumb: Use a light sharpening pass with a small radius, then toggle the before/after to ensure edges look natural. If halos appear on high-contrast edges, dial back the amount or radius.
- Noise control: Apply denoise only where noise is visible and not where fine texture matters, like clouds or the sky. If you must, use a light denoise setting and then selectively bring back texture with a brush.
- Selective sharpening: If your editor supports masks, sharpen the subject but leave the background softer to preserve a natural separation.
If you want a straightforward guide on sharpening for social media, check out a practical resource that covers mobile sharpening workflows and how to avoid halos: How to Sharpen a Photo in Lightroom Mobile and a tutorial on avoiding halo effects: How to Avoid Halos When Sharpening Photos.
Key takeaway: keep sharpening subtle, use masks if possible, and reserve denoise for genuinely noisy areas. A little sharpening goes a long way on a smartphone photo.
Preserve Details with Selective Edits
Selective edits help keep skin tones natural while preserving texture in clouds, skies, and backgrounds. Masks make this approach precise, so you can tame one part of the image without flattening the rest.
- Skin tones: Apply edits to the subject with a mask. Soften only where needed, and avoid heavy adjustments near the cheeks or shadows around the jawline.
- Sky and clouds: Leave texture intact. A light lift in clarity or texture on the sky can help the clouds pop without making the entire image feel harsh.
- Practical steps: Start with a global edit for overall tone, then create a mask for the subject. Adjust exposure, contrast, or color balance within the mask to improve only those areas.
- Workflow note: If your app supports selective editing tools, use a brush or radial mask to target specific areas. If not, try separate layers or local adjustment tools to mimic the same effect.
For readers who want to explore selective editing with mobile apps, Snapseed and Lightroom Mobile offer strong masking capabilities. You can see practical examples of selective editing workflows here: Selective editing in Lightroom for photographers and the Snapseed app overview: Snapseed: Photo Editor – App Store – Apple.
If you’re new to masking, start with a simple two-zone approach: skin tones and background. Make your skin edits gentle, then adjust the background only to enhance mood or color harmony.
Images can help illustrate this approach. Consider an image like a portrait where you selectively brighten skin a touch while leaving the sky in the background untouched. A calm, natural result is more engaging than a heavily edited look.
Key takeaways for this section:
- Use masks or selective edits to protect skin tones and preserve cloud texture.
- Edit globally first, then localize adjustments for balance.
- Keep changes subtle to maintain a natural feel.
Images to accompany this section:
- Photo: Smartphone editing in action, showing a masked adjustment on a portrait (credit if using a real photo).
In summary, these editing tricks help you keep quality intact from shot to share. With careful exposure, restrained sharpening, and selective edits, your Instagram posts will look polished and true to what you captured.
External references and further reading:
- Adjust White Balance on iPhone for Natural-Looking Shots: https://filmora.wondershare.com/basic-video-editing-tips/white-balance-on-iphone.html
- 4-White Balance: https://uviclibraries.github.io/smartphone-photography/white-balance.html
- How I Get the Perfect White Balance in My Smartphone Photography: https://makeuseof.com/get-perfect-white-balance-smartphone-photography
As you move to the next section, you’ll apply these principles to ensure your edits stay crisp and natural from your smartphone to the Instagram feed. A measured, thoughtful approach to exposure, sharpness, and selective edits creates a reliable workflow you can repeat with confidence.
Troubleshooting and Quick Fixes
Even with the best workflow, a hiccup can creep in and leave your Instagram uploads looking soft or off. This section gives you fast, practical fixes you can apply right away. Each sub-section includes a simple test, a quick checklist, and links to trusted resources if you want deeper guidance. Think of these as your pocket toolkit for when posts misbehave.
Test with a New Photo
If a photo still looks bad after edits, try a fresh shot to isolate the issue. A new capture helps you determine whether the problem is the file itself or a processing step along the way.
- Quick checklist:
- Capture in the highest available resolution, ideally using RAW if your device supports it.
- Avoid digital zoom during capture; zooming later can amplify artifacts.
- Shoot under consistent, soft light and stabilize the shot with a tripod or solid surface.
- After you shoot, export a JPEG in sRGB at a quality setting around 80–90 before testing on Instagram.
- Post the new photo to a private story or a test album to compare against your previous upload.
- What to observe:
- Does the new photo appear crisper on feed and profile grid?
- Is color more faithful to the scene after export in sRGB?
- Do you still see compression artifacts after upload, or does the image feel closer to the original capture?
- Quick next steps if issues persist:
- If the fresh shot still looks off, the problem might be external to the image file itself. Check your device settings, online upload path, and Instagram app behavior.
If you want a quick reference on why tests matter, you can read about common causes of degraded uploads and how to approach them here: https://support.google.com/pixelphone/thread/302053447/picture-quality-degraded-while-uploading-in-instagram?hl=en
Image suggestion:
 Photo by Tofros.com
Update App and OS
Software updates often fix bugs that can impact how images are encoded, colored, or resized during upload. Keeping the app and the phone’s OS current reduces surprises and maintains compatibility with the camera and editing apps you rely on.
- What to do:
- Check for Instagram app updates weekly or enable automatic updates on Wi Fi.
- Install the latest iOS or Android OS updates when prompted, especially if you’re posting high volume.
- After updating, do a quick test post to confirm the upgrade didn’t introduce new quirks.
- Why updates matter:
- New codecs or GPU improvements can improve how images are compressed and displayed.
- Bug fixes often address edge cases that cause color shifts or artifacts after upload.
- Updates can tighten integration with camera features like HDR, ProRAW, or extended dynamic range.
Helpful references for updates:
- How to enable high quality uploads on Instagram (Android and iOS) and related steps: https://www.wikihow.com/Enable-High-Quality-Uploads-on-Instagram-on-Android-and-iOS
- A general guide on updating Instagram and OS on iPhone and Android: https://nerdtechy.com/how-to-high-quality-uploads-instagram
If you want to see official guidance from Instagram on staying current, check their support content here: https://help.instagram.com/370569449686414
Key takeaway: regular updates reduce the chance of quality shifts between the moment you capture and the moment your post goes live.
Clear Cache and Reinstall If Needed
Cache buildup can cause odd playback, stale previews, or inconsistent compression when you upload. Clearing the cache or reinstalling the app can resolve many stubborn quirks without a full device reset.
- Quick steps for both platforms:
- iOS: Offload the Instagram app, then reinstall. This preserves your account data while clearing the app’s local cache.
- Android: Clear the app cache from Settings > Apps > Instagram > Storage > Clear Cache. If issues persist, force stop the app and reopen, or reinstall the app.
- Backup tips before taking action:
- Ensure you know your Instagram login details or have them saved in a password manager.
- If you’ve created custom filters or saved presets, note them or take screenshots since some settings can reset after reinstalling.
- If you manage multiple accounts, consider logging out of other sessions to avoid confusion post reinstall.
- Practical guidance by platform:
- iOS users may offload Instagram and then reinstall to reclaim space and clear cache without losing your account data.
- Android users can clear cache directly; if problems continue, a full reinstall often resolves deeper cache or encoding issues.
External references for cache clearing:
- How to clear Instagram cache on various devices: https://us.norton.com/blog/how-to/clear-instagram-cache
- Clear Instagram cache on Android and iPhone: https://www.avast.com/c-clear-instagram-cache
- How to clear Instagram cache: https://www.vixendigital.com/social-media/how-to-clear-instagram-cache/
When you’re ready, re-run a quick test post to confirm the change fixed the issue. If not, consider the next fixes in this guide or temporarily adjust your workflow to reduce compression pressure.
Images to accompany this section:
- Optional portrait-friendly image showing a user clearing apps on a phone (no image required if not relevant).
In many cases a clean reinstall or cache purge restores consistent upload quality, especially after a stubborn bug or a storage-strapped device.
Links for further reading and practical steps:
- How to clear Instagram cache on iPhone, Android, and more: https://us.norton.com/blog/how-to/clear-instagram-cache
- Clear Instagram cache on Android: https://www.avast.com/c-clear-instagram-cache
- Clear Instagram cache guide: https://www.vixendigital.com/social-media/how-to-clear-instagram-cache
As you move forward, you’ll have a smoother path when you need to reset app behavior without losing your content or login state.
Images for section integration:
- If you choose to include an image here, use a photo that shows a person using a phone with the Instagram app open, editing or clearing cache, to reinforce the idea of a quick app refresh.
External links summary:
- Test with a New Photo: practical testing approach with image quality focus
- Update App and OS: guidance on why and how to update
- Clear Cache and Reinstall If Needed: steps and precautions for iOS and Android
Note: The links above are provided to support practical steps; you can weave them naturally into the narrative without turning this into a long link list.
Conclusion
A simple, repeatable workflow can transform your Instagram quality from a phone capture to a publishable post. Start with a high quality source, export with the right settings, and apply light edits that preserve texture and color. Consistency matters; practice this process on your next few shoots and you’ll see steady progress. If you try these steps and share your results, you’ll help others learn faster and keep your feed crisp and vibrant, no matter which smartphone you use.
He Was Drowning in Bills and Burnout Until a Simple Daily Ritual Rewired His Brain for Wealth in Less Than a Week
>>> Start Your Shift Today <<<