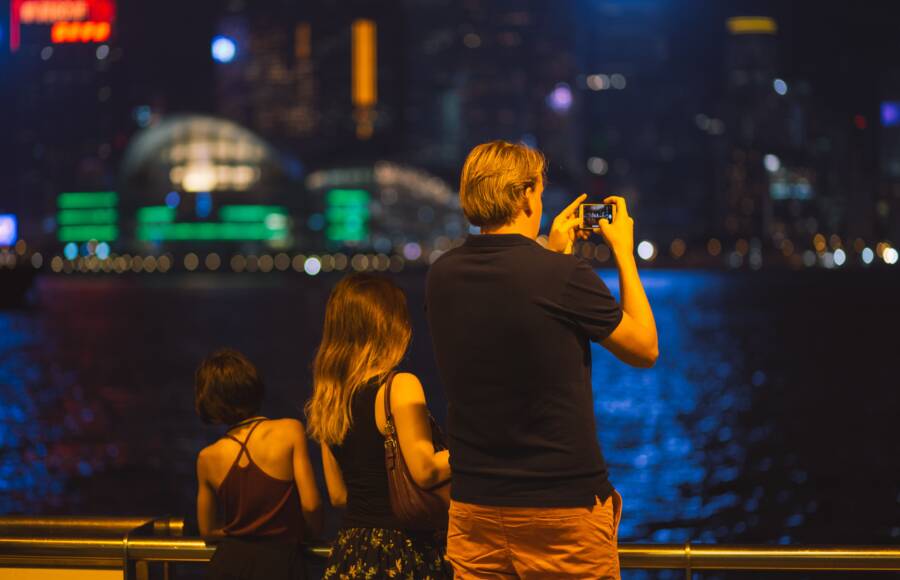
Dark photos on your smartphone typically occur because of incorrect exposure settings, poor ambient lighting, or a smudge on the camera lens. You can fix most of these issues by cleaning the glass, adjusting the focus, or tapping your screen to manual brightness levels.
These simple adjustments often restore clarity and light to your images immediately. If you want to know exactly how to reclaim your photo quality, this guide will walk you through the necessary steps for your device.
Checking the Basics Before Changing Camera Settings
Before you adjust your ISO, shutter speed, or white balance, start with the physical state of your device. Many dark or grainy images on a smartphone result from simple environmental factors or physical obstructions rather than software glitches. Taking a moment to verify your hardware status saves time and often eliminates the need for complex menu navigation.
Clean Your Lens for Clearer Images
A dirty lens is a primary culprit for poor image quality. Over time, your smartphone accumulates finger oils, dust, and lint because it spends most of the day in pockets or bags. These substances create a hazy film over the glass, which diffuses incoming light and causes the camera sensor to struggle with contrast and brightness.
If you notice your images appear cloudy or suffer from strange light streaks, the lens glass likely needs a wipe. Use a clean, dry microfiber cloth to gently remove debris. Avoid using paper towels or abrasive fabric, as these materials can scratch the lens coating over time. You should also skip chemical cleaners or harsh solvents, which can strip away protective anti-glare layers. A simple circular motion with a soft cloth is usually enough to restore full light transmission and clarity to your photos.
Ensure Your Case is Not Blocking the Sensor
A protective case is vital for preventing drops, but a poorly designed one can interfere with your photography. Many modern smartphones use sophisticated sensors and auxiliary flash units positioned very close to the primary lens. If your case has thick edges or an imprecise cutout, it might cast a physical shadow onto the edge of your sensor or block the flash during low-light shots.
When you suspect the case is the issue, try taking a reference photo with the case removed. If the brightness level improves or the lens flare disappears, you have found the problem. Some cases also reflect light back into the lens, which can trick the auto-exposure settings into darkening the entire scene. If you frequently capture dark images in specific environments, check that no part of the case frame hangs over the camera module. Choosing a case with a wider bevel around the camera unit is a practical solution if you find yourself battling consistent obstruction issues.
Adjusting Exposure and Focus Manually
Modern smartphone cameras are powerful, but they often struggle when light sources are uneven or subjects are off-center. Automatic settings frequently misinterpret high-contrast scenes, leaving your photos too dark or improperly focused. You can take manual control of these settings by interacting directly with the camera interface on your screen. This manual override allows you to compensate for challenging lighting conditions and ensures your subject remains sharp.
Mastering the Exposure Slider
Most smartphones use a tap-to-focus system that simultaneously measures the brightness of the area you select. When you tap a specific part of the frame, the camera calculates the exposure for that exact point. If your subject appears too dark, you can adjust the light levels immediately using the exposure slider.
On an iPhone, tapping the screen reveals a yellow square with a sun icon next to it. Sliding your finger up or down adjusts the brightness in real time. Android devices offer a similar experience, often displaying a sun or brightness bar after you tap a target area.
Follow these steps to fine-tune your shot:
Open your camera app and point it at your subject.
Tap the darkest part of the frame to tell the camera where to prioritize light.
Observe the exposure slider that appears near the focus square.
Drag the slider upward to brighten the image until the details in the shadows become visible.
If the scene looks washed out, drag the slider downward until the balance feels natural.
Moving the slider helps you recover shadow detail without needing third-party editing apps. This manual adjustment tells the software to increase the gain or adjust the shutter speed to capture more light before the image is saved.
Using AE/AF Lock to Keep Settings Steady
Smartphone cameras often adjust settings constantly as you move the phone or as subjects enter the frame. This fluctuation causes inconsistent exposure, especially when recording video or taking a sequence of photos. An Auto-Exposure and Auto-Focus lock (AE/AF Lock) stops the camera from resetting these values automatically.
When you use the lock function, the camera holds the focus and brightness settings exactly where you set them. This is helpful when the lighting is tricky, such as a person standing in front of a bright window or a dark backdrop.
To activate the lock, press and hold your finger on the screen where you want the focus and exposure to stay. On most devices, a message appears indicating “AE/AF Lock” is active. Once the lock is engaged, the camera stops hunting for new focus points or recalculating light levels, even if you shift the phone slightly. You can still adjust the brightness with the slider while the lock is active to achieve the perfect balance. Tapping anywhere else on the screen typically releases the lock, returning your smartphone to its standard automatic mode.
Optimizing Software and Camera Settings
Beyond physical adjustments, your smartphone relies on internal software processing to interpret light. When you face difficult lighting conditions, these settings determine whether your final image appears clear or remains trapped in shadow. Modern devices include intelligent modes designed to balance extreme light and dark areas automatically. Learning how to manage these software features ensures that you capture well-exposed images even in suboptimal environments.
Understanding When to Use HDR Mode
HDR stands for High Dynamic Range. This technology works by capturing multiple frames at different exposure levels the moment you press the shutter button. The software then merges these images to combine the best parts of each shot. It pulls detail out of deep shadows while preventing bright areas, such as the sky or light bulbs, from becoming completely white or overexposed.
You should enable HDR when your subject stands against a strong light source, such as a window or the setting sun. Without this mode, your camera exposes for the brightest area, which forces your subject into a dark silhouette. HDR balances these extremes so both the background and the foreground remain visible.
Most modern smartphones feature an Auto HDR setting that detects high-contrast scenes independently. Relying on this default is often safe, but you can manually toggle it to “On” if you find your device is failing to lift shadows in tricky backlighting. This process takes a fraction of a second longer than a standard shot, so keeping your phone steady during the capture helps the software align the frames perfectly.
Leveraging Night Mode for Low Light
Night Mode uses advanced exposure stacking to brighten scenes that would otherwise appear black or noisy. When you activate this setting, the camera takes a series of images over several seconds rather than a single instant shot. By combining these exposures, the phone gathers more light than a single frame allows and uses software algorithms to reduce digital grain.
Steady hands are the most important factor for success with this feature. Because the camera sensor remains open longer to collect light, any movement during the process causes blur. If you hold the device loosely, the software struggles to align the layers, resulting in a soft or smudged look.
Follow these tips to get the best results:
Rest your elbows on a stable surface or lean against a wall to reduce shaking while you hold the smartphone.
Use a small tripod or lean the phone against a solid object if the suggested exposure time exceeds two seconds.
Wait for the indicator on your screen to finish the processing cycle before you move the device away from the scene.
When the camera detects extremely dark environments, it often suggests a specific exposure time. Following these prompts helps the sensor maximize light intake, turning a muddy, dark frame into a clear, usable photograph. Even with the powerful stabilization built into most devices, removing physical movement remains the best way to get sharp photos in low light.
Advanced Fixes for Persistent Camera Issues
If your photos remain dark after cleaning your lens and adjusting your exposure, software glitches or deep-seated system errors might be the source of your trouble. These problems often stem from corrupted cache files, conflicting apps, or outdated firmware that no longer communicates correctly with your camera hardware. Taking a systematic approach to your settings often restores full functionality without requiring a professional inspection.
Clearing App Data and Checking for Updates
Software bugs frequently occur when your camera app retains old, conflicting configuration files. Resetting these settings forces the application to return to its factory defaults, which clears out errors that prevent proper light sensitivity. Your personal photos will remain safe, though you might need to reconfigure custom preferences like grid lines or file formats after this reset.
To perform a reset, open your system settings and locate the application manager or apps list. Select your camera app and choose the option to clear storage or clear cache. For many devices, this simple action is enough to fix sudden underexposure issues caused by background processes. If a basic reset fails, check for a pending system update. Manufacturers frequently release patches that fix known bugs related to sensor image processing. A pending security or operating system update often contains the specific fix your camera requires to interpret light correctly again.
Knowing When to Seek Professional Repair
Sometimes the dark photos you see are signs of a failure within the hardware itself rather than a minor software hiccup. You should consider a professional repair if you notice persistent, specific indicators that suggest a physical component has failed.
Look for these signs that indicate your camera module requires an expert inspection:
Physical damage to the lens glass, such as deep scratches or internal cracks, often prevents light from reaching the sensor accurately.
Strange spots or dead pixels that appear in the exact same location across every image suggest physical damage to the camera sensor.
Mechanical failure of the aperture or shutter mechanism, which you might hear as a faint clicking or buzzing, indicates the hardware is physically stuck.
A complete inability of the lens to focus on subjects at any distance often reveals a broken focus motor.
If you have tried resetting your software and cleaning your lens but the images remain consistently black, dark, or distorted, you are likely dealing with a hardware malfunction. Taking your smartphone to an authorized service center allows a technician to run diagnostic tests that isolate the faulty component. Professionals possess the tools to replace the camera module or ribbon cables safely. Attempting to pry open a modern, water-sealed device yourself often causes more damage to the internal seals or the screen, so leave these complex repairs to those with the proper equipment and training.
Conclusion
Most dark photo issues stem from simple obstructions like smudges or cases that interfere with your sensors. Cleaning the glass and checking your protective gear often resolves these problems without the need for complex settings changes.
Take time to experiment with the exposure slider and manual focus controls on your smartphone before you assume the hardware is broken. Adjusting these values in real time helps you see how different lighting conditions affect your final image.
If your camera performance remains poor after you clean the lens and reset your app data, you might have a hardware failure. Reach out to a technician for a professional diagnosis to avoid causing further damage to your device.