There Is a Frequency That the Wealthiest Families Have Used for Generations and Most People Will Never Know It Exists
>>> Open the Door <<<

Are you or someone you love navigating a smartphone with vision loss or low vision? This guide cuts through the jargon to show how the right phone can restore independence, not complicate it. A good device makes calling, texting, and using apps feel natural again.
Choosing the right phone matters for daily tasks. With the right accessibility features, you can read messages, identify objects in photos, and map your route with confidence. This intro highlights how tools like screen readers, zoom, and simple navigation can transform everyday routines.
You’ll see top picks for different needs and budgets. From premium options like iPhone models with VoiceOver to Android choices such as Galaxy phones with TalkBack, there are strong options for most users. Specialized devices like BlindShell Classic 2 offer tactile comfort and easy menus for those who prefer physical keys.
Feature by feature, these phones remove barriers. Look for robust screen readers, magnification, Braille support, and reliable voice assistants. High contrast modes and color adjustments can make screens legible at a glance, while large icons help with quick recognition.
He Was Drowning in Bills and Burnout Until a Simple Daily Ritual Rewired His Brain for Wealth in Less Than a Week
>>> Start Your Shift Today <<<

Whether you’re focused on pure simplicity or powerful versatility, the best smartphone for visual impairments fits your lifestyle. This article gathers the latest reviews and hands-on insights so you can compare options with clarity. Read on to find practical guidance that helps you pick a device that truly supports independence.
Key Accessibility Features That Make a Difference
In the real world, accessibility features are the difference between struggling to use a phone and enjoying effortless independence. This section highlights three essential areas that truly move the dial for people with visual impairments: hands-free navigation with screen readers, effective zoom and magnification for low vision, and practical voice control with high contrast options. Each subsection explains how these features work on iPhone and Android, what to expect in daily use, and how to set them up quickly so you can start benefiting right away.
Screen Readers for Hands-Free Navigation
Screen readers transform a smartphone into a voice-first device. On iPhone, VoiceOver is the built-in solution that reads aloud what’s on the screen and provides gesture-based navigation. A simple example is swiping with one finger to move focus from element to element, then double-tapping to activate. You can customize how VoiceOver speaks, adjust verbosity, and choose voice options that are comfortable for daily use. The system also supports braille displays for users who prefer tactile output, making long texts easier to manage and review.
On Android devices, TalkBack offers a similar hands-free experience. It provides spoken feedback and vibration cues to confirm actions, helping you stay oriented even when you’re not looking directly at the screen. TalkBack plays a critical role for tasks like reading messages, composing emails, and navigating apps with simple swipe patterns. A connected braille display is also supported, so you can switch between audio and tactile output as needed.
Setting up these screen readers is straightforward. On iPhone, you’ll go to Settings > Accessibility > VoiceOver to turn it on and customize the voice, rate, and pronunciation. On Android, open Settings > Accessibility > TalkBack and enable it, then tailor the gestures and feedback to your preferences. If you’re new to these features, most devices offer a guided setup that walks you through common tasks, like reading a list of messages or navigating your home screen with spoken feedback. Beyond basic navigation, screen readers help with reading selected text aloud, which is a big assist for proofreading, replying to messages, and consuming ebooks or articles on the go.
If you rely on braille, both ecosystems support braille displays over Bluetooth. This is a game changer for detailed reading and editing, letting you preserve privacy and speed when handling sensitive information. To get started, pair your braille device from accessibility settings and test key actions like moving through a page, selecting text, and sending a message. The combined effect of spoken feedback and braille support gives you flexible options depending on your environment and preferences.
Practical benefits in daily life are clear. You can have a phone read your texts aloud while you’re cooking or commuting, or listen to a long article on a noisy train without straining your eyes. For calls, voice output helps you confirm who you’re calling and review messages before replying. When you need to search for an app or adjust a setting, screen readers provide direct feedback so you don’t miss a step. In short, hands-free navigation via VoiceOver or TalkBack reduces interruptions and increases confidence across everyday tasks.
Useful resources:
- Get started with VoiceOver on iPhone for effortless hands-free navigation and braille support. Turn on and practice VoiceOver on iPhone
- Hear iPhone speak the screen, selected text, and typing to stay informed without looking. Hear iPhone speak the screen
- Get started with accessibility features on iPhone to see what tools fit you best. Get started with accessibility features on iPhone
For Android users curious about the basics and the range of options, TalkBack is a robust starting point. It offers eyes-free control and a path to efficient smartphone use in everyday scenarios, from messaging to app navigation. Learn more about TalkBack and how it integrates with other accessibility tools on Android. Get started on Android with TalkBack
If you want a broad view of how Android handles accessibility, this overview covers display adjustments, interaction controls, braille support, and more. Android accessibility overview
A final note: many users benefit from pairing screen readers with high-contrast modes and larger text. These options reduce cognitive load and enhance readability, especially in bright outdoor lighting or on smaller screens.
Zoom and Magnification for Low Vision
Low vision calls for magnification that is precise, responsive, and easy to activate. Both iPhone and Android devices include built-in zoom and magnification features that work in tandem with other accessibility tools to improve legibility.
On iPhone, the Zoom feature enlarges the entire screen and can be controlled with simple gestures. A familiar approach is a three-finger double-tap to zoom in or out, with drag to move around the screen. For readers who prefer a standalone tool, the Magnifier app acts like a portable magnifier with features such as live-cam view, high contrast, and optional filters. This combination makes reading menus in a dark restaurant or inspecting small print on a product label much more manageable.
Android provides similar capabilities through its Magnification settings and the built-in Magnifier app. The Magnifier uses the device camera to enlarge text and images, while system-wide magnification lets you zoom into any app or screen. For a quick zoom, you can enable quick gestures that instantly magnify with a tap or triple-tap, depending on your device. Android also integrates well with the TalkBack screen reader, so you can hear descriptions of what you’re viewing as you zoom, which can be a big help in identifying UI elements.
In practice, magnification makes daily tasks smoother. Reading a recipe while cooking, reviewing a bill during checkout, or scanning a price tag at the store becomes less stressful. Large text options complement magnification by increasing readability across apps. For example, enabling larger system fonts improves readability even in content-heavy apps like email or social media.
Choosing between iPhone and Android magnification tools often comes down to preference and ecosystem familiarity. iPhone users may prefer the seamless integration between Zoom, Large Text, and Bold Text under Accessibility settings, while Android users might appreciate the flexibility of Quick Gestures and a broader range of magnification apps. In either case, the upshot is a noticeable reduction in eye strain and a more comfortable viewing experience across daily tasks.
Practical steps to enable magnification:
- iPhone: Settings > Accessibility > Zoom; also enable Magnifier from Accessibility if you want a camera-based option.
- Android: Settings > Accessibility > Magnification; or use the Magnifier app for a camera-based view.
Key benefits to remember:
- Faster reading in bright or cluttered environments.
- Safer navigation when reading small print on labels and screens.
- Flexible text sizing that reduces squinting and fatigue.
Helpful resources:
- iPhone magnification and display options overview: Get started with accessibility features on iPhone
- Android magnification and display controls: Android accessibility overview
If you’re exploring magnification for a family member or client, pair magnification with high-contrast themes. This reduces the cognitive load of decoding text and icons, letting you focus on tasks rather than the display itself.
Voice Control and High Contrast Options
Voice control brings another layer of independence. On iPhone, you can use Siri to place calls, send messages, launch apps, and perform tasks with spoken commands. This is especially useful when you’re hands full or want to avoid touching the screen altogether. Siri can initiate routines, navigate to specific settings, and fill in form fields via dictation. For example, you can say “Call mom” or “Open Settings” and have the device respond without tapping.
On Android, Google Assistant serves a similar role. You can ask it to place calls, send texts, set reminders, or open apps. The assistant also works with multiple languages and can handle complex voice queries, making it a reliable companion for people who prefer voice-first interactions.
Beyond voice assistants, high contrast options in both ecosystems help users distinguish interface elements more clearly. Color inversion and high-contrast text modes adjust the color palette to improve visibility for color-blind users and those with limited contrast sensitivity. These features are especially helpful when reading status icons, buttons, or tiny UI text.
Setting up voice control is quick. On iPhone, enable Siri in Settings > Siri & Search, and adjust language, voice, and feedback preferences. On Android, enable Google Assistant in the Assistant settings and customize its voice, languages, and routines. Both platforms support hands-free activation, so you can trigger actions with phrases like “Hey Siri” or “Hey Google” without lifting a finger.
When it comes to display adjustments, you’ll often find high-contrast modes under Accessibility settings. On iPhone, you can enable Smart Invert or Color Filters to optimize visibility in different lighting conditions. On Android, you’ll find similar options under Display or Accessibility settings, including color inversion and captivating contrast boosts. These tools can dramatically improve legibility, especially in bright outdoor environments or at night.
Practical tips for quick wins:
- Use voice to read incoming messages aloud while you focus on a task.
- Create a routine that opens your most-used apps with a single voice command.
- Turn on high contrast and larger text for apps that rely on small UI elements.
Supportive resources:
- iPhone accessibility overview and voice control setup: Turn on and practice VoiceOver on iPhone and Get started with accessibility features on iPhone
- Android TalkBack and assistance features: Get started on Android with TalkBack and Android accessibility overview
Finally, think of these features as a toolkit you can mix and match. Voice control helps you move through tasks without hands, screen readers provide precise feedback on what’s on the screen, and high contrast modes reduce eye strain. Together, they create a smoother daily experience that supports independence and confidence in using your smartphone.
Links and quick references:
- VoiceOver setup and practice for iPhone: https://support.apple.com/guide/iphone/turn-on-and-practice-voiceover-iph3e2e415f/ios
- iPhone reading and speaking content: https://support.apple.com/guide/iphone/hear-whats-on-the-screen-or-typed-iph96b214f0/ios
- Getting started with iPhone accessibility: https://support.apple.com/guide/iphone/get-started-with-accessibility-features-iph3e2e4367/ios
- TalkBack on Android: https://support.google.com/accessibility/android/answer/6283677?hl=en
- Android accessibility overview: https://support.google.com/accessibility/android/answer/6006564?hl=en
- Google accessibility products: https://www.google.com/accessibility/products-features/
By embracing these core features, you gain practical, everyday control over your smartphone. The goal is not to overwhelm you with options, but to provide reliable tools that fit your routine and preferences. If you try one or two changes this week, you’ll likely notice a meaningful improvement in how you interact with your device.
Top iPhone Picks for Visual Impairments
This section dives into why the iPhone remains a strong choice for users with visual impairments. It highlights key hardware and software features that translate into real-world independence, with practical tips you can use today.
Why iPhone 17 Pro Stands Out
The iPhone 17 Pro blends a brilliant display with long-lasting battery life and powerful accessibility tools, making it a standout option for visual impairments. The Super Retina XDR panel delivers bright, vivid images with deep contrast, helping you spot details more easily in diverse lighting conditions. ProMotion keeps motion smooth, which reduces eye fatigue when you’re scrolling through messages or apps.
A standout feature for object identification and situational awareness is the Magnifier app. Built into iOS, Magnifier turns the camera into a handheld magnifier with live description options, high contrast modes, and enhanced focus tricks that help you read labels, menus, and small print in real time. This toolkit is especially useful when you’re out shopping, reading product specs, or trying to verify details on a document.
Battery life matters for all-day use. The iPhone 17 Pro is designed to deliver extended video playback and robust endurance through a 3998 mAh cell, along with efficient hardware and software integration. Fast charging via USB-C and wireless MagSafe charging keep you moving, even on busy days. This means you can rely on steady performance from morning briefings to evening calls without hunting for a charger.
Practical setup tips to maximize accessibility right away:
- Enable Magnifier for quick camera-based viewing: open Settings > Accessibility > Magnifier, then add Magnifier to your Accessibility Shortcut for one-tap access.
- Turn on VoiceOver for hands-free navigation: Settings > Accessibility > VoiceOver. Customize the voice, rate, and emphasis to fit your preferences.
- Customize display for better legibility: Settings > Accessibility > Display & Text Size. Try Bold Text, Increased Contrast, and Color Filters to find the best balance for your eyes.
- Use the Magnifier in conjunction with VoiceOver: Magnifier can describe scenes while VoiceOver reads on-screen text, giving you a richer understanding of your surroundings.
- Keep essential tools within reach: set up a dedicated accessibility widget or home screen folder with your most-used tools like Magnifier, VoiceOver, and Quick Settings for quick access.
For more on the iPhone 17 Pro’s display and battery, see Apple’s official specs and reviews:
- iPhone 17 Pro specifications: https://www.apple.com/iphone-17-pro/specs/
- Magnifier and accessibility resources for iPhone: https://support.apple.com/guide/iphone/magnify-or-describe-things-around-you-iphe867dc99c/ios
If you’re evaluating options, this model’s combination of a bright display, reliable battery, and integrated magnification tools makes it a natural fit for readers who want independence without sacrificing ease of use. The Magnifier app specifically extends your ability to ID objects, read small print, and verify details in real time, which is invaluable when you’re shopping, cooking, or handling paperwork.
External insights:
- Magnify or describe things around you with Magnifier on iPhone: https://support.apple.com/guide/iphone/magnify-or-describe-things-around-you-iphe867dc99c/ios
- Accessibility features for vision on iPhone: https://support.apple.com/guide/iphone/overview-of-accessibility-features-for-vision-iph732dc028d/ios
If you want a broader perspective on how iPhone accessibility features help vision-impaired users, this overview is a solid read: https://support.apple.com/guide/iphone/get-started-with-accessibility-features-iph3e2e4367/ios
In short, the iPhone 17 Pro is more than a phone. It’s a confidence booster that pairs a premium display with practical tools like Magnifier and VoiceOver, all backed by a battery you can rely on throughout the day.
Best Android Phones with Great Accessibility
When accessibility is a priority, the right Android phone can make daily tasks easier, faster, and more independent. This section highlights two strong options that balance robustness, affordability, and built-in tools designed for visual impairments. You’ll see practical tips you can implement today, plus quick guidance on setting up key features for smoother, hands-free use.
 Photo by Anna Shvets
Samsung Galaxy S24+ Features Explained
The Galaxy S24+ stands out for its combination of a large, crisp display and rich accessibility options that help you stay independent throughout the day. The screen is bright with strong contrast, which makes reading text and spotting icons easier in both bright daylight and indoor lighting. For users who rely on audio feedback, the TalkBack feature is a reliable screen reader that announces what’s on the screen, guiding you through apps, messages, and settings with simple gestures.
A major advantage is seamless compatibility with external Braille displays via Bluetooth. This lets you switch between spoken output and tactile feedback, which is crucial when you need to review long messages or edit documents privately. The Galaxy’s voice assistant, Bixby, can also assist with hands-off tasks, though TalkBack remains the core accessibility tool for most vision-impaired users.
He Was Drowning in Bills and Burnout Until a Simple Daily Ritual Rewired His Brain for Wealth in Less Than a Week
>>> Start Your Shift Today <<<
Setting up TalkBack is straightforward. Go to Settings > Accessibility > TalkBack to enable it, then tailor gestures and spoken feedback to fit your preferences. Pair a Braille display from Settings > Bluetooth to enjoy dual output modes. For magnification, you can combine the built-in Zoom feature with the Magnifier app for camera-based viewing, which helps you read menus, labels, and small print in a pinch.
Practical tips to maximize independence with the Galaxy S24+:
- Turn on TalkBack and customize your preferred voice and pace for comfortable, natural feedback.
- Enable high contrast and font size adjustments under Display Settings to simplify reading.
- Use the Magnifier in combination with TalkBack for a richer description of what you’re viewing.
- Add a dedicated accessibility widget to your home screen for quick access to Magnifier, TalkBack, and Quick Settings.
Useful resources:
- Use TalkBack or Voice Assistant on your Galaxy device. https://www.samsung.com/us/support/answer/ANS10002553/
- Accessibility – Mobile. https://www.samsung.com/us/sustainability/accessibility/mobile/
- How do I enable and disable the Screen Reader on my Samsung Galaxy smartphone. https://www.samsung.com/ie/support/mobile-devices/how-do-i-enable-and-disable-voice-assistant-talkback-on-my-samsung-galaxy-smartphone/
For wider Android accessibility context, TalkBack is a solid starting point. It provides eyes-free control for everyday tasks, from messaging to app navigation. Learn more about TalkBack and how it fits with other accessibility tools. https://support.google.com/accessibility/android/answer/6283677?hl=en
If you want a broad view of Android accessibility options, this overview covers display adjustments, interaction controls, Braille support, and more. https://support.google.com/accessibility/android/answer/6006564?hl=en
The Galaxy S24+ ecosystem also benefits from high-contrast themes and larger text options, which reduce eye strain and improve readability in busy environments. For best results, combine these with a clean home screen and clearly labeled app icons.
Image credit: Photo by Anna Shvets
Affordable Option: Motorola G Play
For readers who want an accessible Android option without a hefty price tag, the Motorola Moto G Play delivers solid built-in accessibility features and a straightforward setup. It’s a practical choice for beginners or someone prioritizing ease of use over top-tier specs.
Key accessibility strengths include a clear path to enable TalkBack, Select to Speak, and other assistive features right from Settings > Accessibility. The phone supports quick toggling of these features via an accessibility shortcut, so you can turn on TalkBack with a single gesture or button press. The user interface is simple, with large, legible icons and a comfortable button layout that minimizes accidental taps.
In daily use, the Moto G Play remains reliable for essential tasks like calls, texts, and app-based navigation. Battery life is decent for a budget device, which means fewer mid-day recharges and more time focusing on what you want to do. The simple setup process is a real plus for anyone who wants to get going fast without wrestling with complex menus.
Practical setup tips to get started quickly:
- Go to Settings > Accessibility to turn on TalkBack and adjust its speed and voice.
- Use the accessibility shortcut to enable or disable features in seconds.
- Try the built-in Select to Speak or Real-Time Text to read messages aloud and compose more comfortably.
How to get more value from the Moto G Play:
- Pair with a Bluetooth Braille display if you need tactile feedback for long-form reading.
- Keep essential accessibility apps on a dedicated home screen for fast access.
- Activate large text and high-contrast themes to improve readability across apps and menus.
Helpful resources for Motorola accessibility:
- Use accessibility features. https://help.motorola.com/hc/3263/44/global/en-gb/jcb1208180855.html
- Motorola XT24133 accessibility guide. https://www.att.com/device-support/article/wireless/000100399/Motorola/MotorolaXT24133
- Visual assistance on your Motorola phone. https://en-us.support.motorola.com/app/answers/detail/a_id/158256/~/visual-assistance/
Turn on TalkBack on Android to enable eyes-free control. https://support.google.com/accessibility/android/answer/6007100?hl=en
Tip: If you frequently read on your phone in public, consider pairing a Braille display or using Real-Time Text for live communication with caregivers or teammates.
Image credit: Photo by Anna Shvets
Sources and further reading:
- Android accessibility overview. https://support.google.com/accessibility/android/answer/6006564?hl=en
- TalkBack help center. https://support.google.com/accessibility/android/answer/6283677?hl=en
With these accessible Android options, you can choose a device that fits your budget while still delivering dependable assistive features. The Galaxy S24+ and Moto G Play show how Android can support independence at different price points.
Specialized Phones Built for Blind Users
For many people with visual impairments, traditional smartphones can feel overwhelming. Specialized devices focus on tactile feedback, intuitive physical controls, and straightforward menus, reducing the learning curve and boosting independence. In this section, we explore BlindShell Classic 2 as a prime example of a purpose-built solution that prioritizes tactile interaction and reliability over touch-centric complexity. If you’re seeking a device that works with minimal screen reliance, this model deserves careful consideration.
BlindShell Classic 2 for Tactile Control
Simplified menus, no screen needed.
BlindShell Classic 2 is built around a design philosophy that puts tactile control first. Its hardware features a large, raised keypad with clearly labeled keys, which many users find far more approachable than a glass screen filled with tiny icons. The device runs on a customized operating system focused on essential functions such as calls, messages, and basic apps, all navigable with physical buttons rather than finger swipes. For individuals who rely on muscle memory and straightforward navigation, this tactile approach can dramatically shorten setup time and reduce errors.
Key strengths for independence:
- Physical keypad and tactile feedback: Each key press is deliberate, making dialing, texting, and menu navigation feel natural without looking at the device.
- Simplified, predictable menus: Options are grouped into clear categories like Phone, Contacts, Messages, and Settings, which minimizes cognitive load and helps maintain a smooth workflow.
- Loud speaker and clear audio: Volume and clarity are optimized for noisy environments, making it easier to hear calls, prompts, and navigation cues.
- Basic yet capable feature set: It covers essential communications and simple tools without adding complexity. The goal is reliability and ease of use, not a feature arms race.
Who benefits most:
- People who prefer non-touch input due to tremors, dexterity challenges, or a comfort with physical keys.
- Users who want a straightforward device for essential tasks, with less potential for distraction from apps and notifications.
- Individuals seeking a dedicated device that remains consistent from day to day, avoiding the variability sometimes found in multi-purpose smartphones.
Ease of setup and ongoing use:
- Initial setup emphasizes hardware first: insert SIM, pair accessories, and confirm preferred language and ringtones.
- Navigation relies on labeled buttons and tactile cues, which reduces the need to read on-screen text during everyday tasks.
- When updates arrive, the process is designed to be simple and non-disruptive, preserving muscle memory and habitual workflows.
Practical tips to maximize usefulness:
Thousands of People Were Struggling With Money Until They Discovered This One Ancient Secret Hidden in Sound
>>> Unlock It Now <<<

- Create a small, dedicated routine for calls and messages using the most accessible keys; keep frequently contacted numbers in a dedicated speed-dial list.
- Pair a Bluetooth headset for hands-free calls, which can further reduce reliance on the keypad and screen.
- Use the device in tandem with a braille display if longer texts or emails need careful review. The tactile output can complement the audible feedback for precision tasks.
- Keep the device in a consistent, easy-to-reach spot in your bag or on a desk to minimize fumbling and dropped calls.
Comparing with mainstream devices:
- BlindShell Classic 2 excels where screen-centric devices can overwhelm: when tactile confidence matters most, the physical keypad and straightforward menus outperform traditional touch navigation for many users.
- Mainstream smartphones offer rich features and apps, but the learning curve can be steep for people who rely on non-visual cues. If your priority is minimal friction in day-to-day use, a tactile device can be a better match.
Real-world scenarios where it shines:
- Quick calls with essential contacts when you’re on the move.
- Composing short messages via the keypad without peering at the screen.
- Navigating basic settings with confidence, letting you adjust volume, ringtones, or connectivity without hunting through menus.
What reviewers and users say:
- Many reviewers emphasize the value of a reliable, non-screen-based interface for users who want predictability and speed without relying on screen-reading or zoom features.
- Users frequently highlight the peace of mind that comes from knowing the device won’t surprise them with unexpected app updates or interface changes that complicate navigation.
Where to learn more:
- BlindShell Classic 2 review and commentary to understand real-world usability and hands-on impressions. https://www.rehabmart.com/post/blindshell-classic-2-review?srsltid=AfmBOopyEDuM9adRq_jVUzV-YdCyMlV_2KrE7Wn68E6eiwUuUitkZka1
- Independent Living resources on BlindShell and tactile phones for vision-impaired users. https://independentliving.com/blindshell-classic-2-mobile-phone/?srsltid=AfmBOoqe7YIywQrFzEvmOGGCPxAuhX3KRaKPSpIQPVgCan6Dd9sV9Wqm
This kind of device is more than a gadget; it’s a tool that anchors daily routines in reliability. If you value predictable interactions and prefer a physical keypad over a touchscreen, BlindShell Classic 2 is worth a closer look. It demonstrates how tactile design can empower independence without sacrificing essential communication needs. For those who want to reduce screen dependence while keeping essential capabilities, this model offers a compelling balance of simplicity and usefulness.
How to Pick and Set Up Your Ideal Phone
Choosing the right phone for visual impairments means balancing accessibility tools with everyday usability. This section helps you define your priorities, compare the major paths, and get your device set up quickly so you can start using it with confidence.
Clarify your priorities first
Start by listing the tasks you perform most often. Do you rely on screen readers to read messages aloud, or do you prefer large icons and high contrast? Is quick access to a magnifier or camera-based reading important when you shop or cook? Your answers guide whether you lean toward iPhone, Android, or a specialized device. The goal is to reduce friction in daily use, not to chase every feature.
Common priorities include:
- Hands-free operation with a reliable screen reader
- Strong magnification options for small print
- Seamless voice control for calls, messages, and app navigation
- Compatibility with braille displays for longer reading or editing sessions
- A simple, predictable interface that reduces the learning curve
If you’re unsure, test a few core tasks on a friend’s device or in a store demo. Focus on speed, accuracy, and comfort. A device that feels familiar today will feel like a natural extension of your routines tomorrow.
iPhone vs Android: which path fits best?
Both ecosystems offer robust accessibility features, but your choice often comes down to preference and ecosystem familiarity.
- iPhone strengths: a well-integrated set of tools such as VoiceOver, Magnifier, and a consistent update cadence. Braille support and high-quality voice options make it easy to build a hands-free workflow. The Magnifier app complements VoiceOver by adding real-time description and live reading of small print.
- Android strengths: deeply customizable quick actions, flexible magnification options, and broad hardware choices. TalkBack provides spoken feedback with wide compatibility, and Bluetooth Braille displays pair smoothly for tactile reading. The ecosystem also supports a variety of accessibility apps that can be mixed and matched.
If you spend a lot of time in bright outdoor spaces, both platforms now offer strong display adjustments. For many users, the deciding factor is which interface feels most natural and which ecosystem you already rely on for other devices or services.
Helpful resources to compare setup options:
- Android low vision accessibility tools and features: https://www.android.com/accessibility/vision/
- Accessibility features for vision on iPhone: https://support.apple.com/guide/iphone/overview-of-accessibility-features-for-vision-iph732dc028d/ios
Quick setup checklist you can start today
These steps cover the essentials to get up and running with confidence. They work across most flagship and midrange devices and can be completed in a short session.
- Turn on core accessibility features
- iPhone: Settings > Accessibility > Vision; enable VoiceOver or Zoom as needed.
- Android: Settings > Accessibility > TalkBack or Magnification; adjust preferences.
- Pair a preferred assistive input
- If you rely on braille, pair a compatible Braille display via Bluetooth.
- For tactile comfort, consider a dedicated physical keyboard accessory if you use a lot of typing.
- Configure display adjustments
- Increase text size and bold text where helpful.
- Enable high contrast or color filters to improve legibility in your typical lighting conditions.
- Set up voice control
- iPhone: Siri with a routine for common tasks.
- Android: Google Assistant for hands-free navigation and quick actions.
- Create a fast-access toolkit
- Place Magnifier, VoiceOver/TalkBack, and the Braille app or reader in a single home screen folder or on a dedicated widget.
Practical setups you can replicate now
- Magnification and narration work in tandem: turn on magnification for camera-based reading and pair it with voice feedback for fuller context.
- High contrast themes reduce eye strain during long sessions with messages or documents.
- Voice control can speed up routine tasks like calling a contact or opening a setting, freeing your hands for other activities.
For ongoing guidance, these resources offer step-by-step instructions and tips:
- Set up and practice VoiceOver on iPhone: https://support.apple.com/guide/iphone/turn-on-and-practice-voiceover-iph3e2e415f/ios
- Get started with accessibility features on iPhone: https://support.apple.com/guide/iphone/get-started-with-accessibility-features-iph3e2e4367/ios
- Get started on Android with TalkBack: https://support.google.com/accessibility/android/answer/6283677?hl=en
- Android accessibility overview: https://support.google.com/accessibility/android/answer/6006564?hl=en
Practical tips to optimize day-to-day use
- Keep a small accessibility widget or shortcut enabled for one-tap access to the tools you use most.
- If you read long texts, pair screen readers with a braille display for faster proofreading and editing.
- Use quick gestures to switch between outputs. For example, you can listen to text with TalkBack while using Magnifier to confirm on-screen details.
External links provide broader context and setup paths:
- Apple’s guide to accessibility features for vision: https://support.apple.com/guide/iphone/overview-of-accessibility-features-for-vision-iph732dc028d/ios
- Android accessibility features overview: https://www.android.com/accessibility/vision/
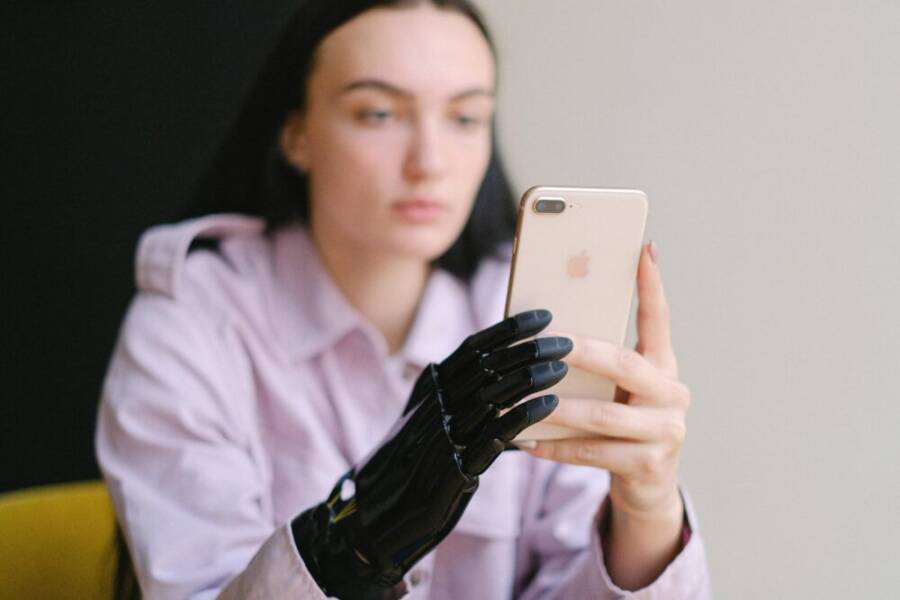
Image to accompany this section
 Photo by Cup of Couple
Real-world references to inform your choices
- For a broad survey of visually impaired smartphone options, see discussions of a range of devices and their strengths in real-world use. This helps you compare features like screen reader performance, magnification, and braille compatibility.
- If you want a tactile option, specialized devices can complement mainstream smartphones with dedicated buttons and predictable menus, reducing the learning curve for new users.
External reviews and overviews:
- BlindShell Classic 2 review and commentary: https://www.rehabmart.com/post/blindshell-classic-2-review?srsltid=AfmBOopyEDuM9adRq_jVUzV-YdCyMlV_2KrE7Wn68E6eiwUuUitkZka1
- Independent Living resources on BlindShell and tactile phones: https://independentliving.com/blindshell-classic-2-mobile-phone/?srsltid=AfmBOoqe7YIywQrFzEvmOGGCPxAuhX3KRaKPSpIQPVgCan6Dd9sV9Wqm
In short, pick a path that respects your daily routines, then tailor the setup to your way of working. A thoughtful initial setup saves time later and keeps you focused on what matters most—independence and ease of use.
Images and photo credits
If you want a visual aid for this section, the accompanying image helps illustrate hands-on use in a well-lit environment. Photo credit: Cup of Couple.
Conclusion
The iPhone 17 Pro remains the strongest all around choice for visual impairments, offering VoiceOver, Magnifier, Zoom, and high quality display options that work together for reliable independence. Its ecosystem supports braille displays, robust voice control, and precise gestures, making daily tasks feel natural again.
If you prefer Android, a Samsung Galaxy model delivers a bold display, TalkBack, and strong magnification alongside seamless Braille support. For a more focused approach, specialized devices like BlindShell Classic 2 provide a tactile, predictable experience that minimizes screen reliance and speeds up routine actions.
Try demos in store or through official accessibility trials to feel how the screen reader feedback, magnification, and voice control align with your habits. Consulting an accessibility professional can help tailor settings to your environment, from lighting to notifications, so you can move through tasks with confidence.
Share your experience in the comments or check the linked guides to dive deeper into setup and best practices. Your feedback helps others find a path that offers real freedom, reduces strain, and strengthens everyday independence with a smartphone that fits your life.
She Pressed Play on a Strange Audio Track and Within Days Her Financial Reality Started Shifting in Ways She Could Not Explain
>>> See How It Works <<<
