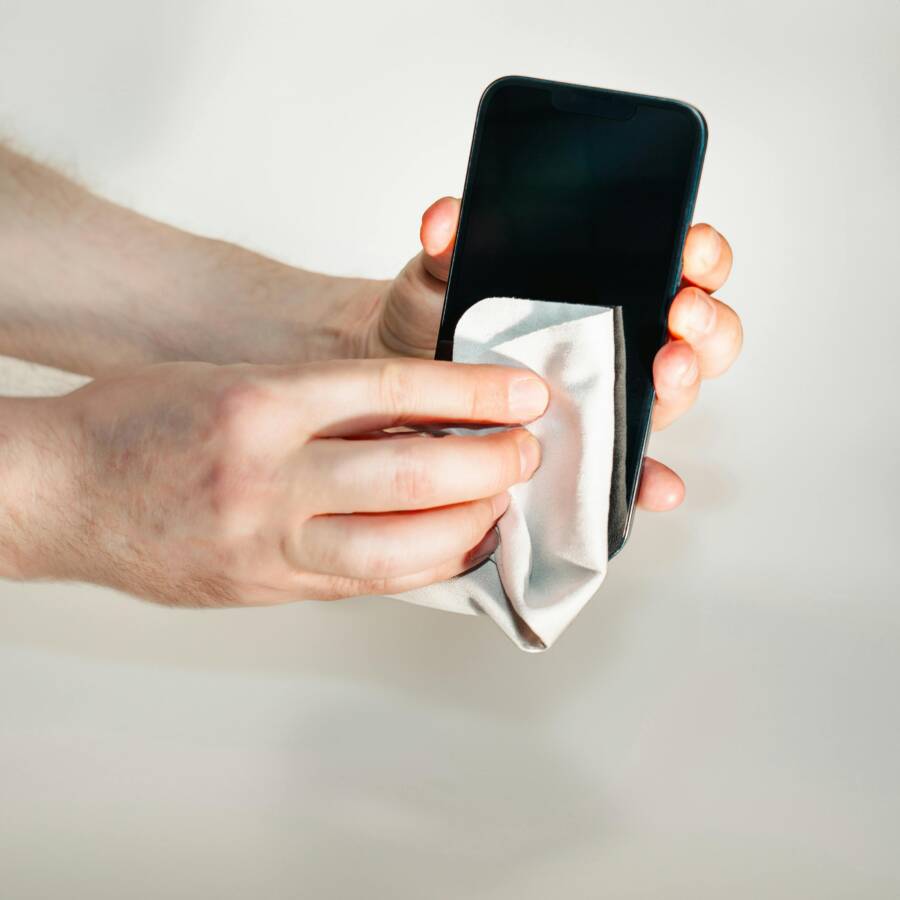
Germs cling to phones more than to many other everyday surfaces, and a quick wipe won’t cut it. Regular cleaning protects your health, keeps your phone looking new, and preserves its touch response. If you’re worried about damage, you’re not alone—the right method is simple and safe.
This guide shows you how to clean your phone without harming it. You’ll learn what supplies to use, what to avoid, and the exact steps that minimize moisture and residue. We’ll cover both the device itself and the case, since both can harbor grime over time.
By the end, you’ll have a reliable routine you can repeat weekly or as needed. The method is gentle, effective, and easy to fit into a busy day. If you’re curious how to balance cleanliness with device safety, this guide has you covered for a healthier, more responsive smartphone.
Essential Supplies for Safe Phone Cleaning
Keeping your phone clean while protecting its finish and persistence of touch is a small, repeatable ritual. The right supplies make the difference between a spotless device and one with streaks or moisture damage. Below is a practical kit list and quick guidelines to help you gather and use what actually works.
1) Core cleaning materials you can trust
- Soft microfiber cloths: These are the safest option for removing oils and fingerprints without scratching surfaces.
- 70% isopropyl alcohol (or higher): A small amount on a microfiber cloth can disinfect without soaking. Do not pour liquid directly onto the device.
- Distilled water: When you need a light dampening, distilled water reduces mineral streaks.
- A small spray bottle: Use it to apply a fine mist to the cloth, not to the device directly.
- Cotton swabs and a soft-bristled brush: Perfect for getting into tiny crevices around ports and speaker grills.
These basics form a simple, repeatable routine. They help you remove grime and germs without leaving behind moisture or residue. For additional guidance on safe approaches, see reputable sources like HealthPartners on keeping germs at bay and practical electronics cleaning tips from PCMag.
2) Safe cleaners to avoid and why
- Harsh solvents and bleach-based cleaners: These can damage coatings and plastics.
- Abrasive cleaners or powders: They scratch screens and cases.
- Vinegar or ammonia mixes in full strength: They can erode protective layers and fingerprint sensors.
- Direct spray onto devices: Liquids can seep into ports and internal components.
If you’re unsure about a product, check the label for “safe for electronics” and test a small hidden area first. The goal is a clean device with no moisture beyond a light, controlled dampening on the cloth.
3) Tools that help reach every nook
- Cotton swabs: Great for edges around buttons and camera lenses.
- Soft paintbrush or makeup brush: Gentle dust removal from speaker grilles and seams.
- Lens cleaning tissue or microfiber stylus sleeve: For precision on cameras without leaving lint.
Having these tools handy ensures you don’t rush and end up with streaks or damp pockets. A calm, patient approach yields the best results.
4) A compact cleaning kit you can keep at hand
- One or two microfiber cloths
- A small bottle of 70% isopropyl alcohol
- A bottle of distilled water
- A couple of cotton swabs and a tiny brush
- A resealable pouch to keep everything organized
Keeping a dedicated kit near your daily bag or desk makes weekly cleanings quick and consistent. It also reduces the temptation to improvise with household products that may not be safe for electronics.
5) Safety reminders that protect both you and your device
- Always apply liquids to the cloth, never directly to the phone.
- Power off the device if you’re performing a thorough wipe.
- Avoid moisture near ports, speakers, and the charging area.
- Let the device air dry briefly after a damp wipe before turning it back on.
These precautions help you clean effectively without introducing moisture risks. If you want a broader view on sanitizing electronics, you can consult trusted guides from industry sources like HealthPartners and Verizon’s how-to articles for extra context and best practices. For example, Verizon’s guide covers practical steps and cautions to keep in mind while cleaning your cell phone. If you’d like a deeper dive into deep cleaning routines, Real Simple offers practical tips on eliminating germs from smartphones.
- HealthPartners: Cleaning your phone and keeping it germ-free
- Real Simple: How to Deep Clean Your Smartphone
- PCMag: 11 Must-Know Tips for Cleaning Every Electronic Device
- Verizon: How to Clean Your Cell Phone and Keep it Germ-Free
If you’re ready to integrate these supplies into a weekly routine, you’ll notice fewer smudges and a healthier, more responsive device. And you’ll feel confident knowing you’re following clear, safety-first steps that protect both you and your smartphone. For a quick reference, keep a dampened microfiber cloth ready, then finish with a dry wipe to remove any last residue. Your phone will look right, function smoothly, and stay less prone to the buildup that makes screens feel unresponsive.
Prepare Your Phone to Avoid Accidents
Before you start cleaning, set the stage to keep your device safe. A quick prep routine reduces the risk of moisture creeping into ports, wear on surfaces, or unintended touches during the process. Think of it as laying a clean, stable work surface for a precise task. When your phone is properly prepped, you can clean confidently, not nervously.
Power down and unplug
- Turn off your phone completely. A powered-down state minimizes the risk of short circuits if moisture touches internal components.
- If your device supports it, remove any accessories like pop sockets, magnetic mounts, or wallet cases. This makes it easier to access edges and grills without tugging on cables or fabric.
- If you’re cleaning a phone that’s been charging, let it cool and unplug the charger first. Wet or damp environments near a charging port can be hazardous.
Keeping the device off and free of attachments gives you a safer, faster cleaning session and helps you avoid surprises once you wipe down the surface.
Remove the case and inspect
- Take off the protective case to clean both the phone and the case itself. Cases collect oils, dirt, and dust, and grime can transfer back to the screen.
- Check for any lingering debris around the ports before you begin. If you see lint near the speaker grills or charging port, gently loosen it with a dry, soft brush or a toothpick wrapped in a cloth.
- If you use a screen protector, ensure it is intact and not peeling. A damaged protector can trap moisture or peel away during cleaning.
Separating the phone from its housing helps you reach every nook and keeps moisture from getting trapped inside the device.
Dry hands, dry workspace
- Wash and dry your hands before you handle the phone. Oils from skin transfer easily and can smear the screen during cleaning.
- Work on a clean, flat surface with good lighting. A calm space reduces the chance of slipping the phone or misplacing cleaning tools.
- Keep a small towel or microfiber cloth handy to dry any accidental moisture on the exterior.
A clean, organized workspace makes the process smoother and less stressful.
Minimize moisture exposure
- Plan to use only a lightly damp cloth. Avoid saturating any cloth or paper with liquid.
- Do not spray any liquid directly onto the phone. If you’re using a spray bottle, mist the cloth lightly first, then wipe.
- Stay away from openings like the charging port, SIM tray, microphone holes, and speaker grilles during the wipe. If you must clean near these areas, use a dry or barely damp tool and be extra careful.
This approach protects internal components and keeps the device dry where it matters most.
Prepare your cleaning toolkit
- Have your microfiber cloths, cotton swabs, and a soft brush within arm’s reach.
- Keep a small spray bottle with a safe, diluted solution ready for misting the cloth, not the device.
- Include a dry, lint-free cloth for the final wipe to remove any remaining streaks.
A ready-to-go kit reduces the urge to improvise with household cleaners that aren’t designed for electronics.
Set expectations for your cleaning session
- Plan for a quick surface wipe plus a more thorough look at the edges and ports. A two-pass approach often yields the best results.
- Allow a brief air-dry time after any damp wipe. Giving the device a minute or two to vent helps prevent moisture from lingering.
- If your device is water resistant, you can follow manufacturer guidelines for slight moisture in the exterior, but avoid pushing limits. Always err on the side of caution.
With a clear plan, you’ll clean efficiently without second guessing every move.
Quick safety reference
- Always apply liquids to the cloth, never directly to the phone.
- Power off, then wipe. Reboot only after the device is completely dry.
- Avoid moisture near ports and openings, and never submerge the device.
- For tougher spots, a gentle touch and a soft brush do the work without scratching.
For additional context on safe disinfection practices, see reputable guidance from trusted sources like Apple Support on cleaning iPhones and other electronics care tips. For example, Apple’s guidance details acceptable disinfectants and proper wiping technique to minimize risk to coatings and sensors. This can help inform your routine while you keep a steady grip on safety. You can read more here: https://support.apple.com/en-us/108765
When to re-evaluate your approach
If you notice persistent grime in hard-to-reach areas, consider a longer, more careful session. If you’re cleaning a device with sensitive coatings or unique finishes, two pass methods with a barely damp cloth are often best. If you ever feel uncertain about a product or technique, start with a small test area.
To reinforce safe practices, you can consult additional expert tips from reputable guides on electronics cleaning. For instance, Lifehacker discusses do’s and don’ts of disinfecting smartphones, while HealthPartners offers guidance on keeping your phone germ-free. Integrating insights from multiple sources helps you tailor a routine that fits your device and lifestyle. See related articles here: The Do’s and Don’ts of Disinfecting Your Phone, Cleaning your phone and keeping it germ-free, and 11 Must-Know Tips for Cleaning Every Electronic Device. For deeper reading, you might check HealthPartners and Real Simple as well. Links provide practical reminders and cautionary notes to support your routine.
Safely Clean Your Phone Screen
Cleaning your phone screen doesn’t have to be risky or time consuming. With the right approach, you can remove oils, fingerprints, and germs without dulling the display or damaging coatings. This section walks you through a practical, safe routine you can do weekly or whenever you notice smudges. We’ll cover why it matters, how to clean step by step, how to care for the case and other accessories, and common mistakes to avoid.
 Photo by Jakub Zerdzicki
Why safe cleaning matters
Your phone is a high touch surface. Oils from your skin, dust, and tiny fibers build up over time, making the screen harder to read and potentially spreading germs. A gentle, consistent routine protects the screen’s coating, keeps touch response crisp, and extends the device’s life. The goal is to remove grime with minimal moisture and no harsh chemicals.
- Guidelines matter: use a soft cloth and light dampening rather than soaking the device.
- Coatings matter too: some screens have oleophobic or anti-glare layers that can wear with aggressive cleaners. Stick to the basics and avoid direct sprays.
- Sanitation is practical: regular cleaning reduces germs on surfaces you touch daily, especially during flu season or travel.
To reinforce these points, reputable sources outline safe disinfection practices and practical cleaning steps for electronics. For example, Real Simple’s deep-clean guidance emphasizes gentle methods that actually work, while Apple Support outlines approved cleaners and wiping techniques for iPhones and other devices.
- Real Simple: How to Deep Clean Your Smartphone
- Apple Support: Cleaning guidance for iPhone and electronics
Step-by-step safe cleaning process
A clear, repeatable routine helps you stay consistent without guesswork. Follow these steps in order, and keep the process calm and methodical.
- Power down and unplug
- Turn off the device completely to reduce the risk of a short or mis-touches.
- If you use a case or accessories, remove them to access all edges easily.
- If it was charging, unplug first and let the device cool.
- Prepare your toolkit
- Have a clean microfiber cloth ready. A second cloth is handy for a final dry wipe.
- Use a small spray bottle to mist the cloth lightly. Never spray directly onto the screen.
- Keep cotton swabs and a soft brush nearby for around edges, cameras, and speaker grills.
- Dry wipe first
- Wipe the screen with a dry microfiber cloth to remove loose dust.
- This reduces the amount of moisture you’ll need for the next step.
- Lightly dampen and wipe
- Lightly mist your cloth with a tiny amount of 70% isopropyl alcohol or a gentle cleaner approved for electronics.
- Wipe the screen in small circular motions, applying minimal pressure.
- Avoid the edges and ports to prevent moisture from seeping inside.
- Pay attention to hard-to-reach spots
- Use a cotton swab or a soft brush to clean around the camera lens, speaker grills, and the home button area.
- If you see streaks, finish with a quick dry wipe using a fresh microfiber cloth.
- Dry and inspect
- Let any residual moisture evaporate for a minute or two before powering the device back on.
- Check for remaining smudges. If needed, repeat the dampening step with a fresh cloth.
- Clean the case and accessories
- Wipe the case with a damp cloth, then dry thoroughly before reassembling.
- If the case has texture or seams, use a soft brush or cotton swab to remove trapped dust.
For more context on safe disinfecting, you can consult well-known guides from trusted outlets. They reinforce the “apply liquid to the cloth, not the device” rule and show why a two-pass approach works well on most screens.
- How to Deep Clean Your Smartphone by Real Simple
- Cleaning your phone and keeping it germ-free by HealthPartners
Cleaning the phone case and other accessories
The case can trap oils and dirt that transfer back to the screen. Clean the case separately to avoid recontaminating the display.
- Remove the case and wipe its interior and exterior with a damp cloth.
- For fabric or silicone cases, a light soap solution followed by thorough drying works well.
- Don’t forget camera lens covers and any screen protectors; inspect for wear and replace if damaged.
If you have a rugged case or a silicone sleeve, dedicated brushes can help reach seams without scratching. After cleaning, reattach the case and give the screen a final quick wipe to remove any lint.
Common mistakes and quick fixes
Learning what to avoid saves time and prevents damage.
- Don’t spray liquids directly onto the screen. Always mist the cloth first.
- Don’t use abrasive cleaners, window sprays, or vinegar on modern coatings.
- Don’t soak or submerge the device. Even brief exposure to moisture can cause issues.
- Don’t rely on newspaper or paper towels. They can scratch or leave fibers.
If you notice streaks, switch to a fresh microfiber cloth and use a lighter dampening. A dry finish often yields the best look and feel. If you’re curious about a broader set of safety practices, you can read more from credible guides like CNET or Wikihow, which cover practical steps and precautions for keeping your phone clean without damage.
- Wikihow: How to Safely Clean Your Phone Screen
- CNET: Sure, You Clean Your Bathroom, But When’s the Last Time You Cleaned Your Phone?
Quick tips to fit cleaning into a busy schedule
- Do a quick wipe at the end of the day with a dampened cloth and a dry finish.
- Keep a small kit in a desk drawer or bag for fast sessions.
- Use a dedicated spray bottle labeled for electronics to avoid cross contamination.
A simple routine adds up. With a little practice, you’ll clean your smartphone quickly and safely, preserving clarity and responsiveness.
Practical safety reminders
- Always apply liquids to the cloth, never to the screen.
- Power off before cleaning and recheck that the device is dry before turning it back on.
- Avoid moisture near ports like the charging jack and SIM tray.
- If in doubt, perform a small test area first and choose a milder solution.
If you want a deeper dive into safe disinfection practices, check the additional resources from reputable outlets. They provide practical reminders and cautions that help you tailor a routine to your device and lifestyle.
- Apple Support: Cleaning guidelines
- Real Simple: Deep cleaning smartphones
By keeping your approach steady and careful, you’ll maintain a bright, responsive screen and a healthier daily routine. For a quick reference, practice a two-pass method: a light damp wipe, then a dry wipe to remove any residual moisture. This small ritual pays off with clearer visuals and fewer stubborn smudges on days you use your phone most.
References and further reading:
- Real Simple: How to Deep Clean Your Smartphone
- HealthPartners: Cleaning your phone and keeping it germ-free
- Apple Support: Cleaning guidance for iPhone and electronics care tips
- Wikihow: How to Safely Clean Your Phone Screen
If you’d like, I can tailor this section further to align with a specific reader persona or add more image options from Pexels to fit your layout.
Wipe Down the Body, Buttons, and Edges Gently
Cleaning the body, buttons, and edges of your phone requires a light touch and careful technique. The goal is to remove dust and oils without driving moisture into ports or rubbing away coatings. Start with a dry wipe to lift loose particles, then use a barely damp cloth for any stubborn smudges. Always keep moisture off openings and avoid direct spraying. If you need extra access to tight areas, a soft brush or cotton swab can help, but never force a tool into gaps. Regular, gentle maintenance preserves the device’s look and feel, while keeping touch response crisp. For best results, pair your routine with a quick check of the charging port and speaker grills to catch dust before it becomes a problem.
Charging and Audio Ports
Keep debris out with short bursts of compressed air and a wooden or plastic pick for stubborn specks. Avoid metal tools that could scratch. A light cotton swab can remove residue near the port entrance, but do not insert anything deep. After cleaning, wipe the area with a dry or barely damp microfiber cloth to ensure no moisture remains. If you notice charging issues after cleaning, give the device time to air dry and then test again. This careful approach reduces the chance of shorts and preserves charging reliability. For step-by-step guidance from trusted sources, see ports cleaning guides like How to Clean the Ports on your Electronic Device and practical safety tips from reputable outlets. External resources:
- https://www.ifixit.com/Guide/How+to+Clean+the+Ports+on+your+Electronic+Device/164721
- https://slashgear.com/1580205/best-ways-to-safely-clean-phone-charging-port-android-iphone
Speaker and Microphone Grills
Dust builds up in speaker and mic grills, which can muffle sound and picked up noise. Use a gentle blow of air or a soft brush to lift particles from the grate without pushing debris deeper inside. Avoid liquids in this area, as moisture can interfere with audio pathways. After brushing, test sound playback and microphone quality to confirm improvement. If you see a stubborn speck, a fine cotton swab lightly dampened with a tiny amount of isopropyl alcohol can be used around the rim of the grill, never directly on the holes. Always finish with a dry wipe to remove any remaining moisture. For additional methods, refer to guides like How to Clean Your iPhone Speakers and Improve Sound and other consumer electronics care tips. External resources:
- https://www.wikihow.com/Clean-iPhone-Speakers
- https://www.tiktok.com/@idoctoruk/video/7277123092642630944?lang=en
Camera Lenses
Camera lenses demand the gentlest care. A microfiber cloth with a dry or barely damp alcohol wipe works well, using circular motions to lift smudges without scratching. Avoid abrasive cleaners and never use harsh solvents that could degrade coatings. If you need more precision, use a lens cleaning pen or a soft brush around the edge of the lens to remove dust without touching the glass directly. After cleaning, inspect for any remaining haze and wipe again with a clean cloth if necessary. Proper technique sharpens photos and keeps autofocus consistent. For guidance on lens care, consult sources like A Guide to Properly Cleaning Your Phone’s Camera Lens. External resources:
- https://elitetechrepair.com/2024/01/04/a-guide-to-properly-cleaning-your-phones-camera-lens/
- https://www.facebook.com/groups/beginnersphotographygroup/posts/7376694392378429/
Dry Your Phone and Build Good Habits
Drying your phone properly is just as important as the cleaning itself. Moisture left behind can cause issues over time, and rushing the process invites streaks or repeating cleanups. This section helps you create a simple, repeatable routine that keeps moisture out and your device looking and working its best. Think of it as building a small habit stack that fits into daily life.
Quick-start habit: a two-step post-clean routine
A reliable routine makes all the difference. After you finish cleaning, finish with a quick dry pass and a 60-second pause.
- Two-pass method: first, a light damp wipe to lift any remaining residue, then a dry microfiber wipe to remove moisture and streaks.
- Air-dry moment: let the device sit for a minute or two in a safe, open space before powering back on.
- Consistency beats intensity: clean weekly or after noticeable grime rather than waiting until the screen is almost opaque.
This simple pattern helps you avoid moisture sitting in ports or coatings. It also reduces the chances of needing a complete redo later in the week.
Build a weekly cleaning rhythm you’ll actually keep
Make cleaning part of a small routine you perform around the same time each week. Use a dedicated kit and a dedicated spot so you don’t have to hunt for tools.
- Create a mini kit: two microfiber cloths, a small spray bottle with a safe electronics cleaner, cotton swabs, and a soft brush.
- Schedule a time: choose a regular day and time, such as Sunday evenings or after your nightly phone wind-down.
- Track progress: a simple checkbox in your notes helps you stay accountable and notice improvements in screen clarity and touch response.
By turning cleaning into a predictable habit, you protect the display coatings and maintain a fast, responsive touch experience. For guidance on practical routines, you can check out practical tips from trusted sources like Asurion and others that focus on decluttering and deep cleaning your phone.
- How to declutter and deep-clean your phone
- Cell Phone Cleaning tips from the American Cleaning Institute
Safe drying techniques after a damp wipe
If moisture drips near ports or speaker grills, follow these steps to dry quickly and safely.
- Avoid direct sprays on the device: always mist the cloth, never spray onto the phone.
- Use a dry cloth for the final pass: this helps lift any moisture that clings to the surface.
- Give it air time: even a minute of air drying near a fan can prevent moisture from lingering.
If you ever suspect moisture in a port, don’t attempt to power on until you’re sure it’s dry. A cautious approach protects your charging infrastructure and internal components. For broader guidance on drying methods and avoiding the rice myth, see reputable articles that debunk quick fixes and offer safer alternatives.
- One Tech Tip: Don’t use rice for your device. Here’s how to dry out your smartphone
- Here’s the Right Way to Rescue a Soaking Wet Smartphone
Turn cleaning into a safety routine
A clean device is a safer device. When you pair cleaning with good habits, you reduce the risk of residue buildup around cameras, speakers, and sensors.
- Set up reminders: a short weekly alert helps you stay on top of grime and germs.
- Keep a log: note which areas tend to need extra attention, like the camera edge or speaker grills.
- Pair with case care: clean the case at the same time to prevent recontamination of the display.
This holistic approach saves time and ensures both your phone and its accessories stay in top condition. If you want more concrete ideas on building and sustaining healthy cleaning habits, reputable guides offer practical steps and rationale behind best practices.
- How to clean and declutter your phone
- Cleaning guidance for iPhone and other electronics
Quick note on safety and sources you can trust
When you follow a routine built on solid steps, you’ll see clearer screens, crisper touch, and fewer streaks. If you ever doubt a technique or product, start with a small, hidden test area and use a milder approach. You can also refer to established guidelines from credible outlets for extra reassurance.
- Apple Support: Cleaning guidance for iPhone and electronics care tips
- Real Simple: How to deep clean your smartphone
A simple reference workflow you can implement today
- Power down and unplug if needed.
- Wipe with a dry microfiber cloth to remove loose dust.
- Lightly dampen a cloth and wipe the screen in small circles.
- Clean edges, camera lens, and speakers with cotton swabs or a soft brush.
- Finish with a dry pass and a brief air-dry time.
- Wipe the case separately and reassemble.
By following this straightforward workflow, you maintain a reliable cleaning habit that protects both your device and your daily routines. For further reading on drying strategies and avoiding common myths, you can explore trusted articles like those from Wired, TechXplore, and Seattle Times. They offer clear, practical guidance on how to handle a wet or recently cleaned device without resorting to risky shortcuts.
- Here’s the Right Way to Rescue a Soaking Wet Smartphone
- One Tech Tip: Don’t use rice for your device. Here’s how to dry out your smartphone
- Phone wet? Skip the rice. Do this instead to dry your device
If you’re ready to tailor this section further, I can help align the tone to a specific reader persona or add more image options from Pexels to fit your layout.
Conclusion
Cleaning your phone without damage is easy when you follow a calm, repeatable routine. Use a soft microfiber cloth, a light mist of a safe electronics cleaner or 70 percent isopropyl alcohol, and keep moisture away from ports and gaps. A two pass method—a quick dry wipe, then a barely damp wipe—delivers clear results with no harm to coatings or sensors. The result is a brighter screen, crisper touch, and fewer germs.
Recapping the benefits helps you stay consistent. Regular, careful cleaning preserves screen readability, protects coatings, and reduces buildup that slows response. You gain more confident use of your smartphone and a healthier daily routine with less effort than you expect. Sticking to simple tools keeps the process approachable and reliable.
Now is the time to try this routine. Set up a small kit, pick a weekly slot, and watch smudges fade and dust vanish. A quick wipe at the end of the day can become second nature, and you’ll notice less rework on busy days. Share your own tips or a quick before and after photo to inspire others.
If you want more help, browse related guides on iPro+ 知識酷. Check out our smartphone care and accessories articles for deeper tips and practical checklists. Happy cleaning, and your smartphone will thank you with better clarity, faster response, and a healthier everyday use.