Ever run into an annoying echo while filming on your phone and wish you could fix it fast? This quick guide breaks down why echo happens and how to clear it up without expensive gear. You’ll get practical tips that work on both iPhone and Android for near studio quality results.
Echo shows up when sound bounces around the room, or when the mic re-captures its own output. In most cases a few small changes—like using headphones, softening room surfaces, or adjusting mic settings—can remove the doubling effect and make your video narration crisp.
Inside you’ll find fast tweaks for on the spot fixes and longer term improvements that actually stick. From simple recording habits to smarter app choices, these steps are designed for real world use so you can film with confidence, no matter your device.
What causes echo in phone videos and how to recognize it
Echo in phone recordings can be frustrating, but the symptoms and fixes are usually straightforward. This section breaks down the main culprits and how to spot them quickly. You’ll learn to identify speaker bleed, room reflections, app quirks, and perform a fast triage so you know what to try first.
Speaker bleed and mic pickup patterns
When you record with a phone, the loud speaker is close to the microphone. If the mic picks up the sound from the speaker and plays it back through the same or another microphone later, you hear an echo. This is most common when you record without headphones or when the device sits near a speaker or another loud source.
- Simple scenario: you’re recording a voiceover on a desk setup. The phone’s speaker emits your own voice back through the mic due to proximity. The result is a short, delayed version of your voice that creates a doubling effect in the recording.
- Quick test you can perform: place a headphones-based setup for a moment. Record a short message while wearing wired or wireless headphones with the phone on standby. If the echo disappears, speaker bleed was the culprit. If the echo persists, the issue likely lies elsewhere.
Tips to prevent speaker bleed:
- Use headphones while recording or monitor with headphones during playback.
- Keep the phone away from the speaker and other loud devices.
- If you must record near speakers, turn them down and create a small acoustic buffer with a soft surface between the mic and the sound source.
If you want more on practical fixes, see discussions about mic echo and speaker interaction in real-world setups, including quick checks for common consumer devices. For deeper reading, see guides on microphone echo and how to stop audio loops in calls. https://getvoip.com/blog/phone-echoing
Room acoustics and reverb
Echo is also a product of room acoustics. When a hard surface reflects sound, especially from a close microphone, the reflected waves reach the mic after a short delay, creating an audible echo. This can happen even in small rooms if there are many reflective surfaces like glass, tile, or bare walls.
- How to recognize it: if your voice sounds bright or metallic, if there’s a faint secondary version of your voice a moment after you speak, or if the echo is more noticeable when you move to different positions, room reflections are likely contributors.
- Quick fixes you can implement now without special gear:
- Add soft furnishings: a throw blanket, rug, or sofa cushions can absorb sound.
- Rearrange furniture to break direct reflection paths. Place the mic away from walls and corners.
- Create a makeshift absorber by hanging a lightweight curtain or moving a bookshelf away from the recording spot.
- Try to record in a room with fewer hard surfaces or place the phone toward a corner away from glass.
Software and mic settings that create echo
Echo can sneak in through the software you use to record. Some camera apps and mic modes introduce processing that unintentionally doubles the signal, or routes audio in ways that cause feedback. Auto gain control can boost levels at the wrong moments, and some apps route microphone input through layers that aren’t needed for your setup.
- Common culprits:
- Effects or filters that add artificial reverb or voice enhancement.
- Automatic gain controls that cause the mic to jump between loud and soft passages.
- Incorrect routing where the mic input uses the phone’s speaker output as a reference.
A quick, practical checklist before you start recording:
- Disable any beauty or enhancement effects that add reverb or echo-like processing.
- Turn off auto gain if your app offers that option.
- Ensure the app is using the correct microphone (not a stereo mode that repeats the signal).
- Use a simple, clean recording mode rather than modes designed for live streaming or video calls.
- Test with headphone monitoring to confirm the mic path isn’t picking up speaker audio.
If you want a deeper dive into how apps handle mic input and echo, check out resources detailing mic echo in consumer software and practical fixes for phone setups. https://fitsmallbusiness.com/phone-echoing/
Symptoms in your recording and quick triage
Knowing what to look for helps you decide what to adjust first. Here are the common signs of echo and a rapid 5 minute triage plan to determine where to start.
- Common signs:
- A delayed copy of your voice heard after you speak.
- Echo that is more noticeable at higher volumes or in certain tones.
- Echo that worsens when you move or change position relative to the phone.
- A hollow or “talking in a tunnel” sound in addition to the echo.
- Fast 5 minute triage plan:
- Confirm speaker bleed: plug in headphones and re-record. If echo disappears, speaker bleed was the issue.
- Check room reflections: move away from walls, add soft items, or place a curtain to dampen reflections.
- Review app settings: disable effects, auto gain, and confirm microphone routing.
- Test different positions: try recording with the phone placed on a stable surface away from the mouth and away from speakers.
- If needed, switch to a different app or a dedicated voice recording mode and re-test.
Scoring guide to guide actions:
- No echo: you’re done for now, no further changes needed.
- Light echo: focus on room adjustments and mic path checks, re-test.
- Heavy echo: consider headphones and a more controlled environment; re-run the quick triage and adjust multiple factors.
If you want more on quick, practical testing methods, you’ll find a range of approaches in current guides that cover how to stop video from echoing during calls and how echo appears in phone recordings. https://www.ringcentral.com/blog/how-to-stop-video-calls-from-echoing/
By understanding these factors, you can diagnose the cause faster and apply targeted fixes. The goal is a clean, natural sound that makes your message clear. If you’d like, I can tailor these steps to your specific device model or app setup and provide a concise, tested checklist you can save for future recordings.
Fast, no‑app fixes you can try right now to cut echo
Echo can make your phone recordings sound hollow or robotic. These quick, no‑app fixes focus on simple tweaks you can do in the moment to dramatically reduce or remove the echo. They work whether you’re on an iPhone or an Android smartphone, and they don’t require special gear. Use them in combination for best results, and trust your ears: if it sounds better, you’re in the right direction.
 Photo by Karola G
Put on headphones and lower the volume
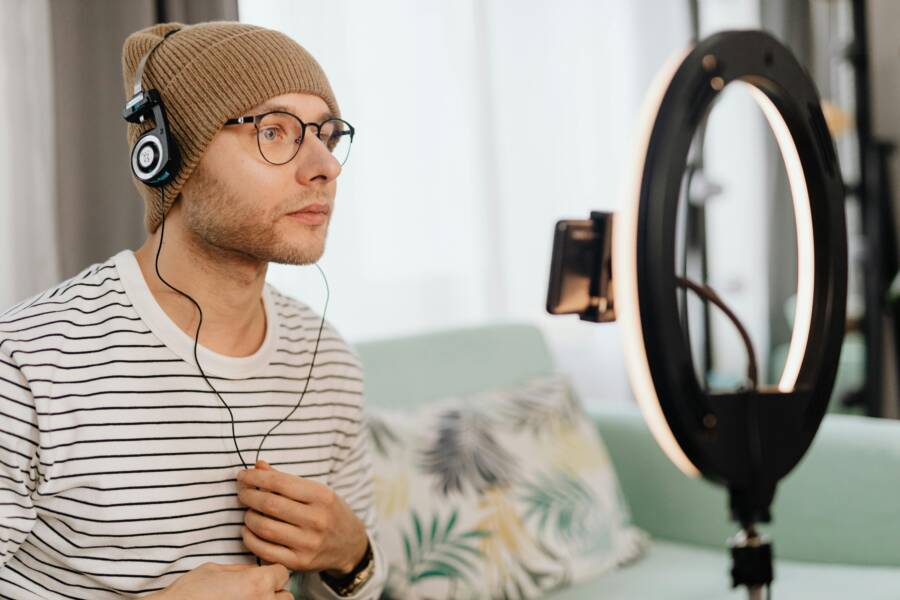
Wearing headphones while you record keeps the sound from feeding back into the mic. When you listen through headphones, you’re not hearing the phone’s own speaker output. That prevents the mic from re-capturing the playback, which is the leading source of the echo. It also gives you a more accurate sense of how you sound in the final track, so you can adjust mic distance and voice level on the fly.
- How it helps: the mic picks up your voice, not your speaker. With headphones, the loudspeaker is silent to the mic, so there’s no delayed loop.
- Quick test: record a short sentence with headphones on and then without. If the echo is gone with headphones, speaker bleed was the culprit. If it remains, move to the next fixes.
Practical tip for on‑the‑go shoots: carry a compact pair of earbuds or a tiny headset. They’re light, inexpensive, and hugely effective in noisy environments. For more on how headphone monitoring can improve mobile recording, see broader discussions about mic‑speaker interaction in real world setups. https://getvoip.com/blog/phone-echoing
Record in a softer room or add soft furnishings
Hard surfaces bounce sound, which creates reflections that the mic can pick up shortly after you speak. Soft furnishings absorb those reflections and tame the room’s reverb, making your voice sit more clearly in the recording.
- Quick, affordable tweaks you can try now:
- Drape a blanket over a chair or sofa back near your recording spot.
- Hang a lightweight curtain or drape a throw over a door or window.
- Place a small rug or a couple of cushions around the desk to dampen reflections.
- Portable options if you’re filming away from home:
- A compact travel blanket or a foldable moving pad can act as a temporary absorber.
- A portable sound-absorbing panel can be set up in minutes.
If you want deeper guidance on room acoustics with simple, budget-friendly ideas, there are practical guides that walk through evaluating your space without fancy gear. What causes room echo and how to fix it
Position the mic and reduce noise sources
Microphone technique matters as much as the room. Keeping the mic close to your mouth while avoiding speech from drifting across the room makes a big difference. You want clean capture of your voice without the mic picking up nearby noise or room reflections.
- Close mic technique basics:
- Hold or position the phone so the mic is near your mouth but not touching it.
- Avoid speaking from across the room; this lets air from your lips hit the mic at a direct angle, increasing ambient noise.
- Keep a consistent distance; tiny changes in distance can change the level and introduce room noise.
- Additional tips:
- Use a soft cloth or small stand to stabilize the phone and keep it steady.
- If you’re moving, record in short, planned bursts to maintain consistent proximity.
- Enable a basic recording mode that prioritizes clean input over added effects.
If you want a deeper look at mic placement and how it affects clarity, check out practical discussions on mic setup for mobile devices and how to avoid echo loops in consumer gear. https://www.dialpad.com/blog/
Restart device and check for updates
Software glitches can cause audio paths to misbehave. A simple restart resets processes that might be creating echo, and checking for updates ensures you have the latest fixes and improvements to your device’s audio stack.
- Restart steps:
- iPhone: hold the side button and either volume button, then slide to power off. After a moment, turn the phone back on.
- Android: hold the power button, choose Restart, and wait for the device to come back online.
- Update checks:
- iPhone: Settings > General > Software Update. If an update is available, install it.
- Android: Settings > System > Software Update. Follow the prompts to install any available updates.
- Quick verification: after the restart and any updates, open a simple voice memo app and record a short clip to hear if the echo issue persists.
Staying current with updates helps ensure your device’s audio handling stays reliable. For a quick overview of common audio issues on phones and how updates can fix them, you can explore related guides. https://www.calilio.com/blogs/how-to-fix-phone-echoing
Test again with a short clip
A final quick test confirms whether the fixes worked. Use a short 10‑second clip and listen carefully through headphones to verify the echo is reduced or gone.
- Protocol for a 10‑second test:
- Record a 10 second spoken line at a normal speaking pace.
- Stop the recording and listen back with headphones.
- Note whether you hear a clean voice or any echo, flutter, or double sound.
- What to listen for:
- If the voice sounds smooth and centered, you’ve reduced room reflections and speaker bleed.
- If you still hear a faint echo, try combining the room tweaks with closer mic technique and a fresh headphone check.
- Quick iteration: make one change at a time, re-test, and keep the changes small. This keeps the process efficient and avoids overfitting to a single room or setup.
For additional testing ideas and a quick method to stop echo during everyday recordings, see reviews and tips on phone microphone behavior in common apps. https://www.ringcentral.com/blog/how-to-stop-video-calls-from-echoing/
Images and practical testing help you validate what really works in your space. If you’d like, I can tailor these steps to your device model, app, and typical recording scenarios and provide a crisp, reusable checklist you can save for future shoots.
Best practices for recording on iPhone and Android to prevent echo
Echo in mobile recordings can ruin a good take. The goal here is to keep your audio clean without lugging around extra gear. Below you’ll find practical, field-tested best practices tailored for both iPhone and Android users. You’ll learn how to use external mics effectively, pick the right camera app and mic settings, and apply platform specific tips that reduce or eliminate echo. Each subsection includes quick action steps you can implement today.
Use external mics for clean sound
External microphones dramatically reduce echo by giving you a dedicated capture path that isn’t affected by the phone’s own speaker output or room reflections. Here’s a quick guide to the main options and how to set them up for best results.
- Wired lavalier mics
- What they are: small, clip-on mics that connect directly to your device’s input jack or via a USB-C/Lightning adapter.
- Quick setup: attach the lavalier to your clothing about 6 to 8 inches from your mouth. Plug into the device’s mic input. If using an adapter, ensure it supports microphone input and not just charging.
- Placement tip: keep the mic roughly at chest height and aimed toward your mouth. Avoid pressing the mic against fabric that can muffle or rub against it.
- USB-C and Lightning mics
- What they are: compact mics with a direct USB-C or Lightning connector, often with built-in preamps for better gain control.
- Quick setup: plug into the phone, select the external mic in your camera app if available, and test a short clip.
- Latency note: some USB mics introduce a tiny delay; monitor with headphones to confirm timing lines up with your speech.
- Wireless lavalier mics
- What they are: transmit audio from a clip-on mic to a receiver connected to the phone.
- Quick setup: pair the mic and receiver, plug the receiver into the phone, and run a quick test clip.
- Placement tip: keep the transmitter about 6 to 12 inches from your mouth. Avoid jangling jewelry or clothing that can create noise.
- Quick setup checklist
- Choose the right input: confirm the app is using the external mic, not the built-in mic.
- Disable unnecessary processing: turn off voice enhancements or noise gates in the app if possible.
- Check for latency: monitor with headphones and adjust mic distance to minimize timing issues.
- Keep cables tidy: secure cables to prevent noise from rubbing against clothing or other objects.
For deeper guidance on choosing a microphone that fits your device, you can explore reviews and buying guides for external mics. For instance, wireless lavalier options and USB-C/Lightning compatibility are covered in several reputable guides and retailer pages. https://www.bestbuy.com/ and related product pages offer model-specific details and user feedback that can help you compare options.
Choose the right camera app and mic settings
The default camera app on your phone may not give you full control over mic input or audio processing. An app with solid mic settings can make a big difference in avoiding echo. Here are a few popular choices and what to look for.
- Filmic Pro
- Why it matters: Filmic Pro gives explicit control over the microphone input path, allowing you to select an external mic and mute built-in processing that can cause echo.
- How to configure: in Filmic Pro, go to audio input and choose the external mic, then disable any post-processing effects like reverb or noise suppression that aren’t needed for your shoot.
- Quick tip: monitor with wired headphones to confirm the mic path is clean before recording long takes.
- Open Camera (Android)
- Why it matters: Open Camera provides flexible audio options and clean routing for a no-frills recording path.
- How to configure: ensure the app uses the external mic as the audio input, disable any amplifiers or automatic gain controls if the option exists, and avoid added audio effects.
- Quick tip: test different mic inputs during a short rehearsal to confirm stability.
- Stock camera apps (iPhone and Android)
- Pros and cons: stock apps are convenient but often apply default processing that can cause echo. They are fine for quick captures, but you’ll lose granular mic control.
- How to optimize: look for settings labeled “microphone,” “audio input,” or “external mic.” Turn off any voice processing, echo reduction, or room correction features if they’re optional.
- Quick tip: when possible, pair a stock app with an external mic and perform a small test clip to confirm the path is clean.
- Quick setup steps you can apply now
- Select the external mic as the input in the app’s audio settings.
- Disable any added audio effects, such as reverberation, echo, or voice enhancement.
- Turn off auto gain control if available; set a stable input level manually.
- Do a short test recording with headphones to verify no echo loops form between the mic and speaker.
If you want a deeper dive into mic routing and app behavior, you can consult dedicated guides and manuals that explain how to manage mic input on common apps. They offer practical tips for preventing echo in consumer workflows. https://www.bestreviews.guide/iphone-external-microphones
Platform specifics: iPhone and Android tips
Different platforms handle audio paths a bit differently. Here are concise, practical tips tailored to each ecosystem to help you verify mic configurations and reduce echo.
- iPhone tips
- Use an approved external mic with a Lightning connection for the most reliable path.
- In Settings, disable any automatic audio enhancements that could loop your mic output back into the input.
- When testing, enable headphones for real-time monitoring to ensure the mic path is clean.
- Verify mic selection in your recording app so it isn’t defaulting to the phone’s built-in mic or a stereo re-recording path.
- If you’re using a wireless mic, ensure the receiver is connected and the iPhone recognizes it as the primary input.
- Android tips
- Choose apps that provide explicit input selection and disable auto gain when possible.
- Some devices offer a “noise suppression” or “echo cancellation” toggle in the camera or mic settings. Use it only if it’s proven to improve results in your environment.
- When using USB-C mics, confirm the device recognizes the external mic under the audio settings and not the internal mic.
- If you suspect a software glitch, a quick restart and the latest OS update can clear up odd audio routing quirks.
- Verifying configurations
- Do a quick 10 to 15 second test clip with headphones on. Listen for any echo artifacts.
- Try a few different mic placements during the test to identify the best distance and angle.
- If echo persists, swap to a different app or microphone type and run the test again.
- Document your preferred config so you can reuse it for future shoots.
For further reading on platform specific guidance and mic routing practices, refer to practical guides and user manuals that explain how to manage mic input on iPhone and Android devices. https://filmicpro.com/FiLMiCFullUserManual.pdf
Images and hands-on testing help you gauge what actually works in your setup. If you’d like, I can tailor these steps to your exact device model, preferred app, and typical recording scenarios and provide a concise, reusable checklist you can save for future shoots.
Tools and techniques to clean up echo after recording
When echo shows up after you record on a smartphone, the fix usually comes down to a few practical tools and simple workflows. This section lays out mobile options for quick de reverb and noise reduction, desktop tools for stronger fixes, and a practical post-production routine that preserves a natural voice. You’ll learn what works, when to use it, and how to apply it without turning your workflow into a tech headache. Throughout, you’ll see concrete steps you can try today on both iPhone and Android, with smartphone-friendly tips that keep your setup lean and portable.
Mobile apps for de reverb and noise reduction
Mobile apps make it possible to clean up a recording right after you shoot, without moving to a computer. Here are easy-to-use options, what they do well, and where they fall short. Each app typically offers a de reverb or noise gate feature; you’ll be using them in straightforward terms like “reduce echo” or “cut background noise.”
- Cleanvoice AI, Echo & Reverb Remover style apps: Great for fast noise removal and basic de reverb. They work well on dialogue and voiceovers but can sometimes soften or alter natural voice tone if pushed too hard. Use them when you need a quick clean and don’t have time for a full edit.
- Strengths: fast results, easy to use, good for podcasts and voiceover clips.
- Limitations: may require a paid plan for higher quality results; could introduce artifacts on complex recordings.
- Quick steps: import your clip, choose a dereverb or noise reduction preset, listen, then adjust intensity to avoid over-processing.
- Audacity on mobile (or mobile-friendly editors with similar tools): While Audacity itself is desktop, many mobile editors mimic its cleanup approach with Noise Reduction, Noise Gate, and a basic DeReverb module. These are solid for cleanups when you’re traveling.
- Strengths: accessible, clear controls, effective on straightforward recordings.
- Limitations: multi-step apps may require export/import, and results vary by mic quality.
- Quick steps: apply Noise Reduction to silence surrounding hiss, then use a Dereverb or Reverb Reduction tool, and finally run a light Gate to reduce faint background sounds.
- Voice cleaner suites with dereverb modules: Several apps advertise de reverb as a single tap fix. They’re useful when you need a fast turnaround and don’t require surgical precision.
- Strengths: intuitive interfaces, good baseline improvements.
- Limitations: less control over specific frequency ranges; may not handle complex room reflections well.
- Quick steps: run a basic dereverb pass, then do a light noise reduction, and compare before/after.
- Quick, practical steps you’ll hear echoed in guides and reviews:
- Apply a de reverb pass to reduce the room’s reflected tails.
- Use a noise gate to suppress quiet background noises between phrases.
- Listen in headphones; if something sounds metallic or muffled, back off the amount slightly.
- Recheck the tone after processing to keep the voice natural.
For further reading, explore resources that discuss how mobile apps handle echo and room reflections in real-world setups. https://getvoip.com/blog/phone-echoing
Desktop tools for stronger fixes
Desktop software provides deeper control over reverb and noise. If you’re aiming for near-studio clarity, these tools are worth learning. They handle dense reverb, complex room reflections, and stubborn background noise much more precisely than mobile apps.
- Audacity: A free, approachable option with proven methods for dereverb, noise reduction, and gating.
- When to use: quick cleanup on a simple recording, or as a stepping stone before more advanced processing.
- Basic workflow: capture a noise profile, apply Noise Reduction, then run a light DeReverb or Echo Reduction, and finish with a gentle EQ to restore brightness.
- iZotope RX (Standard or Advanced): A professional-grade suite designed to tackle stubborn echo and reverb with dedicated modules.
- When to use: dialogue with heavy room reflections, multi-mic recordings, or videos needing broadcast-quality clarity.
- Basic workflows:
- Dialogue De-reverb: target the reverberant tail without thinning the voice.
- Spectral Repair: remove specific artifacts while preserving voice texture.
- Noise Reduction: refine hiss and ambient noise after dereverb.
- Quick tip: monitor in headphones to ensure timing alignment and avoid artificial “tinny” vocal tone.
- Specialized plugins and standalone dereverb tools: These can be used as part of a DAW workflow or as standalones for quick fixes.
- When to use: complex projects, post-production for videos, or when you need surgical control over specific frequencies.
- Quick steps: isolate the dialogue, apply a dereverb module, then run a light EQ to restore natural vocal presence.
- Quick workflows to keep in mind:
- Start with a clean noise print and reduce it without removing vocal detail.
- Apply a targeted dereverb pass to control echoes, then refine with an EQ to recover brightness or warmth.
- Check mono compatibility; some processing can create phase issues that affect clarity when played back in mono.
If you want a deeper dive into these desktop tools, you can watch tutorials on how to remove echo with iZotope RX and read guides that compare Audacity and RX for dereverb tasks. https://www.youtube.com/watch?v=t1Bztk3WVSg https://vocalremover.easeus.com/ai-article/noise-cancelling-app-android.html
Practical post steps that keep voice clear
A clear voice sits on a simple, repeatable workflow. Use these steps to maintain natural tone while reducing echo, without overprocessing.
- Capture a clean baseline: record a short line in a quiet sub-room with minimal reflections. This gives you a reference to compare against after processing.
- Remove background noise: apply a light noise reduction. Aim for the cleanest gain without muffling vowels or adding a hiss.
- Dereverb with care: use a dereverb module that targets mid to high frequencies first, then adjust if the voice sounds dull or hollow.
- Rebalance with EQ: a gentle high-shelf boost can restore air, while a slight dip around 2–4 kHz can reduce harshness.
- Check dynamics: if the voice feels too static, use a light compressor to smooth levels without flattening the natural timing.
- Check for artifacts: listen on headphones and on loudspeakers. If you hear metallic ringing or pumping, back off the processing a notch.
- Final polish: a touch of mild saturation can bring warmth back into the voice, but use it sparingly.
A straightforward approach keeps the natural tone intact while removing the biggest offenders. If you want, I can tailor this routine to your device and editing setup and provide a compact checklist you can save for future recordings. For platform-specific cues, see the iPhone and Android tips in the previous section.
Tips you can apply right away:
- Use a gentle EQ boost around 8 kHz to restore air after dereverb.
- Keep compression light to avoid making quiet passages louder.
- Always monitor with headphones to hear how processing affects the voice in real time.
Engage with the right combination of tools and steps, and you’ll keep your voice clear and natural even in imperfect rooms. If you’d like, share your typical recording scenario and I’ll map a compact, repeatable workflow you can apply across devices and apps.
Long term fixes: hardware checks, room setup, and backup strategies
This section focuses on durable, long term improvements that prevent echo from creeping into future phone recordings. Think of it as a husbanding of your equipment and space: you’ll identify when to repair or replace hardware, optimize your room for repeated shoots, and adopt reliable backup practices so you never lose a take. These steps work across devices and apps, including your smartphone, and they scale from quick fixes to steadier, studio-like setups.
When to repair internal mic hardware
A faulty internal mic or routing hardware can silently degrade your sound over time. Here’s how to recognize when a repair or replacement makes sense, and how to weigh the cost against the benefit.
- Signs it may be failing
- Consistent reduction in input level or uneven gain across the mic’s range.
- Unexplained crackling, pops, or static during recordings.
- Echo or feedback that reappears after software changes or app updates.
- Hardware-induced distortions only when using the internal mic, not with external mics.
- What to check first
- Test with a known good external mic; if the problem disappears, the issue is likely internal.
- Inspect for loose connections or dust inside the port if you’re comfortable opening the device or have a pro do it.
- Try a different cable or adapter if your setup uses external mics via adapters; sometimes the fault isn’t the mic but the interface.
- Repair vs replacement
- If repair costs are a sizable fraction of a new device, replace the unit who’s mic is failing and still under support.
- For older devices, weigh total expected lifespan versus repair cost; sometimes a newer model with better mics is a wiser long term choice.
- Consider a professional diagnostic to avoid unnecessary repairs. In many cases, a simple port cleanup or mic replacement can restore clean capture.
In cases where you need professional help, reputable repair services can often diagnose quickly and offer a clear cost versus benefit estimate. If you’re evaluating options, a quick reference on repair services can help you compare. See smartphone microphone repair options from trusted repair networks for guidance. https://www.ubreakifix.com/repairs/smartphones/services/microphone-repair
If you’re deciding between repair and upgrade, a practical read on the cost-benefit of repairing versus buying new can help you decide. https://www.ifixomaha.com/blog/repair-vs-buy-new-phone
For broader context on price ranges and what affects repair costs, this overview can serve as a baseline. https://cellmedics.ca/expected-smartphone-repair-costs/
Room and setup best practices for future shoots
A quiet, well treated space is the best ally for clear sound. Here is a practical plan to create a small home studio that minimizes echo, plus portable ideas for shoots on the go. The goal is a space that keeps your smartphone recordings sounding natural and balanced, no matter where you are.
- Core room principles
- Soft surfaces everywhere: rugs, curtains, soft chairs, and cushions absorb sound and cut reflections.
- Strategic placement: position the mic or phone away from walls and corners where reflections bounce back quickly.
- Control the sources: limit hard surfaces directly in front of the mic; use a bookshelf or fabric screen to diffuse sound.
- A compact home studio setup
- Desk level: place your phone or small camera on a stable perch at about arm’s length from your mouth.
- Absorbers on a budget: hang a thick curtain behind the recording spot or place a portable panel to dampen reflections.
- Simple lighting, clean audio path: keep cables tidy and away from the mic to reduce noise from movement.
- Portable, go-anywhere ideas
- A foldable sound blanket or light travel panel can turn any room into a quick recording booth.
- A compact travel rug or foam tiles can be set up in minutes for consistent acoustics.
- A small, battery-powered field recorder with a separate mic offers a strong back up to smartphone capture when you’re away from a controlled space.
If you want examples of portable setups used by creators in real world shoots, these guides offer practical ideas and product roundups. https://www.thepodcastspace.com/resources-for-podcasters/diy-portable-podcast-booth
- Room tweaks that pay off
- Angle the mic away from reflective surfaces and toward your mouth for a direct capture.
- Use a diffuser or soft panel to break up harsh reflections without dulling the entire sound.
- Place a thick towel or blanket on hard surfaces when you can’t change the room layout; little padding makes a surprising difference.
- Quick checklists you can reuse
- Before recording: close doors, minimize outside noise, and check the mic path in your app.
- During recording: monitor with headphones to ensure you hear your voice clearly without reflected echoes.
- After recording: scan for spots where echo crept in and adjust the room layout for the next take.
Backup tracks to avoid lost audio
Echo or data loss is frustrating, but you can build safety nets that keep your content safe from start to finish. Here are strategies to ensure you always have a clean take, even if one recording path fails.
- Dual recording with an external device
- Use a field recorder as a second track while you shoot with your phone. This gives you a backup on a separate device with its own mic path.
- Sync later using a clap or a loud spike at the start of both takes. Most editors align audio by waveforms with ease.
- Backup captures on a second device
- Run a separate device with a duplicate recording of your narration or on-camera audio. If one file is compromised, you’ll still have a usable version.
- Keep the second device in the same environment and distance to minimize timing differences.
- Separate audio tracks for each source
- Record voice and room ambiance on separate tracks to give you flexibility in post. It helps you preserve clarity if one track has noise or echo.
- In post, balance levels to keep a natural blend without over processing.
- Practical tips to implement today
- Always enable a backup recording option in your camera app if available, or use a dedicated app for secondary audio.
- Label and organize takes by scene and date so you don’t confuse primary and backup files later.
- Check file formats and save locations before you start; a small setup saves time in post.
For readers who want a broader view, a quick overview of the cost and benefit of backup strategies in repair scenarios can be informative. https://www.therepairdepot.com/blog/post/how-much-does-it-cost-to-repair-a-phone
- A quick test protocol
- Do a 10 second main take and a second backup track simultaneously. Verify both files are clean and synchronized.
- In your editing software, audition the backup track against the primary track to confirm timing matches and no data gaps exist.
- If one track has issues, you still have a reliable source for the final cut.
By adopting these long term fixes, you’ll reduce echo across future smartphone shoots and create a robust process that protects your audio quality. If you’d like, I can tailor these recommendations to your exact device, room layout, and typical shooting scenarios, and provide a compact, repeatable checklist you can save for future videos.
Conclusion
Reliable fixes start with simple, repeatable steps: use headphones to cut speaker feedback, dampen room reflections with soft furnishings, and choose apps or mic settings that avoid extra processing. Testing across different environments is essential because room acoustics and device setups vary widely, and what works in one space may not in another. For best results, pair these checks with a quick 10 to 15 second test on your smartphone, adjust mic distance, and confirm the path stays clean with real-time monitoring.
Quick, reusable checklist before every recording
- Put on headphones and re-record to check for echo
- Lower speaker volume or mute playback during recording
- Verify external mic is selected in the app and disable extra effects
- Record a short clip in two spots in the space and compare results
- If echo persists, swap mics or try a different app and run another quick test
Share your results and questions in the comments to help others troubleshoot and compare setups with your smartphone and environment.