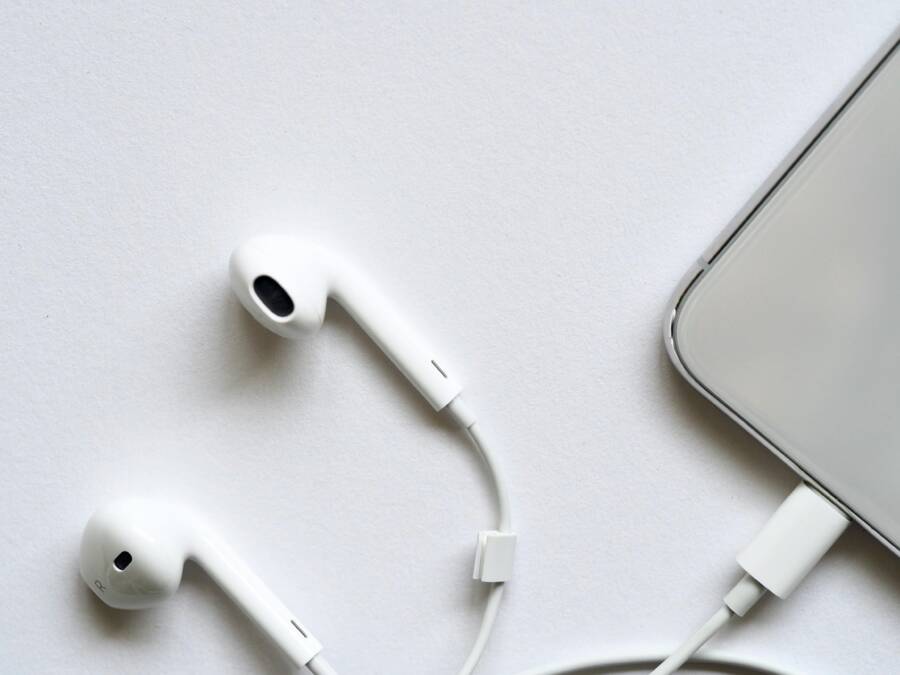
Ever notice audio coming from the wrong side on your phone during calls, videos, or music? This common issue usually isn’t a hardware disaster; it often comes down to simple audio routing and settings that got out of sync. Getting this fixed matters because the left and right channels carry different cues in calls and media, and the experience can feel off if you’re listening in mono or one speaker is quiet.
In this guide you’ll find quick triage steps and practical fixes that work for most phones. We’ll cover how to check and reset audio routes, how to disconnect stray Bluetooth connections, and how small tweaks in settings can restore normal stereo output. You’ll learn what to try first, what to test in multiple apps, and when a problem is likely hardware related.
We’ll walk through approachable checks you can do in minutes, with clear steps for both iPhone and Android devices. You’ll discover how to clean squeaky speaker grilles, how to test left and right channels with simple audio tests, and how to rule out app specific routing versus system wide issues. The goal is to get your sound back to normal without a long repair bill.
By the end, you’ll know how to prevent this from happening again. Simple habits like keeping your phone updated, managing Bluetooth devices, and avoiding blocked speaker openings can reduce future headaches. If the issue still lingers, you’ll have a clear path to targeted hardware checks or service options. This quick, practical guide is here to help you keep your smartphone audio in the right channel and in great shape for all your media and conversations.
Quick checks to fix audio from the wrong side on your phone
When sound seems to come from the wrong side, the fix is usually quick and practical. Start with simple routing checks, then confirm the issue across apps. This section covers blunt triage steps you can perform in minutes, with clear actions for both iPhone and Android devices. You’ll learn how to rule out Bluetooth or wired headphone paths, how to test the built-in speaker, and how small setting tweaks can reestablish proper stereo balance. Smartphone audio should feel natural again, not lopsided or mono.
Confirm Bluetooth and wired connections are not routing audio
Before blaming the device, make sure nothing else is routing audio in the background. Here’s a concise checklist you can follow:
- iPhone
- Open the Control Center and look at the audio output card (the AirPlay icon). If it shows a Bluetooth device or a connected headset, tap it and select iPhone to route audio back to the phone.
- If you’re using wired headphones with a Lightning to 3.5 mm adapter, unplug the adapter and unplug any headphones. Then press the side button to lock the screen, wake it, and test the speaker by playing a quick clip.
- Test on-device speaker for calls and media. For calls, place the phone on speaker and listen for both channels; for media, play a standard stereo track and confirm balance.
- Android
- Pull down the Quick Settings shade and tap the audio output tile if visible. Choose the phone speaker to route back to the device itself.
- Disconnect any Bluetooth devices from Settings > Connected devices > Bluetooth, and select Disconnect or Forget. Then unplug wired headsets or adapters and test again.
- Play a short audio clip on the speaker to verify both left and right channels are present. If the app has its own output option, ensure it isn’t forcing mono or left-only sound.
After you complete these steps, run a quick stereo test across three scenarios: a video, a voice call, and a song. If the sound is still coming from one side, the issue may be app specific or a deeper routing setting. For deep-dive guidance on iPhone and Android, see how users describe left-right balance issues in real-world scenarios, and check that mono audio is off and the balance is centered.
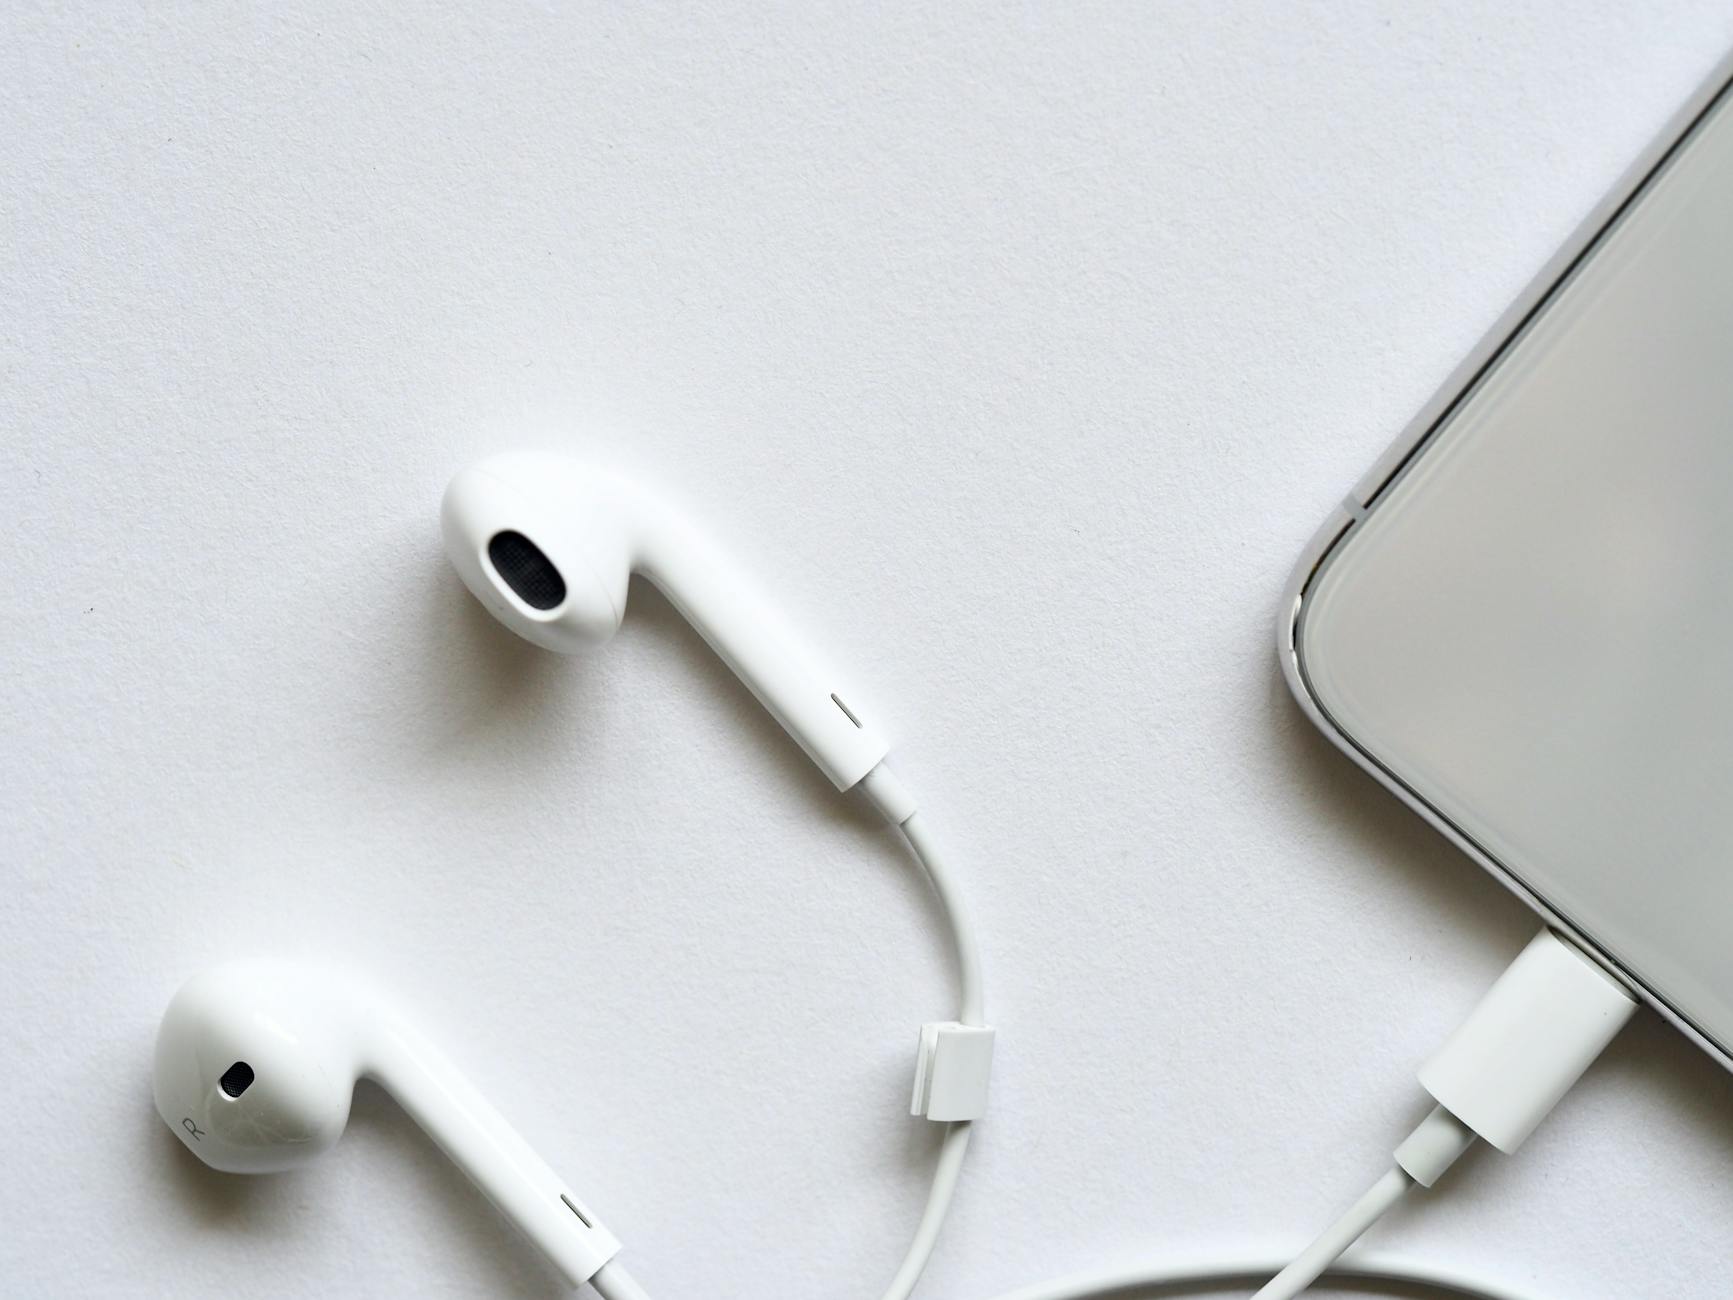 Photo by Jess Bailey Designs
Toggle audio output during calls and media
Smartphone audio routing often changes with the app in use. You’ll see a quick on-screen audio output icon that lets you switch between speaker, earpiece, and connected headphones. Practice these steps and test across different activities to confirm proper stereo playback:
- Locate the on-screen audio output control
- On iPhone, the control appears during a call or in the Control Center when playing media. Tap the icon to switch from the earpiece to Speaker or to Headphones as needed.
- On Android, the icon may appear during calls or while playing media in the notification shade. Tap it to toggle between Speaker, Earpiece, or a connected device.
- Examples to test
- Video: Start a short video and switch output to Speaker, then to Headphones. Listen for both channels and compare cues.
- Calls: While on a call, switch to Speaker to verify the left and right channels are balanced. Then switch back to Earpiece and listen again.
- Music: Play a stereo track, switch outputs, and confirm that both channels remain in stereo. If you hear a predominance from one side, re-center the balance in settings and retest.
- Quick testing tip
- After each switch, pause briefly and listen for a moment to confirm the audio routes correctly. If you still hear one side louder, move on to a more complete reset of routing.
If you find app-specific routing is to blame, check app permissions and audio settings inside the app itself. Some apps have built-in mono audio options or their own output routing, which can conflict with system-wide settings. In many cases, simply reloading the app or updating it fixes the mismatch. For a deeper dive into user experiences with audio routing on iOS, this Apple community thread offers practical troubleshooting insights.
- External reference: Apple discussions on right-side sound quirks and routing behavior. https://discussions.apple.com/thread/251136076
- Practical guide to phone sound issues common across devices. https://www.cellphonerepair.com/resources/blogs/113/how-to-fix-phone-sound-issues
Do a quick restart and re-test
A quick restart often clears temporary routing glitches that apps or the OS may create. It’s a simple, low-risk step that solves many odd audio problems.
- iPhone
- Press and hold either volume button and the side button until the slider appears, then slide to power off. Wait a few seconds, then press and hold the side button again until the Apple logo appears.
- After the device powers up, test the speaker with a quick audio clip, then test with a call and a video to ensure the right and left channels are balanced.
- Android
- Hold the power button and select Restart. If prompted, confirm. If your device doesn’t show Restart, choose Power off, wait 15 seconds, and power it back on.
- Once rebooted, run a quick speaker check. Then test audio in a call and in a short video to confirm stereo balance.
Restarting resets routing preferences without touching most user data. If the issue was caused by a transient software glitch, this step will clear it and restore normal behavior. If problems persist, look at additional system settings or app-specific configurations that may influence routing.
Check volume, Do Not Disturb, and mono/stereo settings
Sound routing often hides in plain sight inside volume and accessibility settings. A few quick checks can restore proper stereo output and ensure you aren’t listening in mono.
- Volume
- Increase media volume while playing music or a video to a comfortable level. Then test a call to confirm the earpiece and speaker volumes are balanced.
- If you notice a mismatch, adjust the in-call volume and media volume separately if your device allows it.
- Do Not Disturb
- Ensure Do Not Disturb or Focus mode isn’t silencing or muting one channel. Turn off DND temporarily to confirm normal audio routing across calls and media.
- Mono audio and balance
- On iPhone, go to Settings > Accessibility > Audio/Visual, and verify Mono Audio is off. Confirm the Balance slider is centered for even stereo output.
- On Android, Settings > Accessibility > Audio & on-screen text may house Mono Audio or Balance options. Set Mono Audio to off and center the balance if there is a dedicated control.
Why stereo balance matters
- Balanced stereo ensures cues across the left and right channels are accurately represented. When balance drifts to one side, you may miss subtle cues in movies, videos, or music. Keeping the balance centered helps ensure you hear the full spectrum of audio as intended by the creator.
If you still hear audio skew after checking these settings, it could indicate a hardware issue with the speaker or a fault in the audio codec. In that case, consider scheduling a service check or exploring repair options with the device manufacturer or a trusted technician. For more guidance on common sound issues, you can consult the iPhone and Android sound issue resources from reputable repair guides.
- External reference: How to fix phone sound issues on iPhone or Android. https://www.cellphonerepair.com/how-to-fix-phone-sound-issues
Additional note on reliability and next steps
- If the problem recurs, keep a short log of when it happens, which apps were active, and whether Bluetooth was nearby. This helps pinpoint whether a specific app or scenario triggers the routing mismatch. In some cases, updating the OS or the app, or re-pairing a Bluetooth device, resolves the issue permanently.
Key takeaways
- Start with simple routing checks, then test across apps.
- Use the on-screen audio output control to switch between speakers and headphones.
- A quick restart often clears temporary routing glitches.
- Verify volume, DND settings, and mono/stereo balance to ensure proper stereo playback.
If you’d like more depth on specific devices or apps, tell me your model and the apps you use most. I can tailor the guidance to get your audio back in perfect stereo.
Software and settings fixes that resolve most routing issues
When audio seems to come from the wrong side, the fix often lies in software and settings, not hardware. Most routing problems boil down to how the system directs sound to speakers, earpieces, or Bluetooth devices. This section covers practical software fixes you can apply quickly, plus a few checks to ensure your changes stick across apps. Think of it as a toolkit for restoring correct stereo playback with minimal hassle.
 Photo by Karola G
Update your OS and apps to fix routing bugs
Updates often fix sound routing bugs by patching the underlying audio stack and improving device support. Keeping both the OS and apps current helps prevent mismatches in how audio routes.
- iPhone
- Open Settings > General > Software Update. If an update is available, tap Download and Install. After the OS update, open the App Store, go to your profile, and update all apps.
- Regularly check for app updates in the App Store, especially for media players and communication apps.
- Android
- Open Settings > System > Advanced > System update. Download and install any available updates. Then open the Google Play Store, go to your profile, and update all apps.
- Some manufacturers push daily or weekly updates; enable automatic updates if possible.
Why this helps: software fixes address misrouting caused by bugs in audio routing paths, Bluetooth handling, or app-specific output switches. After updating, perform a quick stereo test across a video, a song, and a call to confirm improvements.
For deeper reading on iPhone and Android update practices, see trusted guides on iPhone audio settings and Android OS updates.
- https://www.idownloadblog.com/2025/11/12/fix-audio-imbalance-iphone/
- https://www.cellphonerepair.com/how-to-fix-phone-sound-issues
Reset audio settings or reset all settings without losing data
You may want to reset only audio settings or perform a full settings reset. Both options help clear stubborn routing glitches, but they impact different data.
- Difference at a glance
- Reset audio settings only: keeps most data, resets only sound routing and accessibility tweaks.
- Reset all settings: restores system defaults across all apps and preferences without deleting media or personal files (on iPhone and most Android devices), but you will need to reconfigure Wi-Fi and certain preferences.
- Backup first
- iPhone: back up to iCloud or a computer.
- Android: back up to your Google account or local storage.
Step-by-step
- iPhone
- Reset audio settings: Settings > Accessibility > Audio/Visual, toggle Mono Audio off, reset Balance to center. If needed, re-pair Bluetooth devices.
- Full settings reset: Settings > General > Transfer or Reset iPhone > Reset > Reset All Settings. Enter passcode if prompted.
- Android
- Reset audio components: Settings > Accessibility > Audio settings, turn off Mono Audio, re-center balance, and toggle off any mono output options.
- Full settings reset: Settings > System > Reset options > Reset all settings (paths vary by manufacturer). Confirm and reconfigure essential connections after reboot.
Tips
- Always back up before a full reset.
- After resetting, test the speaker and earpiece with a stereo track, a video, and a call to confirm the change.
If you want extra confidence, the iPhone user guide and several support articles provide safe reset procedures.
- Reset iPhone settings: https://support.apple.com/guide/iphone/reset-iphone-settings-iphea1c2fe48/ios
- How to reset device settings and keep data: https://www.youtube.com/watch?v=RkPLn-IymHE
Review mono audio and left-right balance
Mono audio can silently wreck stereo reproduction. Ensuring Mono Audio is off and the balance is centered helps reestablish true stereo across apps and content.
- iPhone
- Settings > Accessibility > Audio/Visual. Make sure Mono Audio is Off. Slide Balance to the middle (0.0) for even left and right output.
- Android
- Settings > Accessibility > Audio & on-screen text. Turn Mono Audio Off and center the Balance control, if available.
Quick checks
- Play a stereo song and watch for equal loudness on both sides.
- Test a video with clear left-right cues, then run a short call to confirm the earpiece and speaker deliver balanced audio.
If you still notice skew after these tweaks, you may be dealing with a device-specific bug or a hardware issue. In that case, consult device-specific support resources or try a different user profile to rule out app-level causes.
From reputable sources on iPhone and Android audio balance, you can find guidance on ensuring proper stereo output across devices.
- Adjust the mono audio and balance settings on iPhone: https://support.apple.com/guide/iphone/iphb80ab7516/ios
- How to adjust audio balance on iPhone and iPad: https://isunshare.com/iphone-ipad/adjust-volume-balance-between-channels-on-iphone-ipad.html
Do a quick restart and re-test
A fast restart clears temporary routing glitches that apps or the OS may create. It’s a simple, low-risk step that fixes many odd audio problems.
- iPhone
- Hold either volume button and the side button until the power-off slider appears. Slide to power off, wait a moment, then press and hold the side button until the Apple logo reappears.
- After reboot, test the speaker, then test a call and a video to confirm stereo balance.
- Android
- Hold the power button and select Restart. If unavailable, power off and then power on after a short wait.
- Once it restarts, test the speaker, a call, and a video to verify stereo output.
Restarting resets routing preferences without deleting personal data. If issues persist, continue with the remaining checks and consider app-specific routing or a hardware check.
External references for further reading include practical guides on phone sound issues and routing behavior across devices.
- How to fix phone sound issues on iPhone or Android: https://www.cellphonerepair.com/how-to-fix-phone-sound-issues
If you still hear skew after trying these steps, log the occurrences. Note the apps in use, nearby Bluetooth devices, and exact actions. This helps identify a repeating pattern that updates or re-pairing a device can fix.
Key takeaways
- Start with OS and app updates to fix routing bugs.
- Use both reset options and back up before a full reset.
- Verify Mono Audio is off and the balance is centered.
- A quick restart often clears transient routing glitches.
If you want more device-specific guidance, share your model and the apps you use most. I can tailor steps to get your audio back in proper stereo quickly.
Hardware checks and cleaning to fix possible physical causes
If your audio is playing from the wrong side, a quick hardware check can uncover physical culprits. This section focuses on tangible, hands-on steps you can take to rule out blocked vents, case interference, and debris in the speaker. A fresh look at the hardware can save you time and money before you dive into deeper software fixes. Think of it as a quick shield against stubborn routing issues that refuse to disappear with settings alone. Along the way, you’ll gain practical tips you can apply to both iPhone and Android smartphones, with simple tests you can perform at home.
Inspect case, accessories, and openings
A case, screen protector, or dongle can physically muffle or block sound if it sits over the speaker grills or vent openings. Even small gaps or tightly sealed edges can throw off perception of left and right channels. Here’s how to inspect and test safely:
- Remove the case and any accessories briefly to see if the audio returns to normal.
- Check for screen protectors or speaker covers that run edge to edge over the grills. If a protector overlays the grill, carefully peel back a corner to test.
- Inspect dongles and adapters that connect to the headset or charging port. Some adapters or cases with built-in covers can press against the openings.
- Reassemble and test in three scenarios: a video, a call, and a stereo track. If the sound moves back to a balanced stereo, the obstruction was the culprit.
- Return to your normal setup and note if the issue recurs with certain accessories so you can avoid that configuration in the future.
While you’re at it, give the speaker grills a quick physical check. A loose grille or misaligned case can create odd rattles or muffling that makes one channel seem quieter. If you suspect the fit, try a different case or remove any protective film from around the speaker area.
Tip: If you’re unsure whether an accessory is the source, run a controlled test with only the phone and its built-in speaker, then reintroduce each accessory one by one to identify the culprit.
For additional context on cases and how they can affect sound, you can review practical guidance from repair professionals who highlight common interference caused by cases and covers.
- How to fix muffled phone sound when a case is to blame. https://denverphonedoctor.com/fix-muffled-phone-speaker/
- Body Glove cases and speaker interference discussions in community threads. https://community.verizon.com/t5/DROID-Archive/Audio-comes-out-of-the-wrong-speaker/m-p/225854
Clean speaker grills safely and test output
Dirt, dust, and lint can accumulate in speaker holes and mute one channel more than the other. The goal is to clean without poking or forcing anything into the grille. Use a gentle touch and common household tools.
- Use a soft brush, like a clean makeup brush or a tiny paintbrush, to sweep away debris from the grill surface.
- If you see visible dust, you can use a small amount of compressed air with short bursts from a distance. Hold the device steady and avoid tilting while you use the air.
- Avoid liquids, including water, cleaning sprays, or alcohol near the speakers. Liquids can seep inside and cause corrosion or short circuits.
- Never insert sharp objects into the grill. A toothpick or pin can scratch the surface or push debris deeper.
- After cleaning, test the audio in three contexts: a video, a voice call, and a stereo track. Listen for balanced left and right channels and any lingering muffling.
If you hear continued imbalance after cleaning, re-check that the speakers aren’t partially blocked by a case or protector, and verify that dust isn’t trapped behind a screen protector. In many cases, a quick wipe and a careful brush restore clarity.
Guidance from trusted outlets emphasizes gentle brushing as a safe approach for smartphone speaker grills. If you want further reading, see resources that describe safe cleaning practices for phone speakers and grills.
- How to clean dust and water from a phone speaker: 5 easy ways. https://www.wikihow.com/Clean-a-Phone-Speaker#:~:text=Cleaning%20Phone%20Speakers%20Safely
- Tips on cleaning phone speakers safely at home. https://www.onethreadapp.com/blog/how-to-clean-phone-speakers/#:~:text=Avoid%20sharp%20tools%2C%20liquid%20cleaners
- Consumer Reports guide on cleaning a smartphone’s speakers and ports. https://www.consumerreports.org/electronics-computers/cell-phones/how-to-clean-smartphone-charging-port-and-speakers-a2505681935/
Test with headphones to compare channel balance
Headphones provide a reliable baseline to assess whether the issue is the speaker hardware or an audio routing problem. If left and right channels sound balanced through headphones but the speaker is off, the problem is likely the speaker hardware or its venting.
- Connect a pair of known good headphones and play a stereo track.
- Listen for even volume in both ears. If one side dominates, note the difference.
- Compare with the built-in speaker playing the same track. If the imbalance persists only with the speaker, the issue points to the speaker hardware or related circuitry.
- If headphones reproduce balanced sound but the speaker remains off, consider a hardware inspection or service.
This test helps narrow down the cause quickly. If you don’t have spare headphones handy, you can use a wired headset with a simple plug to perform a similar check. If the left-right balance shifts with different output methods, you can focus your troubleshooting on hardware components.
Helpful reference on testing audio output with headphones and speakers can be found in practical diagnostics tools:
- Speaker & Headphone Test – Audio Output Diagnostics. https://www.helptester.com/speaker-test-online/
- Headphone test in browser. https://soundandgo.com/en/headphone-test/
Do a quick restart and re-test
A restart can clear temporary routing glitches that apps or the OS create. This is a simple, low-risk step that resolves many odd audio problems.
- iPhone
- Hold a volume button and the side button until the power-off slider appears. Slide to power off, wait a moment, then press the side button again to restart.
- After reboot, test the speaker with a quick clip, then run tests on calls and videos to confirm stereo balance.
- Android
- Hold the power button and choose Restart. If you don’t see Restart, power off and then turn the device back on.
- After reboot, test the speaker and do quick tests on a call and a video to verify balance.
A fresh start resets routing preferences without touching your data. If the issue persists, move to the next steps or consider app-specific routing possibilities that might affect playback.
If you want extra context on troubleshooting steps, see guides that discuss common phone sound issues and routing behavior across devices.
- How to fix phone sound issues on iPhone or Android. https://www.cellphonerepair.com/how-to-fix-phone-sound-issues
Check volume, Do Not Disturb, and mono/stereo settings
A surprising number of issues hide in plain sight in volume and accessibility options. A quick pass through these settings can restore true stereo.
- Volume
- Increase media volume while playing music or video, then test a call to confirm balanced earpiece and speaker output.
- If you notice a mismatch, adjust in-call and media volumes separately if your device allows it.
- Do Not Disturb
- Temporarily disable DND or Focus mode to verify audio routing across calls and media.
- Mono audio and balance
- iPhone: Settings > Accessibility > Audio/Visual. Ensure Mono Audio is Off and the Balance slider is centered.
- Android: Settings > Accessibility > Audio & on-screen text. Turn Mono Audio Off and center Balance if available.
Why stereo balance matters
- Balanced stereo preserves cues from both channels. If balance drifts, you may miss subtle audio details in movies, videos, or music. Keeping balance centered helps you hear the full mix as designed.
If you still hear skew after these checks, the issue could be hardware in the speaker or a fault in the audio codec. In that case, a service check or repair may be needed. For further guidance, apps and device-specific support resources can help you confirm the next steps.
- External reference: How to fix phone sound issues on iPhone or Android. https://www.cellphonerepair.com/how-to-fix-phone-sound-issues
Additional note on reliability and next steps
- If the problem returns, keep a brief log of when it happens, which apps are active, and any nearby Bluetooth devices. This helps identify whether a specific app or scenario triggers the routing issue. Sometimes an OS update or re-pairing a Bluetooth device resolves it for good.
Key takeaways
- Start with hardware checks to rule out cases and obstructions.
- Clean the grills carefully and test across contexts.
- Use headphones to confirm whether the problem is speaker hardware.
- A quick restart often clears glitches; follow with targeted tests.
If you want more device-specific guidance, share your model and the apps you use most. I can tailor steps to get your audio back in proper stereo quickly.
When to seek professional help and what to expect
Audio issues that seem stubborn or tied to hardware can be frustrating. If you’ve tried routine checks and the problem persists across apps, it’s time to consider professional help. This section explains concrete signs that point to hardware damage and practical guidance on choosing a reputable repair option. You’ll learn what to expect from a service visit and how to save time and money by preparing in advance.
Hardware damage indicators that require service
When the left and right channels behave oddly, it can signal hardware wear or damage rather than a simple software glitch. Look for the following signs, and treat them as triggers to seek expert inspection:
- Distortion or crackling sounds that appear even at low volume. This often means the speaker cone or internal connections are stressed.
- Buzzing or intermittent pops during playback or calls. These noises can indicate a loose connector or a failing audio codec inside the device.
- Moisture exposure or corrosion around speaker openings. Water or sweat can damage the metal contacts and short the audio path.
- Physical drops or trauma to the phone. A drop can misalign the speaker, loosen seals, or crack components behind the grille.
- One channel consistently quieter or completely silent across many apps. That pattern usually points to a hardware fault rather than app settings.
Why these indicators matter: hardware components age and degrade, and software fixes have limited impact once the speaker, copper traces, or codec are compromised. If you notice any of these signs, it’s prudent to book a diagnostic with a professional. A quick check by a technician can prevent further damage and confirm whether a replacement part is needed. For context on how muffling and distortion develop and how professionals approach fixes, see reputable guides on phone speaker issues.
- For a practical overview of muffled or distorted phone sound and how cleaning or replacement can help, see this practical guide: https://blog.ecoatm.com/why-your-phone-speaker-sounds-muffled-or-distorted/
- A consumer-focused guide on common speaker problems and fixes: https://www.asurion.com/connect/tech-tips/fix-samsung-galaxy-speaker-problems/
If you’re unsure whether your issue is purely software or hardware related, a professional diagnostic can be a fast way to confirm the cause. Some shops offer a no-fee diagnostic when you proceed with the repair, while others include it in the service cost. Always ask up front what the test entails and whether there’s a charge if no repair is needed.
Choosing a reputable repair option
Once you decide to seek help, the next step is selecting a trusted repair path. A clear plan helps you avoid scams, save money, and get real value from the service. Consider these practical steps:
- Check warranty coverage. If your device is still under manufacturer or carrier warranty, start there. Repairs through authorized centers often carry coverage for parts and labor that third-party shops cannot match.
- Seek authorized service centers. Authorized locations have access to original parts and certified technicians. They tend to offer better long-term reliability and preserve resale value.
- Read reviews and ask for provenance. Look for recent customer feedback about intake speed, quality of repairs, and parts authenticity. High ratings and transparent responses are good signs.
- Get a preliminary cost estimate. Request a written quote before any work starts. A good shop will outline parts, labor, and any diagnostic fees. If the price seems too high or vague, shop around.
- Inquire about parts and warranty on the repair. Ask whether they supply genuine parts and what warranty covers the repair. A solid warranty often reflects confidence in the work.
- Compare turnaround times. Some issues require days to source parts; others can be fixed in a few hours. If you rely on your phone daily, speed matters.
- Verify service transparency. Favor shops that show the repair path, provide photos or notes from the diagnostic, and explain the recommended plan in plain language.
- Ask about data handling. If you’re concerned about information on the device, confirm that data will be preserved or discuss backup options before the repair.
If you want a trusted starting point, reputable repair guides highlight factors like official authorization, clear pricing, and reliable parts as the foundation of a good repair experience. These considerations help you pick a option that balances cost and peace of mind. For guidance on evaluating repair services, see practical resources from established repair service providers.
- How to Choose a Reliable Cell Phone Repair Service: https://prophonerepairs.com/choosing-a-reliable-cell-phone-repair-service-what-to-look-for/
- Choosing a Trusted Cell Phone Repair Shop: Key Factors: https://bsofttech.com/choosing-a-trusted-cell-phone-repair-shop-key-factors/
Before you commit, prepare a short brief for the shop:
- Describe the symptoms with dates and apps where you noticed them.
- Note any recent drops, moisture exposure, or accessories in use.
- Bring your device, any receipts or warranty information, and a list of the tests you’ve already run.
A reliable technician will typically perform:
- A physical inspection of speaker grills and openings.
- Functional tests of left and right channels using standard audio samples.
- A diagnostic check of the phone’s audio IC and connectors.
- A quote and a brief plan for whether a repair or replacement part is needed.
If you’d like, I can tailor recommendations to your model and your most-used apps. Share your device’s make and model, and tell me which steps you’ve already tried. I can help you pin down a repair strategy that minimizes downtime and cost.
External reading on selecting repair services and verifying credibility can guide your decision:
- How to Choose a Reliable Cell Phone Repair Service: https://prophonerepairs.com/choosing-a-reliable-cell-phone-repair-service-what-to-look-for/
- Choosing a Trusted Cell Phone Repair Shop: Key Factors: https://bsofttech.com/choosing-a-trusted-cell-phone-repair-shop-key-factors/
What to expect during and after the repair
- Diagnostic phase: Expect a written assessment of root cause, estimated parts, and labor. If moisture or water damage is involved, the technician should outline the risk and potential need for full component replacement.
- Repair phase: Parts replacement or realignment of the speaker system may occur. In some cases, a software recalibration accompanies hardware work to restore balance.
- Turnaround: Typical timelines range from a few hours to a few days depending on parts availability and shop workload.
- Post-repair testing: Re-test across calls, videos, and stereo music to ensure both channels are balanced. Ask for a test log or photos showing what was inspected and replaced.
By approaching a repair with clear expectations, you’ll reduce uncertainty and speed up the restoration of true stereo sound on your smartphone. If you want help locating an authorized or well-reviewed option near you, share your city and model details and I’ll pull targeted suggestions.
Prevention tips to avoid future audio routing problems
Even after you fix the current misrouting, the best approach is to build habits that prevent it from happening again. This section covers practical, actionable steps you can take to keep audio flowing through the right channels on your phone. Think of it as a low-effort maintenance routine for your smartphone’s sound system.
Regular maintenance and smart device habits
Small, consistent habits reduce the chances of future routing issues. Regular cleaning, timely software updates, and quick tests after changes go a long way toward reliable stereo output.
- Clean and inspect regularly: dust and debris can muffles sound or throw off channel balance. Use a soft brush to sweep the speaker grills and test after any cleaning. Avoid liquids near the openings.
- Keep software current: OS and app updates fix bugs that affect audio routing. After a major update, perform a quick stereo test with a video, a song, and a call to confirm balance remains intact.
- Test after updates or new installs: when you install new apps or update existing ones, run a short audio test across at least three scenarios. If you notice a repeat issue, revisit settings or consider delaying nonessential updates until you confirm stability.
- Monitor app behavior: some apps have their own audio routing options. If you notice mono or unbalanced sound after launching a specific app, check its internal audio settings and permissions, then re-test with other apps.
- Keep vents clear and cases light: ensure a case or screen protector isn’t muffling the speaker. If you notice changes after swapping cases, test with the device bare to confirm the source.
If you want deeper context on handling smartphone sound issues, consider guides that address common audio problems and practical fixes. For example, resources focusing on how to fix phone sound issues can be helpful as you develop a routine that minimizes future routing trouble. See trusted sources like this overview on phone sound issues for further insights.
- https://cellphonerepair.com/how-to-fix-phone-sound-issues
Smartphone users who follow these routines often report fewer surprises when streaming video or taking calls. A quick check right after plugging in new accessories or updating apps can catch misrouting before it becomes a hassle. If you’re ever unsure about a change you made, re-run a three-scenario test: video, call, and music.
Manage Bluetooth devices wisely
Bluetooth keeps your audio path flexible, but it can also cause routing mixups if devices stay paired or auto-connect to the wrong accessory. A few smart practices help keep Bluetooth behavior predictable and stable.
- Unpair unused devices: periodically clear out devices you no longer use. This reduces the chance of the phone auto-connecting to the wrong accessory in a crowded space.
- Keep devices updated: firmware updates on your headset, car system, or speaker improve stability and reduce unexpected routing shifts.
- Use stable connection rules: where possible, set a preferred device order in your settings or use multipoint connections correctly. If you notice audio hopping between devices, review the multipoint behavior on your phone and the connected peripherals.
- Avoid cluttered environments for testing: when chasing a routing issue, test in a simple setup with just the phone and one Bluetooth device first. Then add others one by one to isolate triggers.
- Re-pair when needed: if audio suddenly starts routing to the wrong device, forget and re-pair the accessory. A fresh pairing often resets the path and fixes lingering quirks.
For broader guidance on Bluetooth routing and how to stabilize connections across devices, see reputable guides that discuss multipoint Bluetooth audio and how to prioritize connections on Android and iOS. These resources help you understand common pitfalls and practical fixes.
- Stop Switching Devices Manually: Your Guide to Multipoint Bluetooth Audio https://www.cnet.com/tech/mobile/stop-switching-devices-manually-your-guide-to-multipoint-bluetooth-audio/
If you frequently switch between devices in the car, at work, or with a home speaker, consider a quick hardware check to rule out interference. A clean test path helps you confirm whether the issue is with the phone or a peripheral. A reliable approach is to test audio with headphones, a car system, and the phone speaker in sequence. If the problem moves with the device, focus on the hardware or OS routing rather than the accessory.
A developer-friendly tip: many phones expose quick toggles for the audio output in the notification shade or Control Center. Using these controls deliberately during activities like calls, videos, and music helps you confirm the audio path remains correct. If you notice repeated misrouting, a deeper review of Bluetooth settings and device priorities may be warranted.
If you want practical steps on Android Bluetooth behavior and prioritization, Google’s official Bluetooth troubleshooting guide is a solid starting point.
- Fix Bluetooth problems on Android https://support.google.com/android/answer/9769184
In busy environments, multipoint can be tricky. Keeping a clean connection map and routinely updating devices helps your phone pick the right route every time. If you ever suspect persistent issues, a quick reset of Bluetooth preferences or a full device reset can clear stubborn misrouting, but back up first.
- A practical primer on prioritizing connections and auto connections on Android https://www.maketecheasier.com/set-network-bluetooth-priority-android/
Key takeaway: maintain clean, updated device ecosystems and explicitly manage connections. A little discipline here saves a lot of mystery when you watch a video or join a call. If you want a quick sanity check, test with a wired headset to see if the issue persists across output methods. That often points to the hardware side rather than software routing.
If you’d like, I can tailor these preventive steps to your model and the accessories you use most. Sharing your phone model and the common devices you pair with will help tighten these tips to your setup.
Conclusion
Most audio misrouting on a smartphone is fixable with quick, practical steps that target software first, then hardware if needed. Start with routing checks, app and OS updates, and a quick reset, then move to cleaning the grills and testing with headphones to confirm the source of the imbalance. If you still hear one side louder, it’s worth a hardware check or professional diagnosis before replacing parts. Share your results or ask for device specific guidance, and tell me your model so I can tailor the steps for your setup. Try these steps now and you’ll likely restore true stereo in minutes.