Is your SD card acting like part of your phone’s inner storage and causing more questions than answers? When an SD card is formatted as internal storage, also known as adoptable storage, Android treats it as part of the main system. That setup can boost capacity, but it also brings unique challenges that can slow things down or create storage mismatches.
This guide explains what adoptable storage means in practice, why it can cause performance dips, and how to approach troubleshooting with a clear, step by step method. You’ll learn quick checks you can do now, followed by safe options to revert if needed, so your smartphone stays reliable.
Whether you’re dealing with laggy apps, confusing storage readings, or data risk, this introduction sets the stage. By the end, you’ll have a practical path for Android troubleshooting that helps you decide when to keep adoptable storage or revert to traditional SD card usage.
Understanding adoptable storage and why it can cause trouble
When Android uses an SD card as internal storage, it invites more capacity and a cleaner file structure. But it also brings tight coupling between the card and the phone’s operating system. This can lead to performance quirks, data access risks, and compatibility questions that aren’t obvious at first glance. Below you’ll find clear explanations and practical notes to help you decide whether adoptable storage is right for your use case.
 Photo by Kelvin Valerio
Adoptable storage explained: how it works
When you set an SD card as internal storage, the card becomes part of the phone’s memory. The system formats it with encryption and ties it to the device so that apps and data move and live there just like they would on built-in storage. This is different from simply saving files to the card as portable storage, where the card stays a separate repository you can remove or replace.
Key points to understand:
- Encryption and binding: The card is encrypted and locked to the specific phone. If you swap it to another device, the data won’t be readable without the original device.
- Seamless integration: The OS treats the card as an extension of internal storage. Apps and data can be moved automatically to the card when needed, and the system manages space.
- Practical effect: You gain more usable space without noticeably changing how you use your device day to day.
A quick caution: if the SD card fails or becomes corrupted, access to a portion of your data can be lost. You may see apps fail to launch, settings discrepancies, or data not appearing where you expect. Regular backups remain essential, especially if you rely on adoptable storage for large apps or media.
Why performance can suffer
SD cards are typically slower than the phone’s built-in storage. When the system moves apps or runs them from the card, you can notice slower app launches, longer load times, and occasional stutters. The difference isn’t always dramatic, but it is real.
Think of it like this: compare a fast internal drive to a slower external card. The internal storage acts like a speedy workstation, while the adoptable card behaves more like an add-on shelf. Accessing items on that shelf takes a little longer, especially if you’re juggling large apps or games.
Practical effects you might observe:
- App launches feel slower as the system fetches data from the card.
- Background processes may take longer to complete, leading to brief freezes or hiccups.
- Large updates or game assets can take noticeably more time to finish.
If you rely on keeping your phone snappy for work or school tasks, this is the area to monitor. In many mid-range devices, the impact is manageable, but high-end expectations for instant responsiveness can be challenged by a slower card.
Compatibility and device limits
Not all phones support adoptable storage. Some brands disable it by design, or they limit how the feature is implemented. Before you enable adoptable storage, confirm that your device will support it as you expect.
Helpful checks to perform:
- Look in Settings: Search for “Adoptable storage” or “Internal shared storage.” If you see the option, read the on-screen notes to confirm how it will work on your device.
- Manufacturer support: Check the official support page or user manual for your model. Some brands may disable the feature entirely, especially on devices with customized software layers.
- Backup plan: If you rely on a brand-specific feature set or service, verify how adoptable storage might affect updates, recovery options, or warranty coverage.
Why this matters: if your device doesn’t officially support adoptable storage, attempting to enable it could lead to unpredictable behavior or void warranties. It’s better to know up front than to run into a surprise after you’ve gone through the setup.
In short, adoptable storage can be a clever way to maximize capacity, but it isn’t a one-size-fits-all solution. Your device, usage patterns, and risk tolerance all play a role in whether it’s the right move for you.
Practical takeaways for readers
- If you value speed and predictability, you may prefer keeping the card as portable storage or using adoptable storage only for non-critical data.
- If you need more space for apps and games and are comfortable with some potential slowdowns, adoptable storage can be tempting.
- Always verify device support before enabling the feature, and plan for backups since data access can become more fragile if the card fails.
By understanding how adoptable storage behaves and where it can trip you up, you can make a smarter choice that matches your smartphone habits. If you’re ready to move forward, the next sections cover specific steps to troubleshoot common symptoms and explore safe alternatives.
Quick checks before deep troubleshooting
Before you dive into deeper troubleshooting, run through a few quick, practical checks. These steps help you distinguish between card issues, device behavior, and setup quirks. They’re fast, low risk, and often reveal the root cause without touching your data.
Back up data before you start
Backing up is essential whenever you test or modify storage. If something goes wrong, you want your photos, documents, and app data safe. Simple options:
- Copy photos and videos to a computer via USB or using a cloud backup.
- Export important files to a separate drive or another online service.
- For seamless access, use a basic file transfer app to move critical items off the card first.
A quick note: even with careful steps, card failures can happen. Having a recent backup is your safety net and saves time if you need to revert.
Photo by Eyüpcan Timur on Pexels
 Photo by Eyüpcan Timur
Test the card on another device
Sometimes the issue sticks to the card, other times it follows the device. Test the SD card in a different phone or with a computer card reader. If it behaves the same, the card is likely the culprit. If it works fine on another device, your phone’s card slot or software is the likely cause.
- Try a different Android phone or a PC/Mac with a reader.
- Note any errors, read/write speeds, or recognition issues.
- If the card works elsewhere but not on your device, consider switching to portable storage or testing the device’s storage settings.
If you’re seeing consistent problems across devices, plan for a data backup and secure data transfer as you move toward more thorough checks.
Check card health and format with a computer
A quick health check on a computer helps you gauge the card’s condition without modifying it. Run a basic analysis to spot errors and verify the card’s health. Keep a few rules in mind:
- Use safe disconnects: eject the card from the computer before removal to prevent data corruption.
- Avoid heavy edits during the test: focus on reading and error checks rather than formatting or rewriting large blocks of data.
- If the test reports bad sectors or recurring errors, back up immediately and consider replacing the card.
Practical steps you can take:
- On Windows: run a read/write test and scan for file system errors.
- On macOS: use Disk Utility to verify disk and repair if needed.
- On Linux: a basic fsck can help identify filesystem issues.
These quick checks won’t solve everything, but they quickly reveal whether you’re dealing with a failing card, a corrupted file system, or an integration issue with your phone.
If you want deeper guidance after these checks, the next sections walk through targeted troubleshooting paths and safe alternatives.
Step by step troubleshooting flow for Android
When adoptable storage is in play, Android treats the SD card like part of the system memory. That can boost capacity but also introduces quirks that affect performance and reliability. This section provides a practical, step by step flow you can follow to diagnose and fix common issues with adoptable storage on Android.
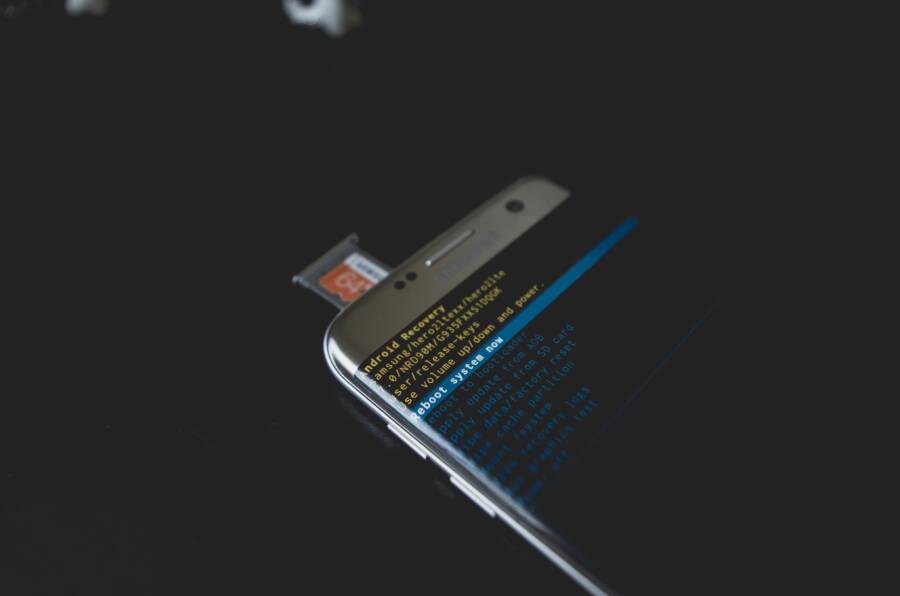
Confirm if the device is using adoptable storage
Explain how to verify from Android settings whether the card is set as internal storage. Include safe signs to look for, like the card labeled as internal or as adoptable in storage settings.
To confirm adoptable storage, start in the Settings app and navigate to Storage (or Storage & USB on some devices). Tap the SD card name in the list. If you see an option labeled Format as internal, Use as internal storage, or Format as adoptable storage on a menu (often under three dots), your device supports the feature and the card is configured as internal storage. If the card is already adopted, it will appear under Internal storage as part of the total capacity, not as a separate Portable storage entry. Some devices show a Migrate data option in the Internal storage menu to move apps and data to the card. Note that not every device supports adoptable storage; some brands disable it by design. If you don’t see any internal storage options, the card is not adopted on your device.
What this means for you: when adoptable storage is active, the system blends the card with internal storage. It’s great for expanding space, but it can slow things down and complicate data management if the card starts failing or isn’t fast enough.
Free up internal storage space
Describe quick ways to reclaim internal space, like clearing cache, moving non essential data, or uninstalling unused apps. Emphasize the impact on system performance.
First, free space where it counts most. Quick wins:
- Clear app caches: Settings > Apps > [App name] > Storage > Clear cache. Cached data can pile up and slow things down.
- Manage downloaded files: Use a file manager to locate large videos, documents, or offline maps and move them to the SD card or cloud.
- Move non essential data: Photos and videos often gobble space. If you can, back them up and remove local copies.
- Uninstall unused apps: Review your app list and remove apps you rarely use. Some apps keep data even after you delete the app, so double check their data in Settings > Apps.
Why this matters: when internal storage is tight, the system has to juggle space constantly. Clearing room can improve app launches, quicken updates, and reduce stutter during heavy tasks.
Move or disable apps and data on internal versus SD
Guide readers on how to identify apps that are causing problems when moved to the SD card. Provide steps to relocate or disable, with caution about essential system apps.
If you’re balancing internal storage with adoptable storage, start by identifying which apps benefit from being on the card and which should stay put. Note that some apps, especially system components and critical services, should not be moved or disabled.
Steps to relocate or disable:
- Open Settings > Apps and notifications > See all apps.
- Tap an app you suspect is heavy on storage or performance.
- If available, choose Move to SD Card or Change storage location. Some apps cannot be moved on certain devices.
- For apps that can’t be moved or that slow things down when moved, consider Disable or Force Stop if you don’t use them often.
- Repeat for other apps, but avoid moving essential system apps or apps that handle critical functions like messaging, security, or backup.
Caution: essential system apps should stay on internal storage. Removing or disabling them can cause instability or data loss. After moving or disabling, monitor performance and stability for a day or two to ensure there are no hidden side effects.
Update software and apps
Explain the importance of keeping Android OS and apps up to date to improve compatibility with adoptable storage and fix known bugs. Provide simple steps to check for updates.
Keeping software fresh helps with compatibility and reliability:
- OS updates: Settings > System > System update. Check for available updates and install them. Updates can improve how the system handles adoptable storage and fix bugs that cause slowdowns or data mismatches.
- App updates: Open Google Play or your app store and update all apps. Enabled updates improve performance and fix known issues that might affect how apps run from the adoptable storage space.
- Security updates: Don’t skip security patches. They can impact how data is read and written, especially when encryption is involved with adoptable storage.
A practical note: updates can automatically improve performance and stability. Set devices to update automatically if you want to stay current without manual checks.
With fresh software, your phone is more likely to handle data and apps on the adoptable card smoothly. If issues persist after updates, you can move to more targeted troubleshooting steps or consider reverting to portable storage.
When and how to revert to portable storage or reformat safely
If your Android device is using an SD card as internal storage (adoptable storage) and you start seeing performance issues, data anomalies, or you simply want to return to a portable SD setup, here is a practical, human‑friendly guide. This section walks you through the moment to revert, what happens to apps and data, and how to reformat safely on common Android versions. Think of it as a clear, step by step path so your smartphone stays reliable.
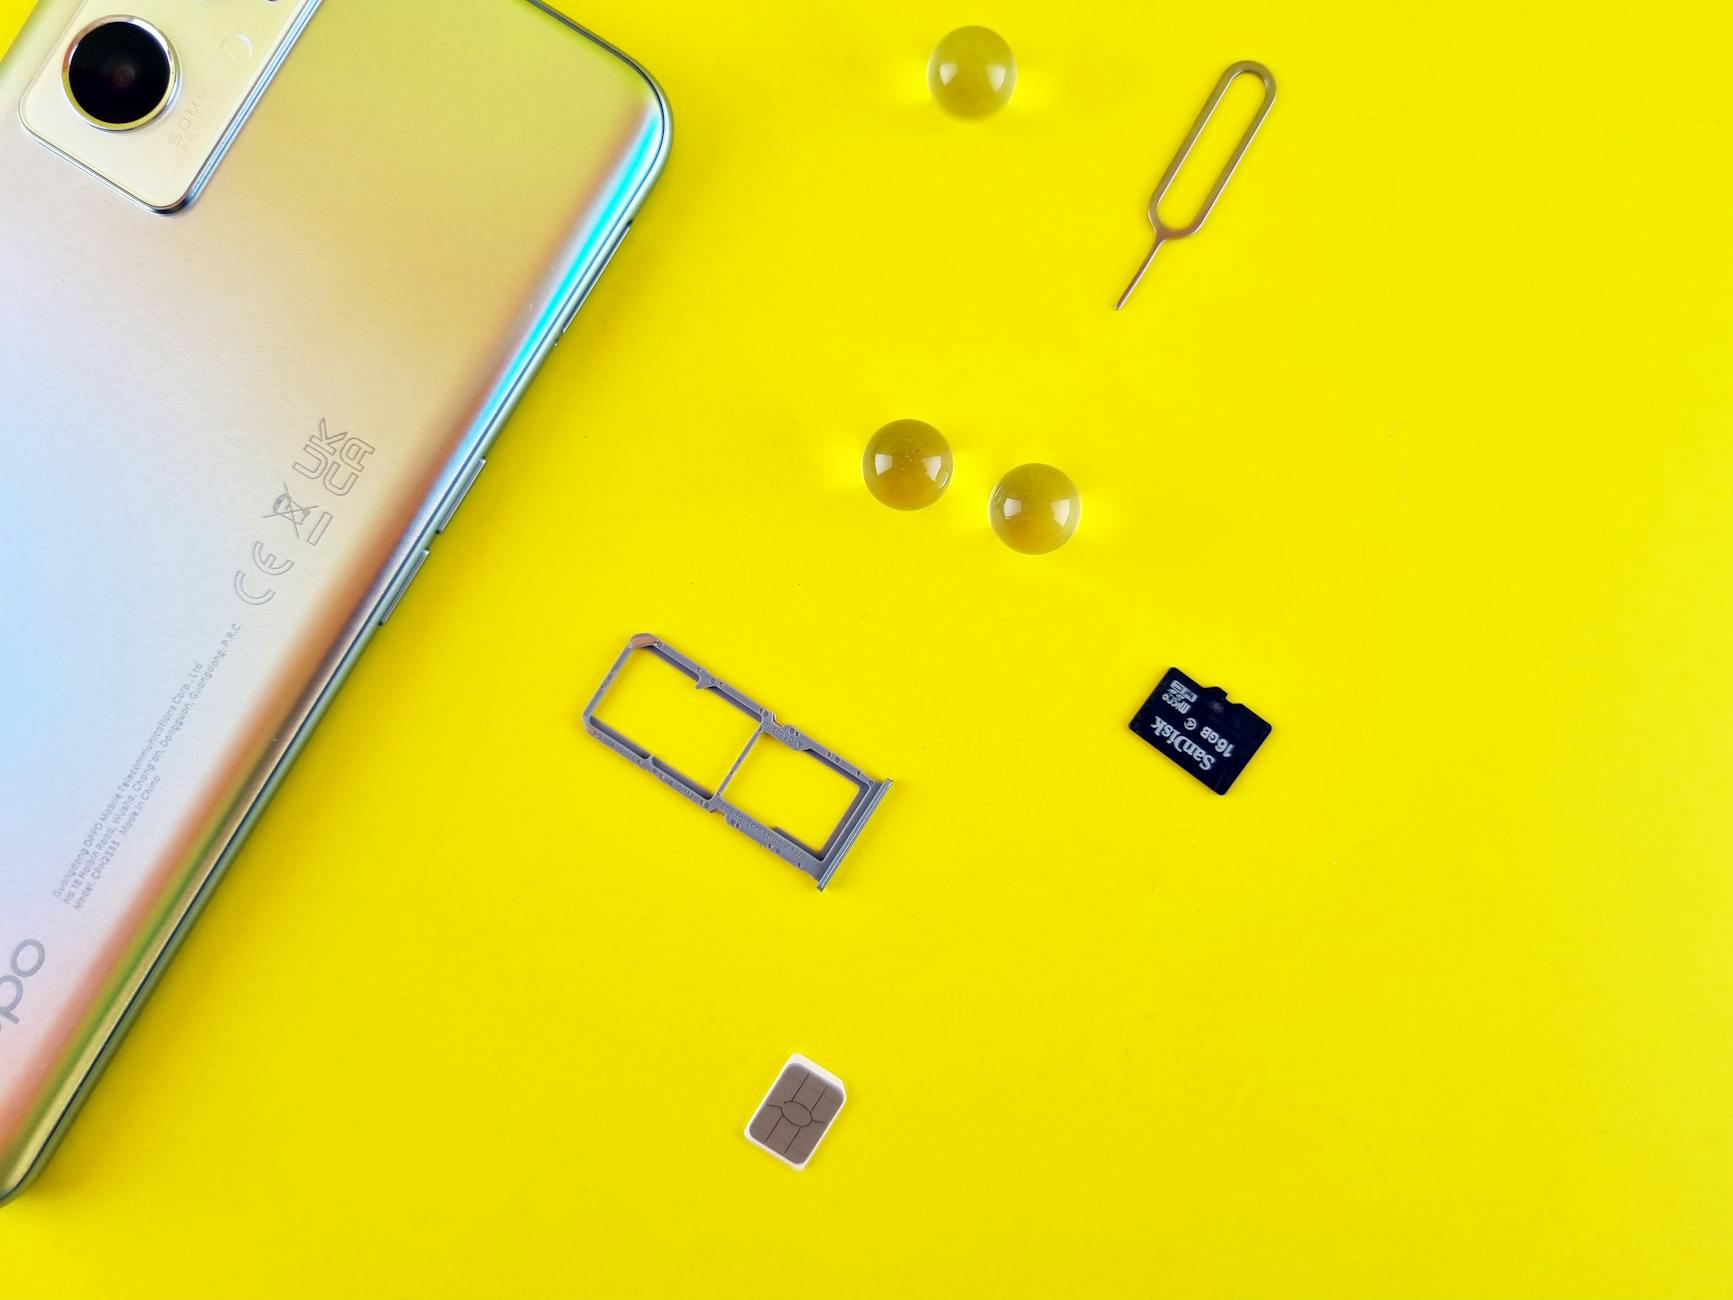 Photo by Andrey Matveev
Remove adoptable storage and revert to portable storage
If you decide to revert, the card will return to a standalone, removable storage state. Here’s how to do it in a straightforward, risk‑aware sequence.
- Back up first. Reverting will erase the card’s internal binding. Copy important files, photos, and documents to a computer or cloud storage before starting.
- Move apps and data off the card. Before formatting, move any apps or app data back to internal storage when possible. Go to Settings > Storage > SD card > Apps > Move to internal storage. This helps avoid loss of app functionality after the card becomes portable again.
- Prepare for a reboot and friendly prompts. Your device may prompt you to format the card as portable after you finish, or you may need to remove and reinsert the card to complete the switch.
- Perform the switch. In Settings, navigate to Storage > SD card. Open the menu (three dots) and choose an option like “Format as portable” or “Format card.” Confirm the warning that all data on the card will be erased.
- Test after the switch. Reinsert the card if you removed it. Open a few apps and files to confirm they read from internal storage as expected and that the card is recognized as portable storage.
What happens to apps and data during the process:
- Apps that were moved to the adoptable card may need to be reinstalled or moved back to internal storage after the card becomes portable.
- If an app stored data on the SD card, that data will reside on the card when it is portable, but you may need to reselect storage locations within the app.
- System features and critical services should remain on internal storage; moving these can cause instability.
Tips for a smooth transition:
- Do not rush: allow the phone a few minutes to reconfigure after formatting.
- Keep a current backup handy in case a file or app requires reinstallation.
- If you rely on certain apps that store large data sets on the card, check each app’s storage settings after the revert.
What to back up before reformat
Before you format the SD card to portable storage, collect essential data so nothing gets lost. Here’s a practical checklist to guide you.
- Photos and videos. Copy to a computer, external drive, or cloud service.
- Important documents. PDFs, presentations, and work files deserve a safe copy.
- App data you need to keep. Some apps store data locally and may not sync automatically. If an app offers a cloud sync, enable it before reformat.
- Messages and chat history. If important, back up locally or to the cloud.
- Contacts and calendars. Ensure they’re synced with your Google account or another cloud service.
- License keys and offline access files. Save any receipts, serial numbers, or offline maps.
- Android settings and Wi‑Fi credentials. A quick export or note can save time later.
Important reminder: reformat wipes all data on the SD card. If you skip backups, you risk losing files forever. A good habit is to back up first, then reformat with confidence.
Reformatting steps on common Android versions
Most Android devices share a familiar reformat workflow. The steps below offer a high level path that works across many brands, with little jargon and a focus on safety.
- Open Settings. Start from the home screen and go to Settings.
- Navigate to Storage. Look for Storage or Storage & USB. If your device labels it differently, search for “SD card” in Settings.
- Select the SD card. Tap the card name to view its options. You should see a menu with actions related to the card.
- Choose format option. Look for an option like “Format as portable,” “Format card,” or similar. If asked, confirm that you want to erase all data on the card.
- Confirm and wait. The device will format the card to portable storage. This can take a few minutes depending on card size.
- Reinsert and verify. If you removed the card to format, reinsert it and confirm it’s recognized as portable storage by the system.
Safety prompts you may encounter:
- Warnings that data will be erased. Read carefully and confirm only if you have a backup.
- A prompt advising a restart. Some devices perform better after a quick reboot.
- A reminder that apps may need to be moved back to internal storage if they were relying on the card.
Restart reminders:
- After formatting, a brief restart helps the system reindex files and permissions.
- If you notice odd behavior after the restart, run a quick storage check and reopen a few apps to verify normal operation.
By following these steps on a typical Android device, you switch from adoptable to portable storage with minimal risk. If your device uses a brand‑specific UI, the wording may differ slightly, but the core idea remains the same.
Note: If you run into an option that seems hidden or unavailable, check the device’s support site or user manual. Some manufacturers restrict adoptable storage or require a specific sequence to migrate data before formatting. A quick check can save you time and frustration.
This approach keeps your data secure while restoring portability to your SD card. The next sections cover practical tips to minimize downtime and keep your smartphone performing well during the transition.
Choosing a reliable SD card and best practices to prevent problems
Picking the right memory card makes a big difference in how smoothly your device runs. A card that isn’t up to the task can slow down apps, cause data corruption, and complicate adoptable storage setups. This section breaks down what to look for and how to keep your card healthy over time.
Selecting a reliable SD card
When you’re expanding a phone’s storage with an SD card, you want a card that keeps pace with your usage. Look for speed specifications that match how you use the device, especially if you rely on apps and games stored on the card.
- Speed classes you should understand: at a minimum, aim for U3 or V30. These ratings indicate sustained write speeds suitable for 4K video and heavy data tasks. If you’re mainly storing photos and documents, you can get by with lower speeds, but higher speeds improve overall responsiveness.
- App performance ratings: A2 is the strongest option for running apps from the card, with higher input/output operations per second (IOPS) than A1. A1 remains acceptable for lighter app use but won’t feel as snappy when you launch or switch between apps.
- Reputable brands matter: choose well-known names such as Samsung, SanDisk, Lexar, or Kingston. These brands consistently meet claimed speeds and have stronger quality control. Avoid no-name or significantly discounted cards that may fail sooner.
- Capacity considerations: common sweet spots are 128GB to 512GB. Bigger cards aren’t inherently slower, but very large capacities can stress some older devices. Check your phone’s maximum supported card size before buying.
Quick buying checks you can perform:
- Verify the card meets U3 or V30 and has A2 or at least A1 rating for apps.
- Compare read/write speeds against real-world tests from reputable reviews.
- Inspect packaging and holograms if buying online or in-store to avoid counterfeits.
- When in doubt, opt for a card from a recognized retailer with a solid return policy.
Practical tip: if you plan to use the card as internal storage, prioritize fast random access for apps. A2 cards tend to load apps more quickly and provide a smoother experience when data moves between internal storage and the card.
Best practices for maintenance and backups
A memory card is a removable component. Treat it with care, and periodical checks will help you catch issues early and prevent data loss. Build a simple routine you can repeat every few weeks.
- Regular backups: store copies of important photos, documents, and app data on a computer or cloud service. Keep a recent backup so you can recover quickly if the card fails.
- Gentle handling: use the device’s safe removal procedure, avoid pulling the card while the phone is running, and don’t drop the card or expose it to moisture or extreme heat.
- Keep it clean and seated: inspect the card slot for dust, wipe the card gently with a lint-free cloth if needed, and ensure the card is firmly seated in the slot.
- Monitor performance: if you notice longer load times, random read errors, or apps failing to launch, run a quick health check or move critical apps back to internal storage if possible.
- Regular checks: every few weeks, run a fast health check using your computer or a trusted app to scan for read/write errors and verify file integrity.
Backup routine you can follow:
- Copy essential media to a computer or cloud storage.
- Create a second backup on an external drive if you have one.
- Verify that your most important files open correctly from the backup.
- After making major changes, recheck that the card is recognized and functioning.
Why backups matter: when a card starts to fail, you may not notice until a file is corrupted or an app can’t access data. A current backup reduces downtime and keeps your workflow intact.
Tips for reliable usage:
- Avoid filling the card to its 100 percent capacity. Leave some free space for the system to manage writes efficiently.
- Eject safely and don’t force removal. Hard removal can corrupt data.
- Keep the card out of extreme conditions. Heat and moisture accelerate wear.
When to replace the hardware
Even with careful handling, memory cards wear out. Knowing the warning signs helps you act before data is lost.
- Frequent read/write errors: repeated inability to open files, or errors during copies and moves.
- Corrupted files or filesystem issues: sudden file corruption, or problems verifying the card’s filesystem.
- Slow performance that doesn’t improve after maintenance: apps take longer to launch, or transfers are unexpectedly slow even after freeing space.
- Card not recognized or intermittent connection: the device sometimes fails to detect the card or reports errors in storage.
- Unusual device prompts or data mismatches: you see mismatched storage readings or repeated prompts to format.
What to do next:
- Stop using the card for critical data immediately and back up what you can.
- Run a health check on a computer to confirm the card’s condition.
- If backups are current, format the card on a computer to rule out soft errors, then test it again. If issues persist, replace the card.
- When replacing, consider keeping a smaller, faster card for apps and a separate card for media to reduce risk. If you must reuse the same card, thoroughly verify data integrity after the move.
If you notice persistent problems after trying these steps, it’s usually a green light to replace the card. It preserves data integrity and minimizes the chance of losing important information.
Summary takeaways:
- Choose cards from trusted brands with appropriate speed ratings for your use case.
- Establish a simple backup routine and keep the card clean and properly seated.
- Watch for signs of wear and be ready to replace the card to protect data and performance.
Conclusion
Troubleshooting adoptable storage on Android boils down to a few solid steps: verify that the card is truly set as internal storage, back up data first, and test the card in a different device if possible. Keeping a recent backup is essential because reformatting or migrating data can erase information and disrupt app behavior. If problems persist, consider reverting to portable storage or replacing a worn card to protect your data and maintain performance.
For readers who want a quick ego boost, start with the fast checks in this guide, report what you find, and compare notes in the comments. Are you using adoptable storage on your smartphone with favorable results, or did you decide to revert to portable storage after a misstep? Your experiences help others navigate the same path.