A failing SD card can wipe out your phone photos in an instant, turning memories into a frustrating blank. This guide lays out safe steps to protect data, practical home recovery methods, and when to seek professional help. You’ll learn how to act fast, choose the right tools, and set up a backup plan so you can keep your memories safe in the future.
Understand the problem and what it means for your photos
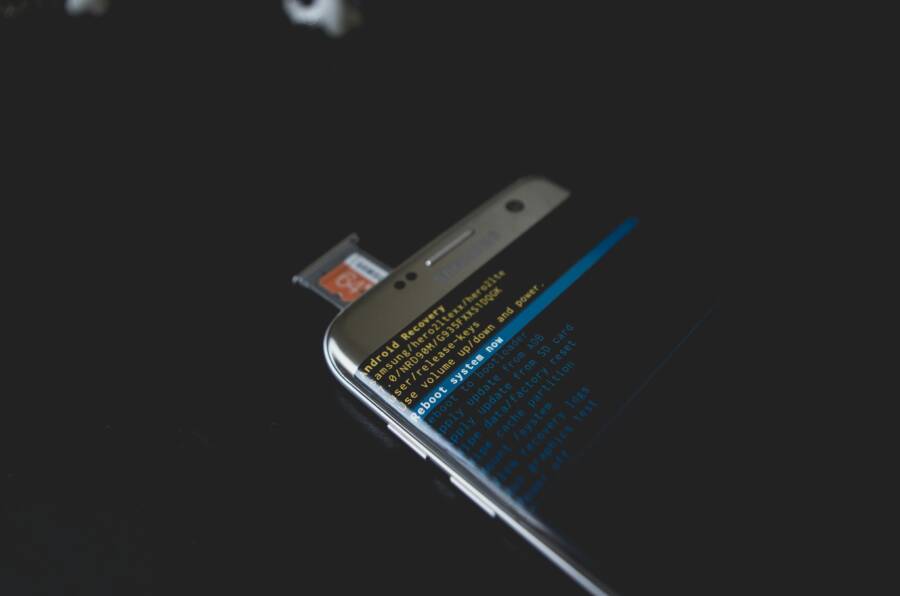
When an SD card starts acting up, your photos are at risk. Understanding what’s happening helps you act fast and protect what matters. Here we break down common failure signs and what they mean for your memory inside the phone.
Common causes of SD card failure in phones
Simple, everyday factors can wear cards down or cause them to fail. Here are the usual culprits in plain language:
- Physical wear from many insertions and removals. Every time you plug in or eject the card, tiny components rub and can loosen over time.
- Corruption from sudden power loss. If the phone shuts off or the card is removed during a write, the file system can get scrambled.
- Exposure to heat or moisture. Heat speeds wear, and moisture can corrode the metal contacts or内部 circuitry.
- Manufacturing defects. Some cards arrive with weak spots that fail after a short period.
- Low quality adapters. A flimsy adapter or faulty connection can introduce read errors and data corruption.
- Hidden wear from long-term use. Even if the card looks fine, internal wear can cause latent damage that surfaces later.
How photo loss happens on mobile devices
Photos disappear or become unreadable in a few relatable ways:
- The phone powers down while saving a new photo. The data may not finish writing, leaving a partial or corrupted file.
- An app crashes during a save. If the app writes to the card mid-operation, the file can end up incomplete.
- The card becomes unreadable by the device. The system reports errors or fails to mount the card, so you can’t access files.
- The card shows as damaged during a transfer. You might see a warning or a prompt to format, which can erase data.
Think of it like a busy kitchen. If the oven goes off mid bake or a dish is moved before it’s finished, the food isn’t saved properly. The same idea applies to photos on your SD card.
What you can expect in recovery outcomes
Recovery results vary, so set realistic expectations from the start:
- Some files come back in full. Clear photos or videos that were recently saved can often be recovered intact.
- Others come back with partial data. You might see corrupted sections or missing frames in video.
- Some files are lost forever. If the card has severe damage or overwritten data, recovery may not be possible.
A practical tip: preview recovered files before saving them back to the card or another location. It helps you keep only the good copies and avoid saving junk data. If a preview looks corrupted or incomplete, move on to the next candidate rather than filling up your storage with unusable files.
Safe first steps to protect and preserve data
When a card starts acting up, your first moves can determine how much data you keep. In this section, you’ll learn practical steps to minimize further loss while you plan the best recovery path. Think of this as triage for your memory stash on the go.
 Photo by Kelvin Valerio
Stop using the card to avoid overwriting data
Continuing to snap photos or connect the card to a reader can overwrite the very data you hope to recover. When a write happens, new information can replace the old file blocks that hold your photos or videos. This is especially risky if the card shows signs of failure such as slow access, random errors, or frequent disconnects.
What you should do now:
- Pause all activity on the card. Do not save new photos to the card, and avoid transferring files to it until you have a recovery plan.
- If you must access the card for diagnostics, keep sessions brief and controlled. Avoid apps that auto-save or auto-backup to the card.
- Move any existing files you can access to a stable location on your phone or computer, but only if the card is still readable and you can do so without forcing a write to the card itself.
The goal is simple: preserve as much intact data as possible. Future you will thank you for stopping the risk of overwriting.
Try a different card reader or port
A faulty reader or a loose connection can imitate card failure. Before you blame the card itself, test with another reader or a different USB/SD port on your computer or phone dock. This helps you separate hardware issues from real damage on the card.
Tips to test safely:
- Use a powered USB hub if available. Some readers draw power from the computer, which can cause errors on marginal connections.
- When swapping readers, power off the device first. Disconnect the original reader, connect the new one, and then power the device back on.
- Check both the read speed and the ability to mount the card. If the card mounts inconsistently, it’s often a sign the problem is with the reader or the card’s contact surface rather than fundamental data loss.
If the card works reliably in a different reader, you can proceed with a careful recovery plan on the card you trust. If it still shows errors, you’ll want to move toward imaging and cloning to protect what’s left.
Create a raw image (disk image) of the card before recovery
Cloning the card before attempting any data recovery is the safest move. A disk image captures the card’s exact state, including unreadable sectors, so you can work from a copy instead of the original. This approach reduces the risk of making things worse and gives you a clean rollback if something goes wrong.
Why a clone matters:
- It preserves the original card in its current condition, preventing further deterioration from recovery attempts.
- It lets you try multiple recovery tools and methods without touching the source every time.
- It provides a fall-back if the card fails during the process; you can revert to the clone and start again with a different strategy.
Simple tools and steps you can follow:
- For Windows: use a tool like Win32 DiskImager or ddrescue to create a sector-by-sector copy. Connect the card, open the tool, choose the correct drive, and start the clone to a safe image file on a separate drive.
- For macOS or Linux: use
ddorddrescueto create the image. Example command:dd if=/dev/sdx of=card-image.dd bs=4M conv=fsync,noerror(replace sdx with the actual device path). Always verify you chose the right device to avoid overwriting other data. - After cloning, perform recovery on the image rather than the original card. This keeps your risk low and your options open.
If you follow these steps, you’ll set up a solid foundation for recovering photos without spiraling into more data loss. The next sections will guide you through practical recovery paths from a safe image and how to evaluate results without guessing.
DIY recovery tools you can use at home
When a phone photo seems lost on a failing SD card, you have practical options you can try from home. The right tools help you see what’s recoverable and save it to a safe drive. Below, you’ll find a mix of paid and free solutions, with clear notes on what each can do, how to use them, and what to watch out for. If you’re working with a smartphone, start with non-destructive steps and ensure you create a safe copy before trying deeper recovery methods.
Disk Drill and other paid tools
Disk Drill stands out as a strong option for 2025 because it reliably recovers photos from damaged cards and supports multiple camera formats. It runs on Windows and Mac, which makes it a flexible choice for households with different setups. A key advantage is the preview mode, letting you see recoverable files before you commit to a purchase. This is especially helpful when you’re weighing which files to save first.
Keep in mind a few practical points:
- Disk Drill offers a free trial that lets you preview recoverable items, but full recovery requires purchase.
- The software supports many camera formats, so you’re not limited to common photo types.
- If you decide to buy, recover to a separate drive rather than the card you’re imaging. This protects the original card from further writes and potential damage.
- The cost is a consideration, so plan how many drives you’ll recover to and whether a one-time license fits your needs.
For households with both Windows and Mac computers, Disk Drill provides a familiar, guided recovery experience. If you encounter a card that’s been pushed to the edge, this tool often gives you a clear path to salvaging as much as possible.
PhotoRec free option
PhotoRec offers a no-cost route for photo recovery by signature. It focuses on file types based on patterns, which can be effective when standard recovery tools miss data. It’s a straightforward option if you’re comfortable with a command line interface and want to avoid upfront costs.
Key points to know:
- It can recover basic formats like JPG and PNG, along with many other kinds of files.
- The interface is text based, which can feel less friendly if you’re new to recovery tasks.
- A potential drawback is that it may not preserve folder structure or file names after recovery. You may need to reorganize files manually later.
- Because it works from a command line, you’ll want to follow exact commands to avoid overwriting data.
PhotoRec is a solid starting point when you want to test a recovery without spending money. If you’re comfortable with basic terminal usage, it can salvage important images and videos before you proceed with other tools.
Stellar Data Recovery and Wondershare Recoverit
Stellar Data Recovery and Wondershare Recoverit are two popular commercial options that many photographers and everyday users consider. They tend to handle larger files well, including videos, and they’re known for user friendly interfaces that guide you through the process.
What to expect:
- Both tools emphasize ease of use, with guided wizards that help you pick the right scan mode for damaged cards.
- They perform well with mixed media, so you’re not limited to photos alone. If your SD card holds video clips or other file types, these tools can often recover a broad range of data.
- Trial versions usually limit how much you can recover or preview, so be prepared to evaluate the tool before buying.
- Before purchasing, read a few recent reviews and compare features such as speed, scan depth, and the ability to save results to a separate drive.
If you’re deciding between these two, consider your typical file types and how much data you expect to recover. Both are strong options, but your choice may hinge on whether you need better video recovery support or a more granular preview feature. Taking a moment to compare current reviews will help you make a safer, informed decision.
How to use recovery tools effectively
Recovering photos from a failing SD card in your phone requires a calm, methodical approach. Start with quick checks and a safe copy, then move to deeper scans if needed. Always preview recovered files before saving, and save only the good ones to a new, safe location. The goal is to maximize what you keep while avoiding unnecessary overwrites. The sections below break down practical actions you can take now.
Best scanning techniques and previews
Begin with a quick scan to identify easily accessible files. This fast pass can recover a surprising number of intact images without much risk. If the quick scan misses important items, run a deeper scan that searches more thoroughly for fragments and less obvious file signatures. The deeper pass takes longer, but it often yields a higher-quality set of recoveries.
- Preview first, save later: Use the preview feature to verify each file before you commit to saving it. This helps you avoid clutter and spot corrupted or incomplete data early.
- Prioritize recent and large files: Recent photos and high‑resolution images are more likely to survive intact. Filter results by date and file size to quickly spot the best candidates.
- Be selective with duplicates: Recovery tools often return multiple copies or fragments of the same file. Use previews to decide which version to keep and discard the rest.
If you’re expanding the scan, ensure the tool isn’t writing to the source card during the process. That simple precaution reduces the risk of overwriting data you still need.
Choosing output locations and file types
Where you save recovered data matters as much as what you recover. Save to a different drive than the SD card to minimize the chance of overwriting data on the card itself.
- Use common formats first: Focus on JPG and PNG, as these are universally readable and easy to work with on any device.
- Include RAW if needed: If you shoot in RAW and want maximum flexibility, recover those files as well. They’re larger but preserve more image data.
- Avoid saving back to the same card: Always choose a safe destination on your computer, external drive, or another USB device. This protects the original data from being overwritten during the recovery process.
- Organize as you go: Create a separate folder structure like “Recovered Photos/YYYY-MM-DD” so you can locate and review files quickly later.
Think of output locations as a safety vault. The right choice keeps your memories intact and ready for further editing or backup.
Dealing with RAW, corrupted, and fragmented files
RAW files can be the most valuable, but they’re also the toughest to recover. They hold more image data and allow for greater editing latitude, so it’s worth attempting RAW recovery when you have high‑quality originals. If you can access RAW, include it in your scan and preview process.
- RAW recovery may be imperfect but worthwhile: You might gain access to the full data stream, even if some metadata or previews look rough at first.
- Corrupted files can sometimes be repaired: Some recovery tools offer repair or reconstruction features for damaged images. Try these options if previews show partial data rather than a clean image.
- Fragmented data is common after card failure: The card may split a single image into multiple fragments scattered across storage. Deep scans and specialized repair options increase your odds of reassembly.
- Expect varying results: Not every RAW or fragmented file will become a perfect image. Prioritize the most complete and highest‑quality previews first.
If a file refuses to open after recovery, don’t assume it’s lost. Some editors can restore or convert partial data, and you may recover enough of a shot to be usable after a little processing.
This approach keeps you focused on what matters most—recovering valuable photos with a clear plan, while preserving your ability to back up and organize what you find.
When to seek professional help
When a failing SD card holds irreplaceable photos, deciding whether to try DIY recovery or call in the pros can be tricky. This section explains clear signs that point to professional recovery, what a lab does behind the scenes, and the typical costs and timelines. The goal is to help you weigh the risks and decide the right path without throwing time or money away.
 Photo by Luis Quintero
Signs of physical damage to the card
Physical damage is the clearest signal to seek professional help. If you notice one or more of these indicators, avoid DIY fixes that could worsen the loss:
- Cards won’t mount or show a read error on multiple devices
- Unreadable sectors or sudden file system corruption
- Unusual noises when the card is connected or written to
- Visible cracks, chips, or warping in the card body
- Cards that work only in certain devices or fail in others
These symptoms point to hardware issues inside the NAND flash or controller. DIY attempts in this scenario risk overwriting data or causing further deterioration, making a lab recovery more likely to succeed.
What a data recovery lab does
A data recovery lab brings specialized tools and controlled conditions to retrieve data from damaged NAND chips. Here’s what happens behind the scenes:
- Imaging the memory: Technicians create a sector-by-sector clone of the card, preserving the original in case the recovery process encounters problems.
- Clean room work: For severely damaged cards, work may occur in a clean room to minimize dust and contamination that could damage delicate circuitry.
- Chip-level access: Experts use hardware that interfaces with the memory chips directly, bypassing defective card controllers and file systems.
- Deep analysis: They interpret fragmented data, reconstruct file structures, and reassemble corrupted or partially overwritten files.
- Evaluation and recovery plan: The team analyzes what can be saved, sets a recovery strategy, and communicates likely outcomes and timelines.
- Turnaround varies: Depending on damage, the process can be quick or require extended work to maximize the chance of success.
Expect some variability in results. A lab cannot guarantee full recovery in all cases, but they aim to extract as much data as possible and present recoverable files in a usable form. The time required depends on damage severity and workload at the lab.
Costs and turnaround times
Professional SD card recovery costs and timelines hinge on several factors. Here’s a practical snapshot to help you decide if this route is worth it:
- Typical price range: Most projects fall between a modest service fee and a few hundred dollars. Costs rise with more extensive damage, larger data volumes, or urgent service needs.
- What drives price: The type of damage (readable vs physically damaged), the amount of data to recover, and how fast you need results. Dead or severely damaged cards usually cost more.
- No data, no charge: Many labs offer a no-data, no-charge policy, so you only pay if they recover files.
- Turnaround time:
- Standard recovery often takes 3–7 days
- Urgent or expedited cases can be completed in 24–48 hours, sometimes at a premium
- Very large data sets or highly damaged cards may extend to 1–2 weeks
If you’re weighing the decision, consider the value of your photos, the likelihood of recovery given the card’s condition, and whether you can afford the potential cost. For priceless memories, professional help is frequently worth the investment. If the data is less critical, you might try first with non-destructive home methods and return to a lab only if needed.
Practical tips for working with a lab
To maximize your chances and keep costs reasonable, follow these practical steps:
- Get a written quote and scope of work before authorizing any recovery
- Provide a raw image of the card whenever possible, if you’ve already created one
- Ask about the no-data, no-charge policy and what constitutes “data recovered”
- Compare labs on turnaround time, success rates, and return formats
- Clarify how recovered data will be delivered (USB drive, external drive, or cloud)
Choosing the right lab can make a meaningful difference in both the outcome and your overall experience. Start with a quick check of the lab’s credentials, reviews, and any certifications they hold.
If you’re leaning toward DIY first, you can still consider a lab later if the initial attempts don’t yield satisfactory results. This approach often preserves the best possible chance of salvage while keeping options open.
Conclusion
Pausing use of the failing card, cloning it, and trying reliable recovery tools gives you the best shot at salvaging photos from a smartphone card.
Preview each recovered file and save only the good ones to a fresh location to avoid data clutter or overwriting more data.
If the card shows signs of physical damage or DIY attempts fail, consider a professional data recovery lab to maximize your chances.
Start a backup plan today to protect memories, then set up automatic backups for your smartphone photos so you never face this again.