
Why do Microsoft Authenticator push approvals sometimes vanish from your phone and leave you stuck at the login screen? If you’ve run into this, you’re not alone. A quick glance at common causes helps you reclaim access fast, whether you’re on Android or iOS.
This guide explains the usual culprits, from unacknowledged notifications to shaky connectivity and account setup hiccups. You’ll see simple, tester friendly fixes you can try in order, so you can move through each step with confidence. Most problems stem from notifications being blocked, battery saver limits, or MFA policy quirks tied to work accounts. A healthy smartphone habit—keeping apps updated and checking both device and app permissions—can prevent these issues from reappearing. You’ll also learn when it’s time to involve your IT team if corporate MFA policies are at play.
By the end, you’ll know which settings to adjust on your smartphone and how to re link your authenticator if needed. The steps cover both Android and iOS, with notes on common stumbling blocks and quick checks you can perform during a busy day. Whether you rely on a personal device or a work phone, this guide aims to restore smooth, secure access with clear, practical actions for your everyday smartphone life.
Quick checks you should do first
Before diving into deeper fixes, run through these quick checks. They cover the basics that often block push approvals. A few minutes here can save you from more involved troubleshooting.
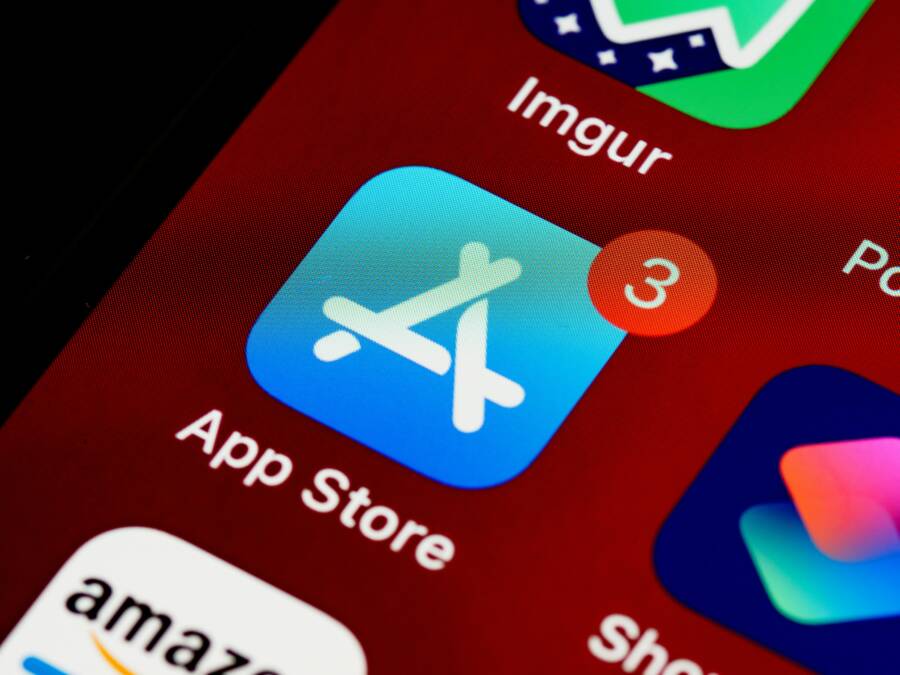
Enable notifications for Microsoft Authenticator
- Android: Settings > Apps > Microsoft Authenticator > Notifications. Make sure banners/alerts and sound are allowed.
- iOS: Settings > Notifications > Microsoft Authenticator. Enable Allow Notifications and choose banners/alerts with sound.
- Keep these prompts visible so you don’t miss a push when you sign in.
 Photo by Andrey Matveev, https://www.pexels.com/@zeleboba
Verify internet connection
Push approvals require a live connection. Check your network and try a quick page load to confirm connectivity.
- Switch between Wi-Fi and mobile data to test stability.
- If you use a VPN, disable it briefly to see if traffic is getting blocked.
- A brief outage or flaky network can prevent pushes from arriving.
Update the app and device OS
Outdated software can prevent push notifications from appearing.
- Update Microsoft Authenticator from Google Play or App Store to the latest version.
- Update your device OS if an update is pending.
- Consider enabling auto-update for both apps and the OS to reduce future gaps.
Make sure the app is unlocked
If the Authenticator app is locked with a PIN or biometrics, pushes may not show until you unlock it.
- Open the app and unlock with your PIN, fingerprint, or face ID.
- After unlocking, try triggering a sign-in again to confirm the push appears.
- If you’re in a corporate environment, ensure the token screen isn’t hidden by a lock screen policy.
Test push after changes
Run a controlled test to confirm the fix is working.
- Trigger a sign-in on another device or test account.
- Watch for the push notification and approve it to complete the sign-in.
- If the test fails, re-check the previous steps and retry in a few minutes.
This quick sequence often resolves the majority of push issues. If the problem persists, proceed with the deeper checks in the following sections.
Platform specific fixes
If push approvals still don’t show after the quick checks, the issue is often tied to platform specifics. This section walks you through Android and iOS adjustments that restore reliable push notifications. You’ll learn how battery optimization and background activity can block deliveries, and how to set things right with simple, step by step actions. A well-tuned smartphone setup makes MFA prompts flow smoothly again.
Android fixes: battery optimization and background activity
Battery optimization and background restrictions can stop Microsoft Authenticator from receiving pushes in real time. Turning these off or adjusting settings lets the app run and receive notifications as you sign in.
- Newer Android versions (Android 9+), general path:
- Open the device Settings and search for Battery optimization or Apps.
- Find Microsoft Authenticator and set it to “Not optimized” or choose “Background activity allowed.”
- If there’s a separate Battery or Power option, ensure Microsoft Authenticator is not restricted.
- Optional: disable any “Adaptive battery” or power saving modes that might throttle background work.
- Brand-specific nuances:
- Samsung devices:
- Settings > Device care > Battery > App power management.
- Find Microsoft Authenticator and set it to “Not optimized” or ensure it’s allowed to run in the background.
- OnePlus devices:
- Settings > Battery > Power optimization or Advanced optimization.
- Add Microsoft Authenticator and Company Portal to the allow list or turn off optimization for both.
- Samsung devices:
- Older Android versions:
- Settings > Apps > Microsoft Authenticator > Data usage and Background restriction.
- Make sure Background data is allowed and that the app is permitted to run in the background.
- Quick verification steps:
- After adjusting, open Microsoft Authenticator and sign in on a test account.
- Trigger a sign in and confirm the push arrives within a minute.
Tips
- Ensure Google Play Services and Google Play Store are enabled, as notification delivery relies on them.
- Recheck that notifications for Microsoft Authenticator are allowed in Android System settings.
- If problems persist, reinstall the app and re-link accounts. A fresh install often clears misconfigurations.
iOS fixes: notification settings and background refresh
Push approvals on iPhone or iPad depend on proper notification permissions and background activity. Adjust these settings so pushes can reach you promptly.
- Enable notifications for Microsoft Authenticator:
- Settings > Notifications > Microsoft Authenticator.
- Allow Notifications and select Banners with Sound.
- Check Focus or Do Not Disturb:
- Settings > Focus (or Do Not Disturb) and ensure Microsoft Authenticator is not silenced by a Focus mode.
- If Focus is on, add the app to the allowed list within Focus settings.
- Enable Background App Refresh:
- Settings > General > Background App Refresh.
- Make sure it is On and that Microsoft Authenticator is allowed to refresh in the background.
- Quick test:
- Sign out of the app and back in, then initiate a sign-in to confirm the push appears.
- If you’re on a work device, confirm there are no MDM restrictions blocking notifications.
Common cross platform tips
A few universal fixes work whether you’re on Android or iOS. These steps address the most common gaps and help you pinpoint the bottleneck quickly.
- Restart the device
- A simple reboot clears temporary glitches that block pushes.
- Sign out and sign back in
- This reestablishes tokens and can re-enable push pathways.
- Check account permissions
- Ensure your Microsoft account is in good standing and MFA prompts aren’t blocked by policy changes.
- Verify time and date
- Accurate system time helps with token validation and push ordering.
- Do a controlled test
- Try signing in from a different device or account to confirm where the problem lies.
- Keep the app and OS up to date
- Auto updates help prevent recurring issues and ensure compatibility with MFA services.
If you follow these platform specific fixes, you should regain reliable push approvals across both Android and iOS. Remember, a well configured smartphone makes authentication smooth and predictable.
In-app and account fixes
When push approvals stop showing up, the most reliable fixes happen inside the Authenticator app and around how your account is linked. These steps are practical, easy to follow, and work on both Android and iOS. A quick reset of the account or a fallback to codes can save you from a frustrating sign in. Keep this section handy as a repeatable checklist for future MFA bumps on your smartphone.
Remove and re-add your account in Microsoft Authenticator
Removing the account from the app and linking it again is often the quickest way to clear misconfigurations that block push notifications. After re-linking, you’ll typically see pushes resume normally.
- Open Microsoft Authenticator on your smartphone.
- Tap the account you want to remove.
- Access the Settings or the three-dot menu and choose “Remove account.”
- Confirm the removal. You’ll see a warning that you won’t be able to verify your identity on this device until you add the account back.
- Re-add the account:
- Tap the “+” icon or “Add account.”
- Choose the account type, usually “Work or school account.”
- Sign in with your Microsoft credentials and follow the prompts to re-link.
- If you use two-factor verification, you may need to scan a new QR code from the Microsoft account page on another device.
- Test the sign-in flow:
- Trigger a sign-in on another device or test account and approve the push on your phone.
- If problems persist, reinstall the app and re-link the account from scratch.
Tips
- On corporate accounts, ensure you’re signing in with the correct work or school account.
- If you have multiple accounts, re-link the primary one first to restore normal flow.
Use backup codes or verification codes when push fails
Backup codes and verification codes are a reliable fallback when a push doesn’t arrive. They let you sign in while you troubleshoot the push path.
- Locate codes:
- Sign-in page: Look for a link like “Use verification code” or “Get backup codes.”
- In the Authenticator app: Some setups show a codes option when you open the account.
- Quick steps to use codes:
- Enter a backup code on the sign-in page.
- If using verification codes, open the app, choose the account, and read the current one-time code.
- Enter the code on the sign-in screen and complete authentication.
- After signing in, plan a follow-up:
- Recheck push delivery by testing sign-ins from another device.
- Regenerate codes if you used one and want to refresh your options.
Notes
- Backup codes are usually a one-time or limited-use resource. Store them securely.
- If you can’t find codes, contact your IT admin for a reset or new codes.
Check time drift and account status
Time drift can throw off MFA codes and push timing. Correcting the clock on your device and confirming account status often fixes most MFA hiccups.
- Time settings:
- Ensure your device is set to automatic date and time.
- On Android, go to Settings > System > Date & time and toggle Automatic date & time.
- On iOS, go to Settings > General > Date & Time and enable Set Automatically.
- Verify account status:
- Check for any policy changes that could block MFA prompts.
- Look for account lockouts or required re-authentication in the admin portal if you have access.
- After adjustments:
- Sign in again from a test device to confirm pushes are delivered as expected.
- If your organization uses conditional access, verify the sign-in path meets all requirements.
Why this matters
- MFA relies on accurate timing. Even a few seconds of drift can trigger failures or prompt delays.
- A clean account status view helps rule out policy blocks before you chase device issues.
If you follow these in-app and account checks, you should regain reliable push approvals. If the problem persists, consider more granular device or policy investigations, such as device enrollment status or app permissions on the smartphone.
When to contact support and prevention
If push approvals stop showing up and you’re locked out of a sign in, it’s time to involve the right people. For work or school accounts, your IT admin is the first line of defense. They can reset MFA, re-register apps, or provide temporary codes. If you’re on a personal account, Microsoft support can help with account-level issues and guide you through re-linking the authenticator. This section covers practical escalation steps, what to prepare, and concrete prevention measures to keep push prompts reliable.
 Photo by Andrea Piacquadio, https://www.pexels.com/@olly
Escalation steps for IT admins and Microsoft support
Start with clear, actionable information to speed up resolution. Here’s a practical path you can follow.
- For work or school accounts:
- Contact your internal IT help desk or admin. They can reset MFA, re-enroll the device, or push a policy refresh to re-link the authenticator.
- Provide context: device model, OS version, app version, MFA method in use, approximate time the issue started, and steps you already tried.
- Ask what checks they run: account status in the admin portal, conditional access policies, device enrollment status, and whether any recent changes affect MFA prompts.
- If the admin needs to escalate, share any error codes or messages you see during sign-in.
- For personal accounts:
- Visit the Microsoft support page or support via the Microsoft 365 admin center if you link a personal subscription.
- Use the app’s Send feedback option with logs or screenshots to illustrate the problem.
- Be ready to verify ownership with alternate contact methods or recovery options if requested.
- What support might check:
- MFA policy changes or conditional access rules that could block pushes.
- The health of the Authenticator service and any recent outages or maintenance.
- Device enrollment or enrollment status on your phone, and whether the account appears correctly in the app.
- How to communicate efficiently:
- Share a concise timeline of events, including when pushes stopped and any test attempts you made.
- Attach screenshots of error messages and device information to avoid back-and-forth questions.
- Confirm preferred contact method and availability for follow-up.
What to prepare before contacting support
A quick, organized bundle of details helps support fix things faster. Use this checklist so you’re ready to go.
- Device information
- Model and manufacturer (Android or iPhone), OS version, and security patch level.
- App specifics
- Microsoft Authenticator version, whether you use cloud backup, and any other MFA methods configured.
- Issue details
- Time and date of the first occurrence, whether the issue is persistent or intermittent, and if it affects all accounts or just one.
- Environment notes
- Whether you’re on Wi-Fi or mobile data, if you use a VPN or work network, and any recent network changes.
- Screenshots and logs
- Error messages, sign-in attempts, and any MFA prompts you expected to see. Include a screenshot of the sign-in screen if possible.
- Testing notes
- Record results from quick checks such as test pushes on a different device or test accounts, and whether a restart or reinstall helped.
Best practices to prevent future push issues
A stable MFA path comes from good habits and regular checks. Implement these practices to reduce future push problems.
- Keep apps and OS up to date
- Enable auto updates for Microsoft Authenticator and the device OS to close gaps caused by older software.
- Check notification settings
- Ensure push notifications are allowed for the Authenticator app and that banners or alerts aren’t blocked.
- Avoid aggressive battery optimization
- Disable heavy power saving modes for the Authenticator, and allow background activity so pushes aren’t throttled.
- Test MFA regularly
- Schedule quick sign-in tests every few weeks to confirm the push flow is working.
- Maintain multiple verification options
- Set up backup methods such as verification codes or SMS/phone call where your policy allows.
- Verify time accuracy
- Confirm the device clock is set automatically. Time drift can disrupt MFA timing and push ordering.
- Re-link if needed
- If issues persist, re-link the account in the Authenticator by removing and re-adding the account after a fresh QR code from the admin page or your Microsoft account security page.
- Monitor policy changes
- Stay aware of any MFA or conditional access policy updates from your IT admin. A sudden change often explains new prompts or missing pushes.
Following these guidelines, you’ll reduce the chances of future push failures and maintain a smoother authentication flow on both Android and iOS. If problems recur, a targeted review of device enrollment and app permissions can uncover deeper issues, such as corporate policy blocks or device management quirks.
Conclusion
Most push issues with Microsoft Authenticator clear up quickly once you run through the basic checks. Start with enabling notifications, verify stable internet, and confirm the app and device are up to date. A quick restart of your smartphone often fixes transient glitches, and re-linking the account inside the app resolves stubborn misconfigurations. If the problem persists, checking background activity and battery settings on Android or notification and background refresh on iOS usually uncovers the bottleneck.
Keep backup codes as a reliable fallback. They let you sign in while you troubleshoot and restore the normal push flow later. When you regain access, re-test with a controlled sign-in and verify that pushes arrive promptly again.
A practical next step is to bookmark this guide for future reference. It’s a handy reminder to run through the quick checks first and then tackle platform or account specifics if needed. Share your experience in the comments and tell us which fix worked for you. Your smartphone should once again deliver smooth, secure MFA prompts with confidence.