Traveling often means you’ll want to capture big scenes without stepping back. A great phone with an ultra wide camera makes it easy to fit landscapes, crowded streets, and group photos into one frame. If you’re choosing a phone for travel, you’ll want reliable color, strong detail, and good performance in varied light.
In this guide you’ll learn which phones currently lead the ultra wide game and why they matter for travel photos. We’ll cover what to look for when you pick a device, from lens quality to data processing, and how these choices affect real world results. You’ll also get practical tips to get the most from wide angle shots on the road.
Whether you’re wandering city streets or chasing wide horizons, the right ultra wide camera helps you tell a fuller story. Expect sharp edges, natural color, and minimal distortion so your memories look as expansive as the places you visit. This intro will point you to strong options and simple techniques that work for any traveler.
Why an ultra wide camera matters for travel photos
A wide or ultra wide lens on your smartphone can dramatically transform how you tell travel stories. It captures expansive landscapes, crowded streets, and group moments in a single frame, reducing the need to step back or stitch shots later. For travelers, this means more efficient shooting and a stronger sense of place in every photo.
What ultra wide brings to your travel kit
- Broader perspective helps you include more of the scene with less distortion at the edges.
- Better storytelling by fitting entire scenes, from city skylines to lauded landmarks, in one shot.
- Smoother group photos when you want everyone in the frame without awkward crouches or awkward angles.
- Creative options like exaggerated perspective, making foreground subjects pop against distant backdrops.
If you want to dive deeper into why ultra wide lenses are valuable, this guide explains the core benefits and how to use them effectively in travel photography. Read more at Digital Photography School: “Ultra-Wide Angle Lenses: A Guide (+6 Reasons to Love …)” link.
Urban landscapes versus wide horizons
- In cities, ultra wide shines when you want to capture dramatic skylines, alleyways, or bustling markets without losing context. It can make narrow streets feel open and lively, pulling the viewer into the scene.
- For horizons and nature, the ultra wide frames mountains, seascapes, and skies in a way that smaller lenses can’t match. It emphasizes scale and drama, from sweeping coastlines to dramatic sunsets.
Pro photographers also use ultra wide for interior spaces like museums or airports. It helps you show both the room and the people within it, preserving the energy of the moment.
Practical tips to maximize ultra wide on the road
- Mind the distortion at the edges. Keep important subjects toward the center to avoid stretched features.
- Get low or go high to alter perspective. A low angle exaggerates foreground interest, while a high vantage point can compress depth for a grand view.
- Frame with leading lines such as roads, railings, or shorelines to guide the eye into the photo.
- Use natural light to avoid harsh shadows. Early morning or late afternoon light gives a warmer tone and better texture.
- Stitch less, capture more by aiming for one solid ultra wide shot rather than multiple overlapping frames when possible.
If you’re curious about how to use ultra wide lenses in travel, this Photography Life piece explains the fundamentals of ultra wide angles and practical tips to get sharper results link.
What to look for in a smartphone ultra wide camera
- Resolution and sharpness matter for wide frames that stay clear when viewed full screen.
- Low light performance is crucial in markets, temples, and dusk cityscapes where light is limited.
- Color accuracy helps landscapes look natural, not oversaturated or washed out.
- Software processing can correct distortion and help your photos look balanced across the frame.
- Field of view matters; too wide can cause perspective distortion, too narrow may feel limiting in tight spaces.
To get a better sense of how these factors translate to real-world images, check out practical examples and guidance in the ultra wide lens discussions linked above.
Quick-start checklist for your next trip
- Pack a phone with a solid ultra wide camera and reliable software processing.
- Scout locations where a wide view will tell the story best.
- Practice framing with foreground interest and a strong lead-in line.
- Shoot in both bright daylight and low light to compare performance.
- Review images on a larger screen and adjust settings for the next day.
This approach helps you build a portfolio of travel photos that feel expansive yet intimate, capturing both the grand scale and the human moments that define your trip. For a deeper dive into how ultra wide angles affect travel images and why they matter, the linked resources offer additional context and practical examples.
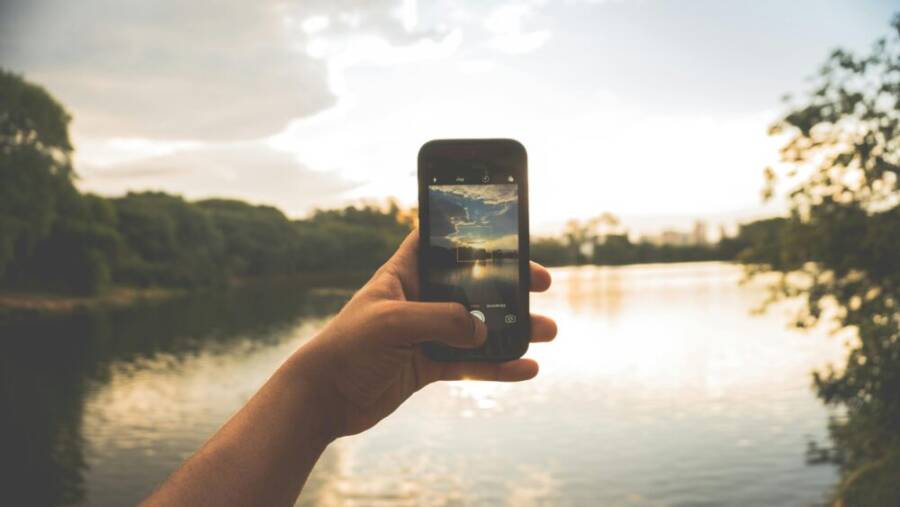
Best ultra wide camera phones for travel
When you’re traveling, an ultra wide camera helps you capture more of the scene in a single frame. It’s your best tool for landscapes, crowded streets, and group moments without stepping back. In this section, we break down top ultra wide phones for travel and show how their specs translate into real-world results. You’ll find practical tips to make the most of each device on the road.
 Photo by Kaique Rocha
Samsung Galaxy S25 Ultra: Ultra wide camera and travel strengths
The Galaxy S25 Ultra carries a capable ultra wide setup that shines in travel scenarios. The 50MP ultra wide with a broad 120° field of view captures expansive scenes with crisp detail and rich color. The bright f/1.9 lens helps keep images clean when light dips, which is common in museums, markets, and late-in-the-day landscapes. Dual Pixel PDAF keeps focus fast, so you won’t miss the moment in crowded spaces. For video, Super Steady stabilization ensures smoother wide-angle clips, a big plus for walking tours or city strolls.
Practical travel tip: in crowded streets, drop to a lower angle and place the horizon near the lower third of the frame. This reduces distortion at the edges and makes the scene feel more immersive.
Google Pixel 10 Pro: AI color, night shots, and stability
The Pixel 10 Pro’s ultra wide is a solid performer for travelers who want natural color and dependable exposure. It features a 48MP sensor with a 114° field of view, delivering sharp landscapes and cityscapes with strong detail. AI processing helps balance color and exposure, so your skies look vibrant without oversaturation. Night shots are still solid thanks to Night Sight, and stabilization is reliable for handheld wide-angle shots on the move.
Travel tip for quick landscape shots: set a small aperture bias in bright light to keep more of the scene in focus, then use a single, steady breath while you shoot to minimize micro-motions in the frame.
Apple iPhone 17 Pro: Realistic wide shots and easy use
The iPhone 17 Pro pairs a 48MP ultra wide with a 120° field of view and Apple’s color science to produce natural, true-to-life images. It performs consistently across varied lighting, from bright daylight to dim hotel lobbies, making it a reliable companion for everyday travel photos. The combination of sharp detail and smooth video capture makes it ideal for both stills and b-roll footage you might shoot while commuting or sightseeing.
Best for everyday travel photos and smooth video, with easy one-handed use that helps you stay in the moment. A practical on-the-go shooting tip is to enable quick capture modes for fast scenes and adjust exposure with a quick tap on the screen rather than a full manual setup.
Xiaomi 15 Ultra: Light gathering power and sharp wide imagery
The Xiaomi 15 Ultra brings a strong 50MP ultra wide with a 115° field of view. It excels at light gathering, offering clean detail on cloudy days or in dim interiors, and solid stabilization helps keep wide-angle shots steady. This option is particularly appealing if you want more texture and depth in wide scenes without pushing the camera into high-contrast boosts.
Travel tip: compare it with other brands by noting how it renders clouds and skies. On cloudy days, aim to include foreground interest to avoid a flat-looking sky.
Oppo Find X9 Pro: Natural colors and solid low light
Oppo Find X9 Pro uses a 50MP ultra wide with 110° field of view and strong color accuracy. It handles low light respectably well, which is handy in sunsets or dusk cityscapes. The wide and zoom capabilities work well together for street scenes and architectural silhouettes, letting you frame dynamic city moments without swapping lenses.
Quick exposure tip for balanced skies: use a small adjustment to bring the highlights down slightly when shooting sunset scenes. This helps protect detail in both the sky and the foreground.
Images and captions help readers visualize how each camera performs in travel contexts. The profiles above summarize how each device handles wide-angle storytelling, color rendition, and stability in real-world conditions, so you can choose based on your preferred balance of detail, color, and convenience.
For further reading on ultra wide performance in real-world travel photography, you can explore hands-on reviews and sample galleries from trusted outlets that regularly test in travel contexts.
[Reference links for deeper reading and spec sheets, updated as needed]
How to choose the best ultra wide phone for your travel style
Choosing the right ultra wide camera phone for travel comes down to matching lens performance with your typical trips. Are you chasing dramatic landscapes, bustling city scenes, or intimate street moments with a conscious eye on packing light? The goal is to pick a device that delivers consistent results in the places you actually shoot, without forcing you to chase new hardware every year. Below you’ll find a practical framework you can apply right away, plus quick picks that illustrate how different travel styles impact the decision.
Key specs to compare across phones
When you’re on the move, certain camera specs translate directly to real-world outcomes. Here’s a short, actionable checklist you can carry in your notes app or on paper:
- Ultra wide MP and field of view: Look for at least 48MP on the ultra wide with a 114° to 120° field of view. A broader field helps you capture more of the scene, especially in crowded markets or scenic overlooks.
- Sensor size and light gathering: Bigger sensors typically deliver better dynamic range and less noise in low light. If the phone packs a large ultra wide sensor, you’ll notice richer color and more texture in dusk cityscapes and dim interiors.
- Stabilization type: Optical or sensor-shift stabilization for ultra wide helps keep wide-angle video and handheld shots steadier on bumpy streets or while walking.
- Focusing speed and tracking: Fast autofocus and reliable subject tracking prevent missed moments in busy environments, like a festival crowd or a fast-changing street scene.
- Battery life and charging: Long-lasting battery and quick charging matter after a day of sightseeing. You’ll rely on long sessions of photography and video capture without hunting for a power bank.
- Software processing: Look for smart distortion correction and color management. The right processing keeps edge straightness, natural colors, and balanced contrast across the frame.
- Real-world performance in varied light: Check how a phone handles shadows, backlighting, and indoor lighting. A good ultra wide should not produce harsh halos or blown-out skies in mixed light.
Why these are the practical checks you should base your choice on: they map to what you actually do on the road. For deeper context, see industry overviews and hands-on evaluations from established outlets that routinely test ultra wide performance in travel contexts. For example, authoritative buying guides and reviews discuss these factors in depth and show how they translate to photos you’ll actually share and print.
Extra reading to broaden your perspective:
- Best camera phones for photography in 2025, with specifications and user impressions: Amateur Photographer
- The best camera phone in 2025, including ultrawide capabilities and overall image quality: Digital Camera World
- Best Camera Phone of 2025, with considerations for both stills and video: CNET
These sources help you translate specs into real-world expectations and set a baseline for your own testing once you’ve picked a model.
Pro tip: keep a small speed test in mind. If you’re under a tight schedule, you’ll want a phone that focuses quickly, processes images fast, and stabilizes video with minimal effort. That matters more in crowded markets and moving city tours than in quiet national parks.
Budget vs premium picks and when to upgrade
Travel photographers often juggle a simple equation: how much should you pay for a more capable ultra wide versus how much you can safely invest in a device you’ll carry everywhere? Here’s a pragmatic way to think about it.
- Value for money on a budget or mid-range device: If you mostly shoot during daylight, want reliable color, and rarely print large formats, a mid-range phone with a solid 12–48 MP ultra wide can cover most scenarios. These devices usually offer good stabilization, decent low-light behavior for the price, and efficient software that corrects distortion without creating artificial contrast. For casual travelers, this is a smart starting point.
- When a flagship makes sense: If your trips frequently involve dim interiors like museums or temples, dusk cityscapes, or high-contrast landscapes with dramatic skies, a premium phone often pays off. Flagships tend to deliver better dynamic range, lower noise in shadows, and more consistent color science across lighting conditions. They also tend to have more robust stabilization systems for wide-angle video on the move, which matters if you vlog or document your travels.
- The right upgrade moments: If you routinely shoot large-format prints, contribute to professional social channels, or want the most faithful color and least distortion at ultra-wide angles, upgrading to a flagship can be worth it. Conversely, if your use is casual and social, a mid-range device that regularly receives software updates will still serve you well for years.
- How to compare value when shopping: quantify what you gain for each price tier. For example, note the improvement in low-light performance, stabilization, and processing quality between your current phone and a mid-range upgrade. Then weigh that against how often you actually shoot wide scenes in challenging light. If the gains are meaningful in your travel style, it’s a good sign to upgrade.
To help you visualize the landscape, many reputable outlets compare budget and premium models side by side, focusing on real-world travel performance. For a comprehensive overview, see:
- Best camera phones for photography (including budget and premium options): Amateur Photographer
- The best camera phone choices by price tier, with ultrawide considerations: Digital Camera World
- In-depth camera phone guides that weigh feature sets against cost: CNET
Real-world guidance: if you travel light and value speed, a premium model will often justify its cost through faster focusing, more accurate color, and steadier video. If you roam on a tighter budget, a solid mid-range phone with a proven ultrawide can keep you competitive in most travel moments, especially with careful composition and light planning.
Putting it into practice
- If you’re new to ultra wide photography, start with a mid-range device to learn framing and distortion control. Your early shots will teach you how to position subjects and leverage foreground interest.
- If you’re a traveler who edits on the go, choose a phone with strong software processing and reliable color science. This makes quick tweaks clearer without heavy post work.
- If you care about video along with stills, prioritize stabilization and frame rate options. A steady walk-around video on a busy street is often worth more than a slightly sharper still in a static setting.
Further reading and practical evaluations can help you decide where your needs sit on the budget-to-premium spectrum. Look for hands-on reviews that compare ultrawide image quality, color accuracy, and stabilization across real-world travel scenarios.
External resources with practical testing and recommendations
- Best camera phones for photography — in-depth specs and user-focused insights
- The best camera phone in 2025 — a broad guide to flagship options and ultrawide performance
- Best Camera Phone of 2025 — cross-comparison of major models, including ultrawide capabilities
In the sections ahead, you’ll find how these principles apply to real devices and travel scenarios, along with tips to extract the most from your chosen ultrawide setup on the road. For readers who want immediate, practical advice, try this quick-start approach: pick a device within your budget, test it in both bright and low light, and compare edge distortion and color consistency across shots with and without distortion correction.
Practical tips for capturing stunning travel ultra wide photos
Ultra wide photos can transform travel memories into immersive stories. They capture expansive skies, dramatic streets, and intimate moments all in one frame. The key is to understand composition, light, stabilization, and quick post tweaks so you can shoot confidently on the road. Below you’ll find concise, practical guidance you can apply right away, with real-world tips that travel light and move fast.
Composition and framing with an ultra wide lens
Placing the main subject off-center creates a more engaging image than a perfectly centered shot. With an ultra wide lens, give your subject room to breathe while letting the surrounding environment tell part of the story. Use leading lines to pull the eye toward the focal point. Roads, railings, shorelines, and building edges are great anchors that guide viewers through the scene.
Watch edge distortion by keeping important elements away from the very edges of the frame. If a subject risks looking stretched, nudge them toward the center and use foreground elements to balance the composition. When possible, shoot from a low angle to exaggerate depth; this makes a foreground interest pop against a distant backdrop.
Quick framing tips you can apply on the spot:
- Position the horizon near the lower third for expansive skies or near the top third to emphasize land and texture.
- Stack foreground elements to create depth; a leading line toward the subject sharpens the viewer’s eye.
- Look for unique foreground textures, like a painted wall, a patterned floor, or a rippling body of water.
- Keep a clean background by removing distracting objects close to the lens.
For more on practical composition with wide angles, check out expert guidance on wide-angle storytelling and frame planning from seasoned photographers. See insights at Digital Photography School and related discussions on corner distortion and foreground planning. https://photographylife.com/ultra-wide-angle-lens
Lighting and timing for wide landscapes
Golden hour is your best friend for ultra wide landscapes. The soft, warm light adds texture to rocks, water, and city façades while preventing harsh shadows at depth. If you arrive early, you’ll get clean shadows and a gentle transition from sky to land. Overhead noon light can flatten textures, so plan around sunrise or sunset when possible.
When the sun sits low, HDR-like processing in some smartphones helps balance sky and land, but you can also manually expose for the sky and let the land fall into detail. If you shoot into the light, use exposure compensation to prevent blown highlights in clouds while preserving the mood of the scene.
A few practical tricks:
- Use a neutral density or graduated neutral density look in software to hold back a bright sky when needed.
- Shoot a bracketed sequence in challenging scenes to blend later, preserving detail from both light and shadow areas.
- Consider a small aperture in bright light for deeper landscapes; in dusk or interiors, a wider aperture can help keep both foreground and background reasonably sharp.
To deepen your understanding of golden hour techniques and how they apply to ultra wide work, explore established guides on golden hour photography. https://digital-photography-school.com/tips-for-creating-landscape-photos-during-the-golden-hour/
Stabilization and shooting modes you should use
Stabilization is crucial for wide-angle video and handheld shots on crowded streets. If your phone offers optical image stabilization or sensor-shift stabilization, enable it, especially when you’re walking or panning. For static scenes, a small tripod that fits in a carry-on can deliver sharper wide shots and steadier panoramas.
When to use different modes:
- Night mode and longer exposures: steady hands or a tripod help, but some ultra wide sensors handle dim scenes well without a tripod if you keep ISO reasonable.
- RAW vs JPEG: shooting RAW gives you maximum flexibility in editing for color, dynamic range, and distortion correction. JPEG is convenient for quick sharing.
- Pro or manual controls: use them sparingly on the road, but they’re useful for tricky scenes with mixed light or when you want precise control over white balance and exposure.
A compact, travel-friendly tripod that fits in a carry-on can be a real lifesaver for dawn shoots or city skylines. If you’re new to stabilization basics, start with handheld modes and move to tripod-based shots as your schedule allows.
For a practical view of how stabilization and wide-angle modes perform in real-world travel, consult hands-on reviews that compare ultrawide behavior under movement and low light. https://fstoppers.com/landscapes/simple-composition-technique-improve-your-wide-angle-photography-624769
Post processing quick tips for wide photos
Post processing helps unify color and correct distortions common with ultra wide lenses. Start with straightening the horizon; a slight tilt can distract from the scene unless it’s intentional. Perspective correction should be gentle; aggressive corrections can inflate or squash edges and break the natural look.
Key edits to focus on:
- Lens distortion reduction: apply subtle corrections to straighten verticals in buildings and remove edge bowing.
- Color balance: adjust white balance to keep skies believable and maintain natural skin tones if people are in the shot.
- Exposure and contrast: bring up shadows only where needed and keep highlights in check so you retain detail in clouds and sunlit walls.
- Final crop: a slight crop can improve composition by removing stray edges and aligning leading lines toward the frame.
If you want a quick reference for processing ultra wide images, look for tutorials that cover practical distortion control and color grading for travel scenes. https://www.creative-photographer.com/wide-angle-lens-travel-photography/
Optional finishing tip: save a RAW-based workflow with a repeatable starting point. This makes post work faster on the road and gives you a consistent look across your travel gallery.
External resources with hands-on testing and practical tips can help you sharpen your approach to ultra wide travel photography:
- Practical guides to ultra wide angles and travel shooting: Creative Photographer
- Online tips for landscape processing during golden hour and beyond: Digital Photography School
- In-depth reviews that compare ultra wide performance across flagship devices: CNET
As you apply these ideas on your next trip, you’ll start to see how small framing choices, light management, and simple edits combine to create wide-angle travel images that feel immersive and true to the moment.
Conclusion
Choosing the right ultra wide smartphone camera hinges on your travel style and budget, not just specs. A solid ultrawide from a reliable phone can capture dramatic landscapes, bustling streets, and intimate moments with natural color and manageable distortion. Pick a smartphone that fits how you shoot, and test it on your next trip to see how it handles light, movement, and edge details.
If you’re new to wide angle travel photography, start with a model that offers reliable processing and easy controls, then level up when your trips demand more advanced options. Share your experience in the comments below and tell us which ultra wide phone you tested on your last journey. Your insights help others choose the right device and inspire new photo ideas for future trips.